Shaders are one of the best ways to make Minecraft's simplistic visuals look fresh and new again. For those unaware, shaders are community rewrites of the vanilla game's lighting and rendering engines. These new rendering engines allow for things like real-time lighting, godrays, realistic clouds, and water. One of the best-looking shaders available for the game is Continuum Shaders.
Here's everything you need to know about installing Continuum Shaders:
How to install and use Minecraft's Continuum Shaders
1) Download Optifine

Chart New Territories with the ultimate Minecraft Seed Generator!
Optifine downloads: https://optifine.net/downloads
Continnum Shaders requires Optifine to run properly, so you'll need to download it as well. Optifine is yet to fully release for Minecraft 1.21, so you'll need to downgrade to at least 1.20.6. Make sure that your Optifine and game versions match.
2) Download Continuum Shaders

Continuum Shaders download link: https://continuum.graphics/downloads/
You'll also need to download a version of Continuum Shaders to use. 2.1 isn't out for the public yet, and early access requires payment, so using 2.0.5, the latest free version, is recommended instead. You can find this using the link provided above.
3) Install both files

The easiest way to install both files is to open up an alternative launcher like Modrinth or CurseForge. This example will be using CurseForge. All you need to do is make a new installation with Forge as the modloader and install any shader into it.
You can install a Minecraft shader by clicking the puzzle piece icon and switching over to the "shaders" tag within CurseForge. The one you select doesn't actually matter, as you're just installing it to get CuseForge to create the shaderpacks folder.
On CurseForge, there's an option hidden within the three dots to "Open Folder." This will open the installation files. There should already be a mods and shaderpacks folder here. To install the files, drop Optifine within the mods folder and Continuum Shaders within the shaderpacks folder.
4) Launch the game

Now that you've installed both Optifine and Continuum shaders, you can go ahead and launch the game. Feel free to install other Minecraft mods and texture packs from within CurseForge while it's open.
5) Create a new world and enable shaders

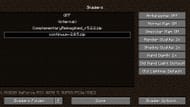
Once you've reached the main menu, hit the "Options" button and then "Video Settings" to reach the graphical settings for Minecraft. There should be a "Shaders" button to click. From here, hit the enable button to turn shaders on and click Continuum Shaders to select them as the ones to render with. From here, start up a new world and enjoy the game's fresh look.
Uncover new worlds with our Minecraft Seed Generator!

