
'%20x='0'%20y='0'%20height='100%25'%20width='100%25'%20%0A%20%20%20%20%20%20%20%20%20%20xlink%3Ahref='data:image/jpg;base64,/9j/2wBDAAYEBQYFBAYGBQYHBwYIChAKCgkJChQODwwQFxQYGBcUFhYaHSUfGhsjHBYWICwgIyYnKSopGR8tMC0oMCUoKSj/2wBDAQcHBwoIChMKChMoGhYaKCgoKCgoKCgoKCgoKCgoKCgoKCgoKCgoKCgoKCgoKCgoKCgoKCgoKCgoKCgoKCgoKCj/wgARCAAGAAoDASIAAhEBAxEB/8QAFgABAQEAAAAAAAAAAAAAAAAAAAUH/8QAFQEBAQAAAAAAAAAAAAAAAAAAAgX/2gAMAwEAAhADEAAAAMTnBtf/xAAaEAADAQEBAQAAAAAAAAAAAAABAgMRACFR/9oACAEBAAE/AJSjKAqV3PGGDnshdsGDfnf/xAAVEQEBAAAAAAAAAAAAAAAAAAAAAf/aAAgBAgEBPwCv/8QAFBEBAAAAAAAAAAAAAAAAAAAAAP/aAAgBAwEBPwB//9k='%3E%3C/image%3E%3C/svg%3E)
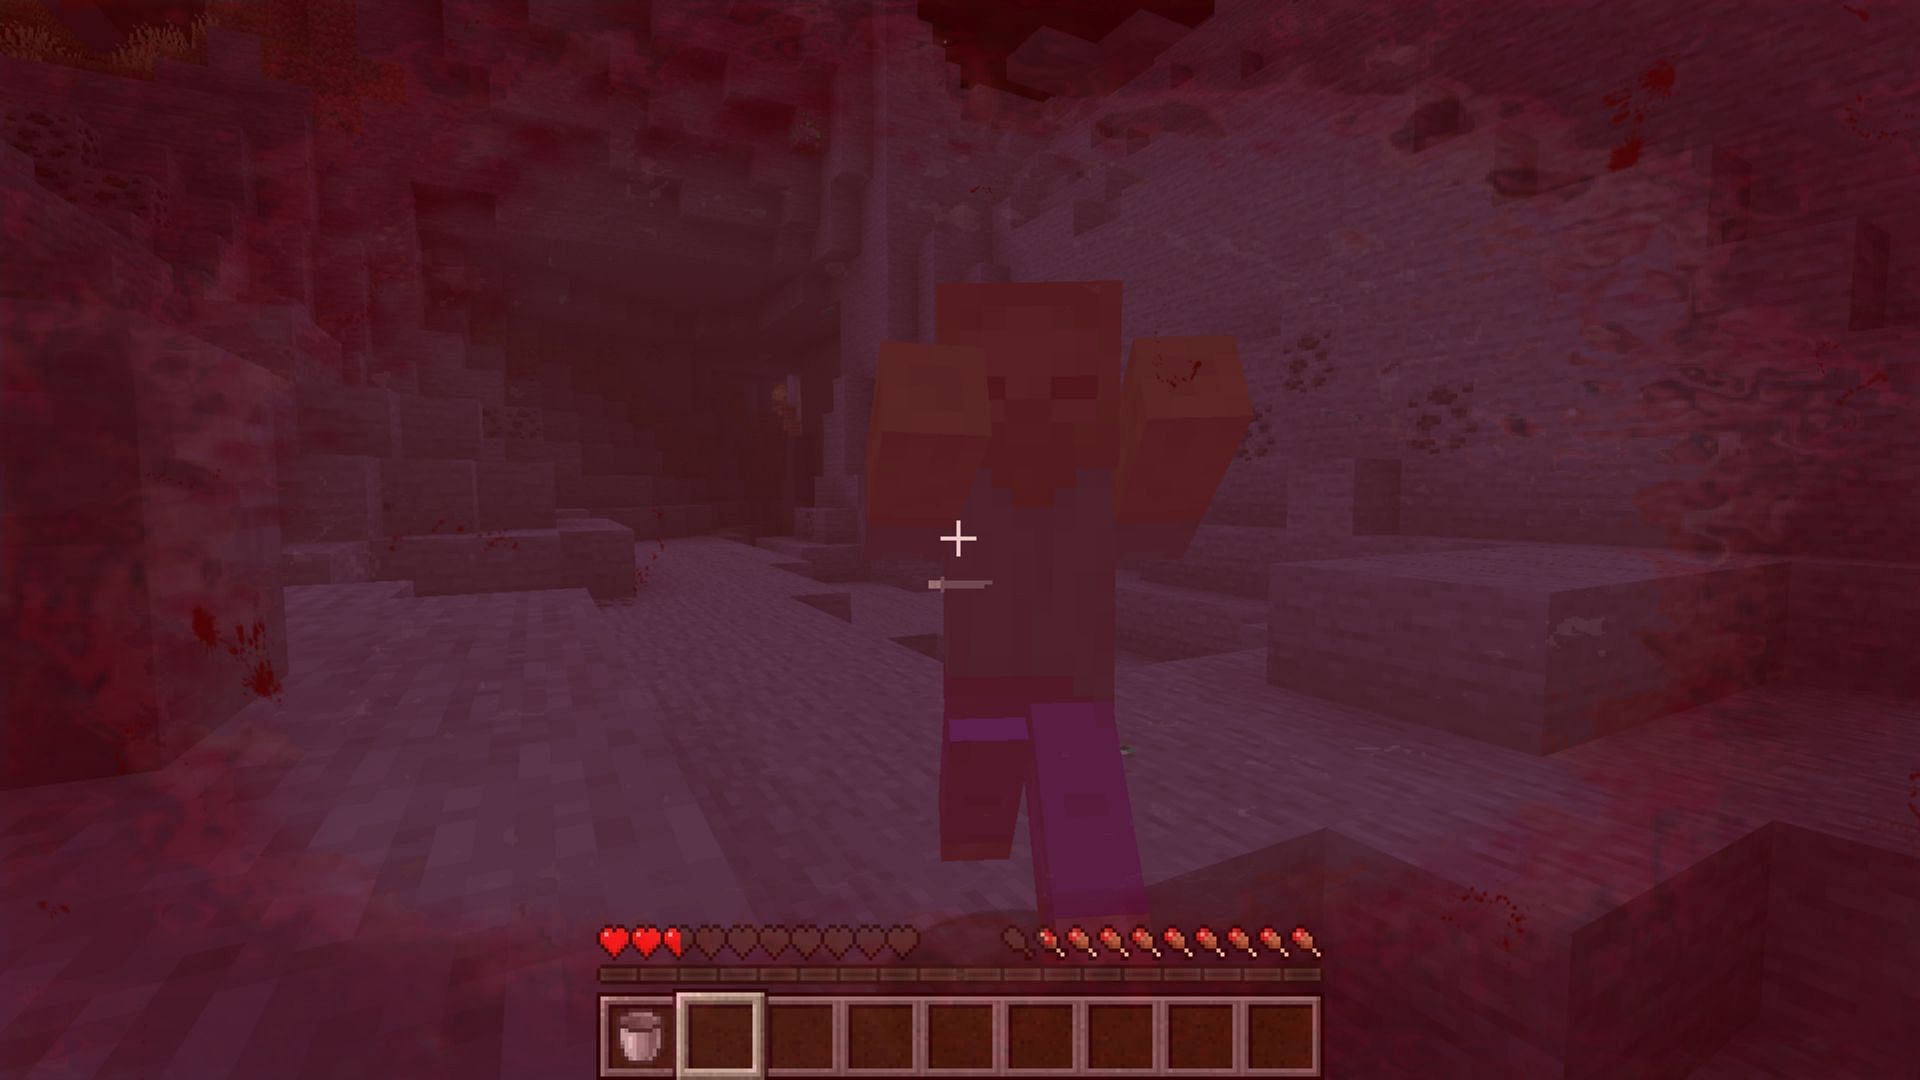
The Minecraft Enhanced Visuals mod is one of the most immersive mods in the community, as it transforms your vanilla world by adding an array of realistic effects to your HUD. These effects reflect conditions like low health, damage, and other metrics visually, which makes the gameplay more engaging.
Here's everything to know about the Minecraft Enhanced Visuals mod.

How to install the Minecraft Enhanced Visuals mod
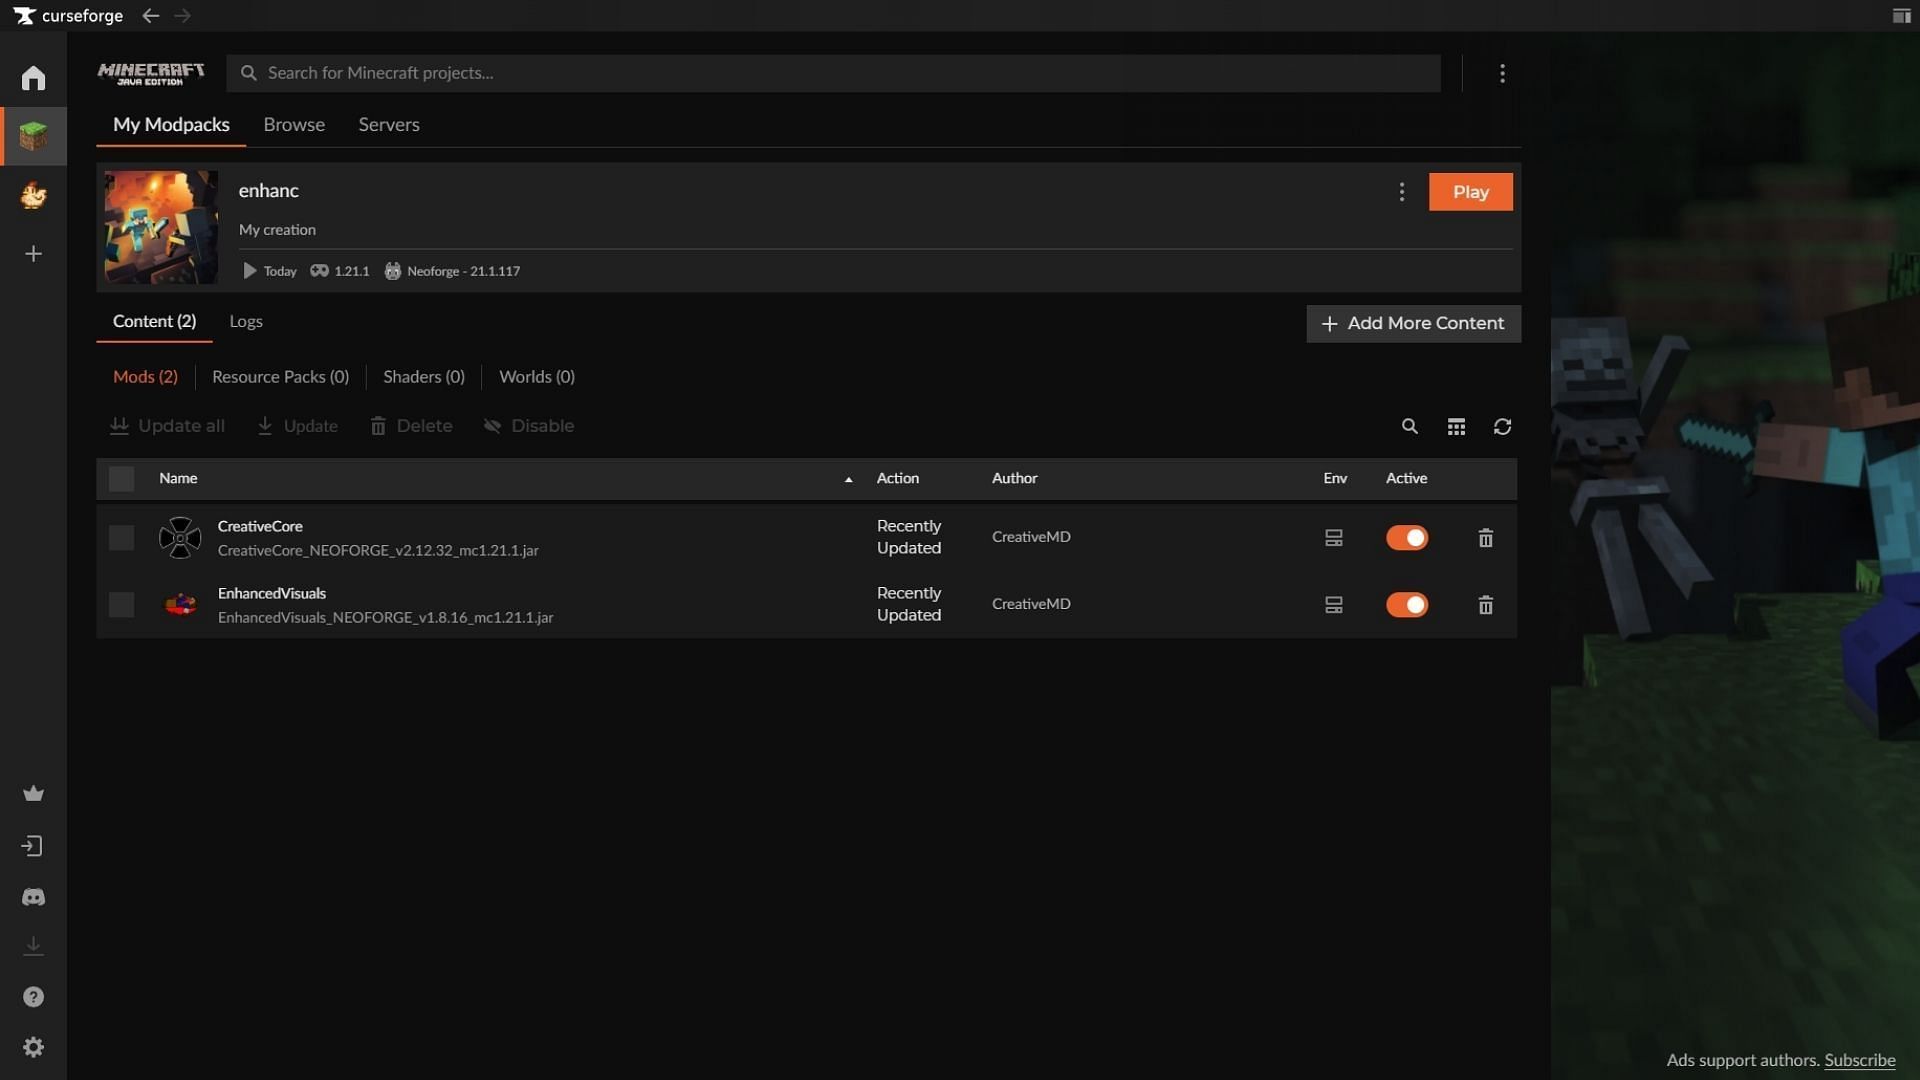
Chart New Territories with the ultimate Minecraft Seed Generator!
The Enhanced Visuals mod for Minecraft can be installed using any mod loader that has Fabric, Forge, or NeoForge installed. For this guide, we have used the Curseforge and its mod loader to make the installation process simpler.
Here's how you can download and install the Minecraft Enhanced Visuals mod:
- Go to the Curseforge website and download the official launcher if you do not have it installed already. Once downloaded, log in with your linked Microsoft account.
- Now, head to the top bar and search for the Enhanced Visuals mod for Minecraft by CreativeMD. You can also click on this link to head to the mod page directly.
- To install the Enhanced Visuals mod manually, click on the black Download button located on the right side of the screen. Once the ZIP file has been downloaded, simply place it in the mods folder of your instance's mod directory. However, if you do not have Minecraft with Fabric, Forge, or NeoForge installed or are new to installing mods, you are recommended to use the Curseforge mod loader to make the installation easier.
- For installation using the mod loader, hit the orange Install button with the anvil logo on the right side. Wait for the deep link to open on the installed Curseforge app.
- Once the app is loaded, you will be prompted to create a new instance (installation) or choose an existing instance of Minecraft to install the Enhanced Visuals mod. While you can choose an existing instance of the game, it is recommended that you install it on a fresh one. This is to prevent any conflicts with existing mods, shaders, or data packs and avoid unexpected world corruption.
- Next, name your instance and click on the Create button to proceed. After this, you will be redirected to the installed modpack's page. Wait till the files and assets are downloaded and installed.
- Once done, hit the orange Play button on the right side to launch Minecraft with the Enhanced Visuals mod successfully installed.
Additionally, if you are installing the Enhanced Visuals mod manually, you must download and add the CreativeCore mod. It is a dependency add-on for the base mod that contains essential features such as rendering systems. Simply download the mod and place it in the same mods directory for it to work as intended.
Note: If you are using the Minecraft Enhanced Visuals mod alongside Optifine for shader support, you must disable the following effects from the Optifine settings tab:
- Fast Render
- Anisotropic Filtering
- Antialiasing
This will prevent your screen from turning black or giving issues when certain effects of the Minecraft Enhanced Visuals mod are activated. Additionally, it is recommended to test shaders before using them to prevent unnecessary crashes.
Also read: Minecraft Tinkers Construct mod: How to get started
Features of the Minecraft Enhanced Visuals mod

The Minecraft Enhanced Visuals mod is a unique mod that adds an array of visual effects to the HUD, making the gameplay even more immersive. It adds animations for status effects such as low health — the screen keeps fading in and out while you can hear your heartbeat in synchronization. Additionally, it adds blood spatters and damage visuals on the screen when you fall or get injured.
One of the highlights of the Minecraft Enhanced Visuals mod is the representation of mob damage. When a creeper explodes near you, the screen goes white like a flashbang effect and you can experience your ears ringing and loss of hearing for a while. The effect gradually recedes, adding to the realism of the mod.
Additionally, the Minecraft Enhanced Visuals mod can be paired with popular mods like Tough As Nails since it has integrated effects for debilitating heat and cold scenarios. It features a wide array of custom animations which enhances the immersiveness of status effects and makes the gameplay more engaging.
Also read: 4 most realistic Minecraft gun mods in 2025
Check out our other latest articles:
- 4 things right with The Garden Awakens update
- 6 best structures for finding armor trims
- How to get pale oak wood
- How to get X-ray pack for 1.21.4
- 5 best cherry blossom village seeds

Uncover new worlds with our Minecraft Seed Generator!