Minecraft Live 2021 was one of the most hotly anticipated Minecraft-related events this year, with a range of new announcements revealed by Mojang.
One such announcement that was particularly well received by fans of Minecraft modding was that of the new Minecraft Entity Wizard plugin to be included as part of Blockbench.
For those unaware, Minecraft Blockbench is a piece of software that players can use to create and program behavior for custom Minecraft models.
Chart New Territories with the ultimate Minecraft Seed Generator!
Minecraft Blockbench: Everything about the Minecraft Entity Wizard plugin
What is the Minecraft Entity Wizard for Blockbench?
The Minecraft Entity Wizard was showcased during Minecraft Live 2021 as a new plugin for Blockbench. Its main purpose is to help beginners and those less adept with Minecraft modding to create models more easily.
The Entity Wizard also allows players to edit the presets of pre-existing Minecraft vanilla mobs. For example, if players want to create a grizzly bear, it might be a good idea to select the polar bear preset as it's a close relative.
How to add Minecraft Entity Wizard to Blockbench?
Adding the Minecraft Entity Wizard plugin to the Blockbench software is relatively easy and can be achieved by following the steps below:
- Open the Blockbench software, then on the navbar select "File" and then select "Plugins"
- Select the "Available" tab, as seen below
- Press the "Install" button for "Minecraft Entity Wizard"

How to use the Minecraft Entity Wizard for Blockbench?
After the Minecraft Entity Wizard plugin has been successfully installed, players can hit the "Filter" tab and then select "Minecraft Entity Wizard" as seen below.

After this, players should hit the blue "Let's Go!" button in order to initiate the wizard process.
Once the wizard has been successfully started, players can select a display name and identifier for their new mob.

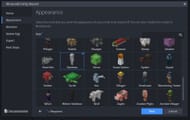
After naming the mob, players will be able to choose a preset appearance which their new mob will be based off of. This will be based on one of Minecraft's pre-existing vanilla mobs, as seen below.

Once an appearance has been chosen, gamers now need to select appropriate behavior for their mob. This can be custom made and tweaked later on in the process or set to be the same as an existing mob.

The final steps of the wizard include choosing the spawn egg design and also exporting the pack.
As shown below, players will need to choose an appropriate pack name, and they can also select a pack icon, but this is not necessary.

After this, the pack can be exported. The easiest way to install the datapack automatically into the Minecraft game is by selecting the first "Export to Folder" option, as seen below.

Once exported, players should be able to load up a copy of Minecraft Bedrock Edition and spawn their newly created mob in-game.
Uncover new worlds with our Minecraft Seed Generator!

