Performance mods are one of the most common types of Minecraft mods installed by fans of Mojang's blocky masterpiece. As their name suggests, these mods aim to make the game run better, and one of the newest and most interesting of these is Nvidium. This mod completely overhauls the already improved rendering of Sodium to push FPS higher and make the game even smoother.
Everything you need to know about the Nvidium mod, including more technical details and how to install it, can be found detailed below.
Features of Nvidium
Chart New Territories with the ultimate Minecraft Seed Generator!
Nvidium, created by the user cortex, replaces the regular rendering backend for Sodium with a system that utilizes Nvidia's OpenGL, resulting in a pretty huge boost to FPS. The mod utilizes a new method of rendering terrain geometry, namely mesh shaders, which allows for very fast and performant culling of terrain.
Essentially, the mod allows your GPU to work much more efficiently, making the game run considerably better with the same amount of resources.
Everything you need to know about Minecraft's Nvidium mod?

It's important to note that the name of the mod, which is based on Nvidia's name, is not just for show. The mod will only function on Nvidia systems, meaning that you won't be able to use the mod if you have a different brand of GPU, like AMD.
Additionally, as the creator warns on the Modrinth page, mesh shaders are an uncommon and highly experimental technology. This, unfortunately, leads to increased instability and even occasional crashes.
The mod does not yet have Minecraft shader support either. This means that if you want to get this increased performance, you'll be stuck with the game's vanilla look. Thankfully, the mod will at least disable itself automatically when applying a shader, meaning that you can use them without having to uninstall Nvidium beforehand.
How to install Nvidium
1) Get the mods

Fabric Link: https://fabricmc.net
Sodium Link: https://modrinth.com/mod/sodium
Nvidium Link: https://modrinth.com/mod/nvidium
The first thing you'll need to do to add Nvidium to your game is to download the mod. As previously mentioned, it requires Sodium to function properly since Nvidium rewrites some of Sodium's rendering code. So, make sure to download Sodium alongside Nvidium.
Both of these mods will require the use of Minecraft's Fabric modloader, which has also been linked above. Also make sure to grab a version of this modloader that matches the game version of the other two mods.
2) Launch the game

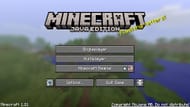
The simplest way to access the game's files is through the menu where Minecraft resource packs are listed. You'll want to launch the game and hit the "Options" button, before clicking on "Resource Packs." There should be a button that reads "Open Pack Folder," which will open the game's folder for installed resource packs. You can navigate up a directory to reach the game's main files.
3) Maximize the settings and check FPS

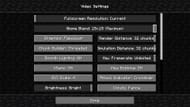
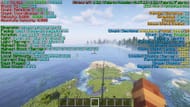
While the game is open, enter the video settings and max out the render distance, simulation distance, and other graphics. Load into a Minecraft survival world and use the debug menu to see the FPS you're getting. This will be useful for comparing just how much Nvidium actually helps. Once you've done this, go ahead and close the game so you can safely mess with files.
4) Install the mods

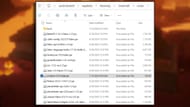
Installing the mods is quite an easy process. Simply drag the downloaded files for both Minecraft's Sodium and Nvidium into the game's "mods" folder, alongside the Fabric modloader needed to actually run them.
5) Relaunch and test

Now that you've installed both Sodium and Nvidium, you'll want to relaunch the game and use Minecraft's debug menu to check your FPS. It should be significantly higher, thanks in large part to Nvidium. Sodium helps too, of course, as it's also a performance mod, but Nvidium is doing most of the heavy lifting in this case.
Uncover new worlds with our Minecraft Seed Generator!

