

'%20x='0'%20y='0'%20height='100%25'%20width='100%25'%20%0A%20%20%20%20%20%20%20%20%20%20xlink%3Ahref='data:image/jpg;base64,/9j/4AAQSkZJRgABAQAAAQABAAD/2wCEAAMDAwMDAwQEBAQFBQUFBQcHBgYHBwsICQgJCAsRCwwLCwwLEQ8SDw4PEg8bFRMTFRsfGhkaHyYiIiYwLTA+PlQBAwMDAwMDBAQEBAUFBQUFBwcGBgcHCwgJCAkICxELDAsLDAsRDxIPDg8SDxsVExMVGx8aGRofJiIiJjAtMD4+VP/AABEIAAYACgMBIgACEQEDEQH/xABhAAEBAQAAAAAAAAAAAAAAAAAABQgQAAEEAQQDAAAAAAAAAAAAAAECAwQRAAUGEiEjMoEBAQEAAAAAAAAAAAAAAAAAAAEDEQEAAgMAAwAAAAAAAAAAAAABAgMAERIEIUH/2gAMAwEAAhEDEQA/AM6NalP3bPhNajLdkOFt+NGeeJcW0GvIlPIn1Klm77ycrb0mzb4BvsJPFPwUaGMYVLZKfSusl5MY1lfIGxU+e8//2Q=='%3E%3C/image%3E%3C/svg%3E)
Valorant is a playground for meticulous players - some who practice and enhance their mechanical skills and others who depend on their character's abilities. Lineups have become a crucial part of the game as players can now passively observe the round unfold and secure the round by simply defending the spike.
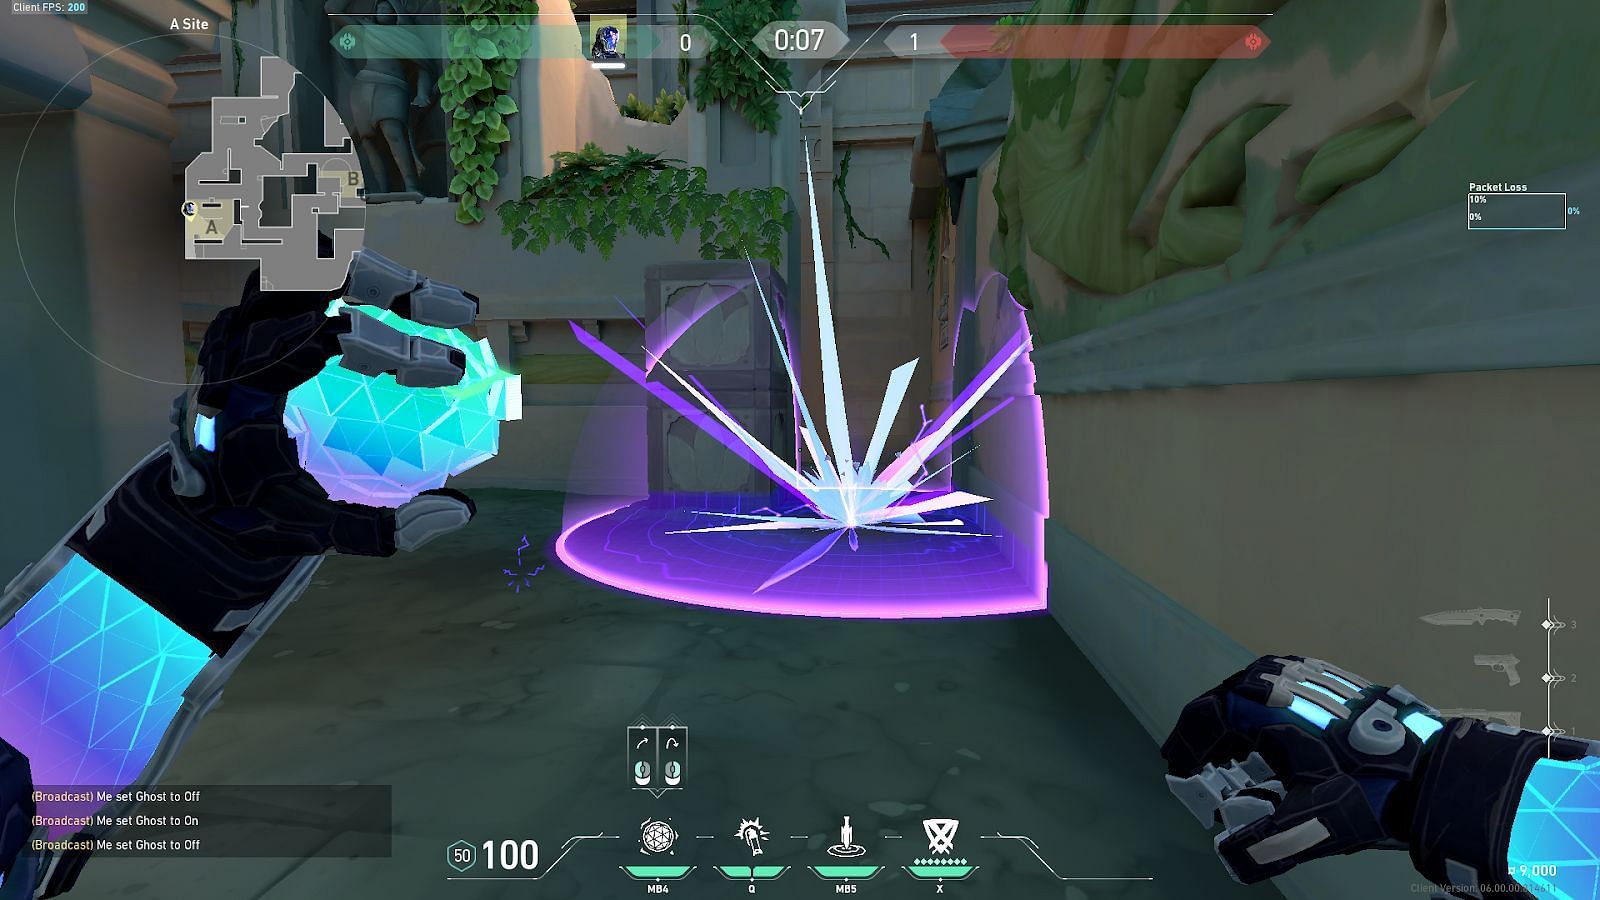
Kay/O is an Initiator Agent in Valorant who can disorient enemies, silence their abilities, and gain information on the enemy team’s positioning. The Agent has a damaging grenade ability that can easily throw over a long distance. Utilizing proper lineups with such an ability can make securing rounds easier for the attackers on the new Lotus map.

Valorant Lotus Kay/O nade lineups for post plant
Riot Games introduced a brand new map alongside the Episode 6 update, which also marked the progression of Valorant’s lore. The new map features three bomb sites, similar to Haven, and has a few new mechanics. Players can greatly benefit from learning a few Kay/O lineups on Lotus before the map officially debuts in the competitive map pool.
1) A-Rubble to A-Site default plant
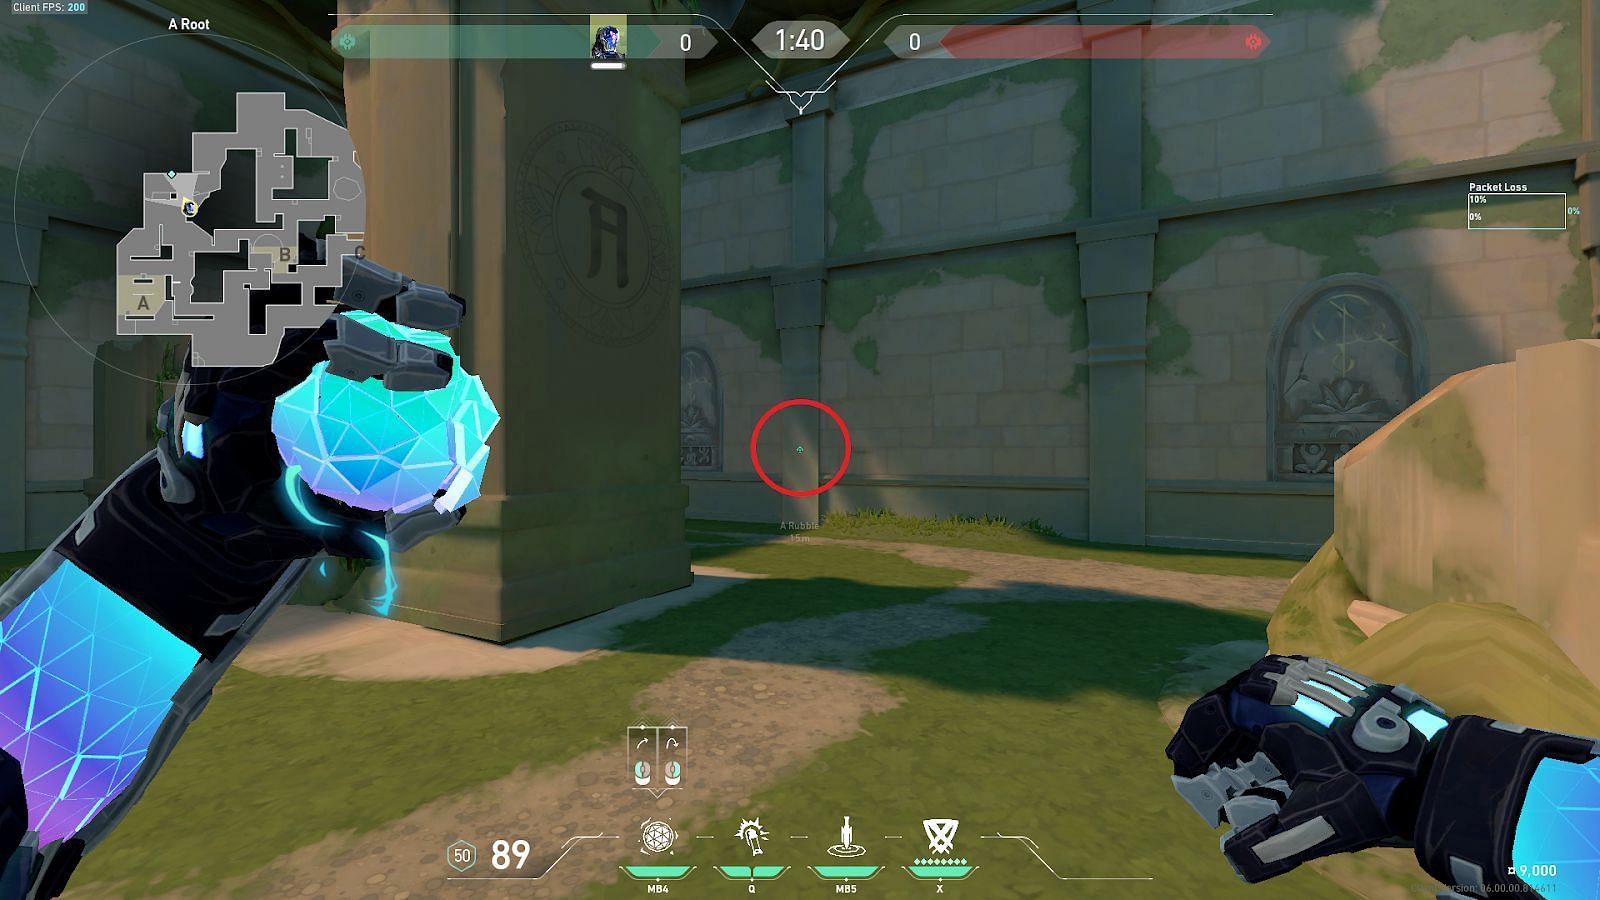
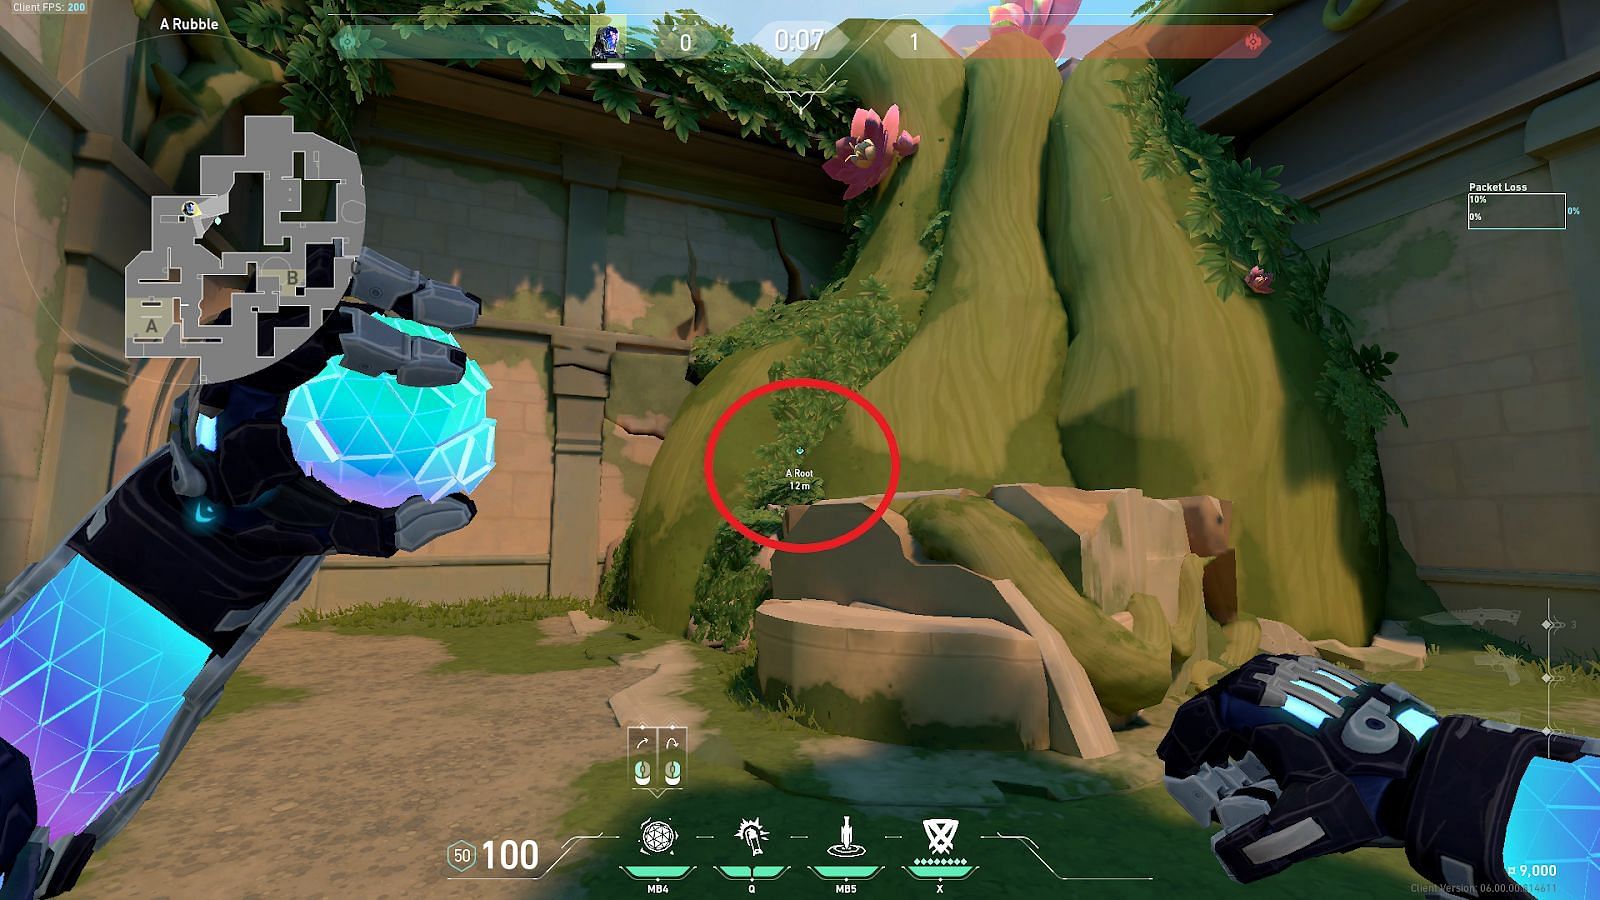
Position yourself in A-Rubble and stand in front of the marked column. Tuck to the wall directly in between the column and look towards A-Site.
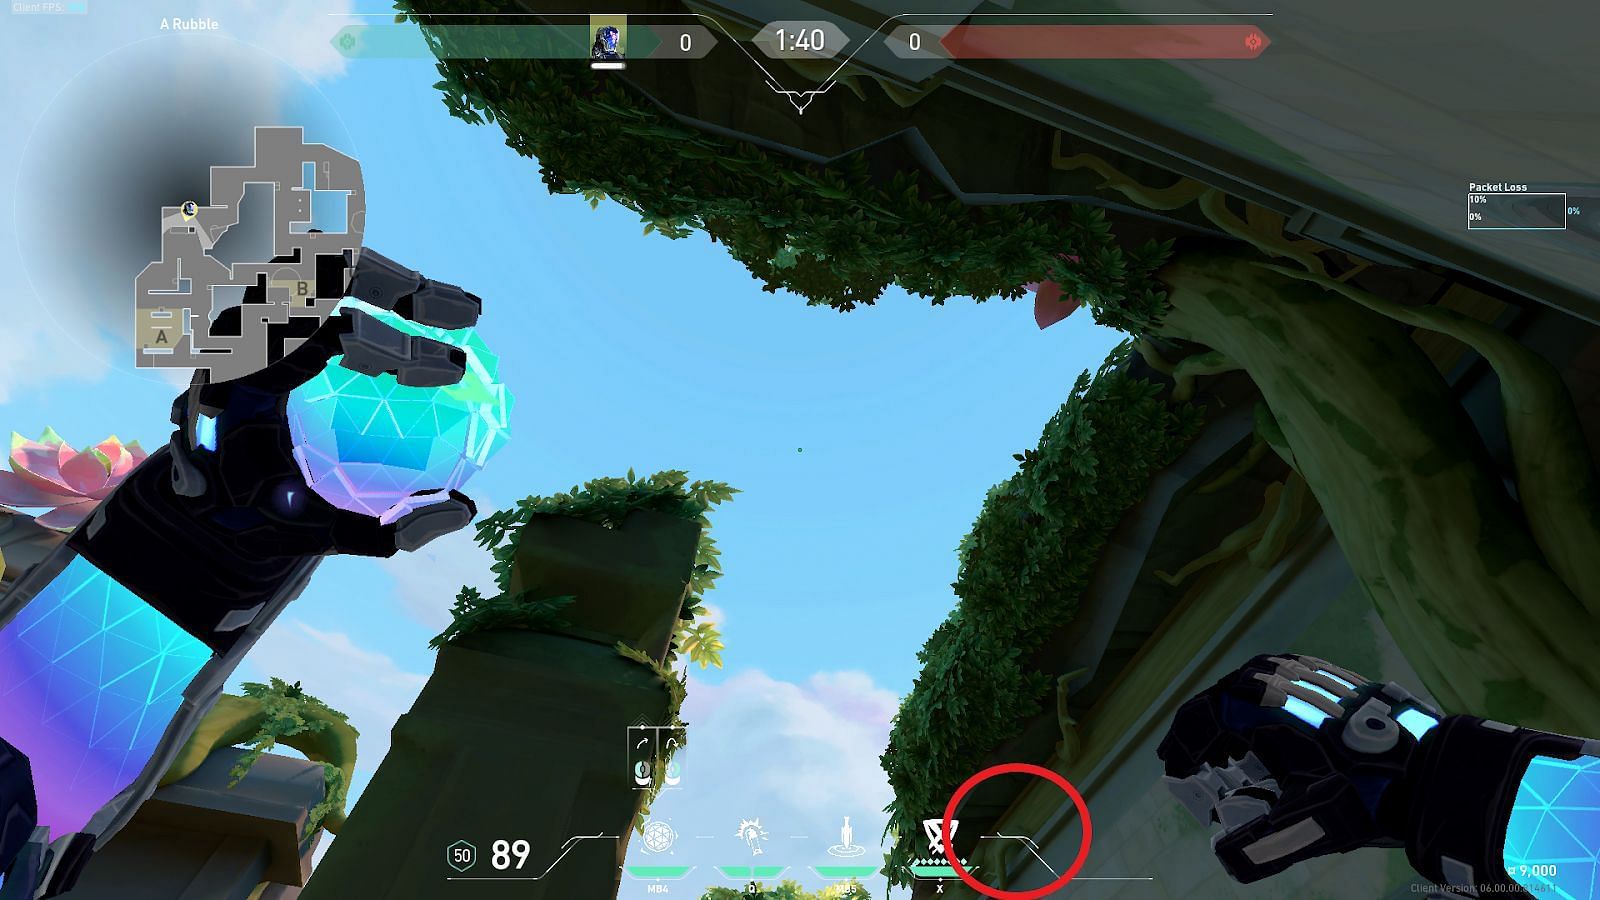
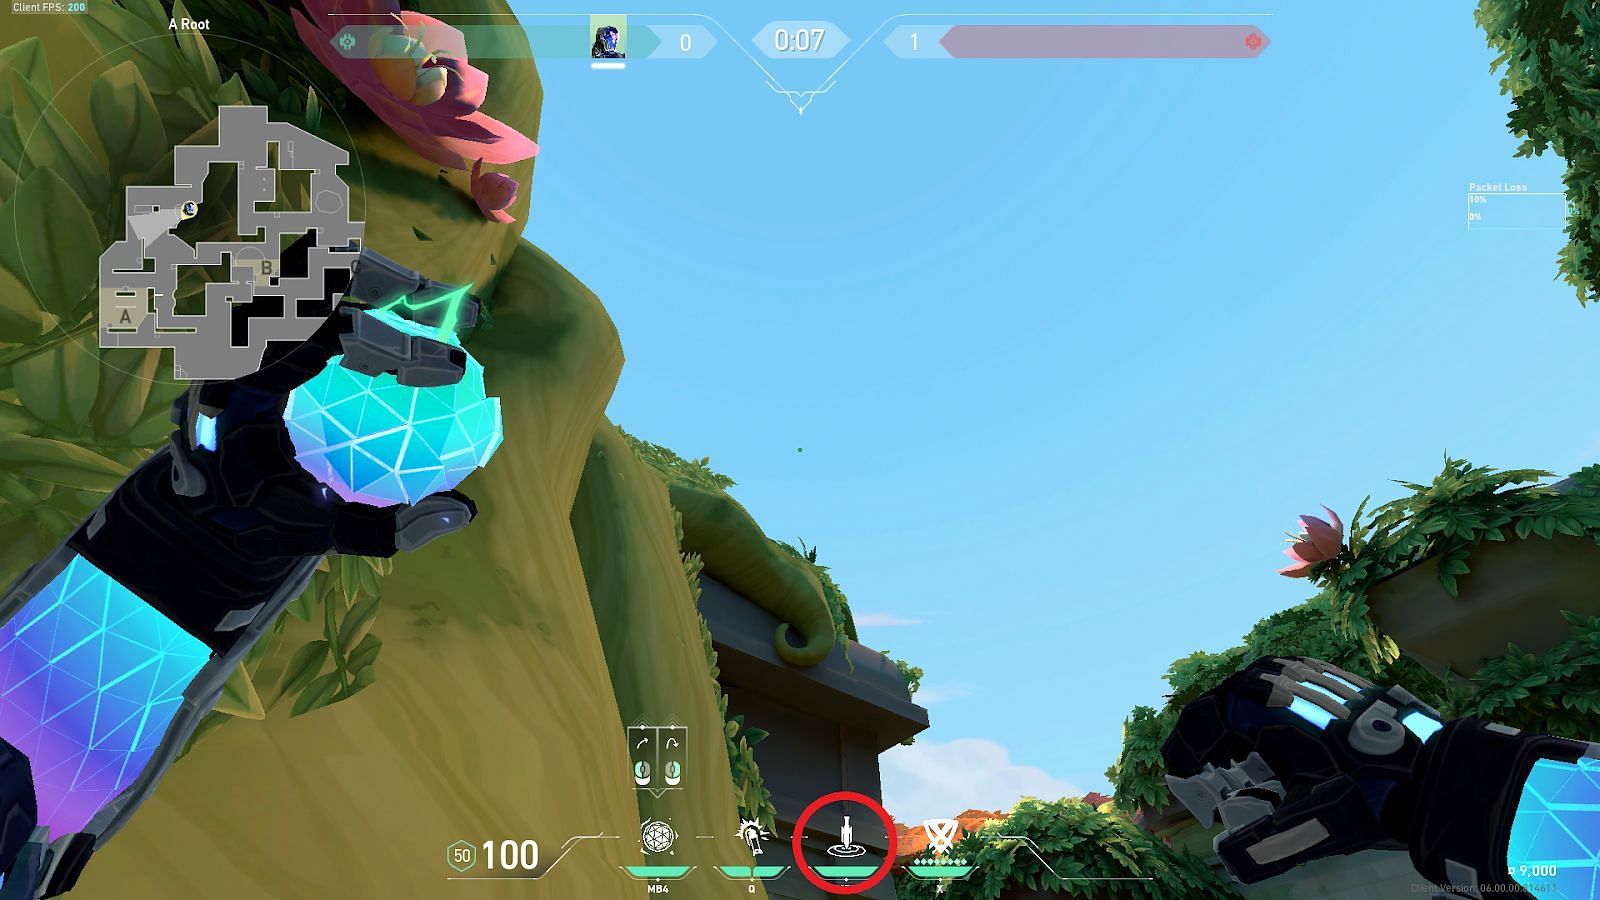
Place the Heads-Up Display (HUD) line with the roof ledge as shown with the circle. Perform a jump left-click throw to deploy the nade towards A-Site.
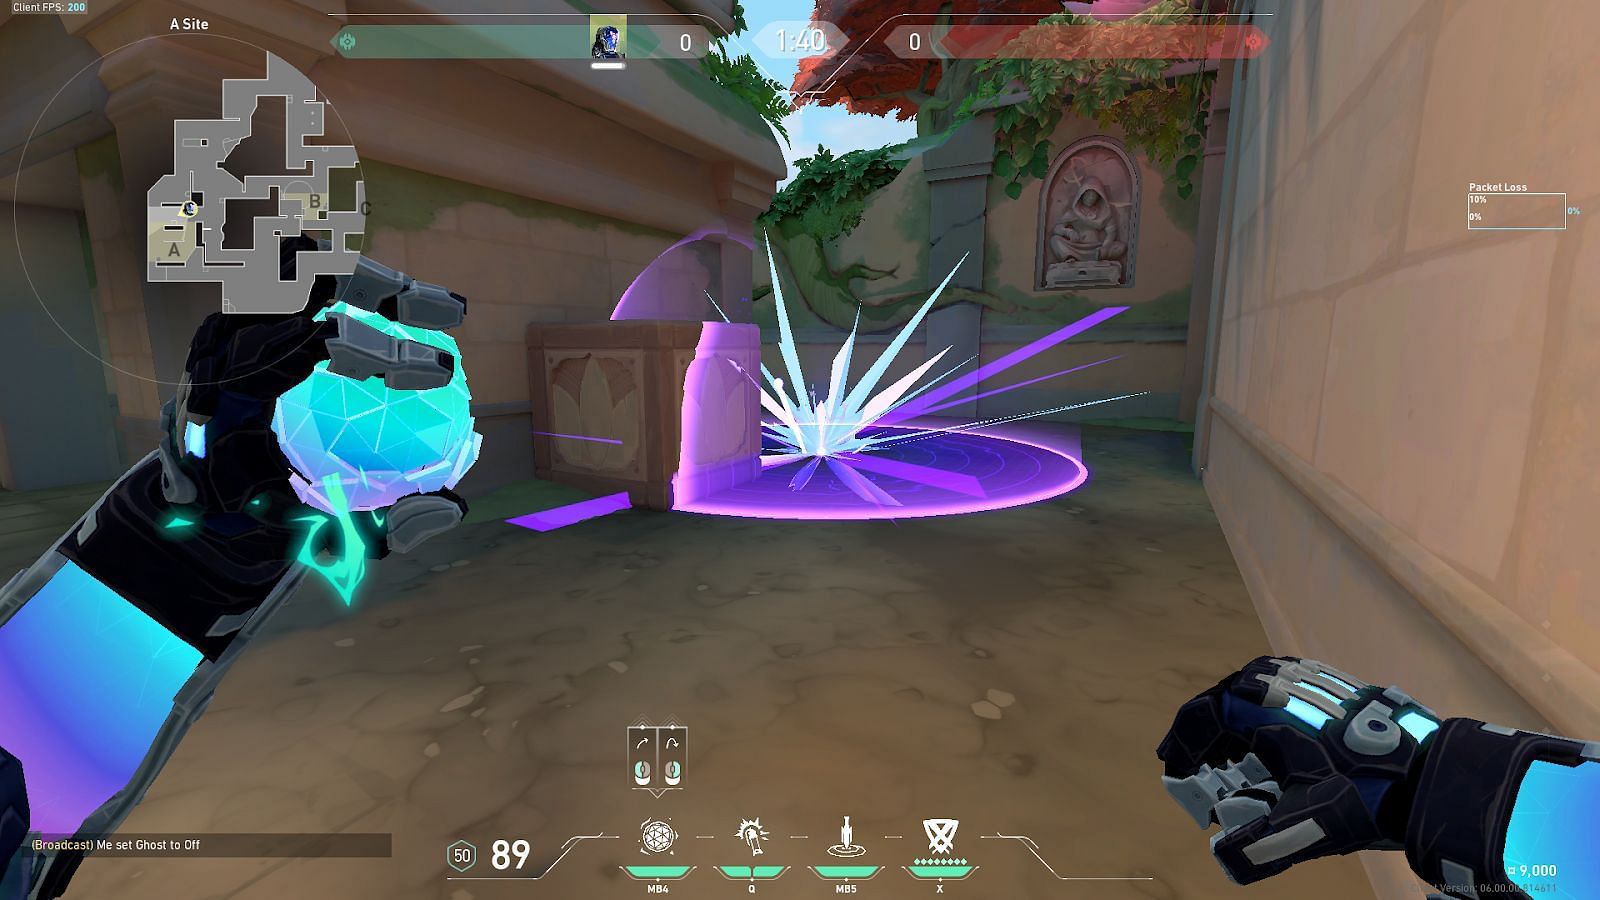
Perfectly lining up the HUD will result in the nade landing directly on the A-Site default plant position. It is a difficult lineup that requires some practice as the nade can get stuck on the A-Hut roof.
2) A-Link to B-Site default pit plant
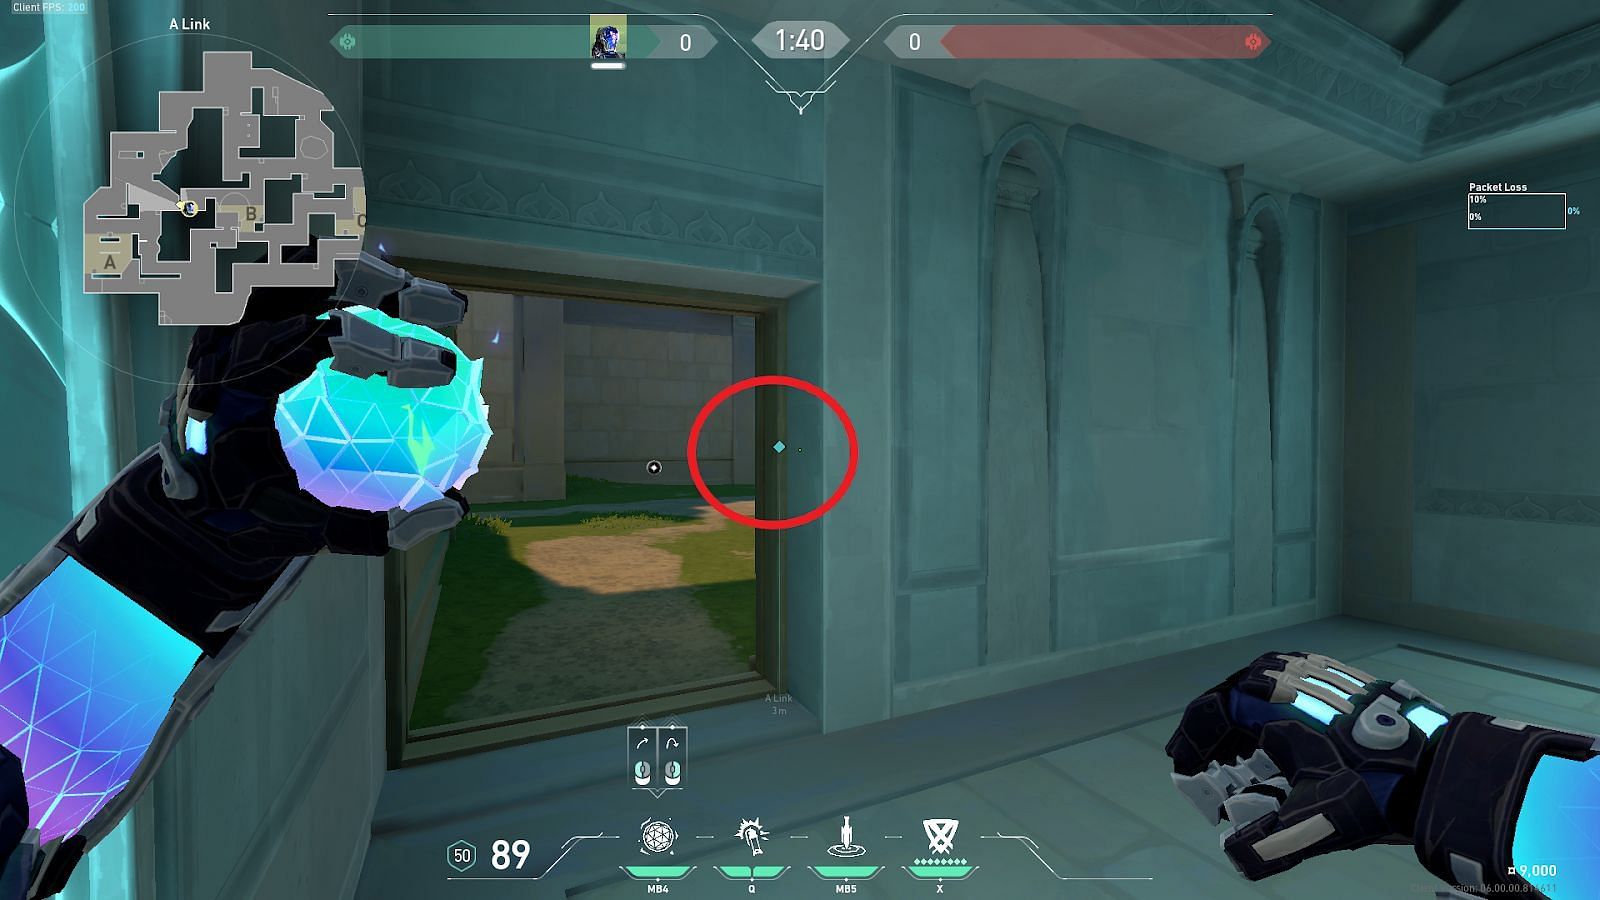
Position yourself in A-Link and stand directly on the wooden ledges. Tuck to the shown edge marked with a circle and look towards B-Site.
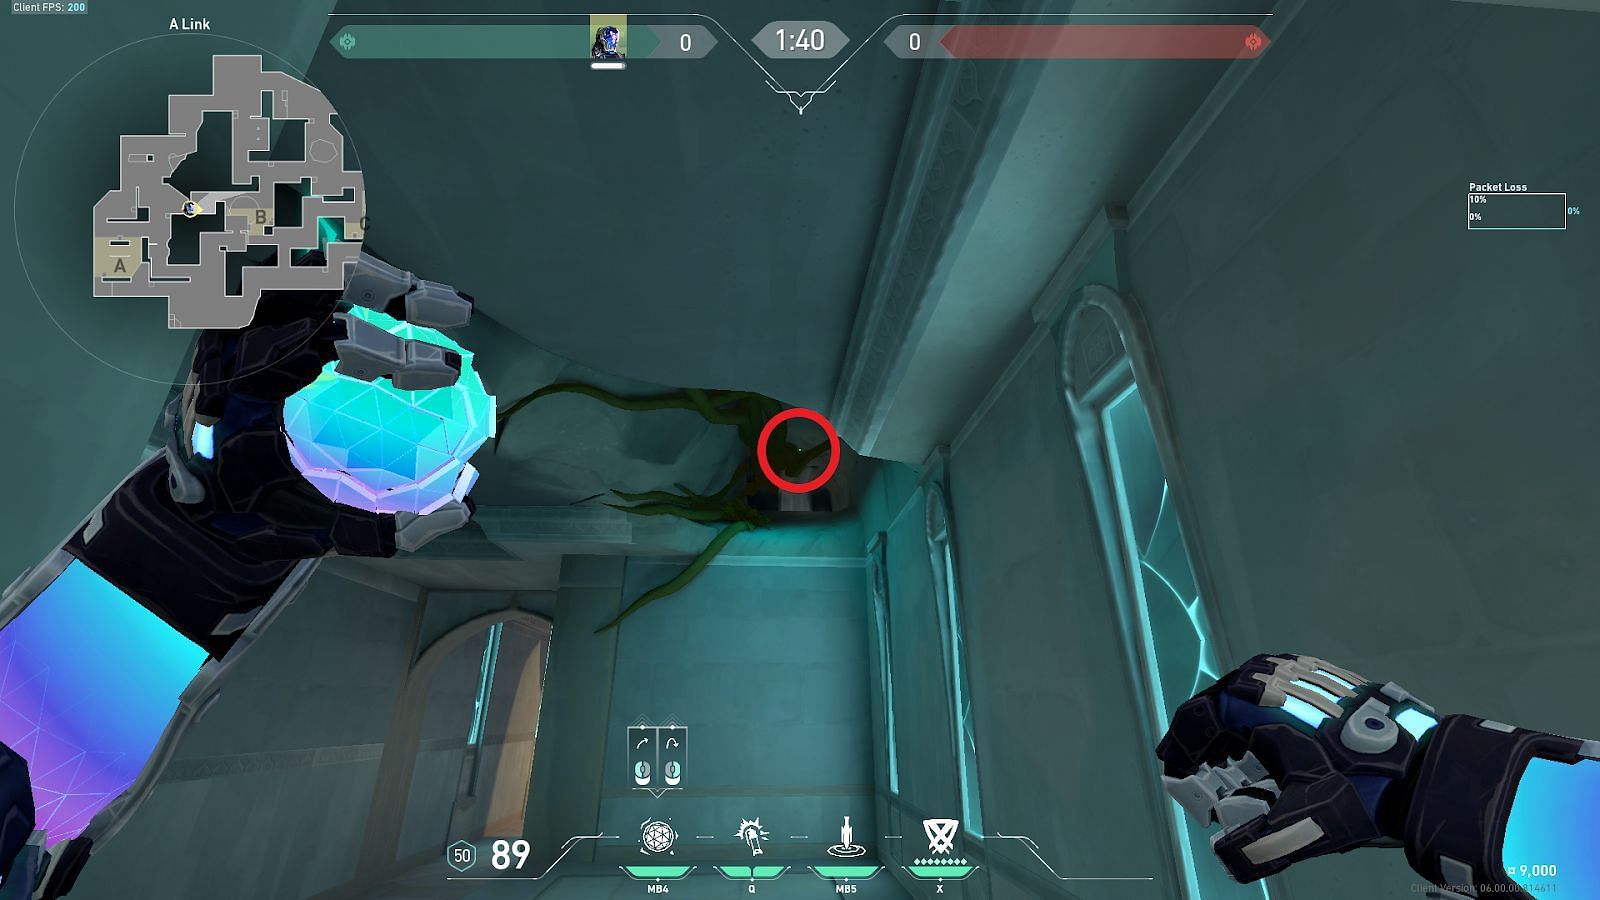
Place your crosshair just above the overgrowth of vines on the roof of A-Link and perform a simple left-click throw to deploy the nade.
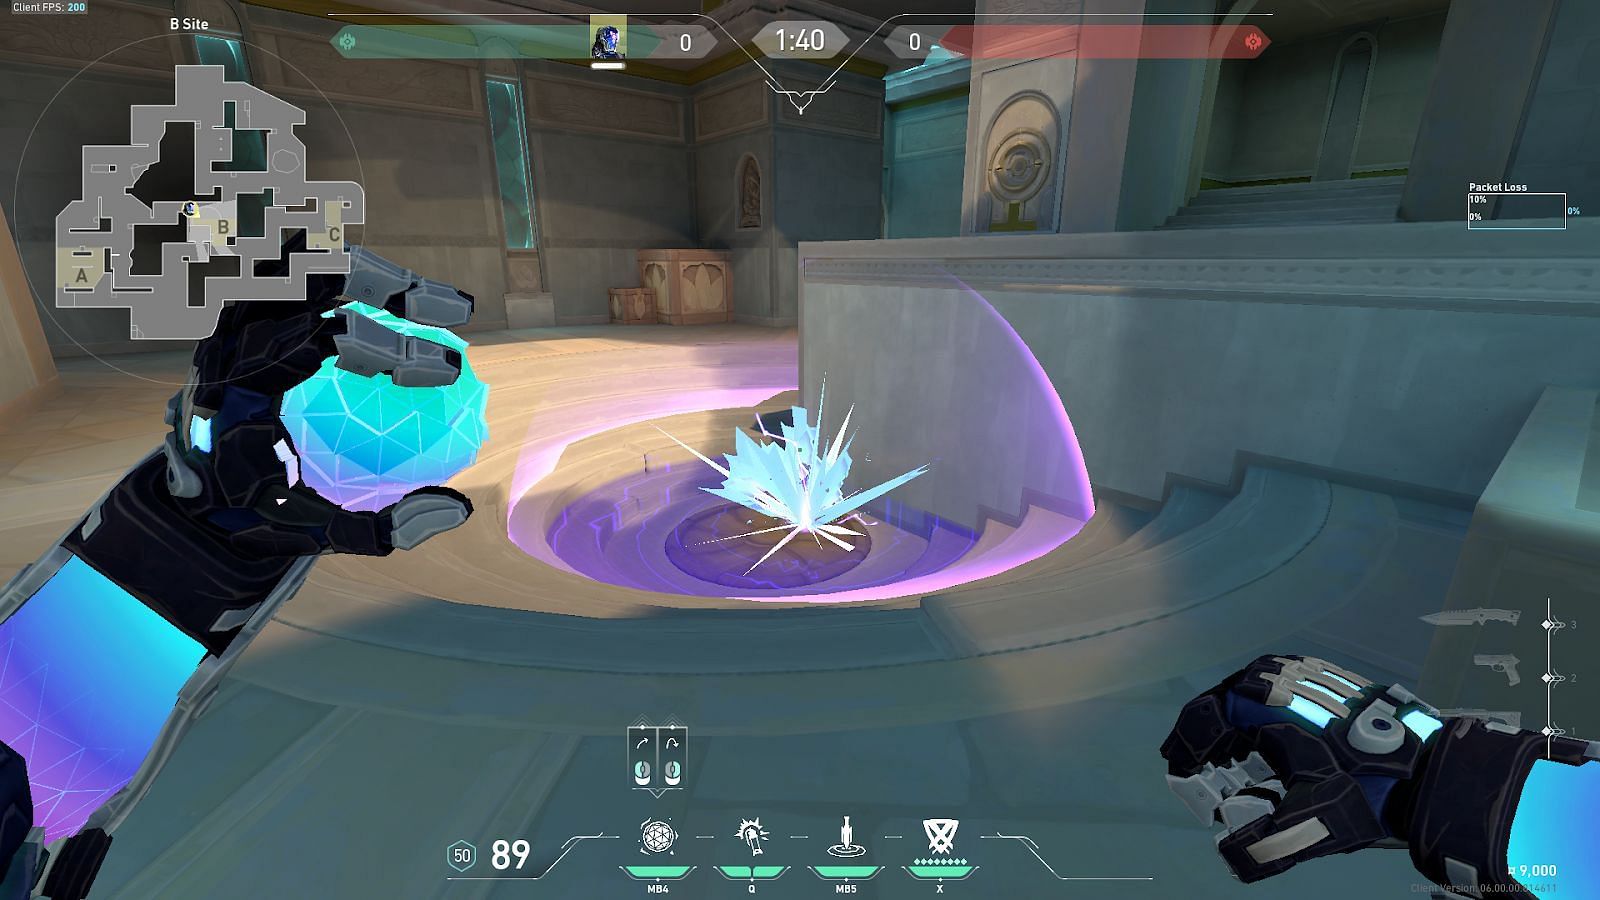
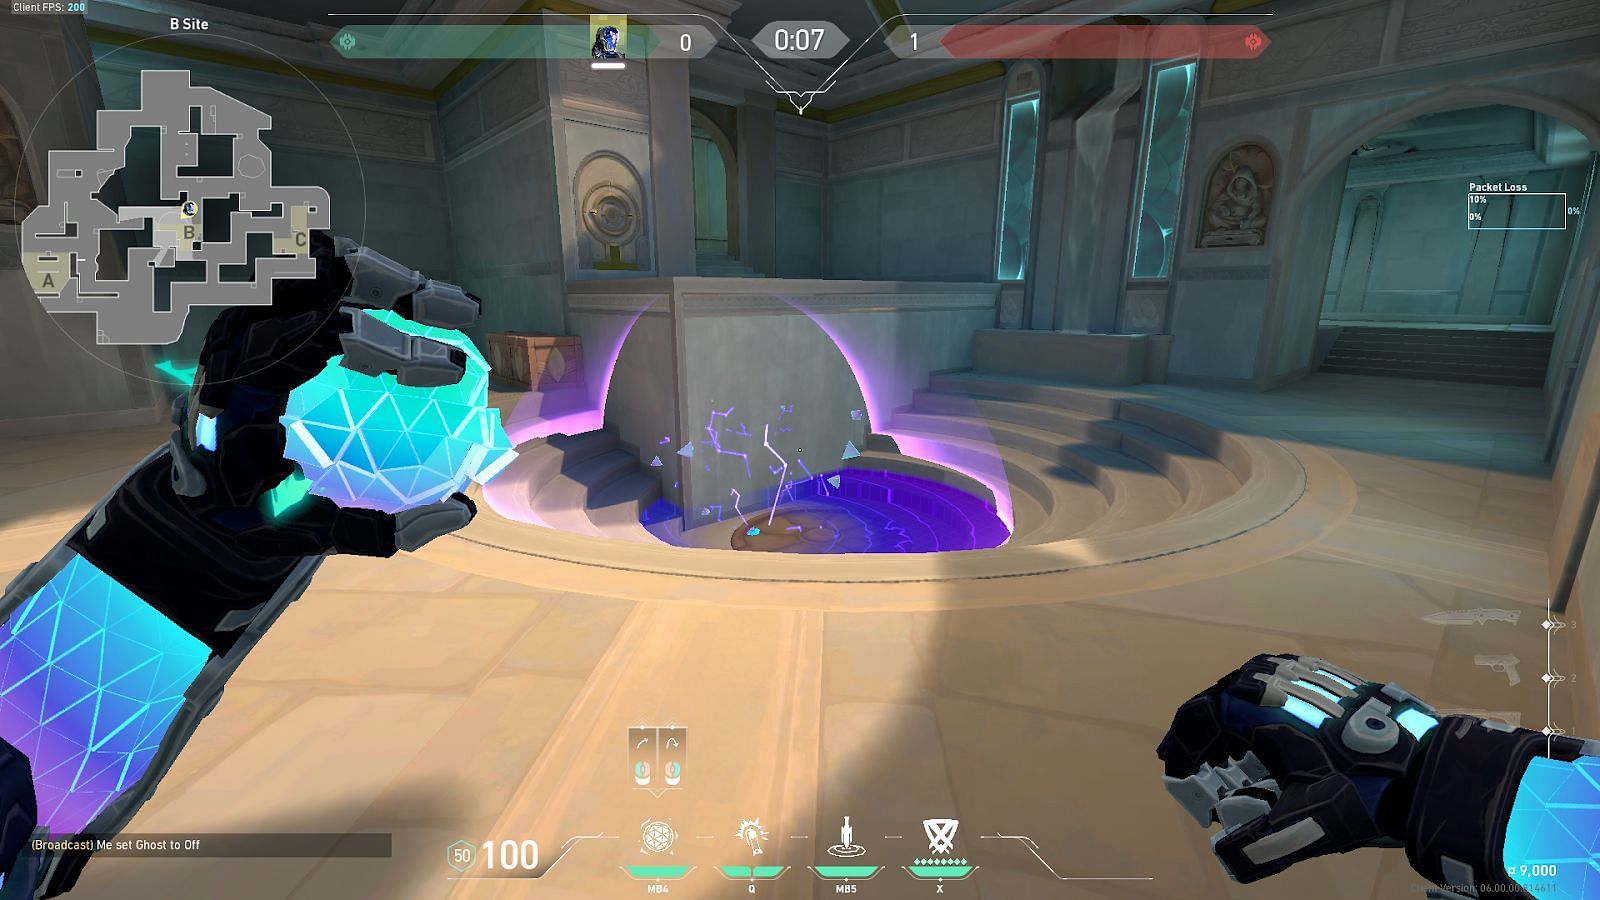
The nade will bounce off the vines and land directly on the B-Site default pit plant. This easy lineup can discourage defenders from defusing the spike.
3) C-Mound to B-Site default pit plant
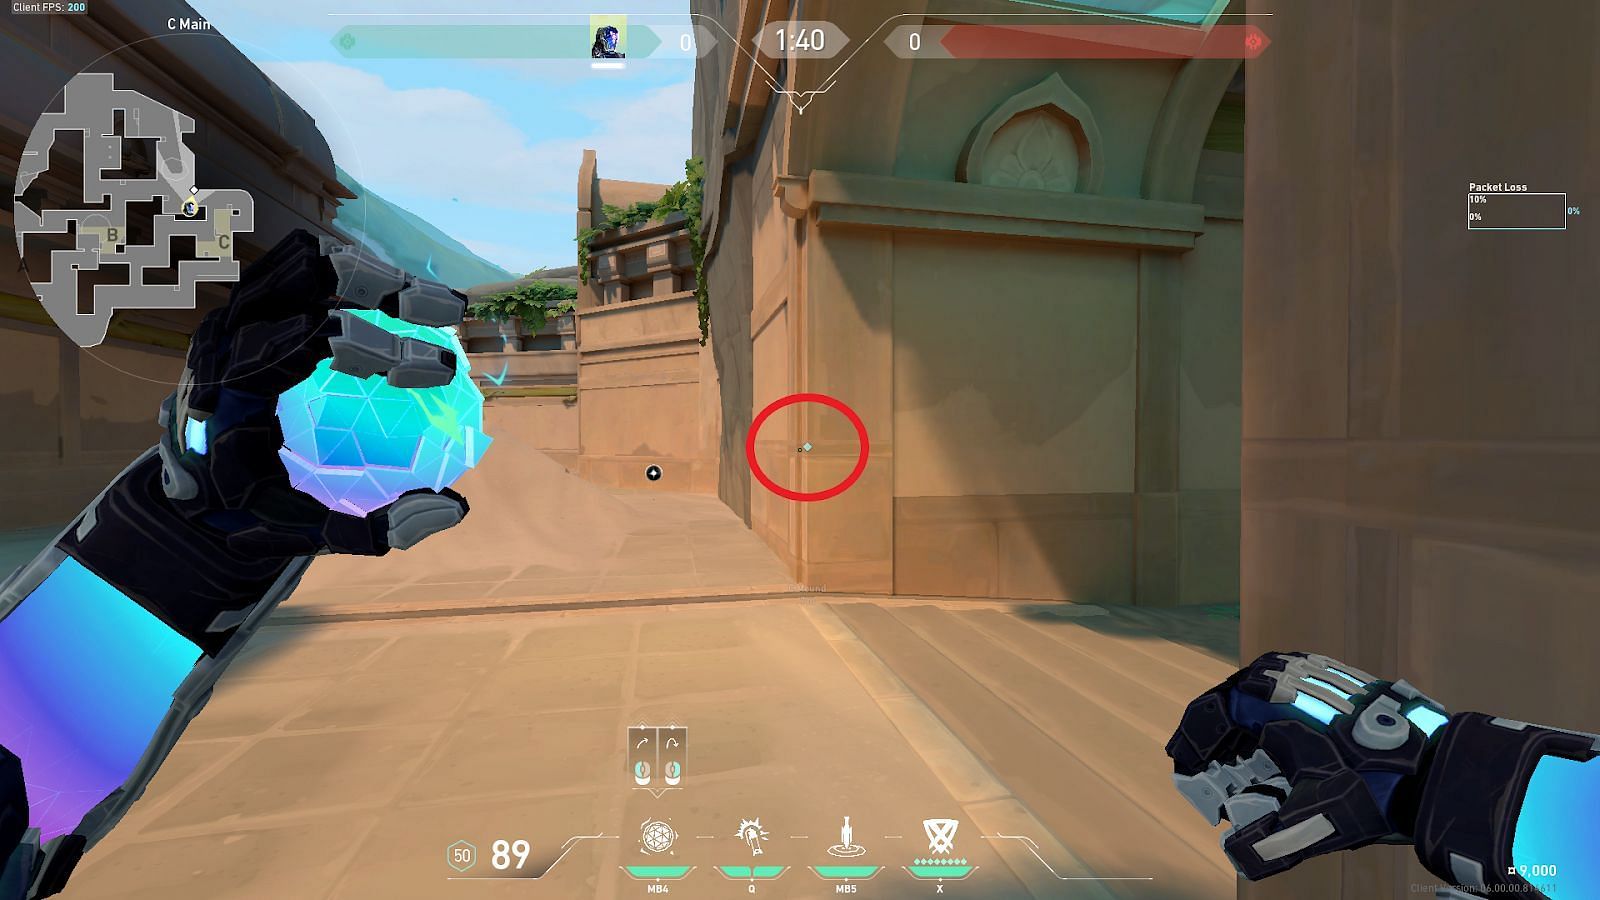
Position yourself in C-Mound and stand in front of the arch edge marked with a circle. Tuck to the edge and look towards B-Site.
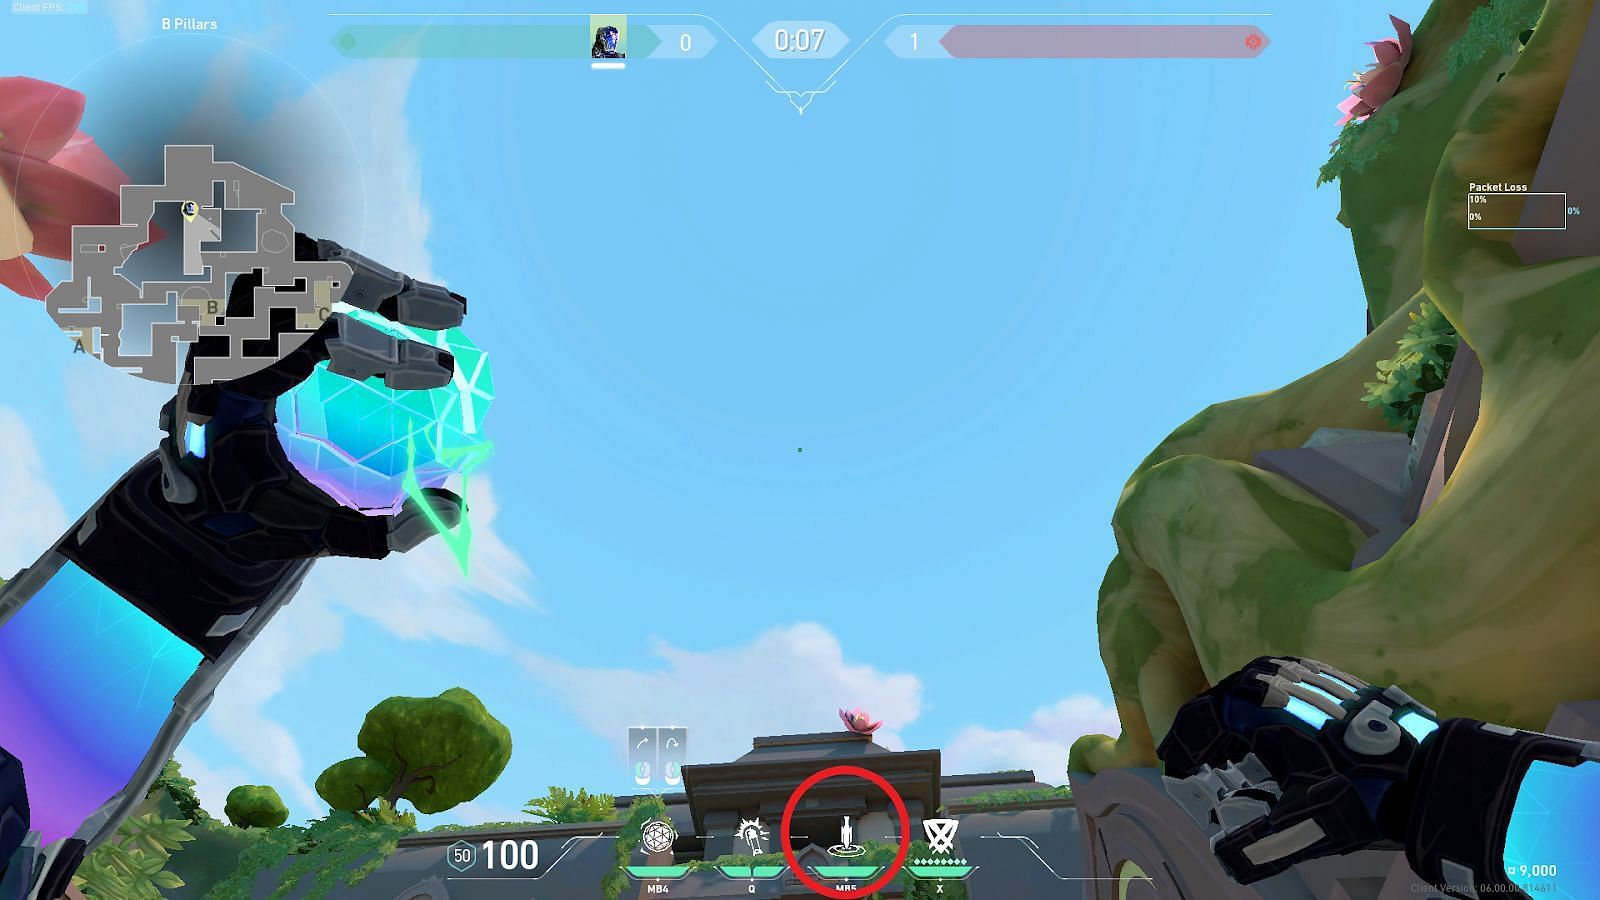
Position the mouse indicator above Kay/O’s nade on the distant roof and the right HUD lines on the ledges marked with the circles. Perform a jump left-click to deploy the nade towards B-Site.

Performing the lineup correctly will land the nade directly inside the B-Site default pit plant position. The lineup is comparatively difficult as it requires two elements of the HUD to line up perfectly.
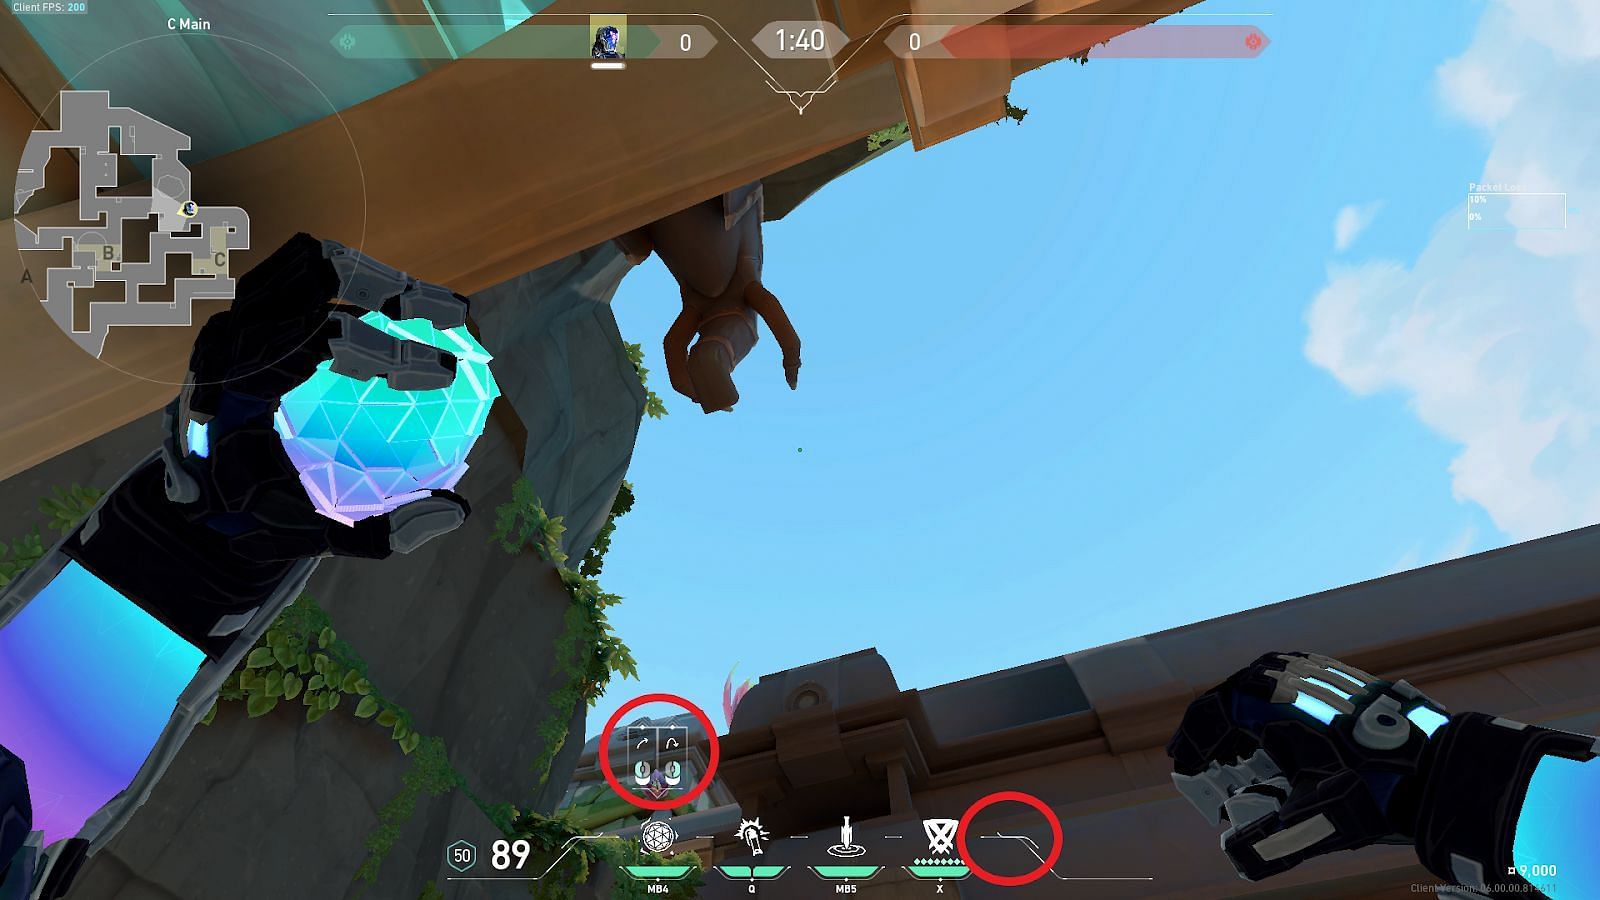
4) Attacker Spawn to B-Site default pit plant

Position yourself in Attacker Spawn and climb the shown wooden boxes marked with a circle. Look below, place your crosshair on the left edge of the box, and then look towards B-Site.
Position Kay/O’s dagger ability icon with the roof ledge as shown and marked with a circle. Perform a jump left-click throw to deploy the nade towards B-Site.
This lineup will result in the nade landing directly on the B-Site default pit plant and stop anyone from defusing the spike. This is an easy lineup that players can utilize from the safety of cover to secure a round win.
5) A-Rubble to A-Site double wooden boxes
Position yourself in A-Rubble and climb the shown ruins. Tuck inside the shown corner marked with a circle and look towards A-Site.
Place Kay/O’s dagger ability icon on the HUD on the roof ledge as shown and marked with a circle. Perform a simple jump left-click throw to deploy the made.
The nade will land directly near the double wooden boxes in A-Site near the silent drop to deter anyone from defusing the spike. This could be a great lineup in a last-alive situation where the other defenders are trying to hunt you down.
Stay tuned to Sportskeeda for the latest updates and more Lotus tips and tricks.
