
'%20x='0'%20y='0'%20height='100%25'%20width='100%25'%20%0A%20%20%20%20%20%20%20%20%20%20xlink%3Ahref='data:image/jpg;base64,/9j/2wBDAAYEBQYFBAYGBQYHBwYIChAKCgkJChQODwwQFxQYGBcUFhYaHSUfGhsjHBYWICwgIyYnKSopGR8tMC0oMCUoKSj/2wBDAQcHBwoIChMKChMoGhYaKCgoKCgoKCgoKCgoKCgoKCgoKCgoKCgoKCgoKCgoKCgoKCgoKCgoKCgoKCgoKCgoKCj/wgARCAAGAAoDASIAAhEBAxEB/8QAFgABAQEAAAAAAAAAAAAAAAAAAAUH/8QAFQEBAQAAAAAAAAAAAAAAAAAABAX/2gAMAwEAAhADEAAAAM3oD5P/xAAfEAACAgEEAwAAAAAAAAAAAAABAgMFAAQREzEyQWL/2gAIAQEAAT8Allqn08QFRHHJpouNpBIzcv1seveJY0SKFarJIG3guf/EABcRAAMBAAAAAAAAAAAAAAAAAAABAjH/2gAIAQIBAT8AnWf/xAAXEQADAQAAAAAAAAAAAAAAAAAAAQIx/9oACAEDAQE/AKxH/9k='%3E%3C/image%3E%3C/svg%3E)
Valorant's Abyss map is perhaps one of the most interesting ones to play Cypher on. It has tiny gaps that force players to jump and hop around to cross. If they don't make the leap, a devastating fall will claim their lives. This Cypher Abyss guide will cruise through some setups abusing these tricks. One interesting mechanic is to put a trap wire right by these gaps to ensure that opponents fall to their deaths.
While other Sentinels such as Killjoy and Sage also remain interesting Agents on Abyss, Cypher is the one that can be enjoyed most creatively. Playing this Agent on Abyss gives you room to experiment with different setups, wall-bang Trapwire placements, and so much more.
This article will explore some effective Cypher Abyss setups. This includes entire setups for both sites and some tips and tricks.

Complete Cypher Abyss setup guide in Valorant
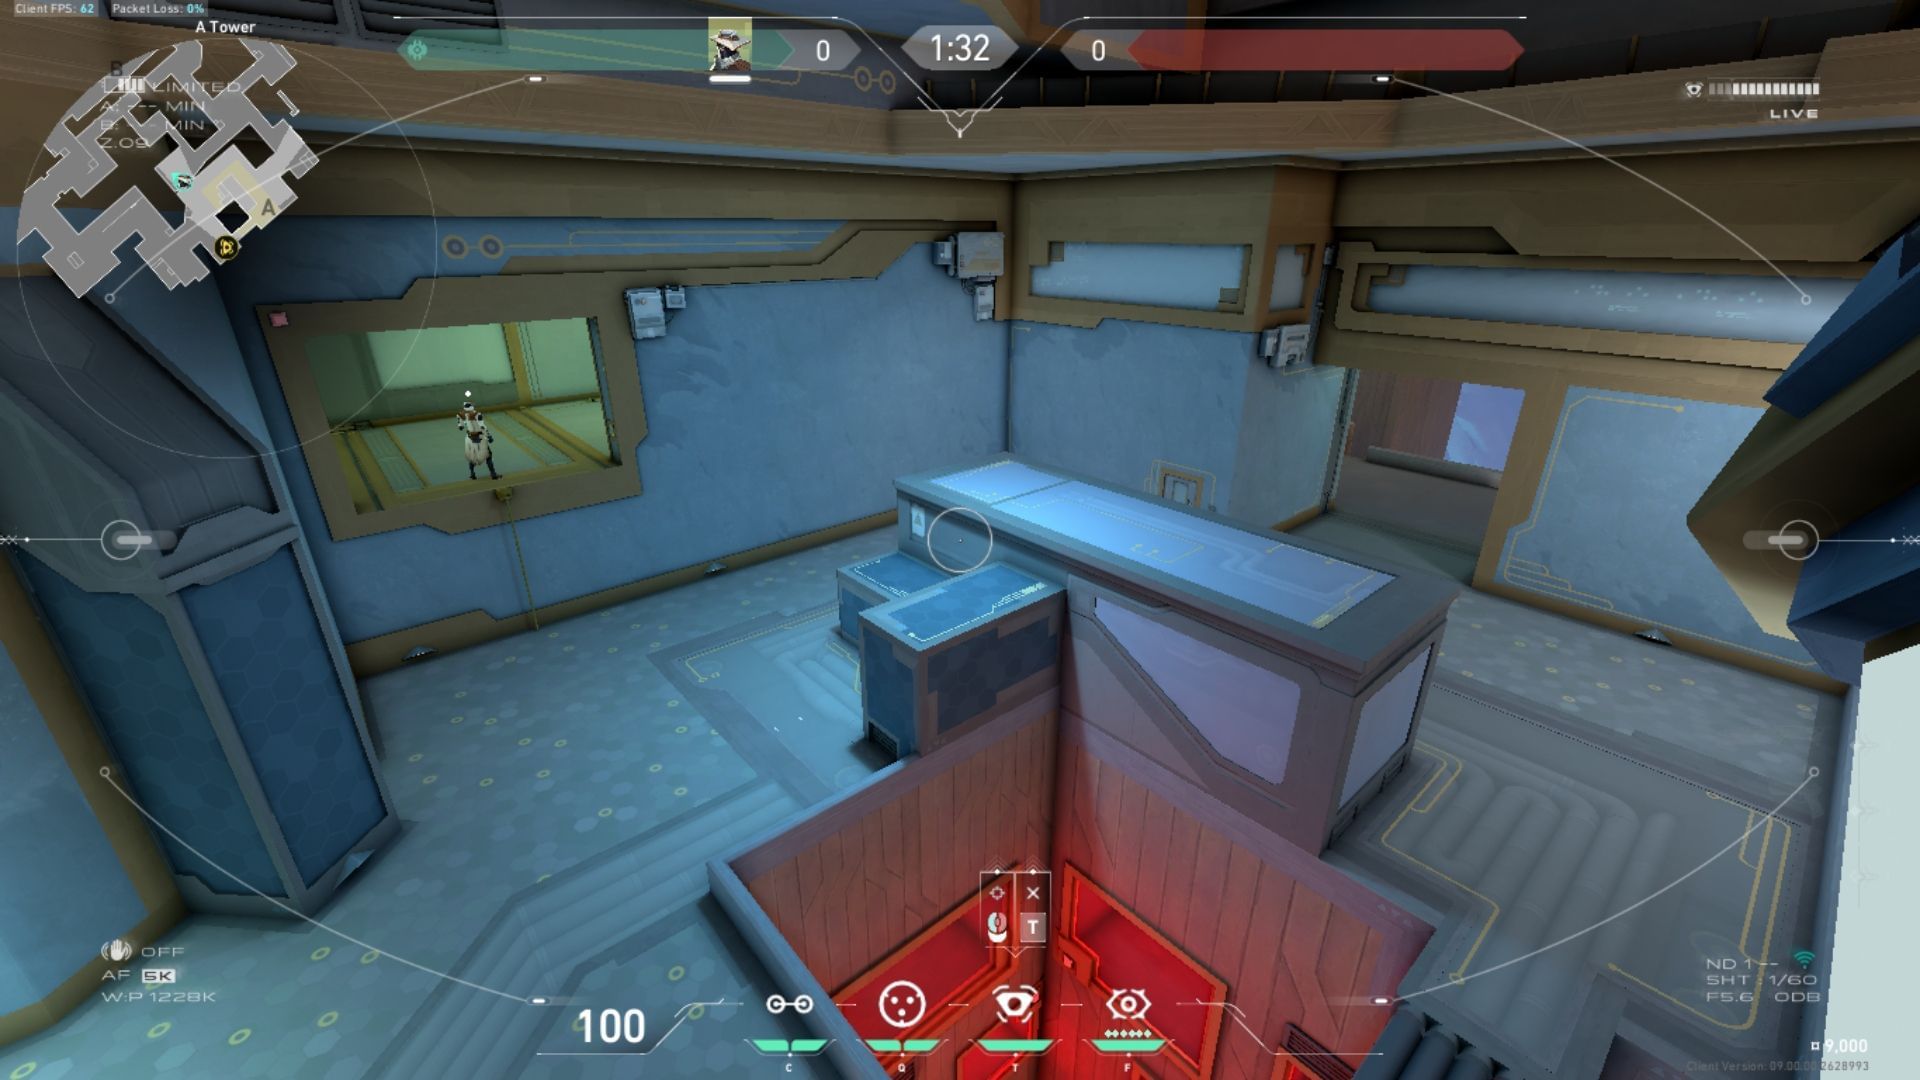
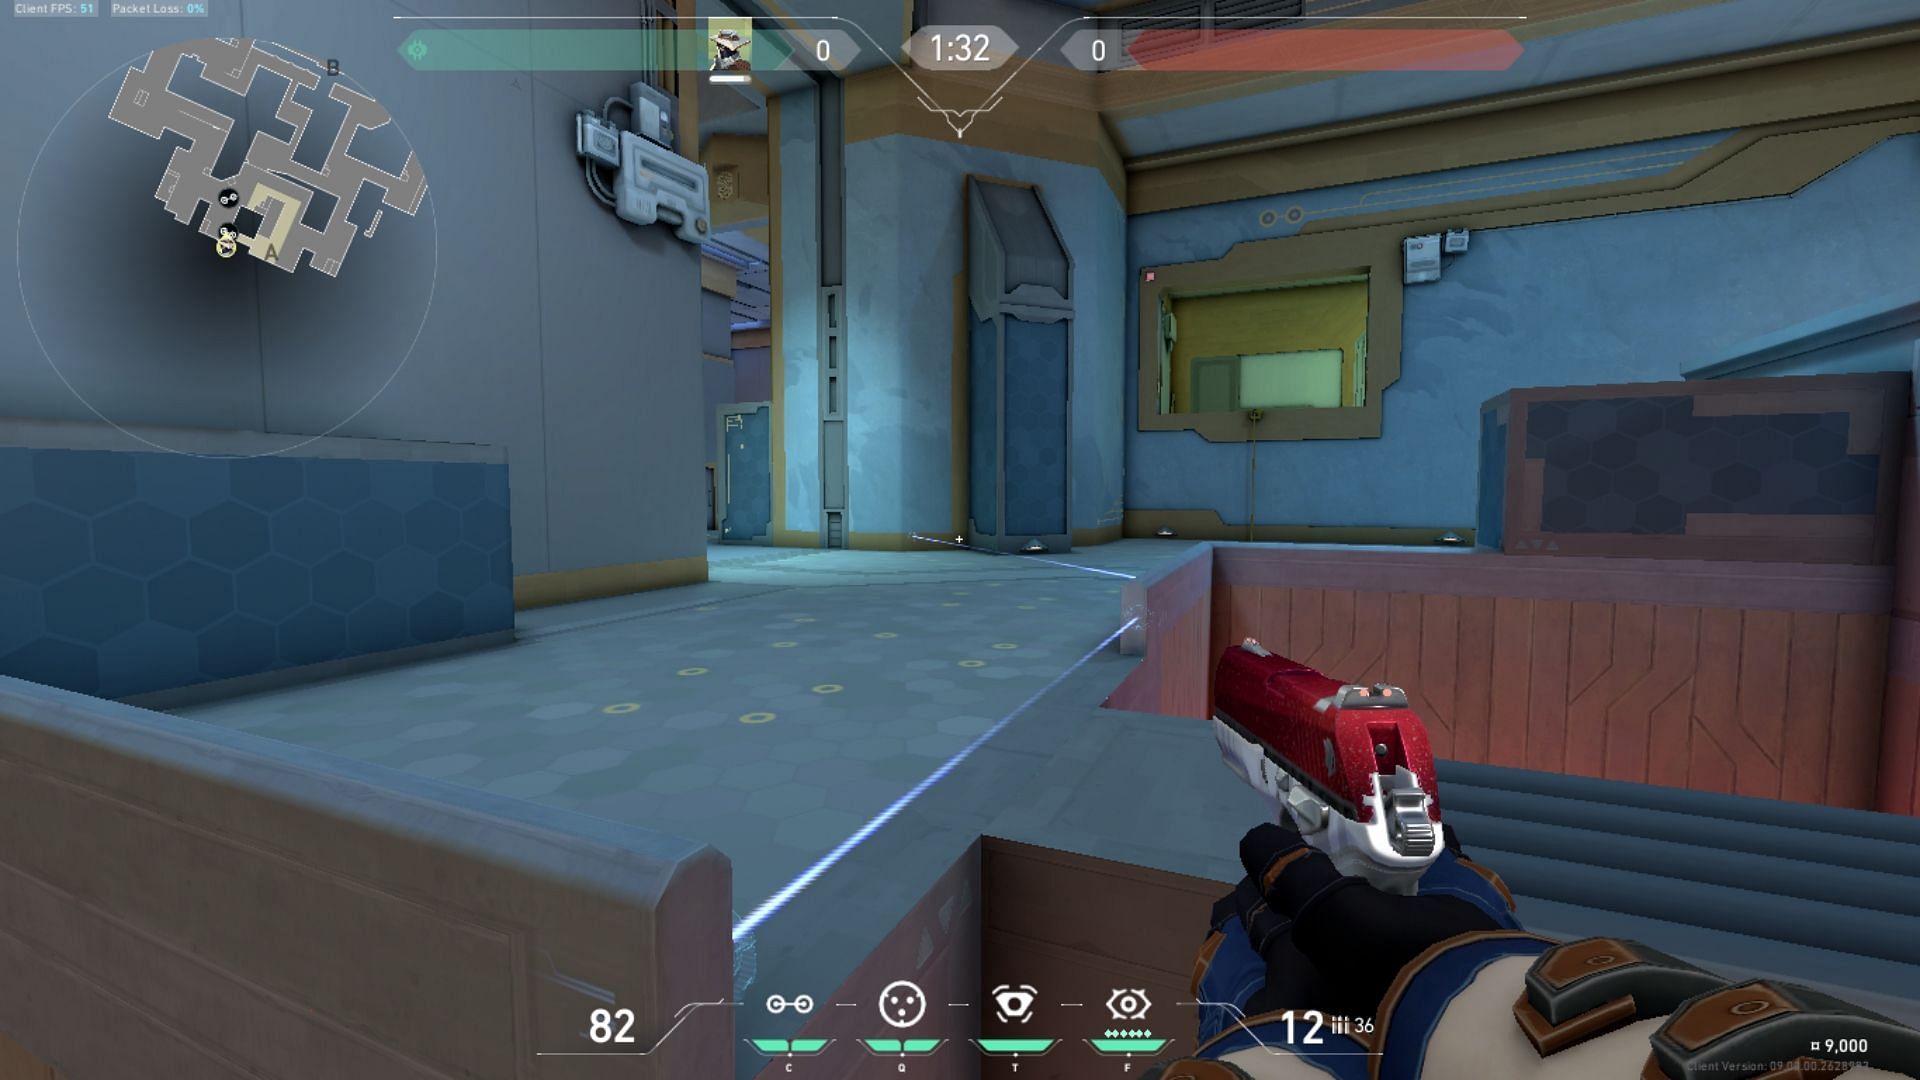
A-Site - Option 1
Camera Position
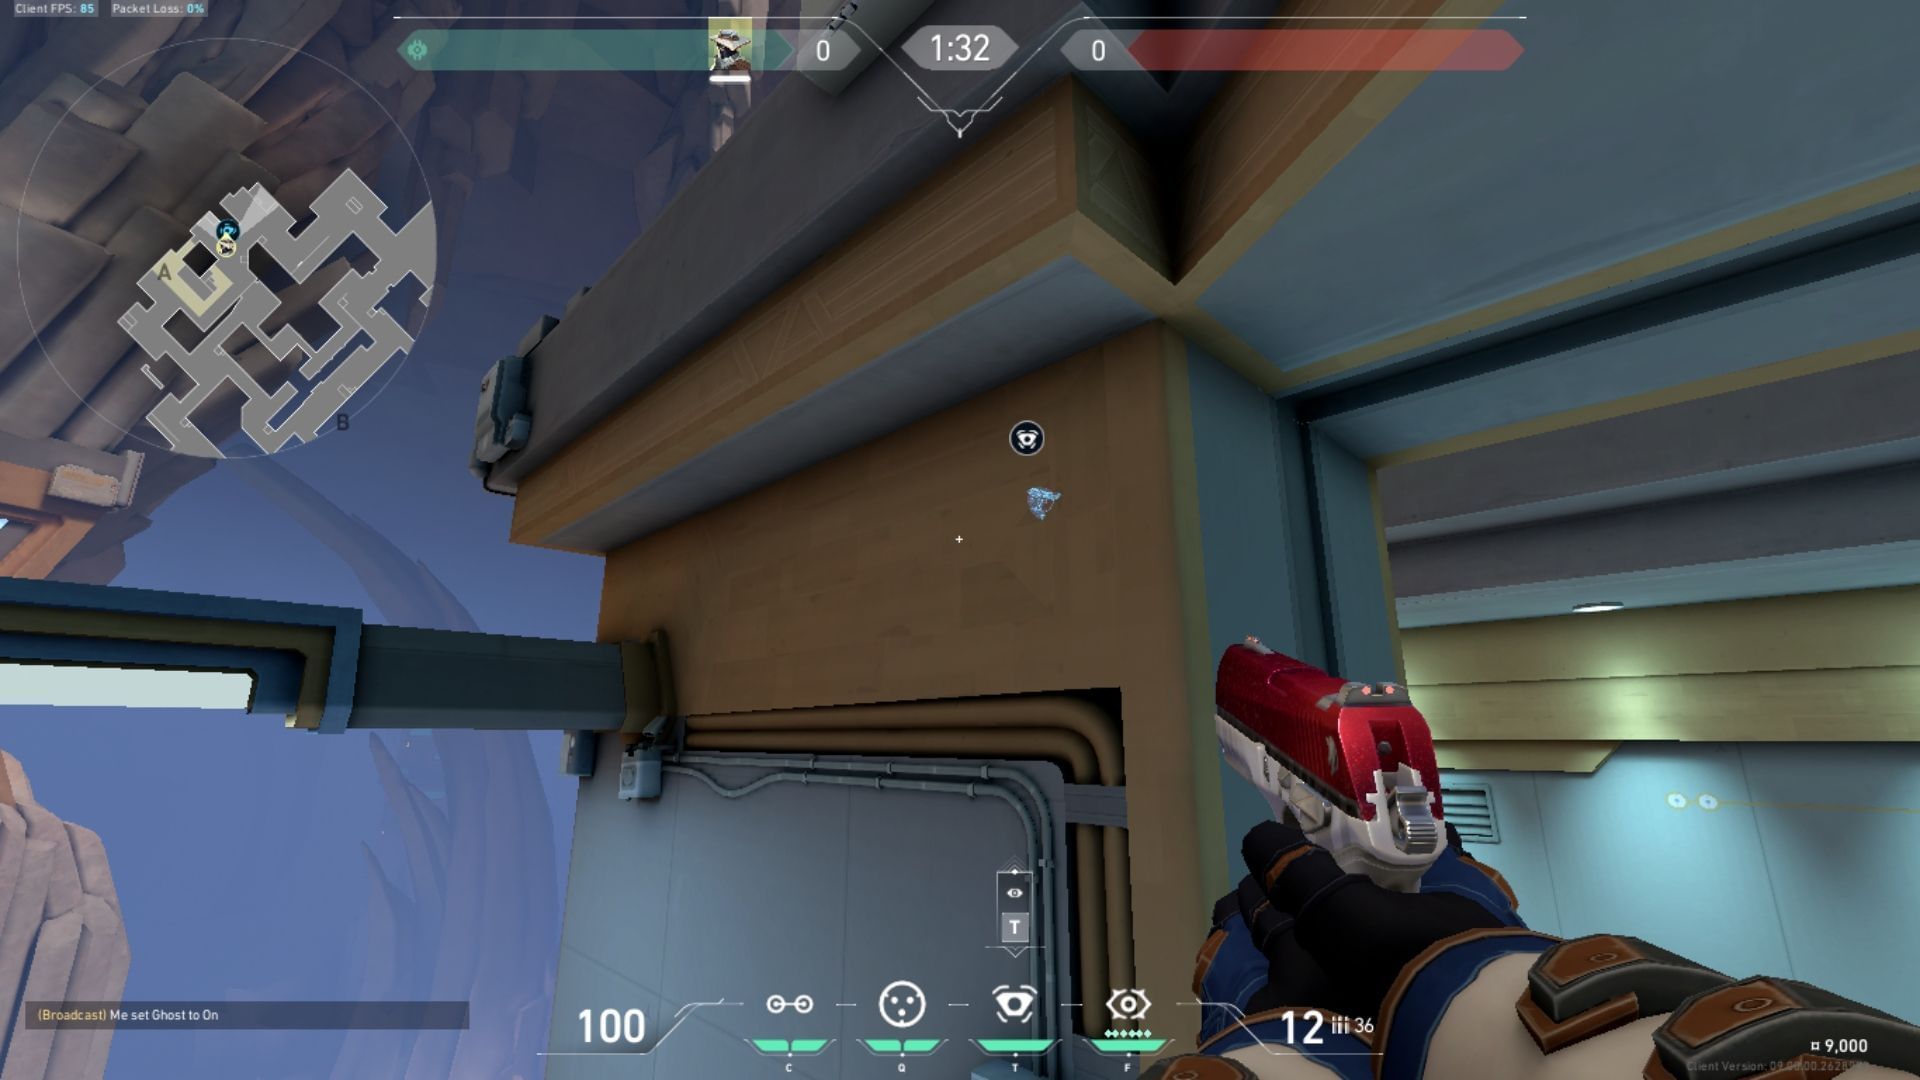
What it sees

In terms of a Cypher Abyss setup on A Site, this is perhaps the most optimal Spycam. It is easy to execute from A Tower. This option requires players to hop out of A Tower and release the Spycam mid-air. There is, however, a variation of it that can also be executed from the same area.
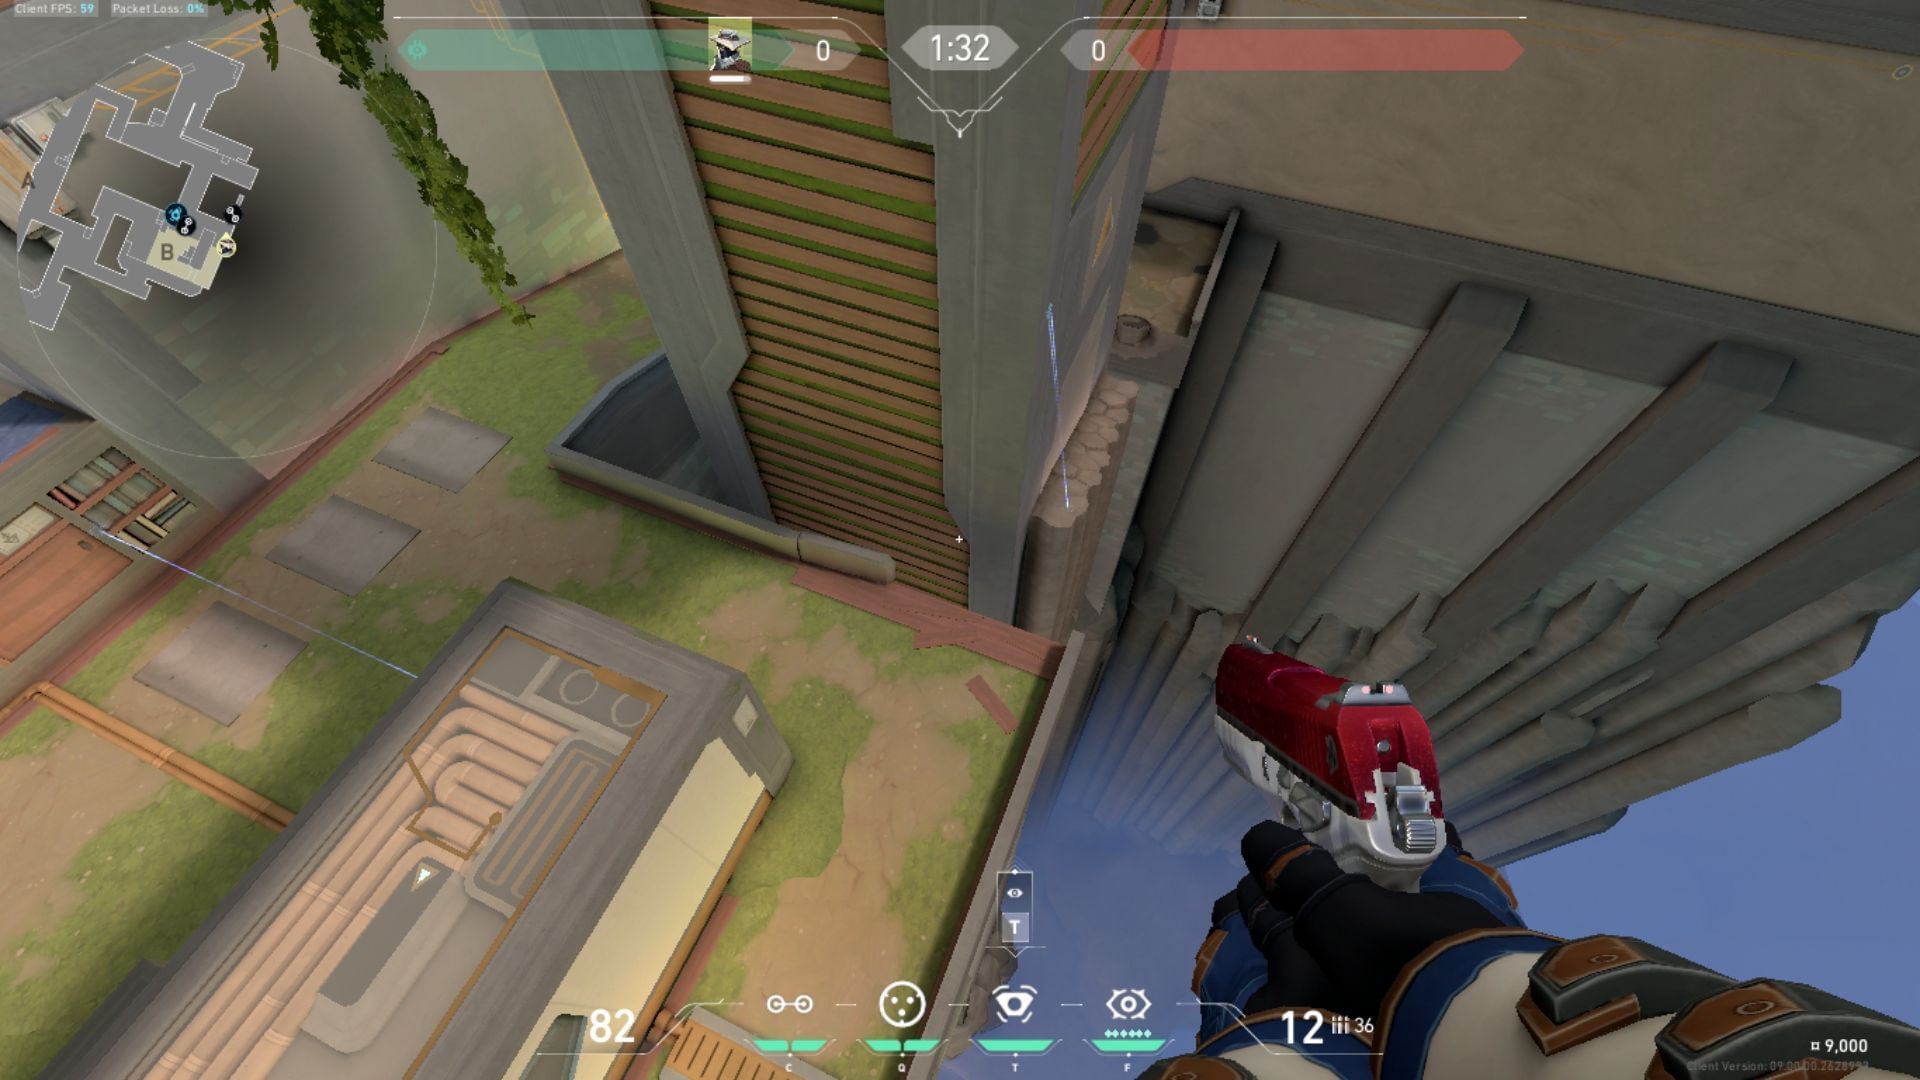
A-Site - Option 2

What it sees
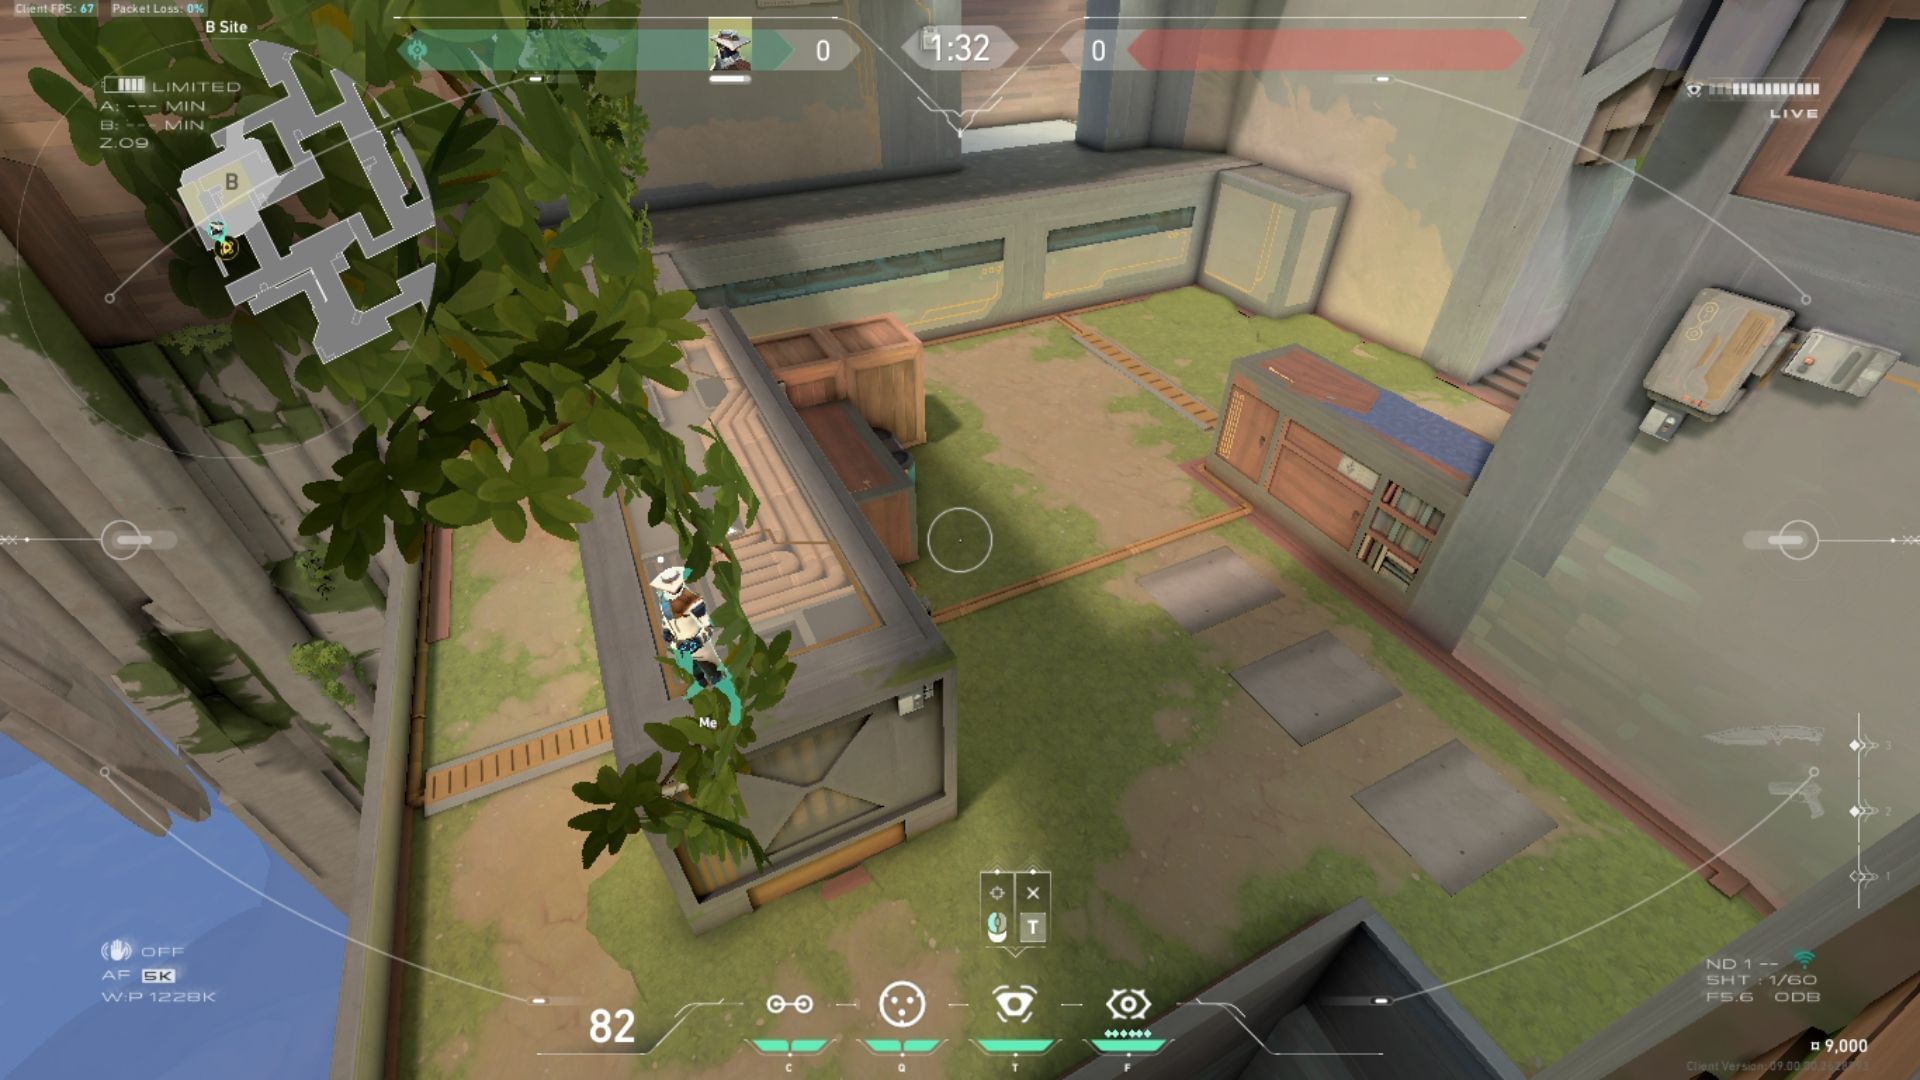
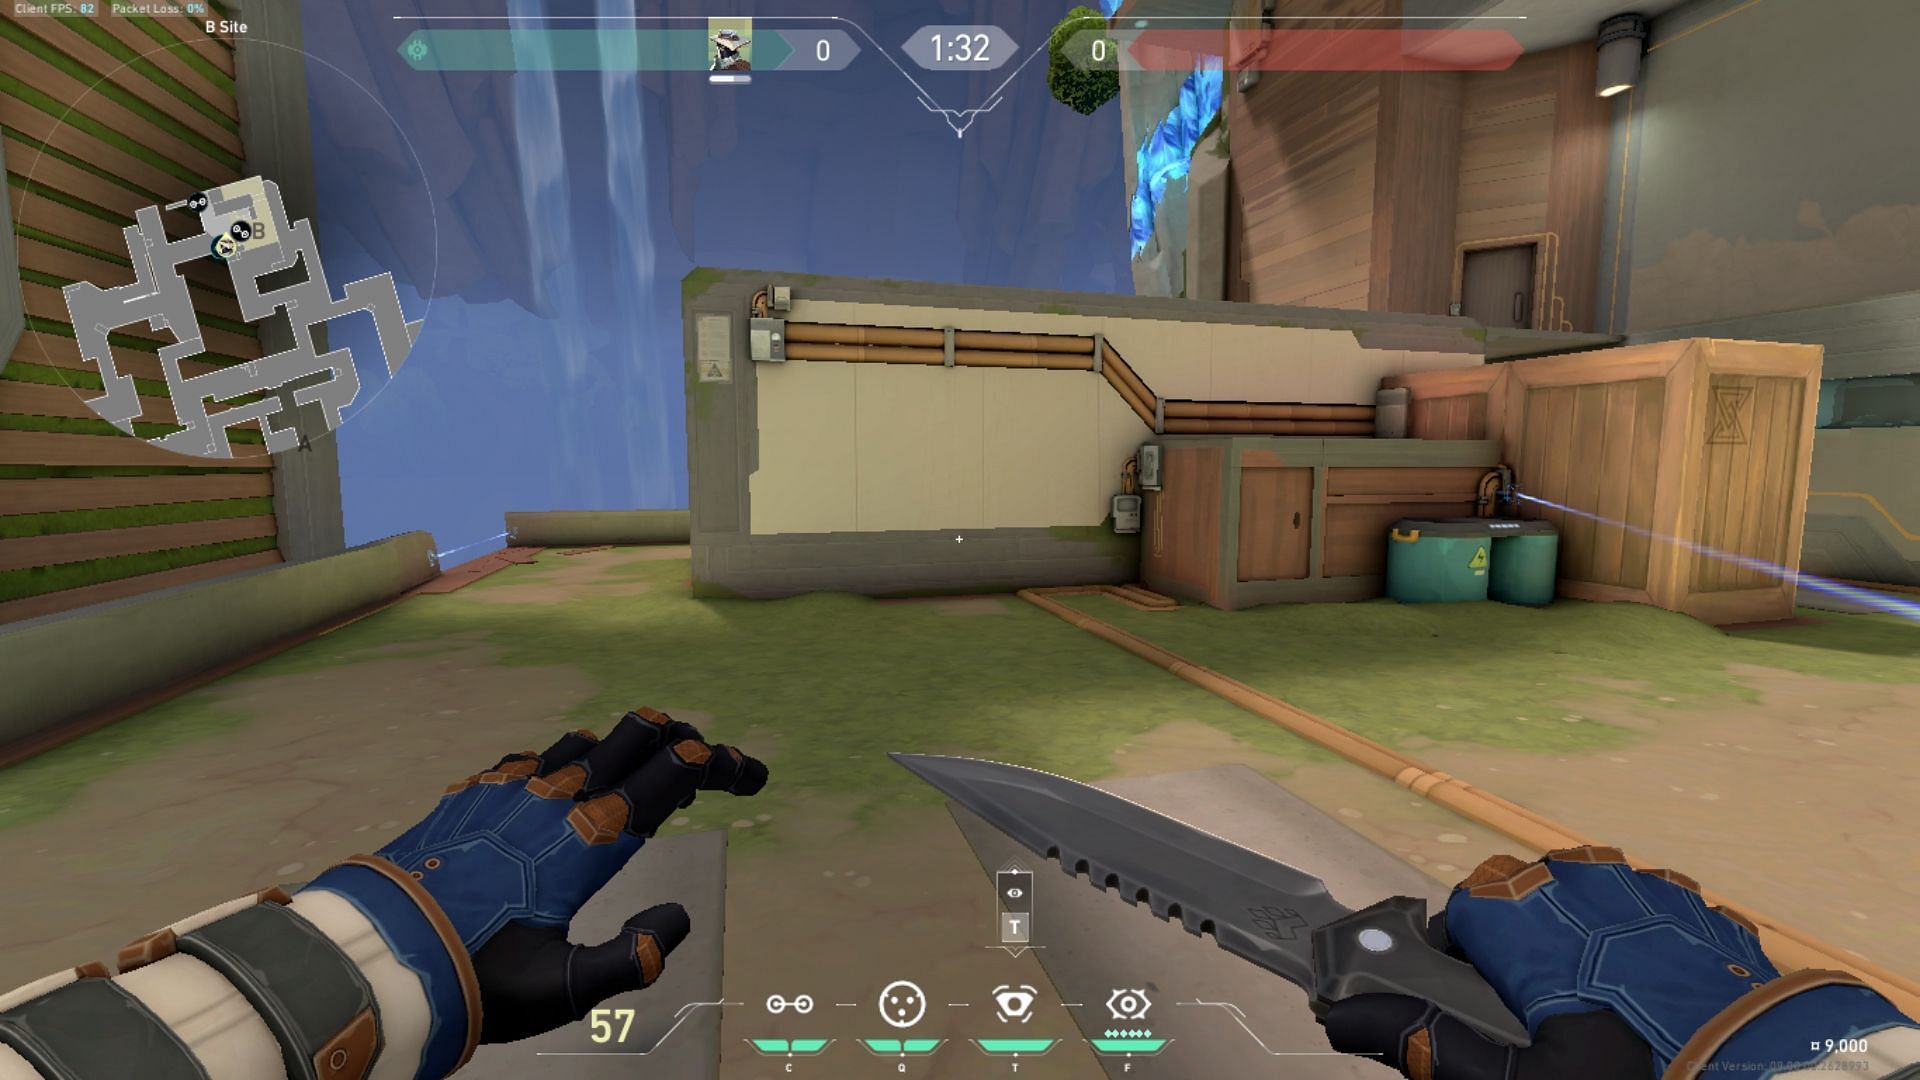
B-Site - Option 1
What it sees
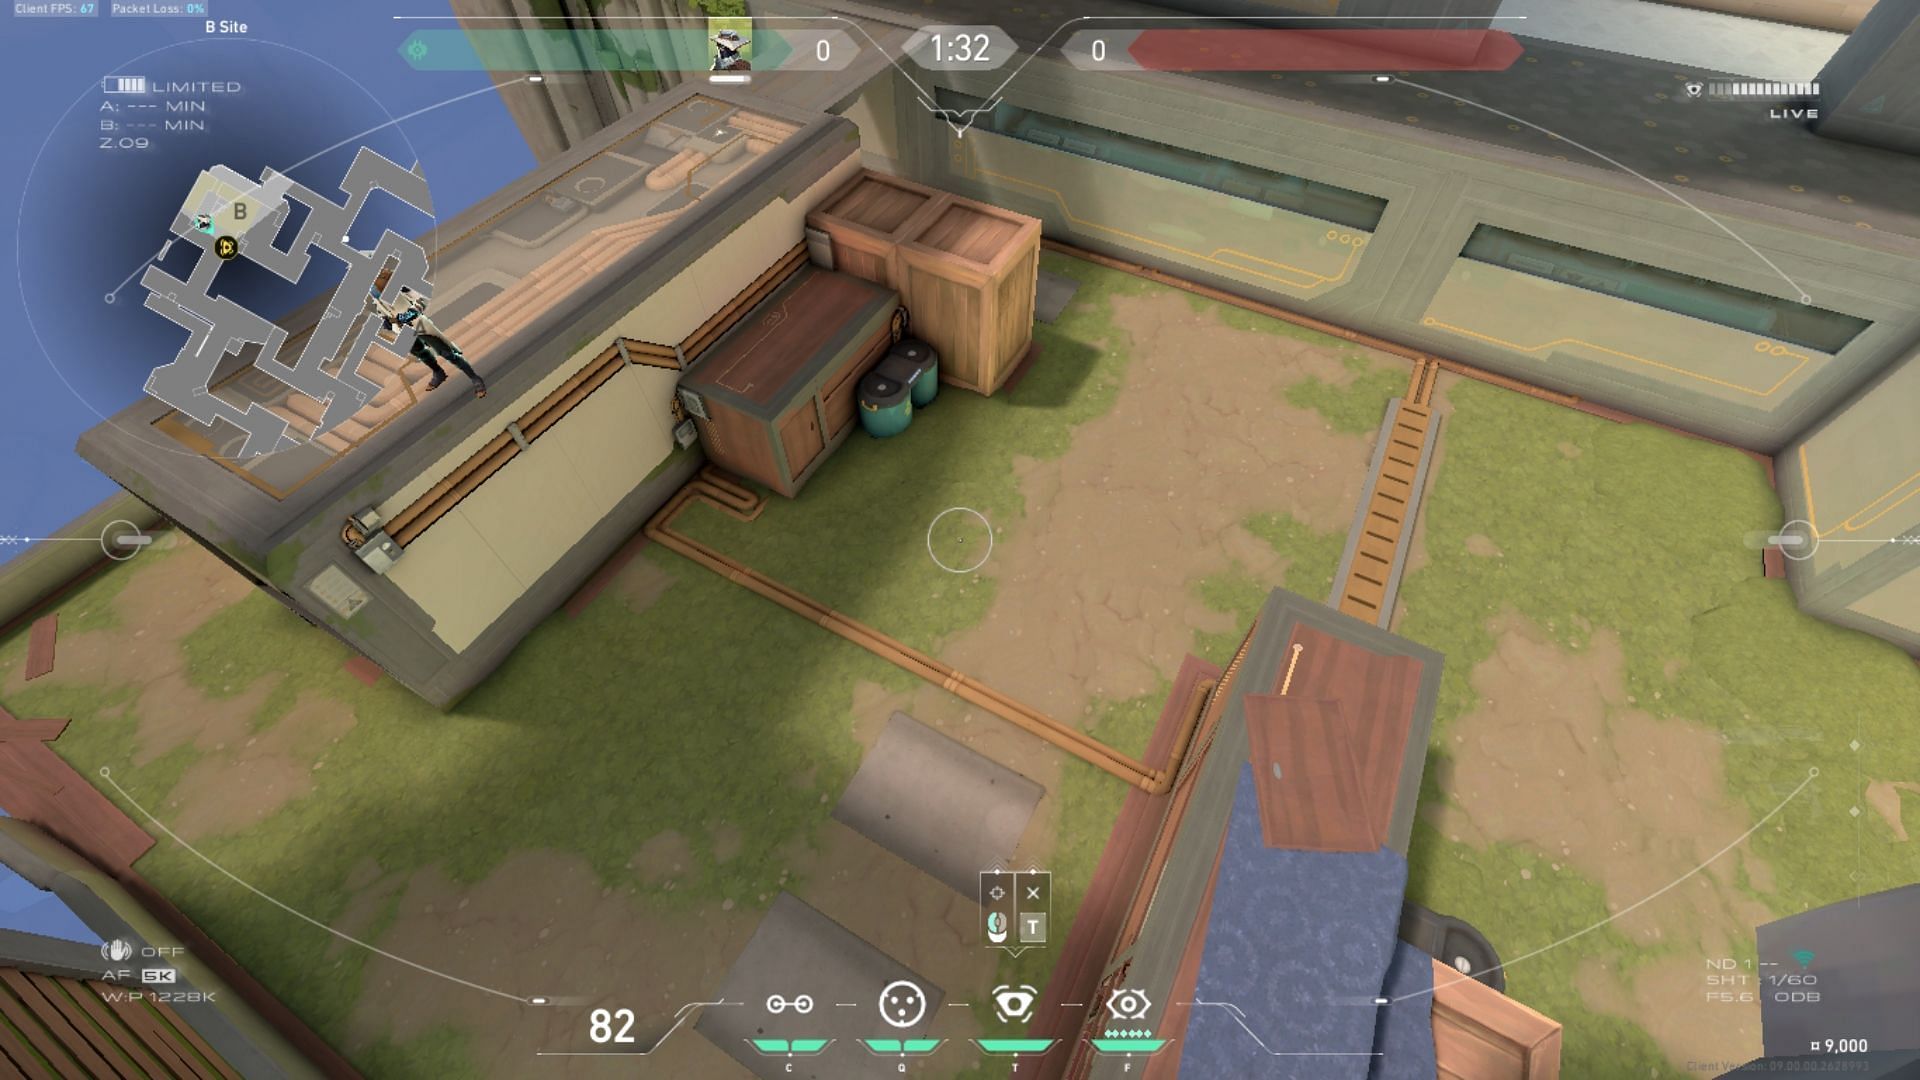
B-Site - Option 2
What it sees
Best Cypher Trapwire setups on Valorant's Abyss
This section explores several Trapwire setups in this Cypher Abyss guide. In general, aim at one of the surfaces or spots as shown in the images to set the Trapwire up. There are some low-wire setups and some other regular-level setups too which can be alternated between to surprise the opponent.
A-Site Option 1
A-Site Option 2
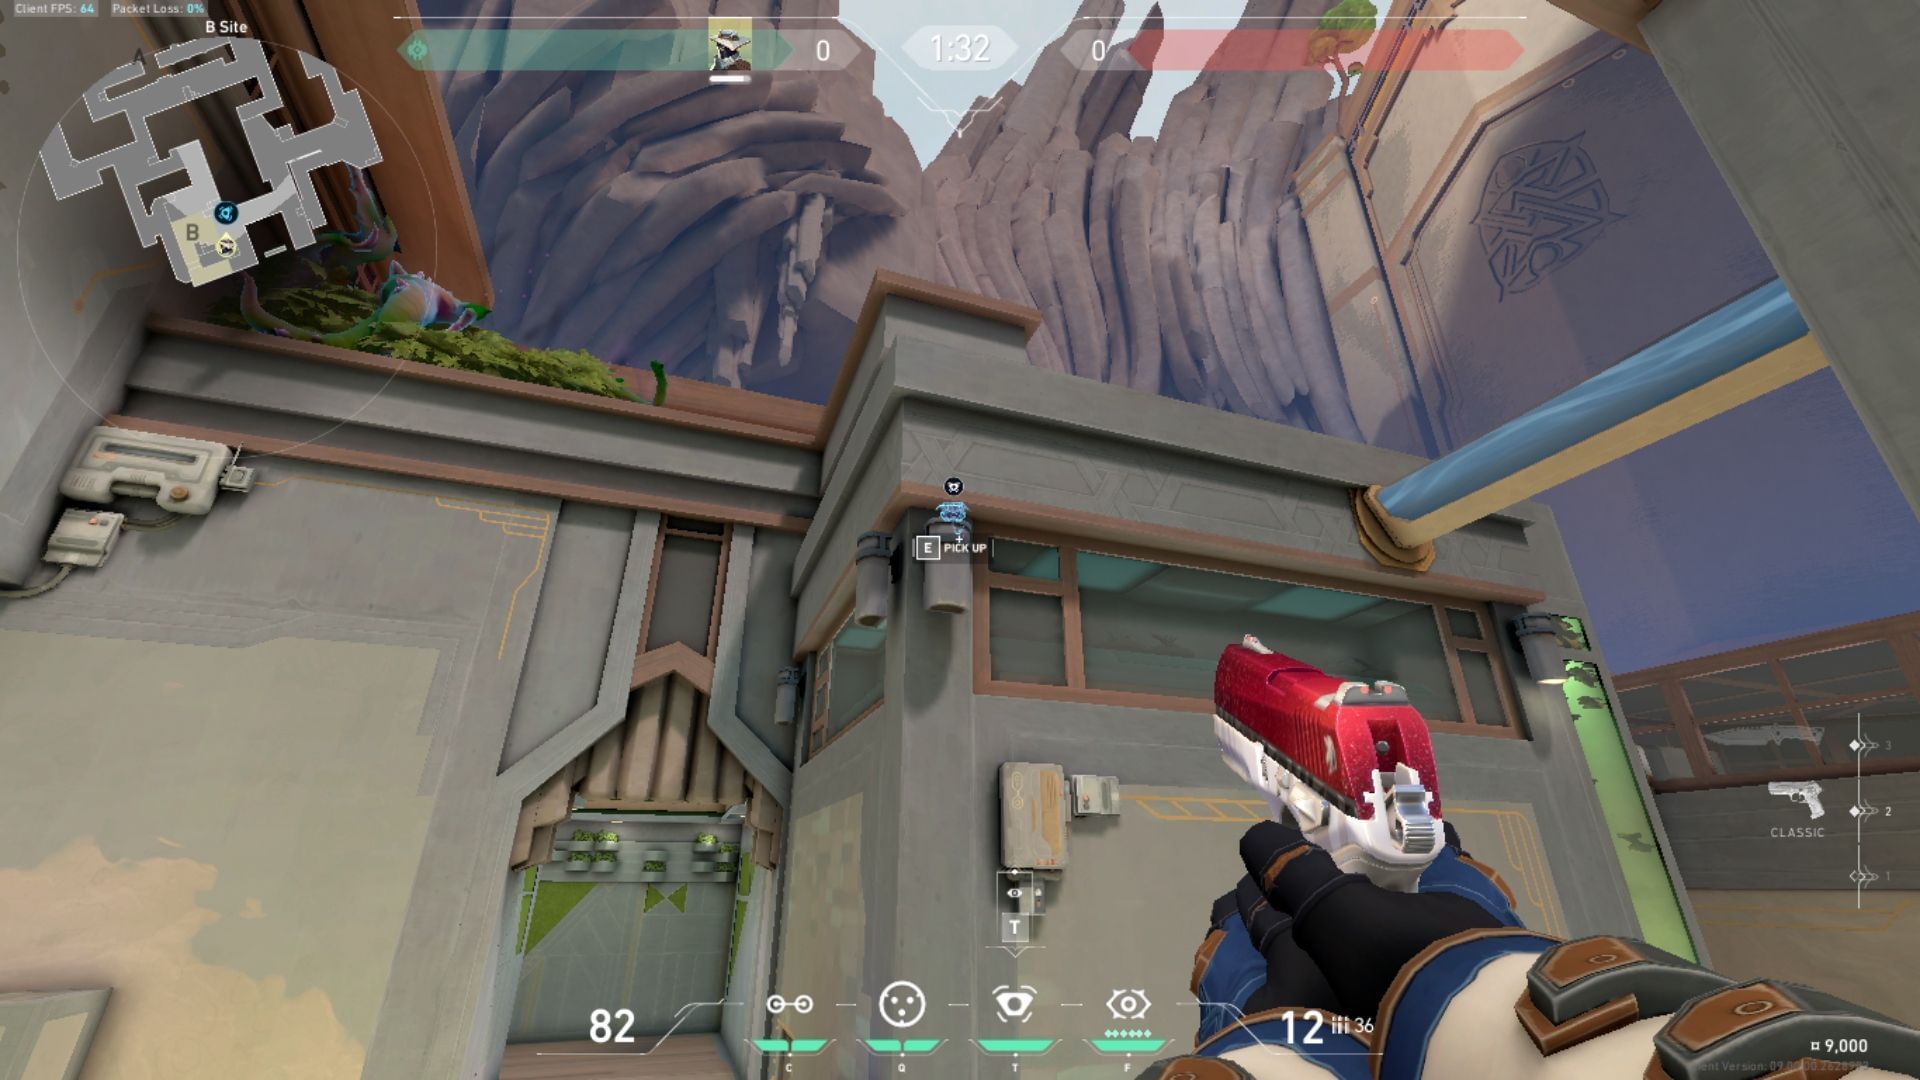
B-Site option 1
B-Site option 2
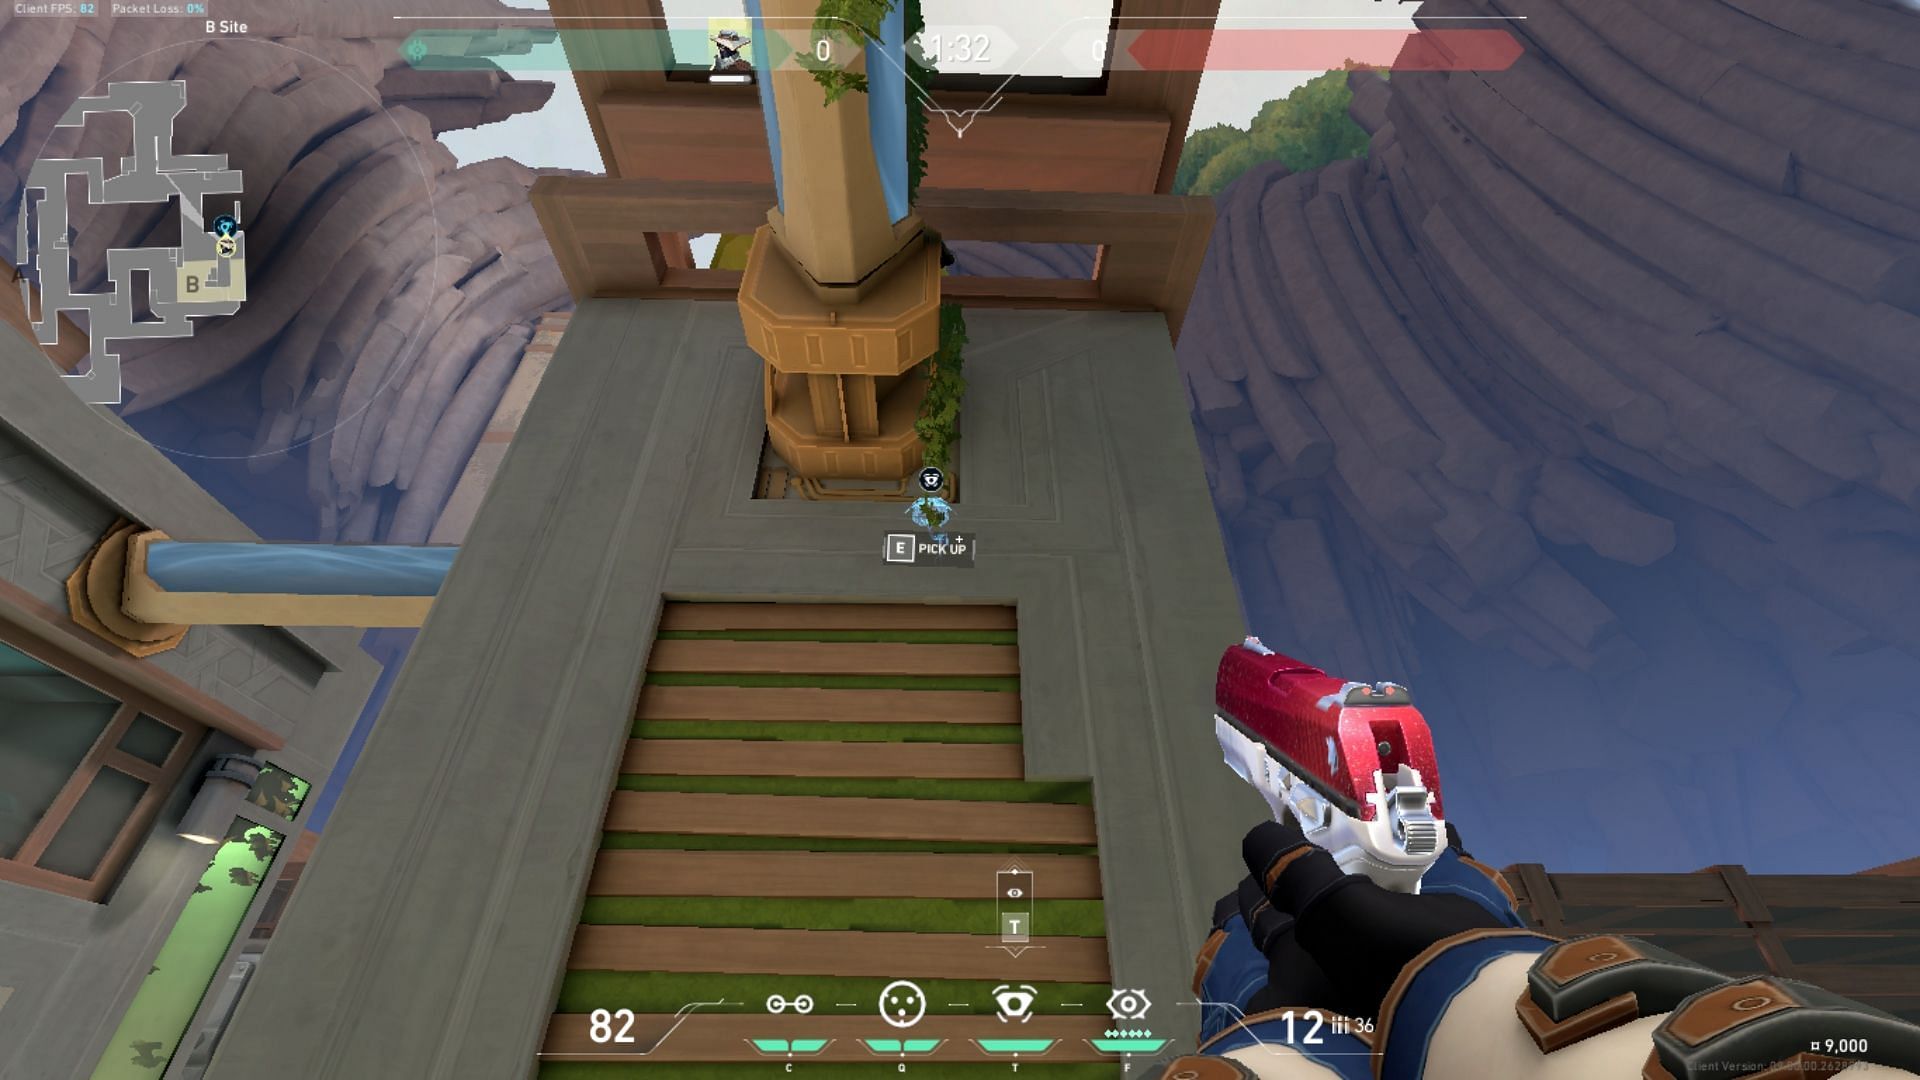
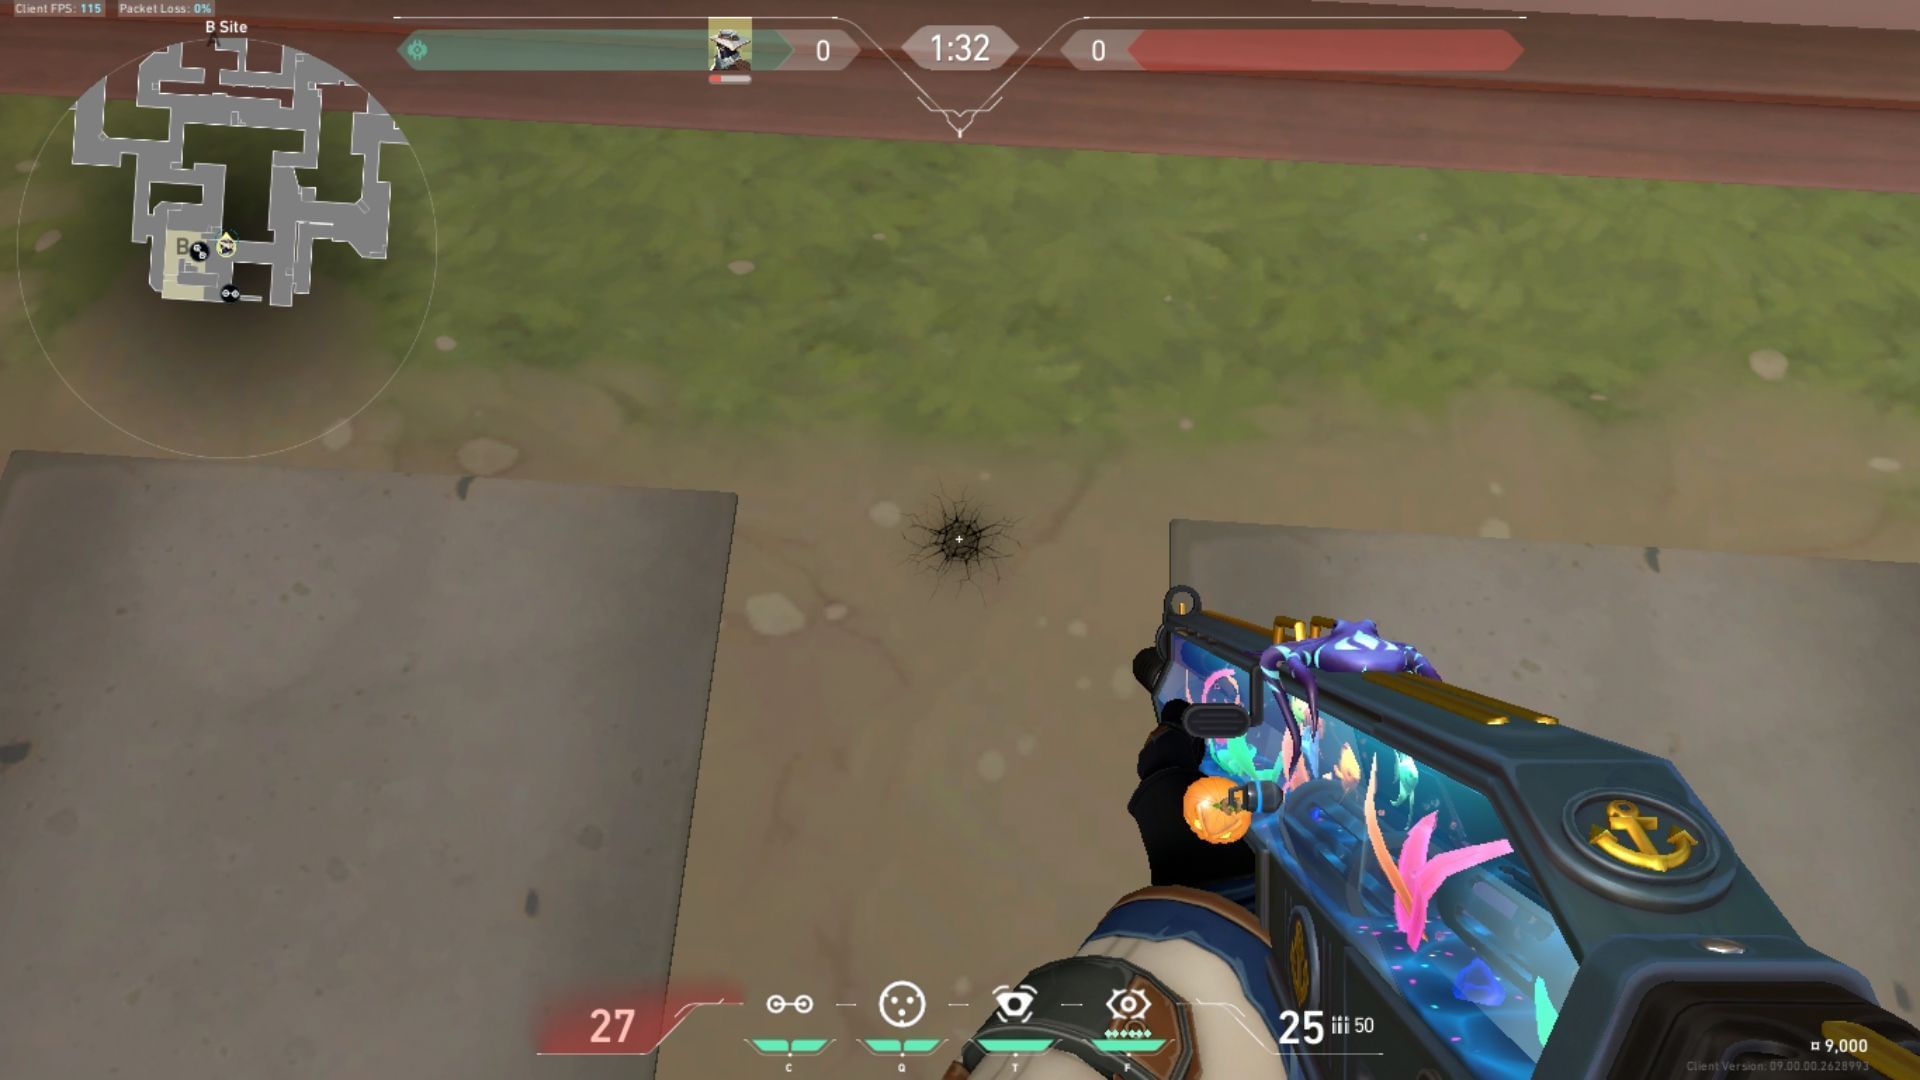
Best Cypher one-way Cyber Cage setups on Valorant's Abyss
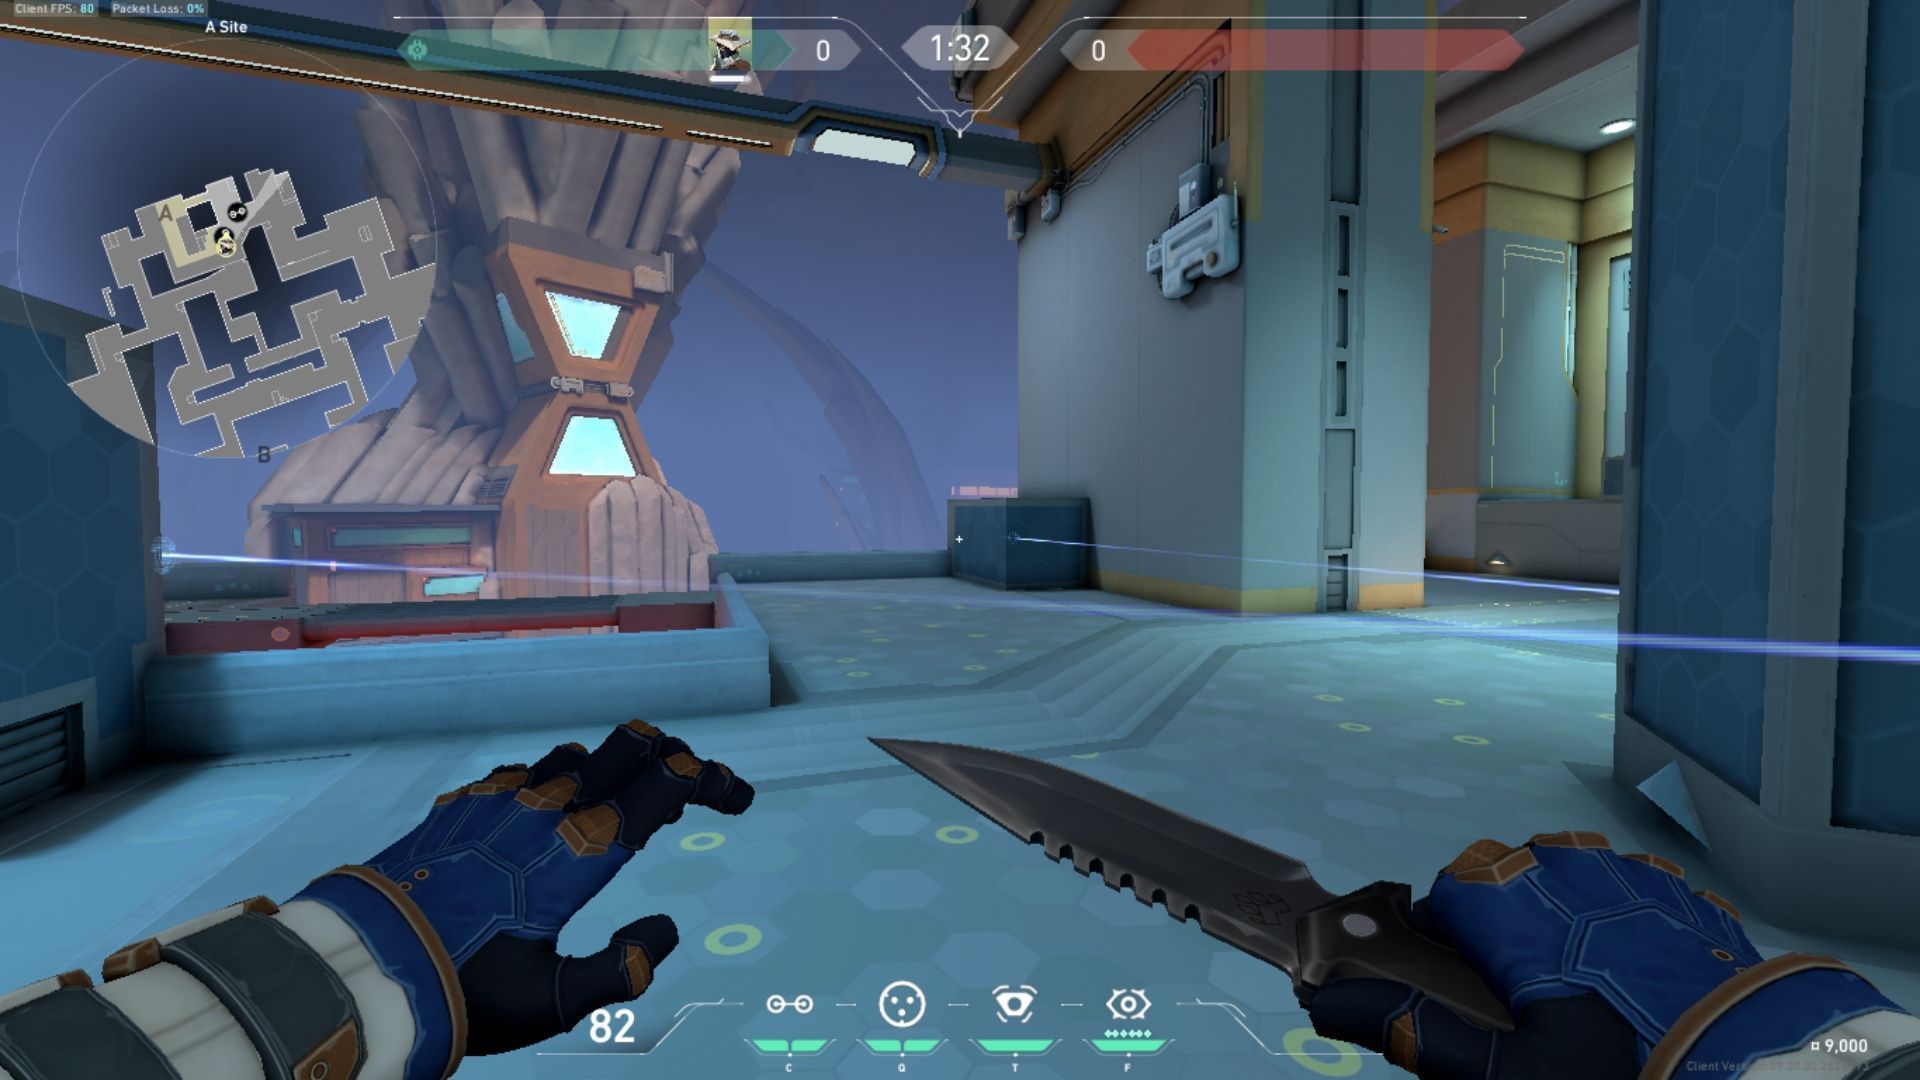
A-Site One-Way Option 1
Where to stand
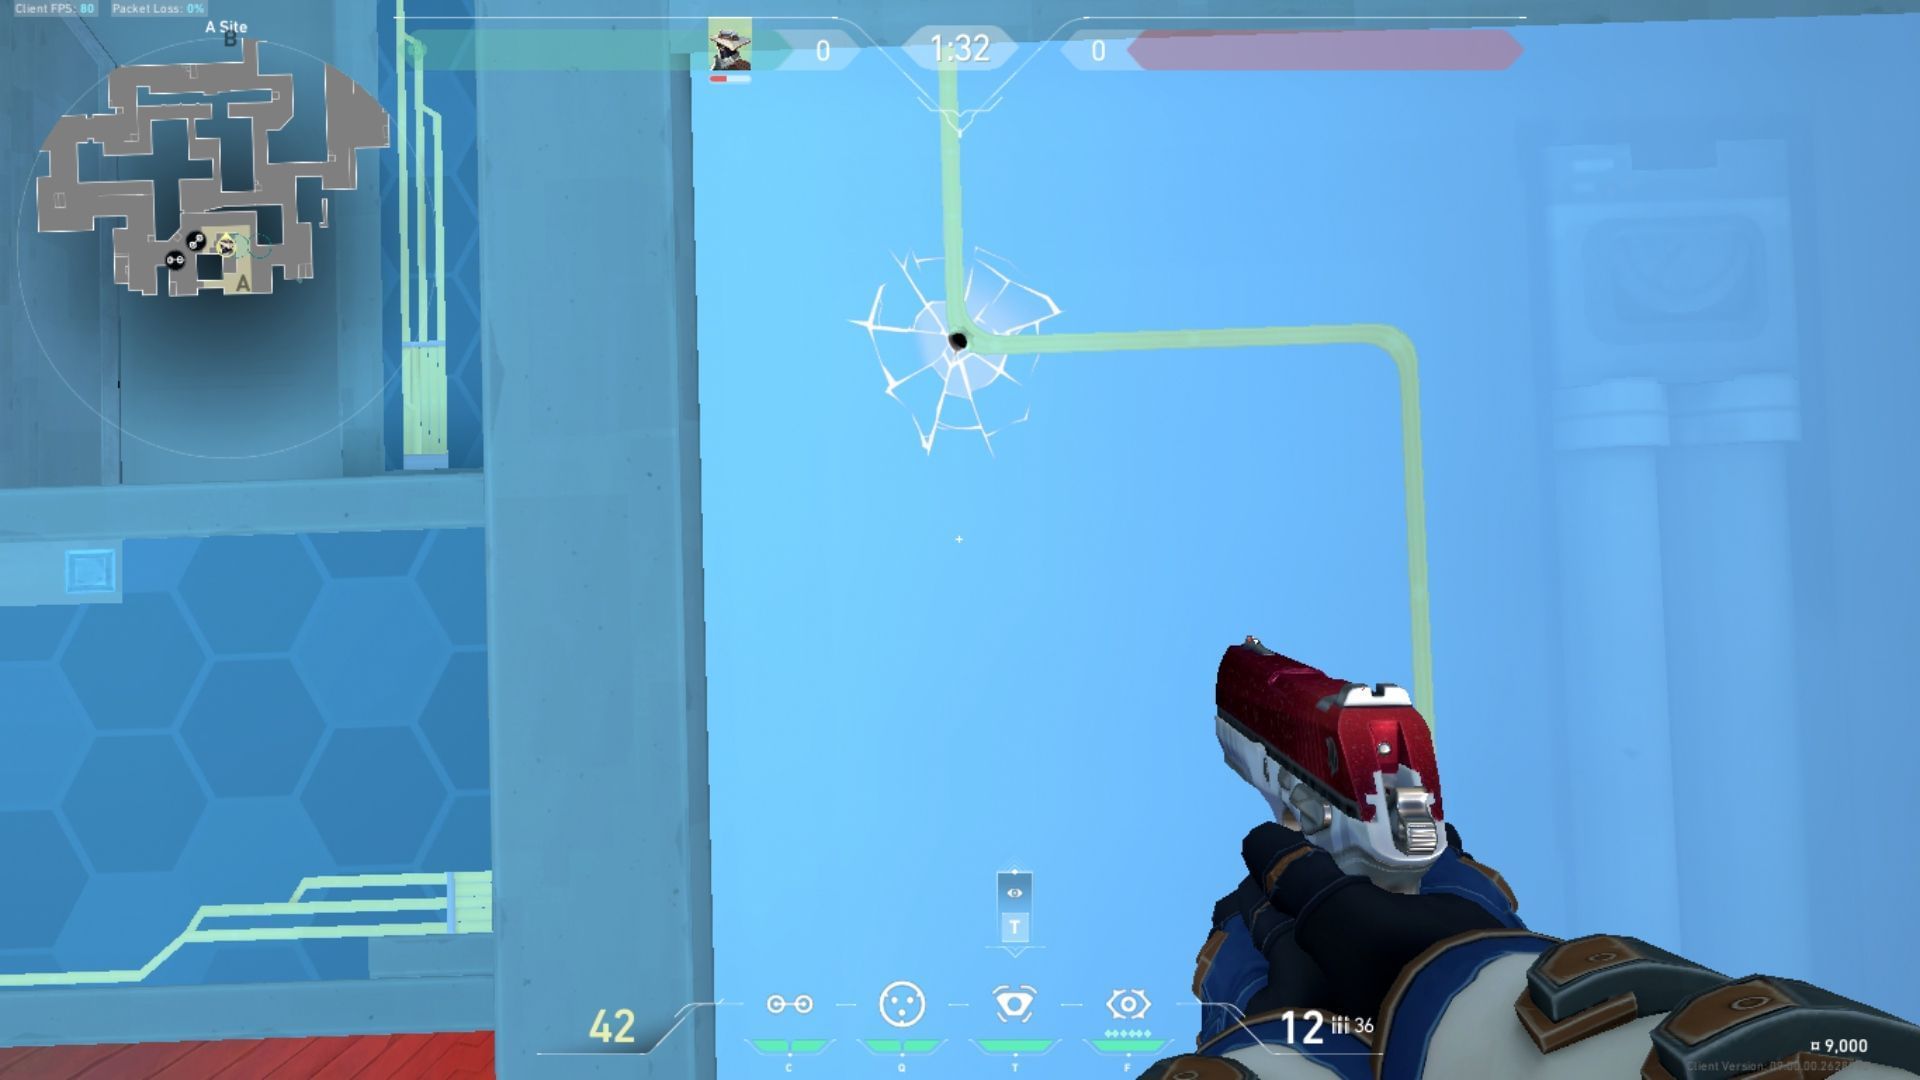
Adjust yourself on top of the platform on A site and line yourself up in a straight line from the design pattern on the floor beneath.
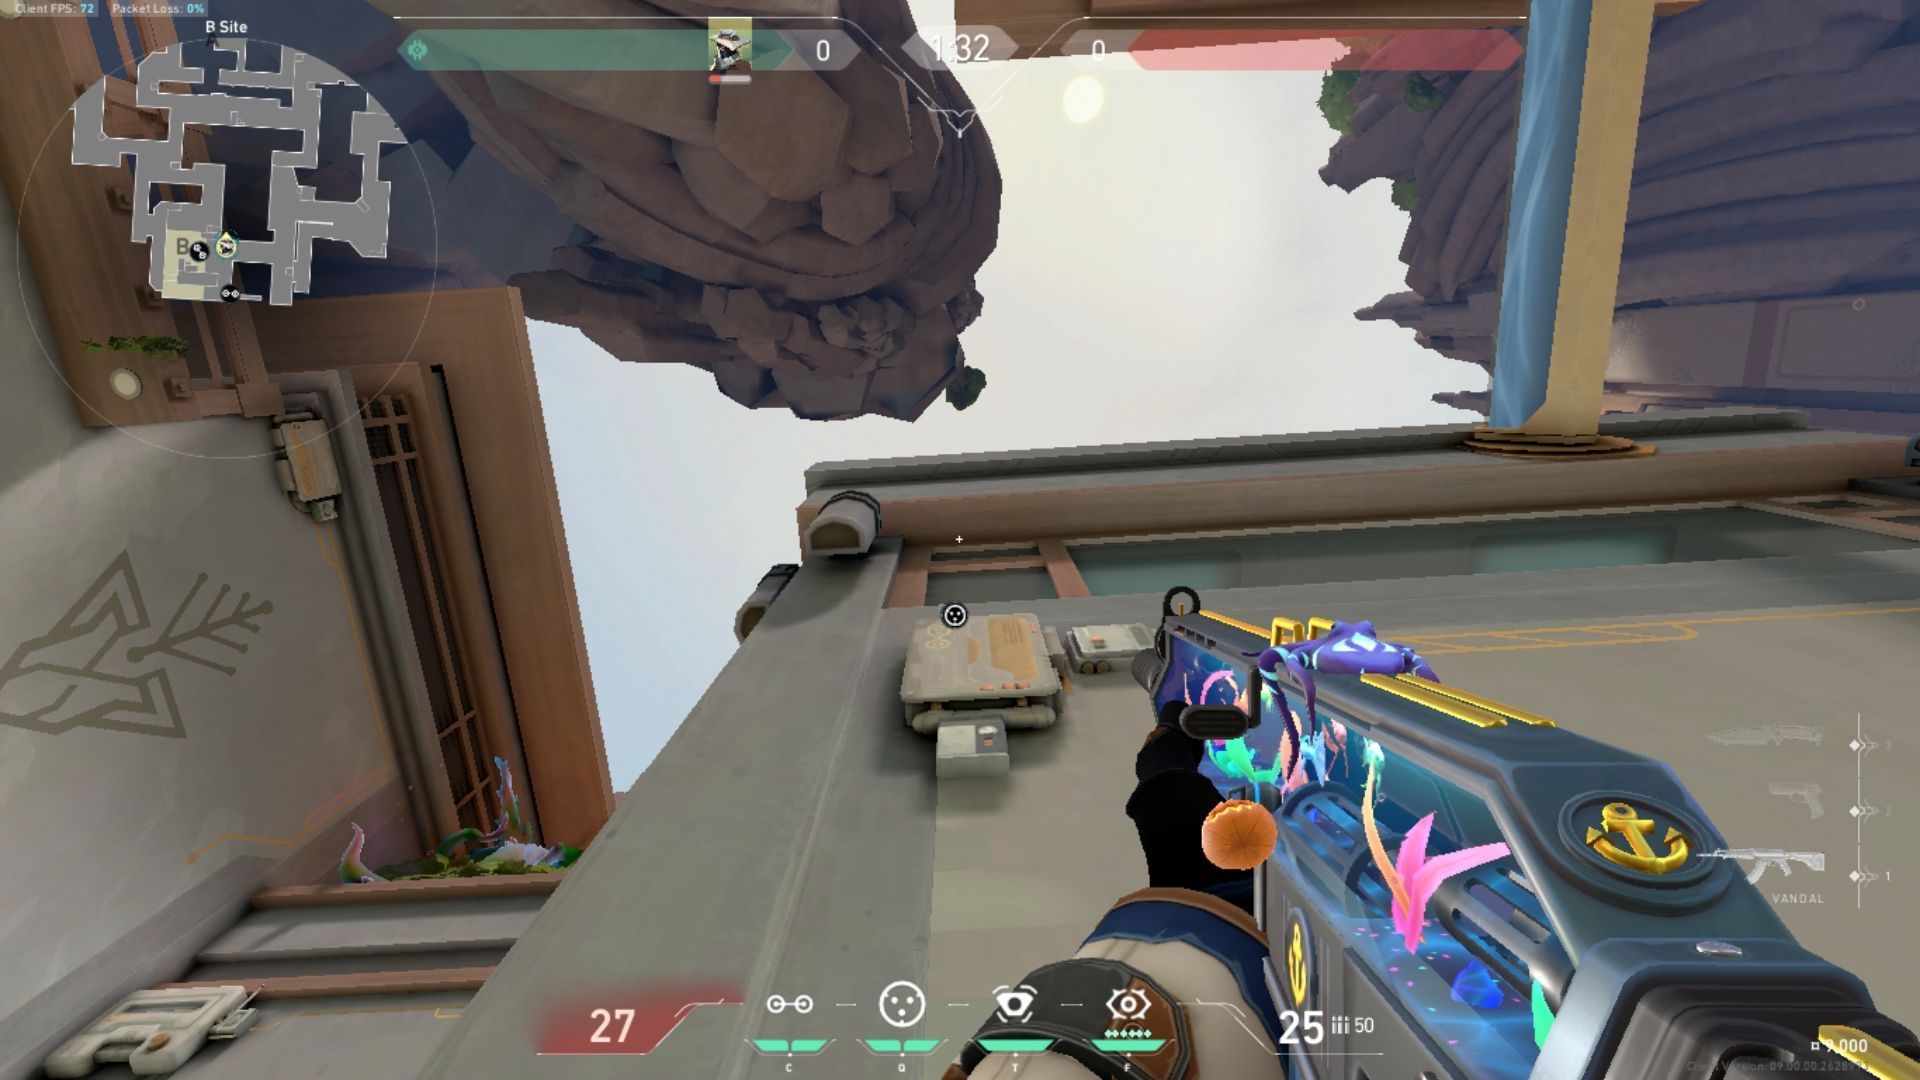
Where to aim

Always line up your crosshair in Valorant using the textures in the wall as cues. Next, release the Cyber Cage so it lands on the panel jutting out of the wall.
Result
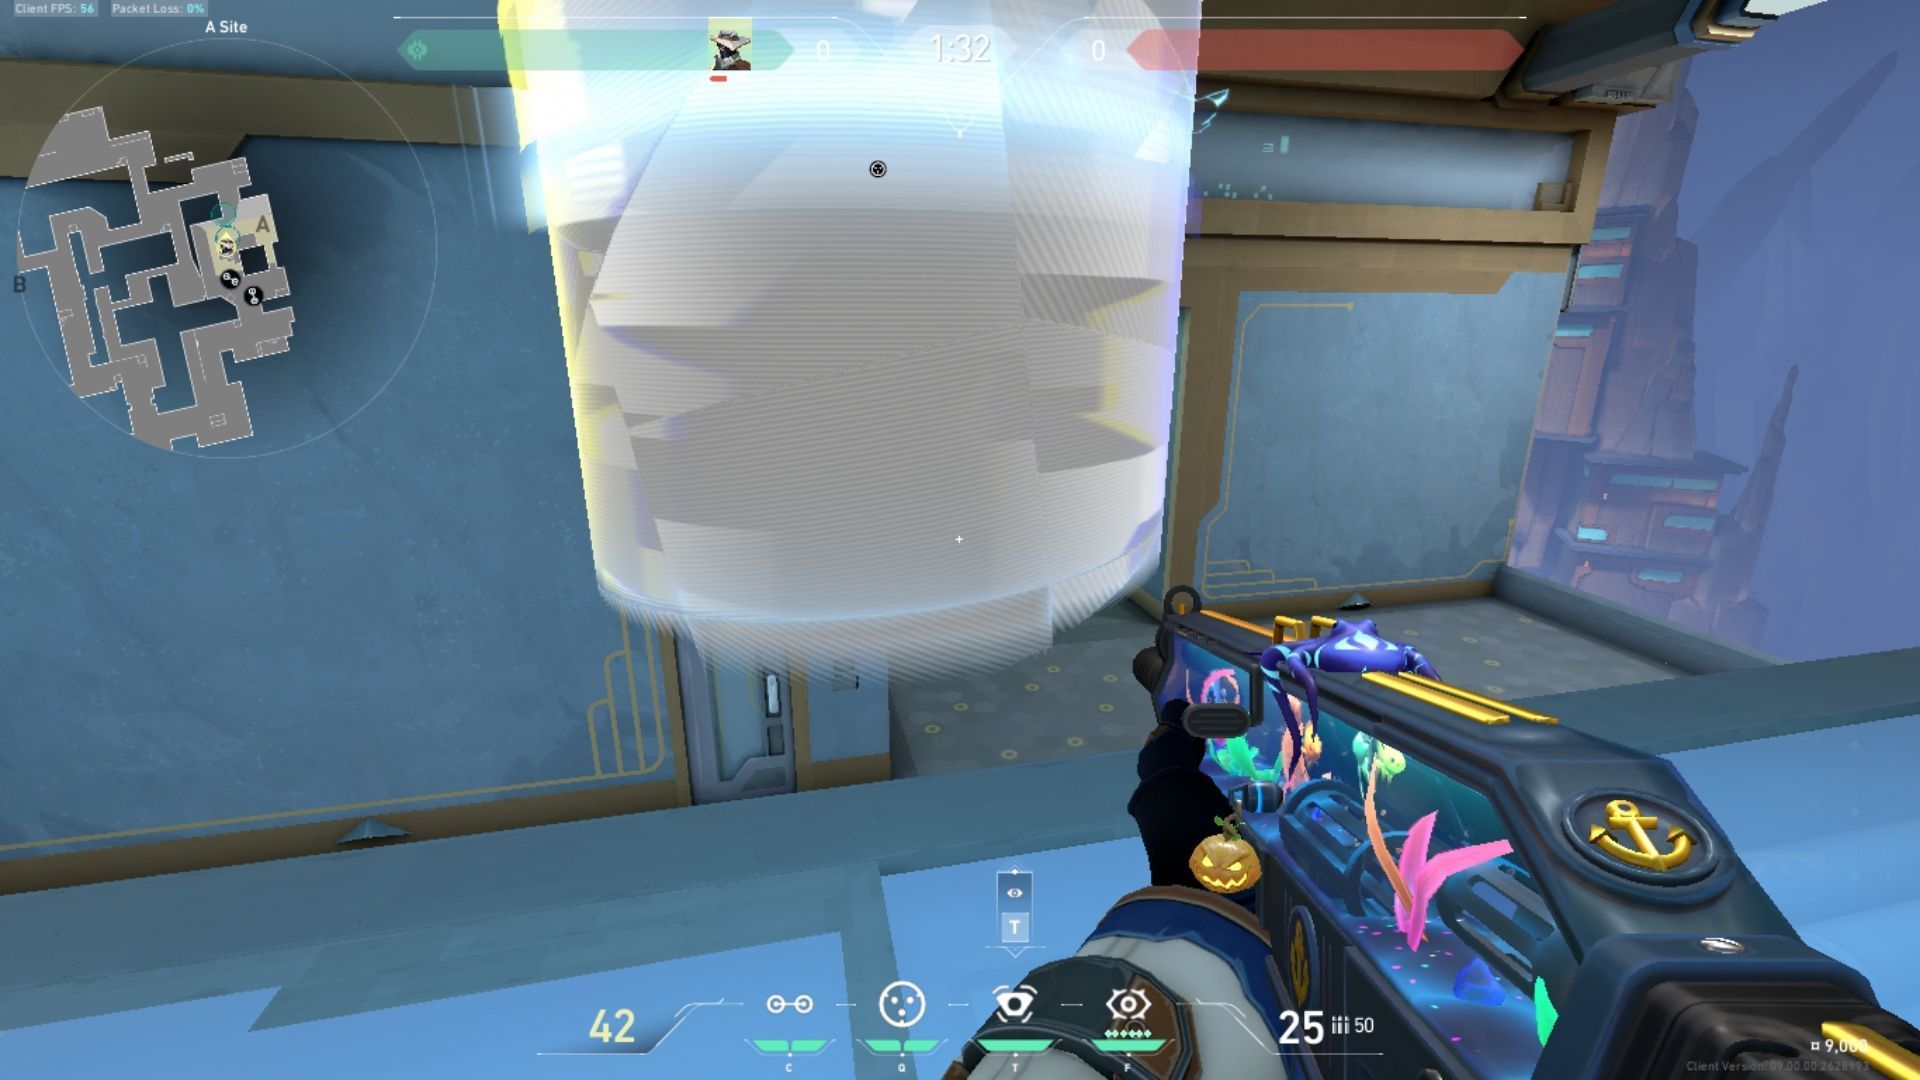
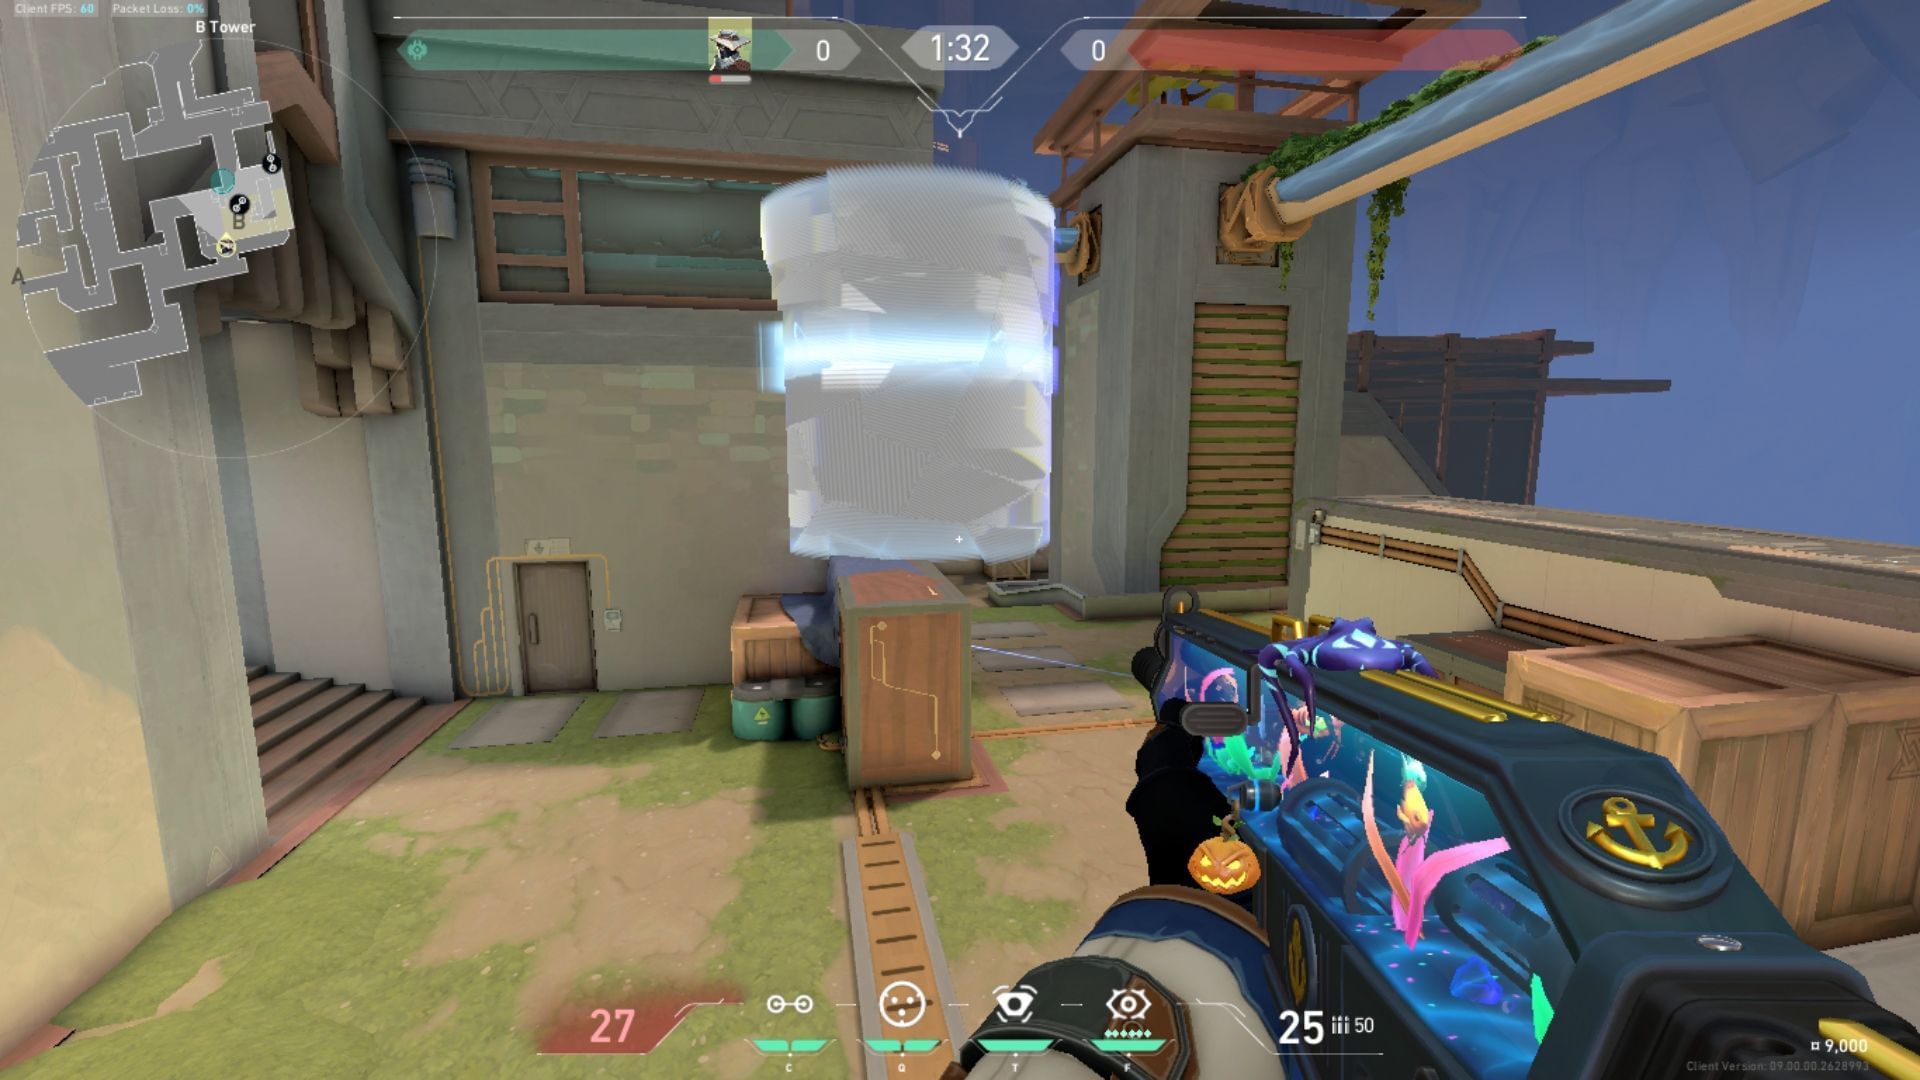
B-Site One-Way
Where to stand
Where to aim
Aim upwards to ensure that the Cyber Cage falls atop the panel as shown in the image.
Result
This concludes the Cypher Abyss guide. All of these setups can be used in harmony to achieve a better grip as Cypher while playing on the defensive side of the map.
