Valorant: Complete Cypher Sunset guide

Cypher Sunset Valorant
Cypher guide on Valorant's Sunset map (Image via Riot Games)

Valorant's map, Sunset, was introduced at the start of Episode 7 Act 2. Its layout received a significant refresh at the start of Episode 9 Act 3. Over the several updates, Cypher has remained a strong pick on the map, seeing play in both ranked lobbies as well as pro games.

Good Cypher gameplay is based on strong setups. In this Valorant Cypher guide, you will encounter a variety of options for placing Cypher's Spycam, Trapwires, and Cyber Cages. Mixing these up throughout a game will always keep your enemies on their toes.


Best Cypher Spycam setups on Valorant's Sunset

A-Site - Option 1

Camera Position

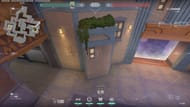
A-Site god camera position (Image via Riot Games)

What it sees

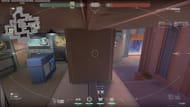
A-Site god camera view (Image via Riot Games)

A-Site - Option 2

Camera Position

A-Elbow camera position (Image via Riot Games)

What it sees

A-Elbow camera view (Image via Riot Games)

B-Site - Option 1

Camera Position

B-Site god camera position (Image via Riot Games)

What it sees

B-Site god camera view (Image via Riot Games)

B-Site - Option 2

Camera Position

B-Market camera position (Image via Riot Games)

What it sees

B-Market camera view (Image via Riot Games)

B-Site - Option 3

Camera Position

B-Site sneaky camera position (Image via Riot Games)

What it sees

B-Site sneaky camera position (Image via Riot Games)

Best Cypher Trapwire setups on Valorant's Sunset

A-Site Option 1

A-Site Trapwire Option 1 (Image via Riot Games)

A-Site Option 2

A-Site Trapwire Option 2 (Image via Riot Games)

A-Site Option 3

A-Site Trapwire Option 3 (Image via Riot Games)

A-Site Option 4

A-Site Trapwire Option 4 (Image via Riot Games)

B-Site Option 1

B-Site Option 1 Trapwire (Image via Riot Games)

B-Site Option 2

B-Site Option 2 Trapwire (Image via Riot Games)

B-Site Option 3

B-Site Option 3 Trapwire (Image via Riot Games)

B-Site Option 4

B-Site Option 4 Trapwire (Image via Riot Games)

B-Site Option 5

B-Site Option 5 Trapwire (Image via Riot Games)

Best Cypher one-way Cyber Cage setups on Valorant's Sunset

A-Site One-Way Option 1

Where to stand

Where to stand for A-Main one way Cyber Cage (Image via Riot Games)

Adjust yourself in the corner where the round-start barrier is, as shown in the above image.

Where to aim

Where to aim for A-Main one way Cyber Cage (Image via Riot Games)

Adjust the line between the Trapwire and Cyber Cage signs in your HUD against the corner on the Radianite boxes and align it with the top of the graffiti. Throwing the Cyber Cage from this position will create the desired one-way.

Result

How the A-Main Cyber Cage looks (Image via Riot Games)

A- Site One-Way Option 1

Where to stand

Where to stand for A-Site one way Cyber Cage (Image via Riot Games)

Adjust your crosshair with the mid-point of the box in the middle of A-Site on Valorant's Sunset.

Where to aim

Where to aim for A-Site one way Cyber Cage (Image via Riot Games)

Adjust the middle of the Trapwire logo with the corner of the lines on the wall as shown. Throw the Cyber Cage for it to create the expected one-way.

Result

How the A-Site Cyber Cage looks (Image via Riot Games)

B-Site One-Way (both cages combined)

Where to stand for the first cage

Where to stand for the first cage (Image via Riot Games)

Position yourself in the left-side corner of the wall of B-Site on the Sunset map of Valorant, as shown in the image.

Where to aim for the first cage

Where to aim for the first cage (Image via Riot Games)

Aim your crosshair at the bottom of the overhang as indicated in the picture.

Where to stand for the second cage

Where to stand for the second cage (Image via Riot Games)

Place yourself at the right corner of the wall of B-Site as shown in the picture.

Where to aim for the second cage

Where to aim for the second cage (Image via Riot Games)

Similar to the first Cage, aim the crosshair at the bottom of the overhang as indicated in the picture.

Result

How the combined one-way cage looks (Image via Riot Games)

If Cypher is not your cup of tea, you can also check out our Killjoy guide for Valorant's latest map.


Also, check out the following Valorant articles:

Quick Links

Edited by Ritoban "Veloxi" Paul
Sportskeeda logo
Close menu
WWE
WWE
NBA
NBA
NFL
NFL
MMA
MMA
Tennis
Tennis
NHL
NHL
Golf
Golf
MLB
MLB
Soccer
Soccer
F1
F1
WNBA
WNBA
More
More
bell-icon Manage notifications