

'%20x='0'%20y='0'%20height='100%25'%20width='100%25'%20%0A%20%20%20%20%20%20%20%20%20%20xlink%3Ahref='data:image/jpg;base64,/9j/2wBDAAYEBQYFBAYGBQYHBwYIChAKCgkJChQODwwQFxQYGBcUFhYaHSUfGhsjHBYWICwgIyYnKSopGR8tMC0oMCUoKSj/2wBDAQcHBwoIChMKChMoGhYaKCgoKCgoKCgoKCgoKCgoKCgoKCgoKCgoKCgoKCgoKCgoKCgoKCgoKCgoKCgoKCgoKCj/wgARCAAHAAoDASIAAhEBAxEB/8QAFQABAQAAAAAAAAAAAAAAAAAABAX/2gAIAQEAAAAAtB//xAAUAQEAAAAAAAAAAAAAAAAAAAAE/9oACAECEAAAAB//xAAUAQEAAAAAAAAAAAAAAAAAAAAE/9oACAEDEAAAAGf/xAAhEAAABQMFAQAAAAAAAAAAAAABAgMEBQAGEhEWIzJC0f/aAAgBAQABPwB7PzVwvINEJh8dJyktmQ58ALh6DT12p3eVzIOlkdzSfGcSdw+V/8QAFxEBAAMAAAAAAAAAAAAAAAAAAgABEf/aAAgBAgEBPwANJZc//8QAFxEBAAMAAAAAAAAAAAAAAAAAAgABEf/aAAgBAwEBPwCySdn/2Q=='%3E%3C/image%3E%3C/svg%3E)
Valorant has emerged as one of the most popular first-person shooter games, allowing players with different playstyles to enjoy Riot’s tactical title together. Various Agents' unique abilities allow players to utilize different lineups for different scenarios.
By role, KAY/O is an Initiator Agent in Valorant and two of his abilities are highly effective in detecting, disorienting, and disabling enemies. One of KAY/O's basic abilities (FRAG/MENT, KAY/O's C ability) is a grenade that can deal high damage in an area of effect. It is capable of converting full kills and holding off enemy aggression.
Bind is a map with multiple short walls and low-rise structures, above which lineups for this heavy damage nade can be thrown. The map also features tight corners and narrow alleys, making it the perfect map for KAY/O users to play in.

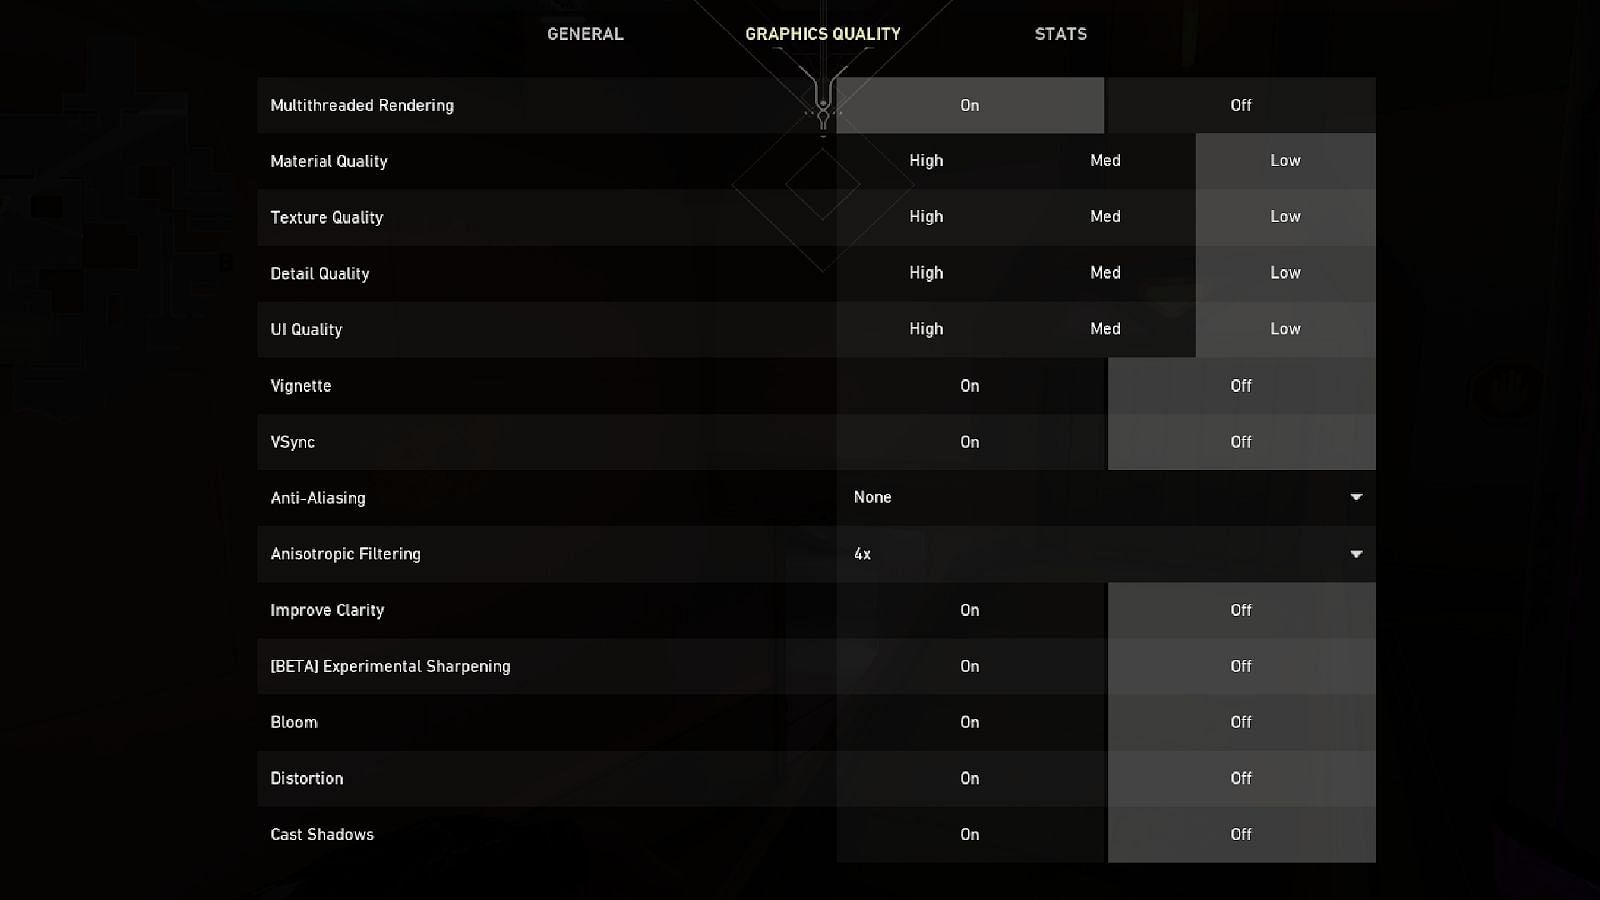
It is important to note that the following lineups are performed in LOW graphics settings.
Note: This article is subjective and solely reflects the author's opinions.
Valorant KAY/O’s easy and best nade lineups in Bind
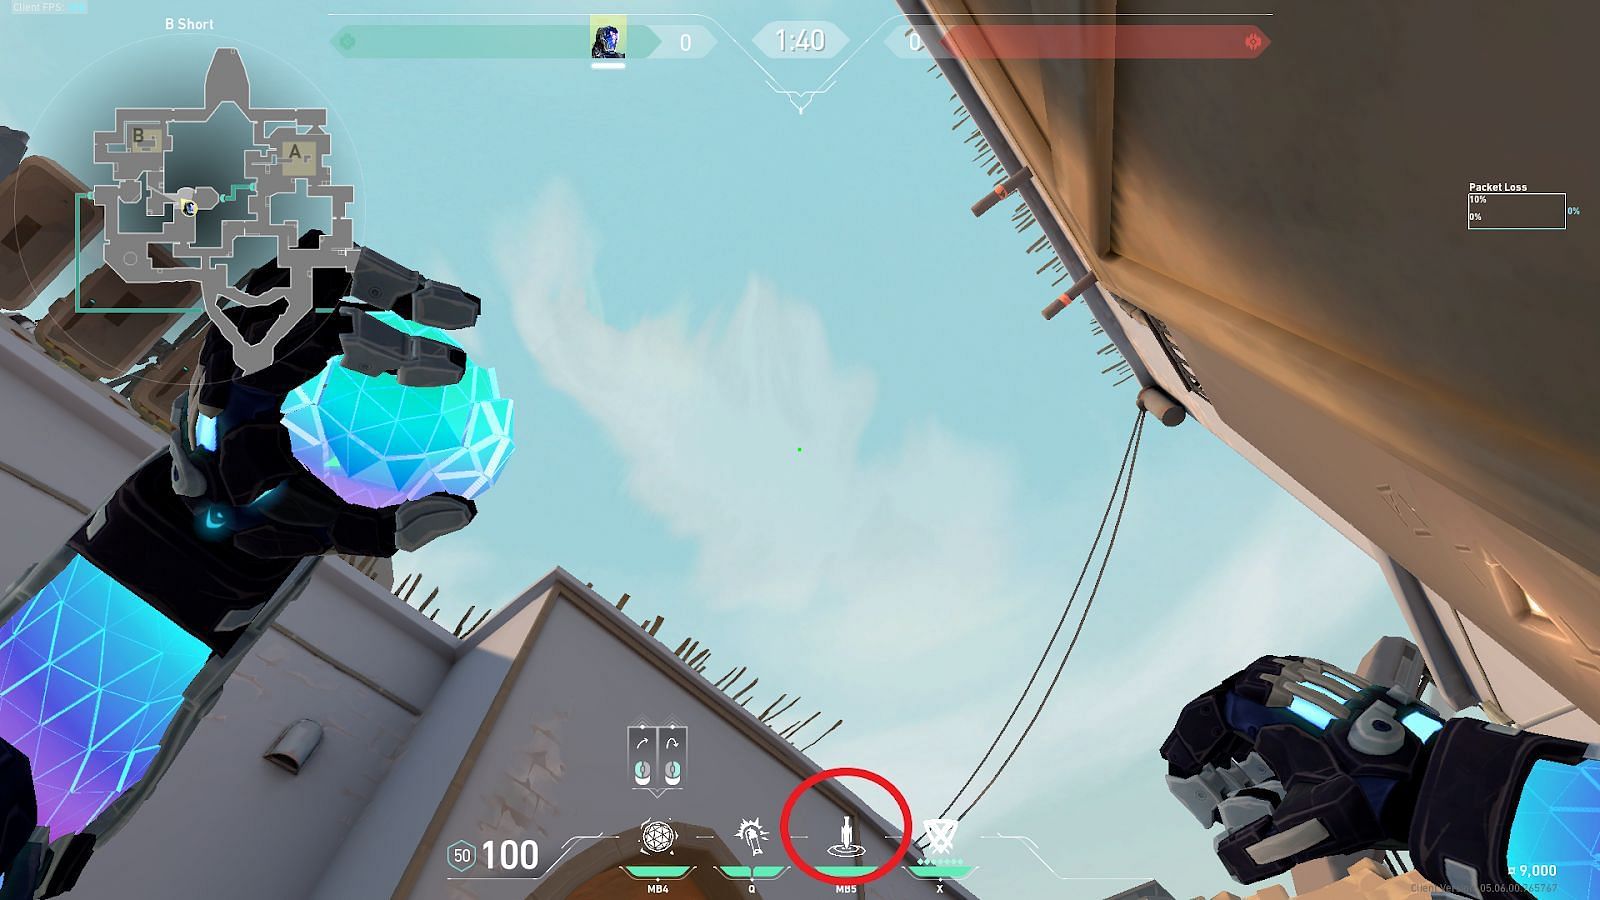
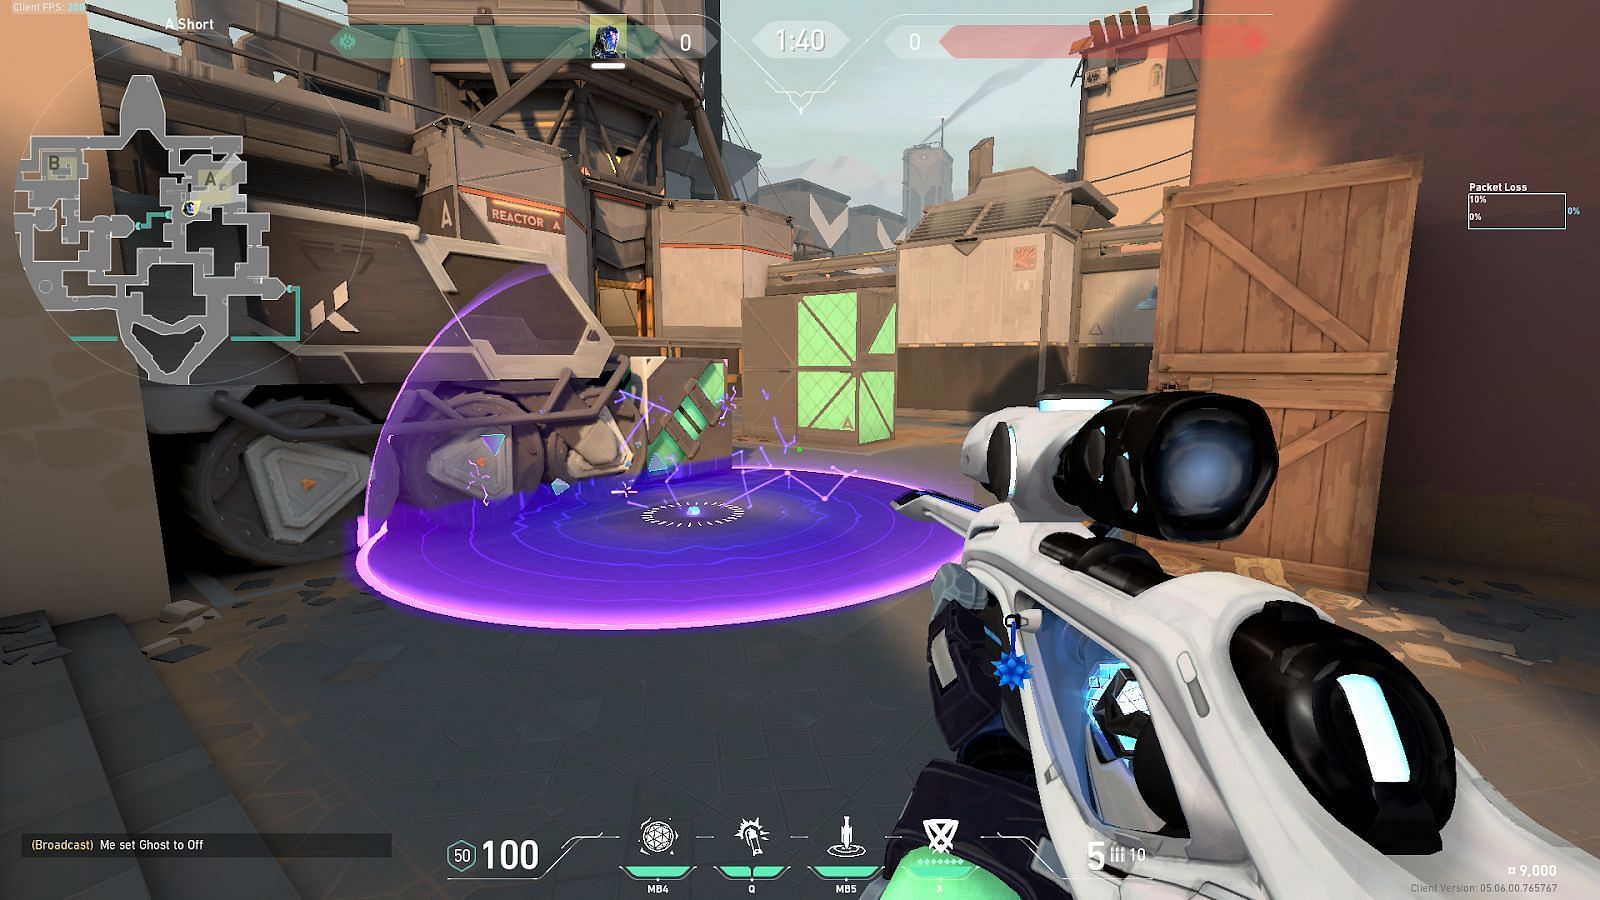
1) A-Short to A-Site Default Plant
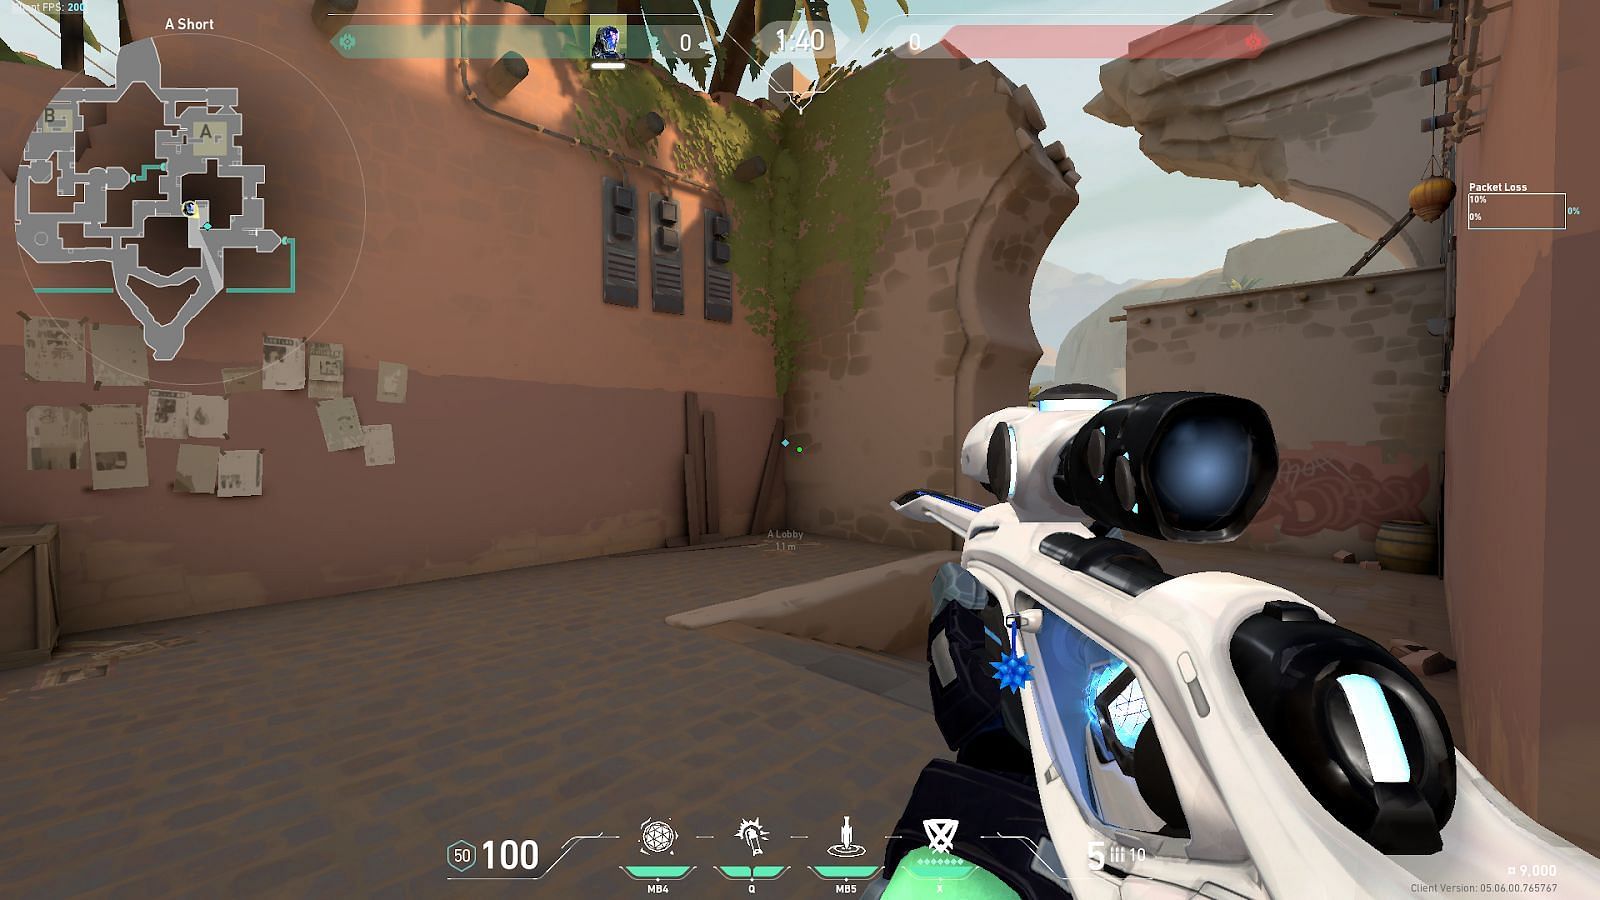
Position yourself in A-Short and tuck inside the corner shown above.
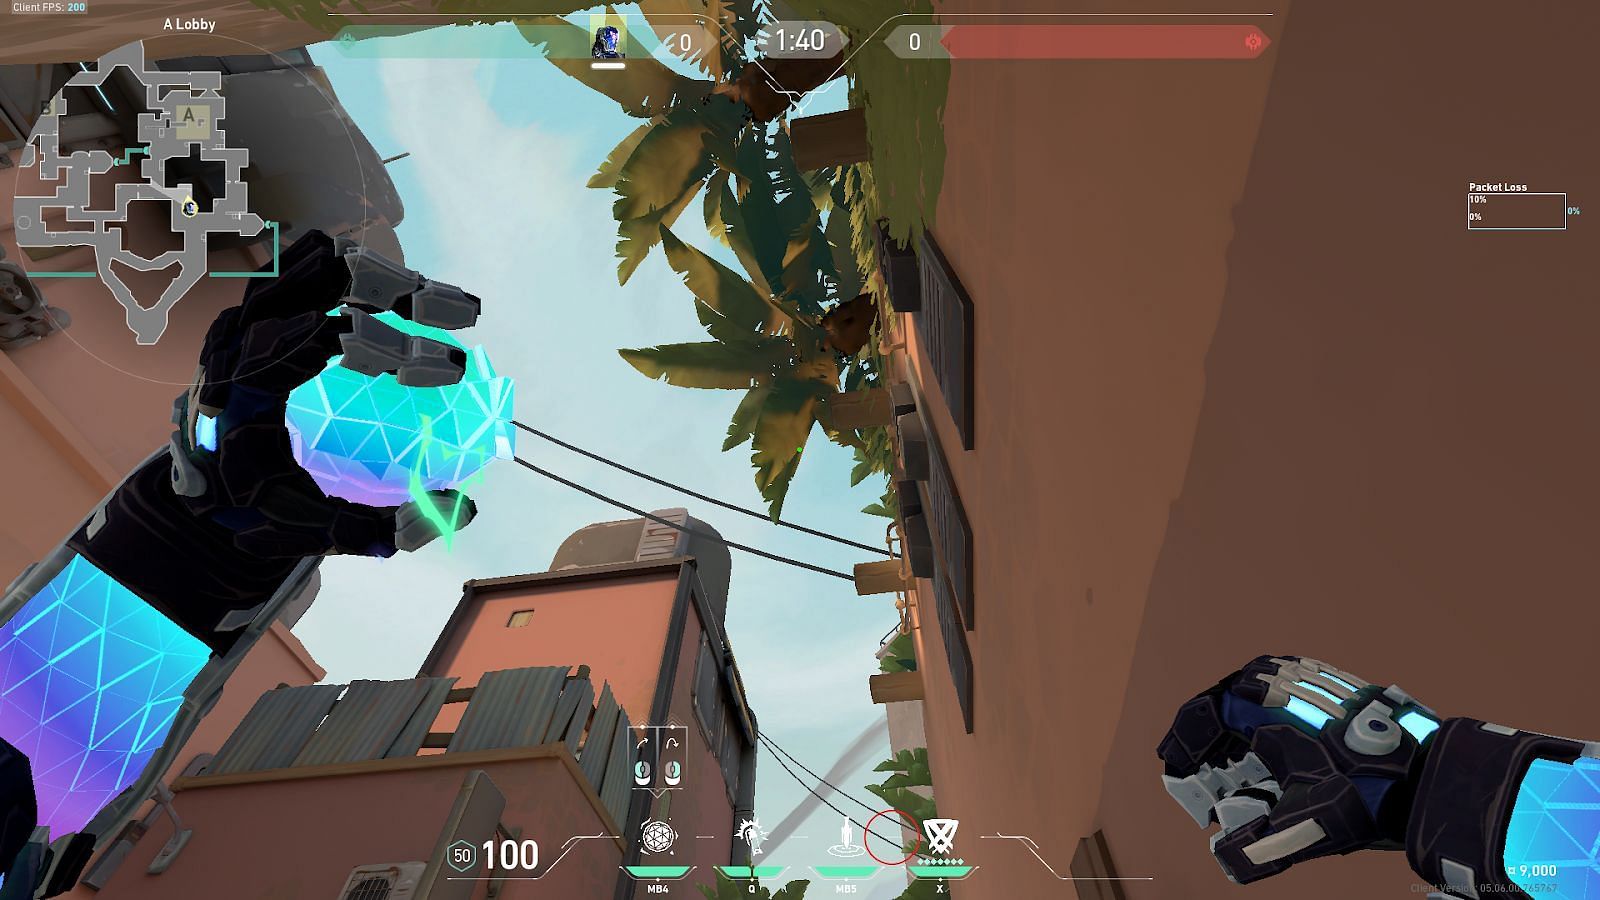
Position the Heads-Up Display line between the Zero/Point ability icon and the ultimate ability icon (shown in a red circle here) and perform a simple left-click throw.
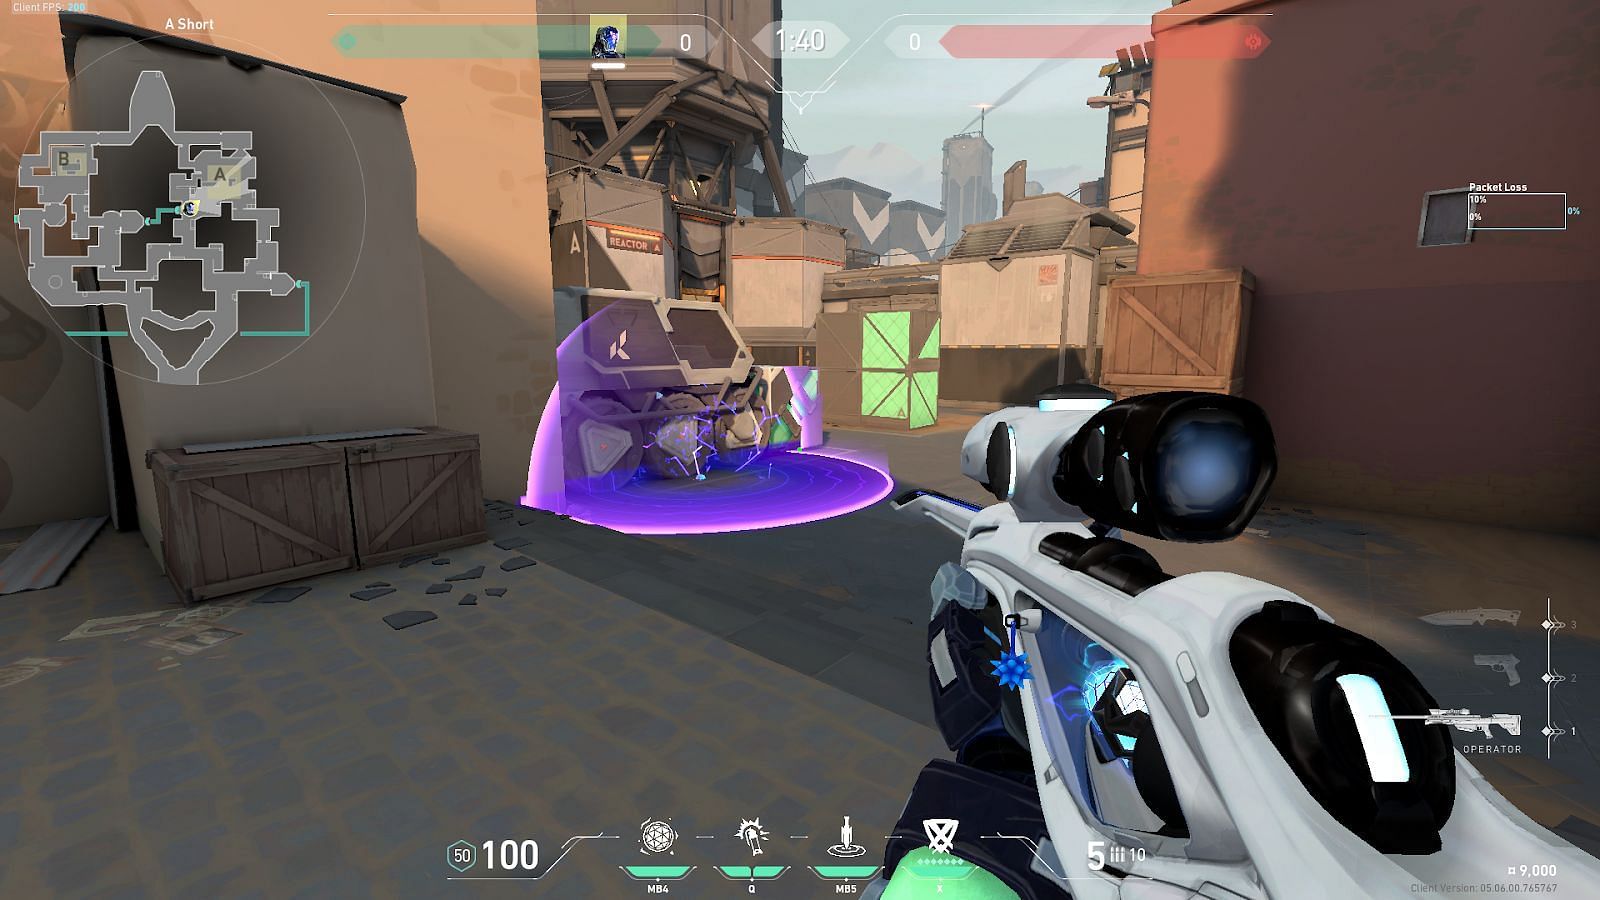
The nade will go over the low-rise roofs and land directly on the A-Site Default Plant Position.
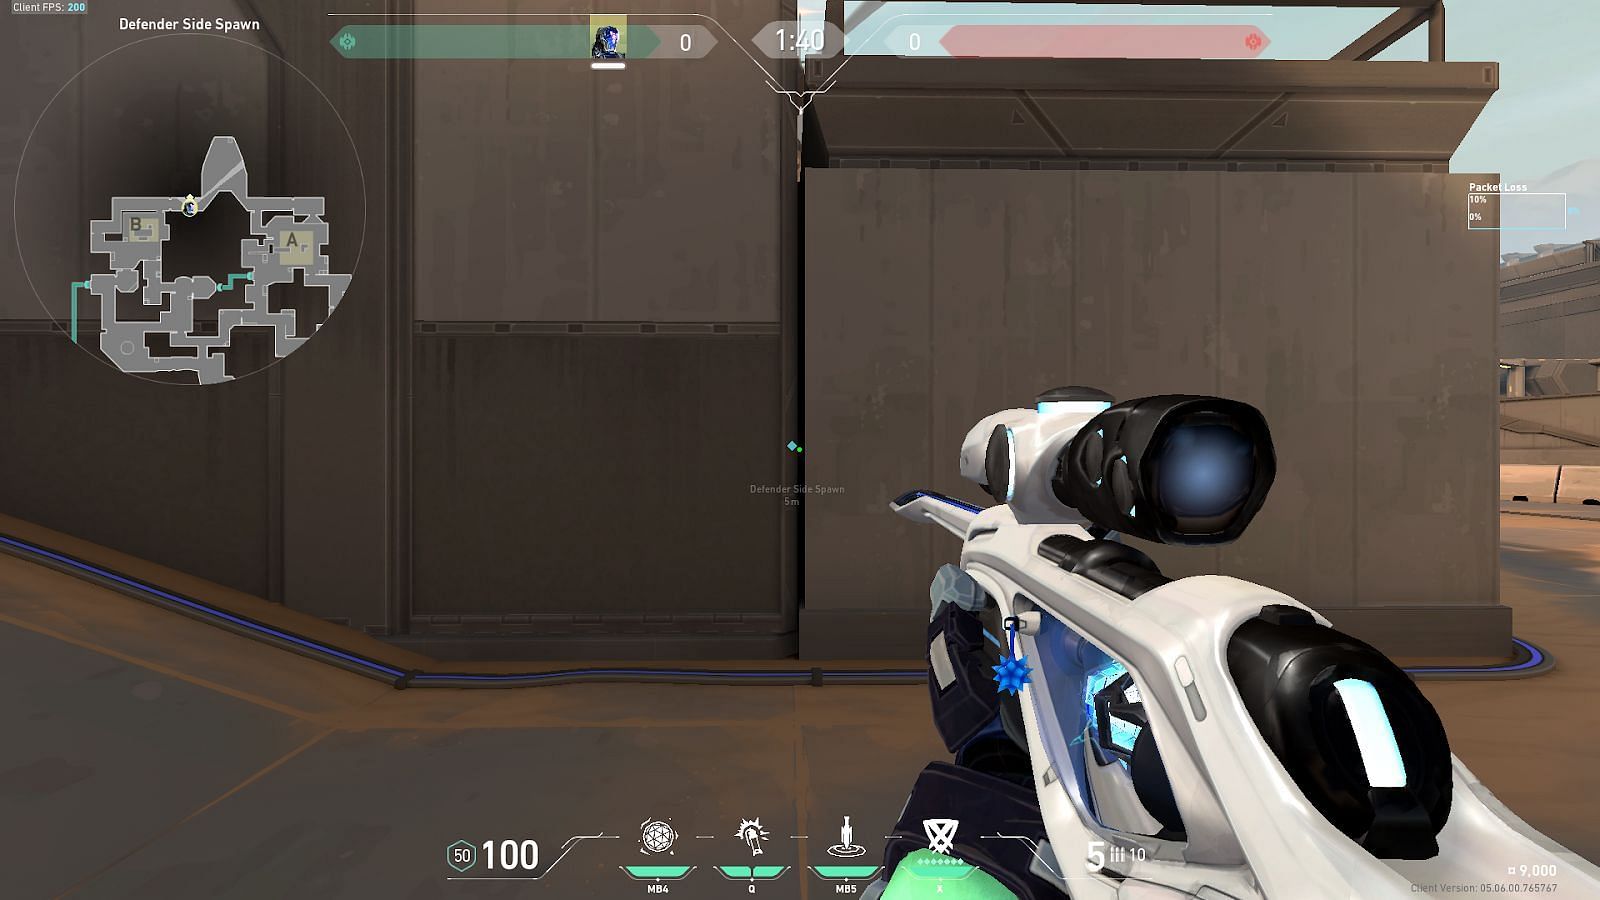
2) Defender Side Spawn to A-Site Default Plant
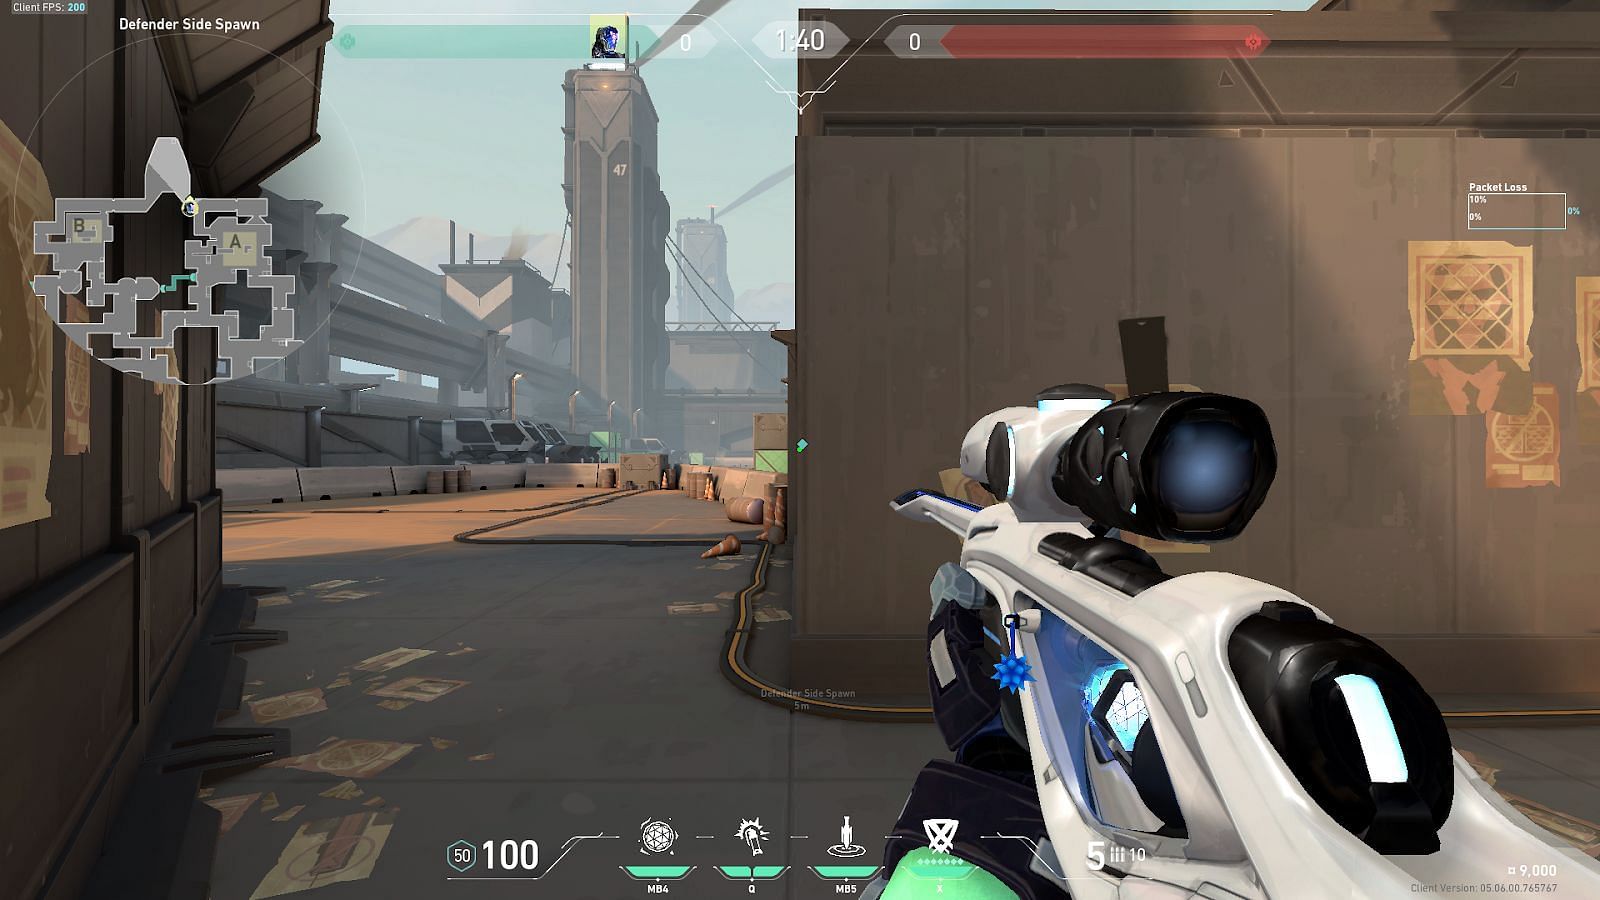
Position yourself in the Defender Side Spawn and stand close to the wall in front of the wall edge shown above.
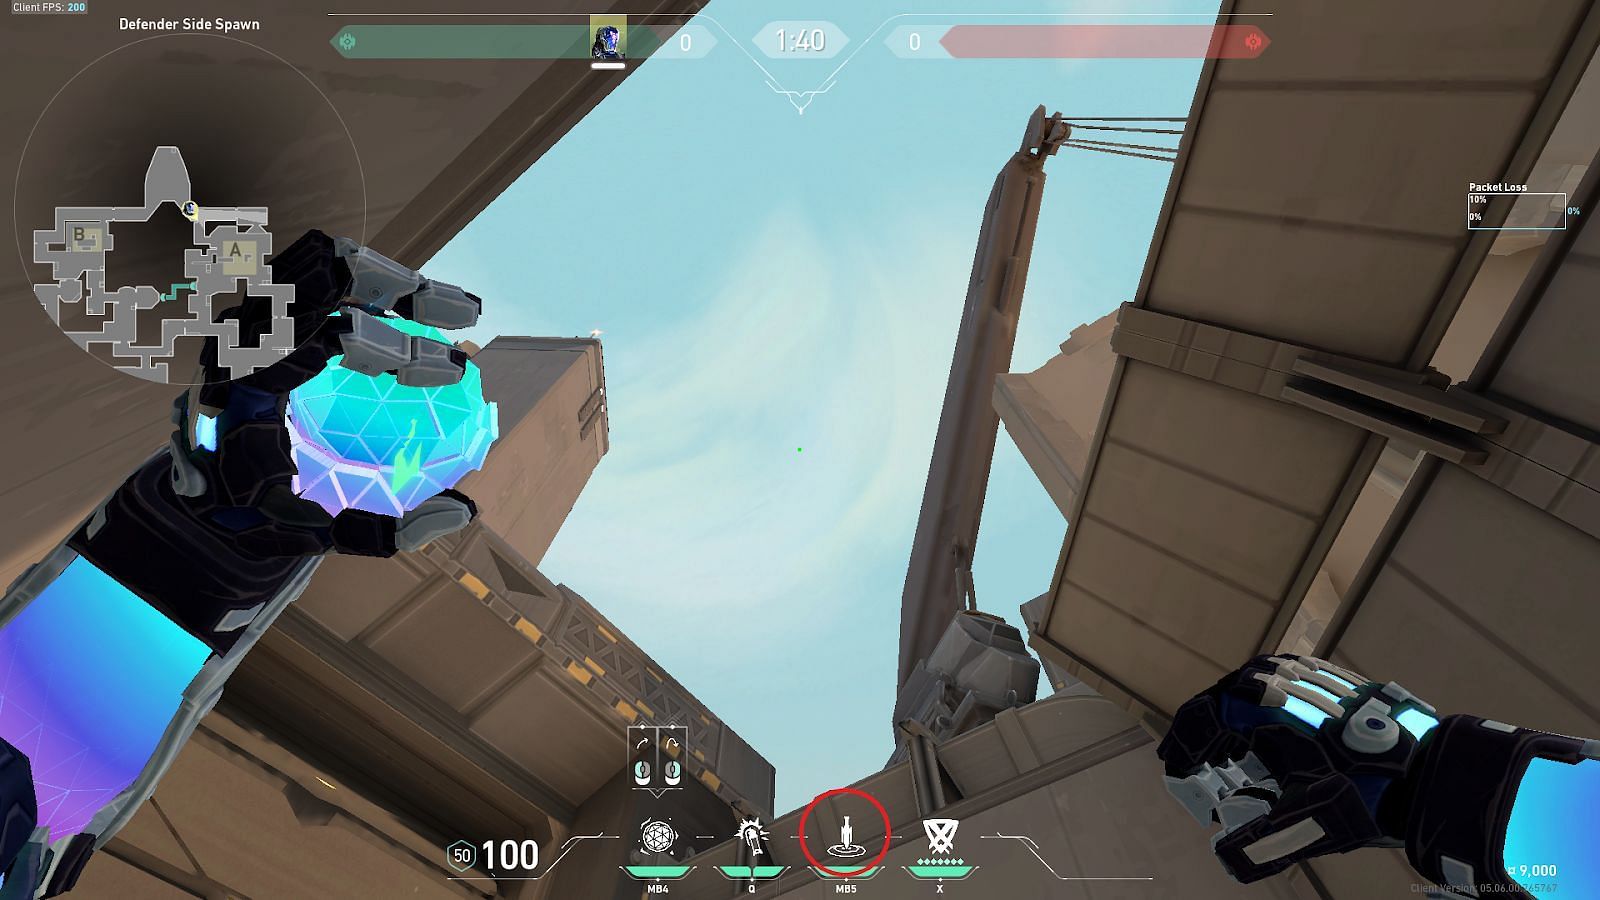
Place the Zero/Point ability icon in the HUD (shown in a circle) on the roof ledge as shown here and perform a simple left-click throw.
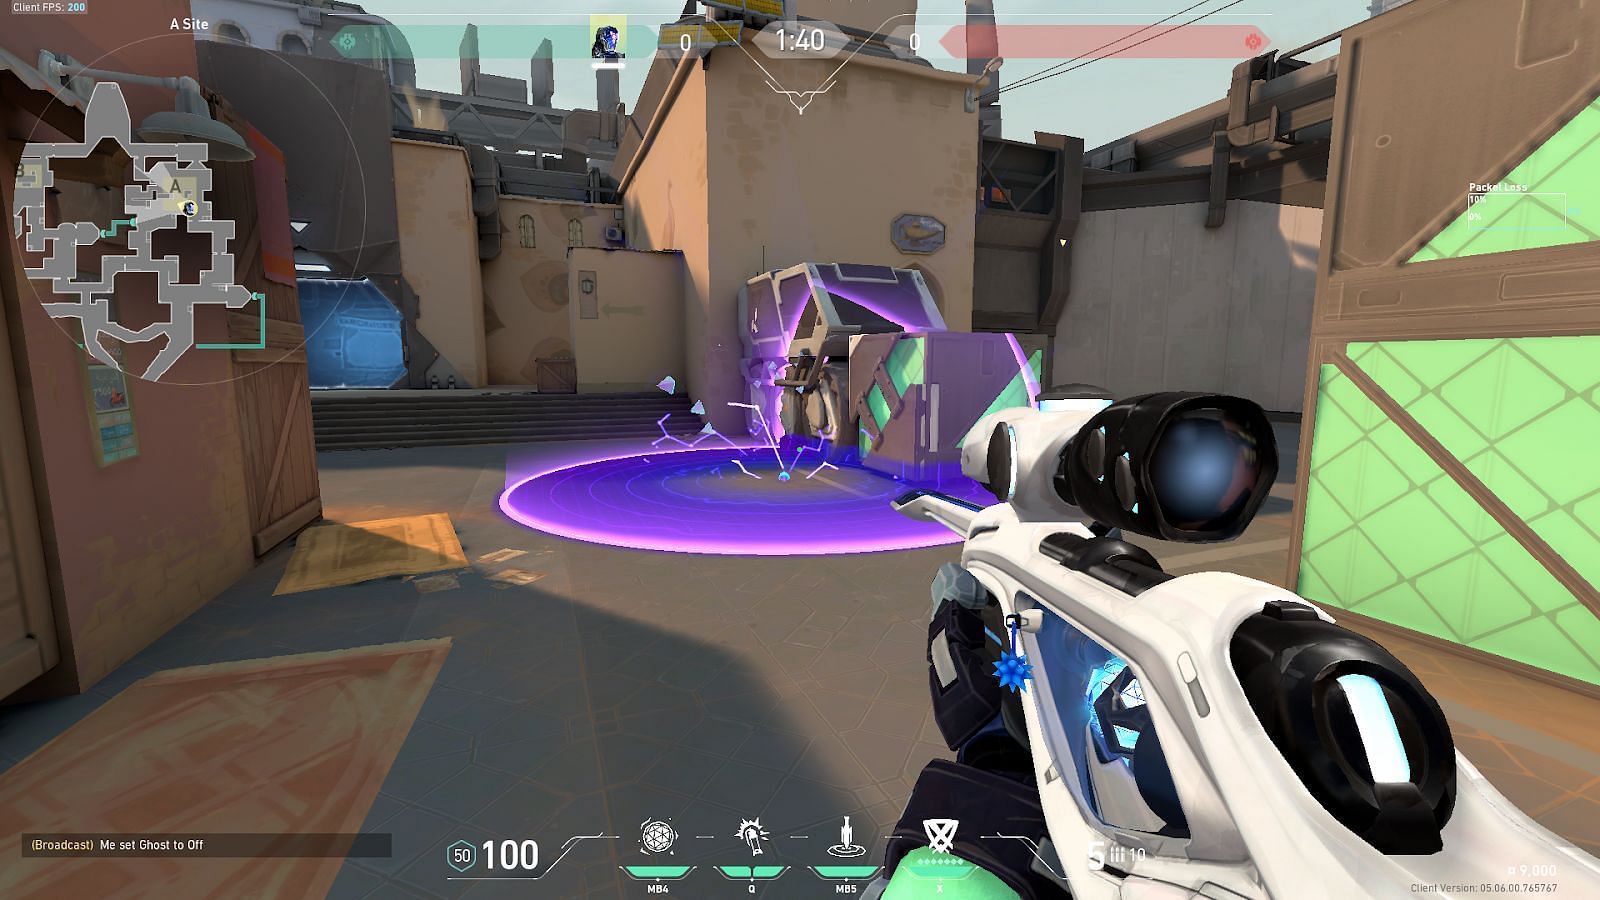
The nade will then land directly on the A-Site Default Plant position and can be used to delay attacker-side aggression.
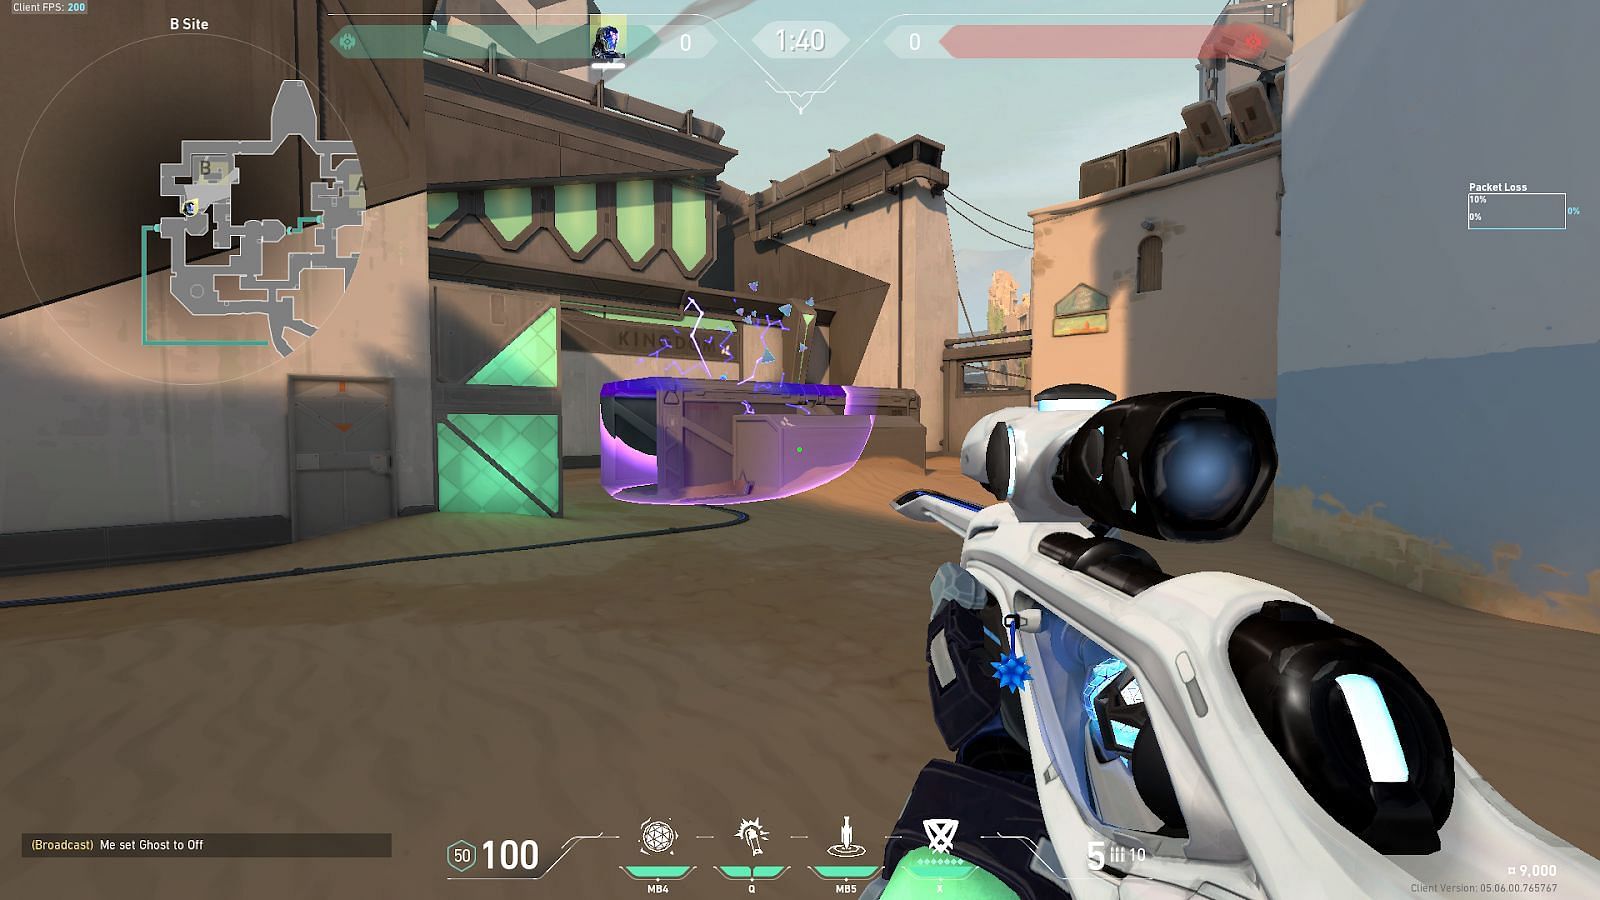
3) B-Short to B-Site Default Plant
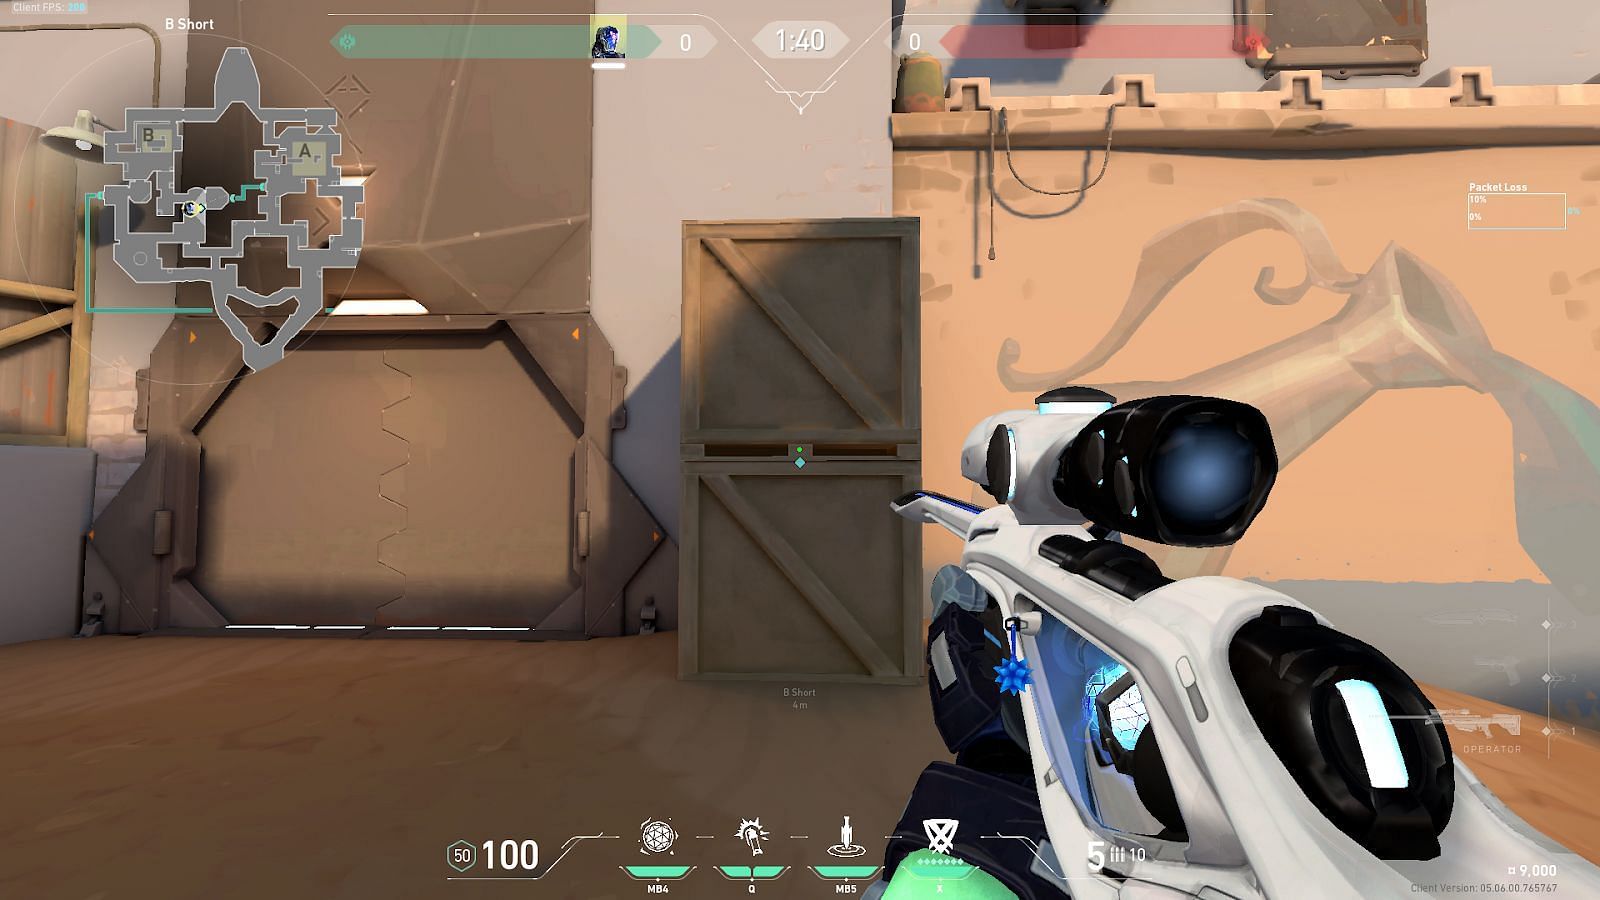
Position yourself in B-Short outside B-Hookah and in front of the shown wooden boxes. Hug the boxes in such a way that you're in the middle of the boxes and look towards B-SIte.
Place the Zero/Point ability icon in the HUD (shown in a circle) along the wooden wall border and perform a simple left-click throw.

The nade goes over B-Hookah and lands directly on the B-Site Default Plant Position. This lineup also covers spikes planted for B-Hookah.
4) Defender Side Spawn to B-Site Default Plant
Position yourself in Defender Side Spawn and in front of the shown dark wall boundary. Hug the wall directly and look towards B-Site.

Place the Zero/Point ability icon in the HUD (shown in a red circle) such that the hotkey aligns directly over the triangular lamp. Perform a jump left-click throw.
The nade will fly over the roofs and land directly on the B-Side Default Plant position. This lineup covers the most-used spike plant spots and can be used to delay attackers for a fair amount of time.
5) A-Lobby to A-Site Default Plant
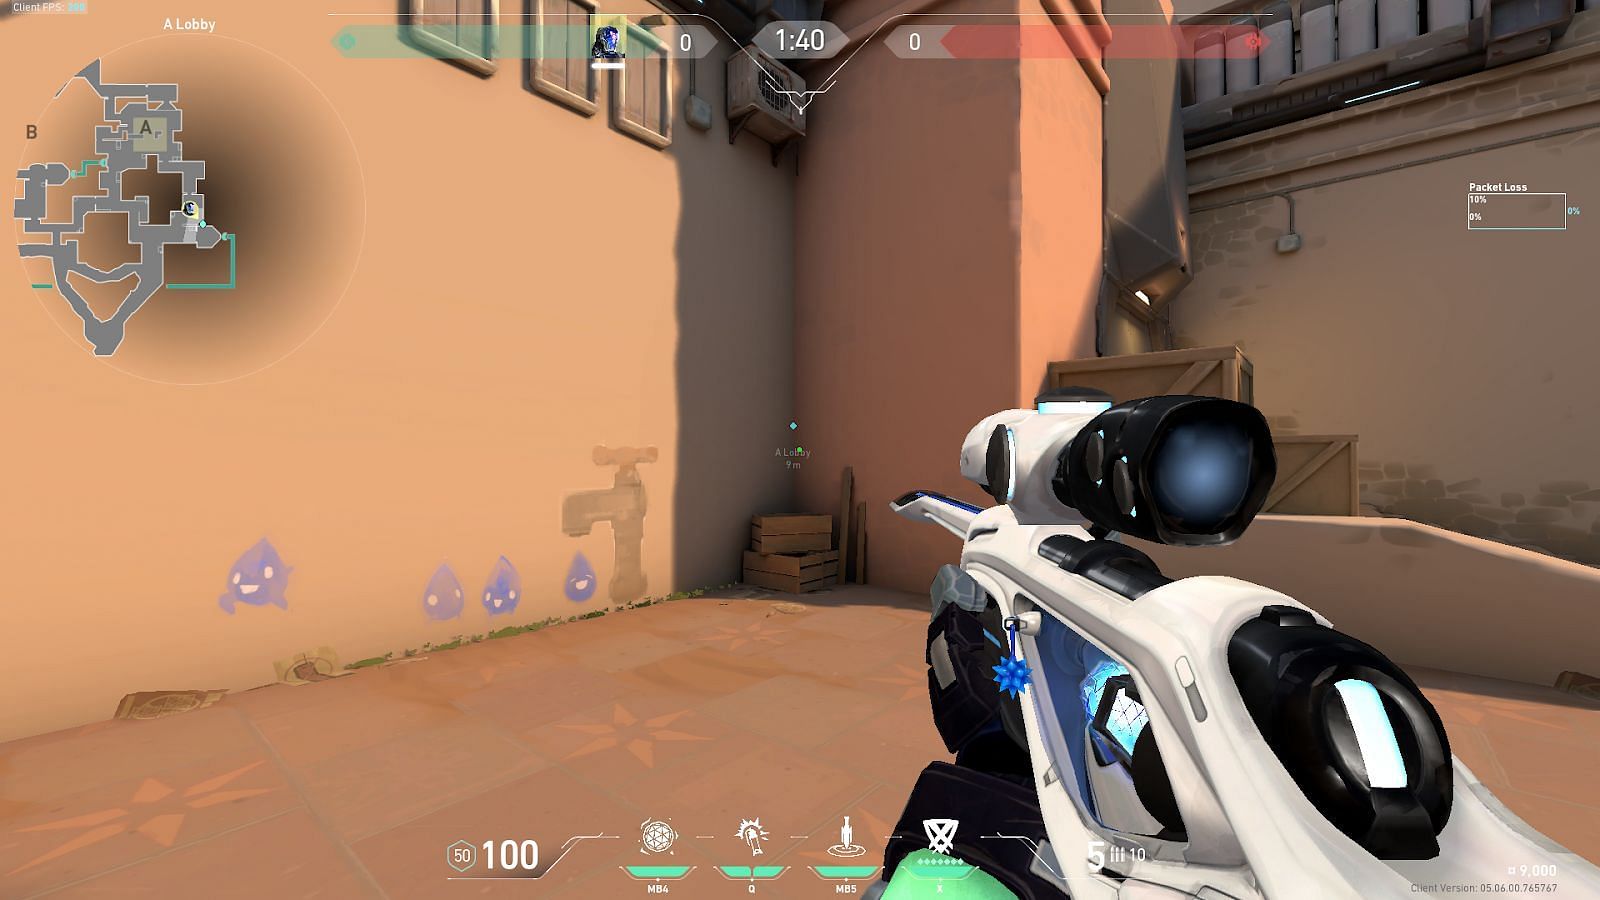
Position yourself in A-Lobby and tuck into the shown corner above the broken wooden boxes.
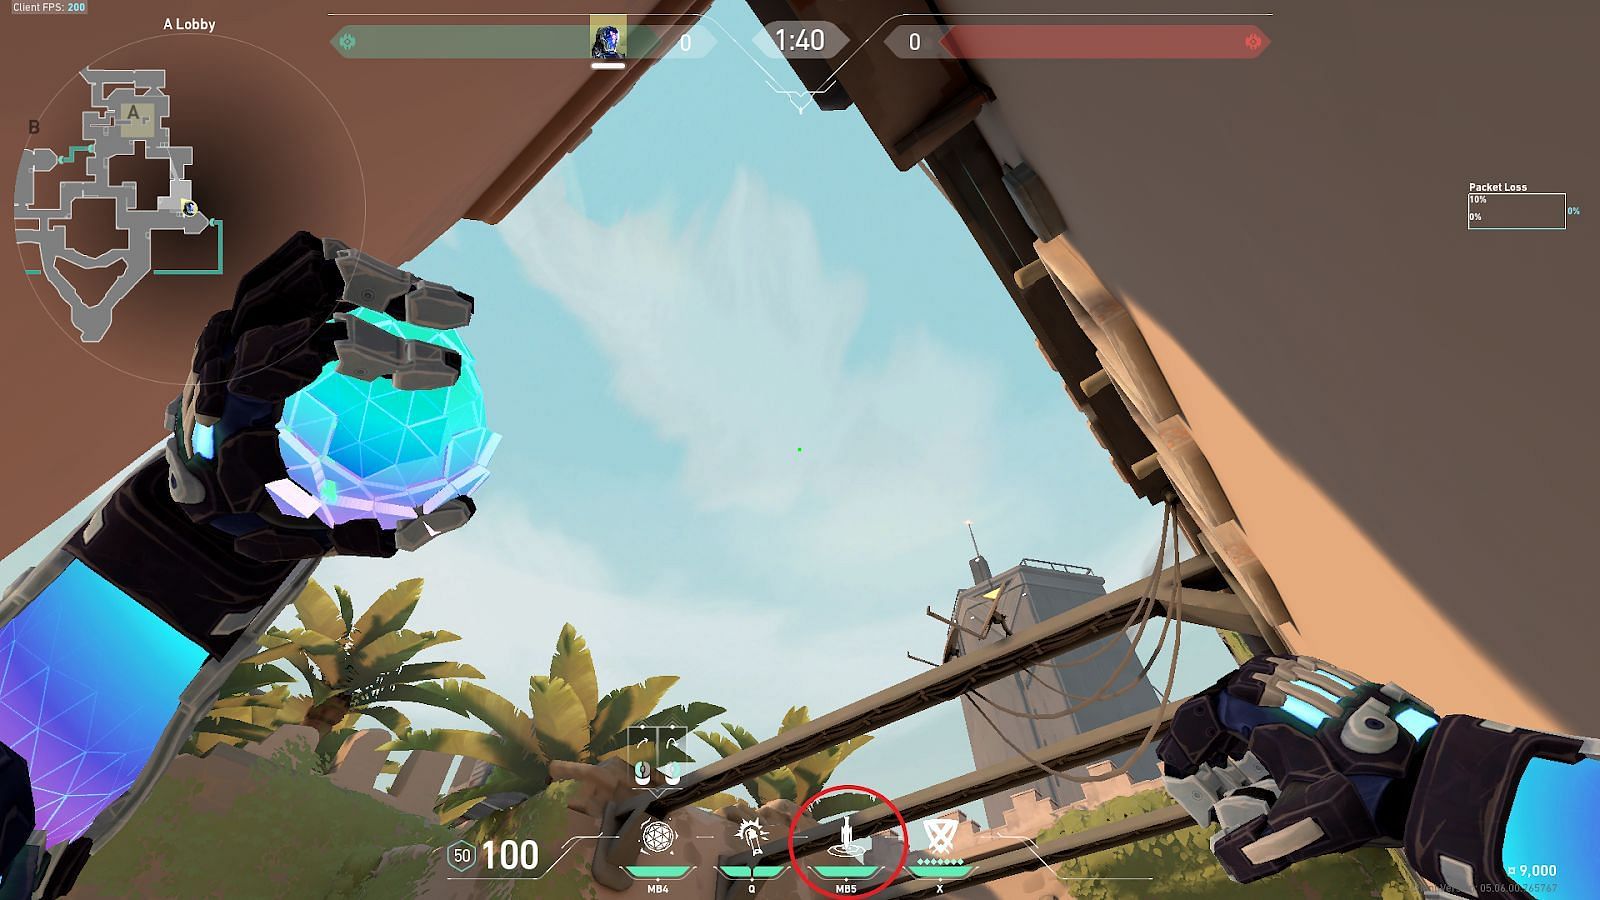
Place the Zero/Point ability icon’s tip in the HUD (shown in a circle) with the roof ledge and perform a jump left-click throw.
The nade then lands directly on the A-Site Default Plant position. This lineup is primarily used in a post-plant scenario, but can be used by defenders with a well-timed flank outside A-Bath.
