
'%20x='0'%20y='0'%20height='100%25'%20width='100%25'%20%0A%20%20%20%20%20%20%20%20%20%20xlink%3Ahref='data:image/jpg;base64,/9j/2wBDAAYEBQYFBAYGBQYHBwYIChAKCgkJChQODwwQFxQYGBcUFhYaHSUfGhsjHBYWICwgIyYnKSopGR8tMC0oMCUoKSj/2wBDAQcHBwoIChMKChMoGhYaKCgoKCgoKCgoKCgoKCgoKCgoKCgoKCgoKCgoKCgoKCgoKCgoKCgoKCgoKCgoKCgoKCj/wgARCAAGAAoDASIAAhEBAxEB/8QAFQABAQAAAAAAAAAAAAAAAAAAAAX/xAAVAQEBAAAAAAAAAAAAAAAAAAADBP/aAAwDAQACEAMQAAAAnyi1f//EACAQAAICAQMFAAAAAAAAAAAAAAECAwQRAAUGEzNBYeL/2gAIAQEAAT8A4tuXW2qMx0aSzOZURDFlC3vzgY1ZEMdiVDVpkq5HY+tf/8QAFhEBAQEAAAAAAAAAAAAAAAAAAQAC/9oACAECAQE/AMLf/8QAFhEBAQEAAAAAAAAAAAAAAAAAAQAx/9oACAEDAQE/AHC//9k='%3E%3C/image%3E%3C/svg%3E)
Our Valorant Tejo Ascent guide is intended to offer players the most effective tips and strategies for thriving in the game. Tejo, the game's seventh Initiator, debuted in January 2025. He specializes in explosives and acquiring information about opponents' positions. As an Initiator, he assists his team in effectively implementing tactics by providing key intel and clearing tight spots, making him a great fit for the Ascent map.
This article provides detailed insights on how to play Tejo in Valorant on Ascent.

Valorant Tejo Ascent guide: How to use Stealth Drone
Tejo's Stealth Drone is an effective tool for scouting corners and gathering intelligence. This drone not only reveals opponents but also disables them. By pressing the fire button, a pulse is emitted that suppresses and exposes a group of enemies.
Also read: Valorant: How to master Tejo
Stealth Drone: Attacking routes
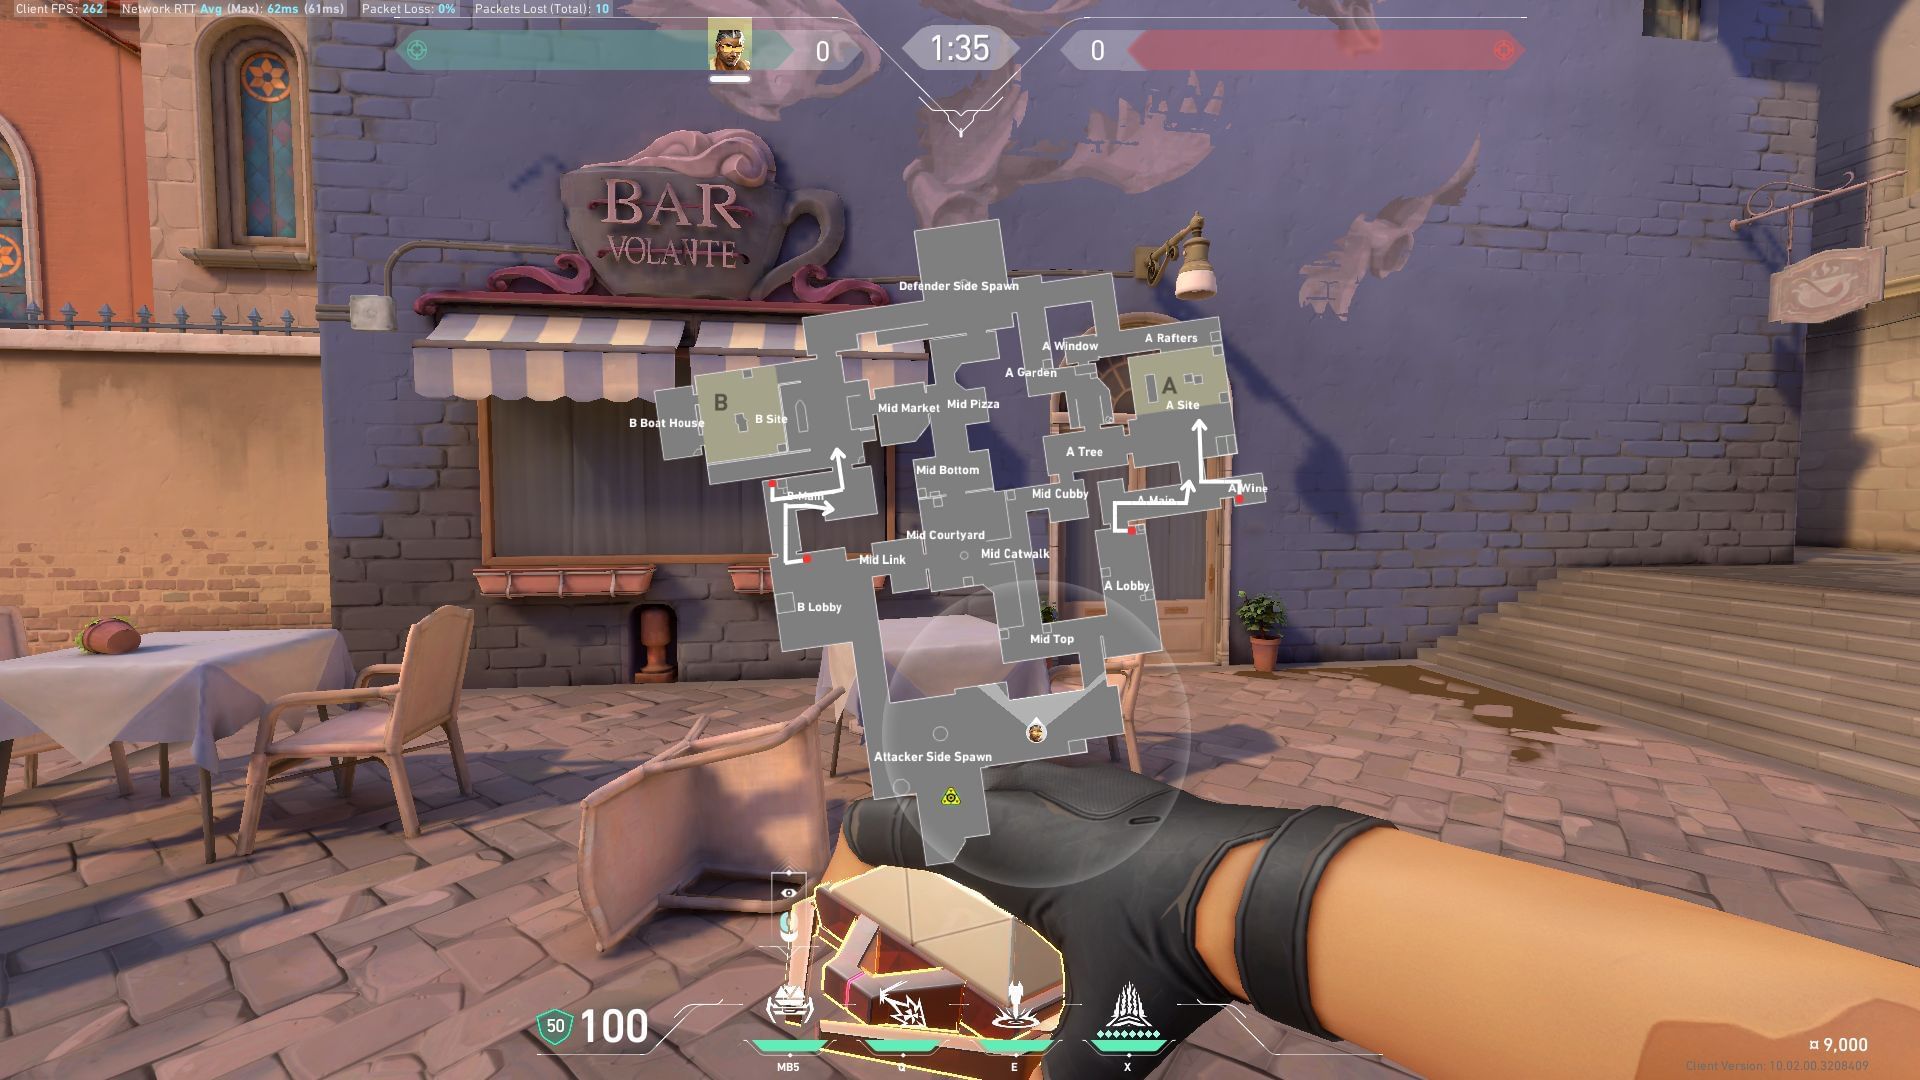
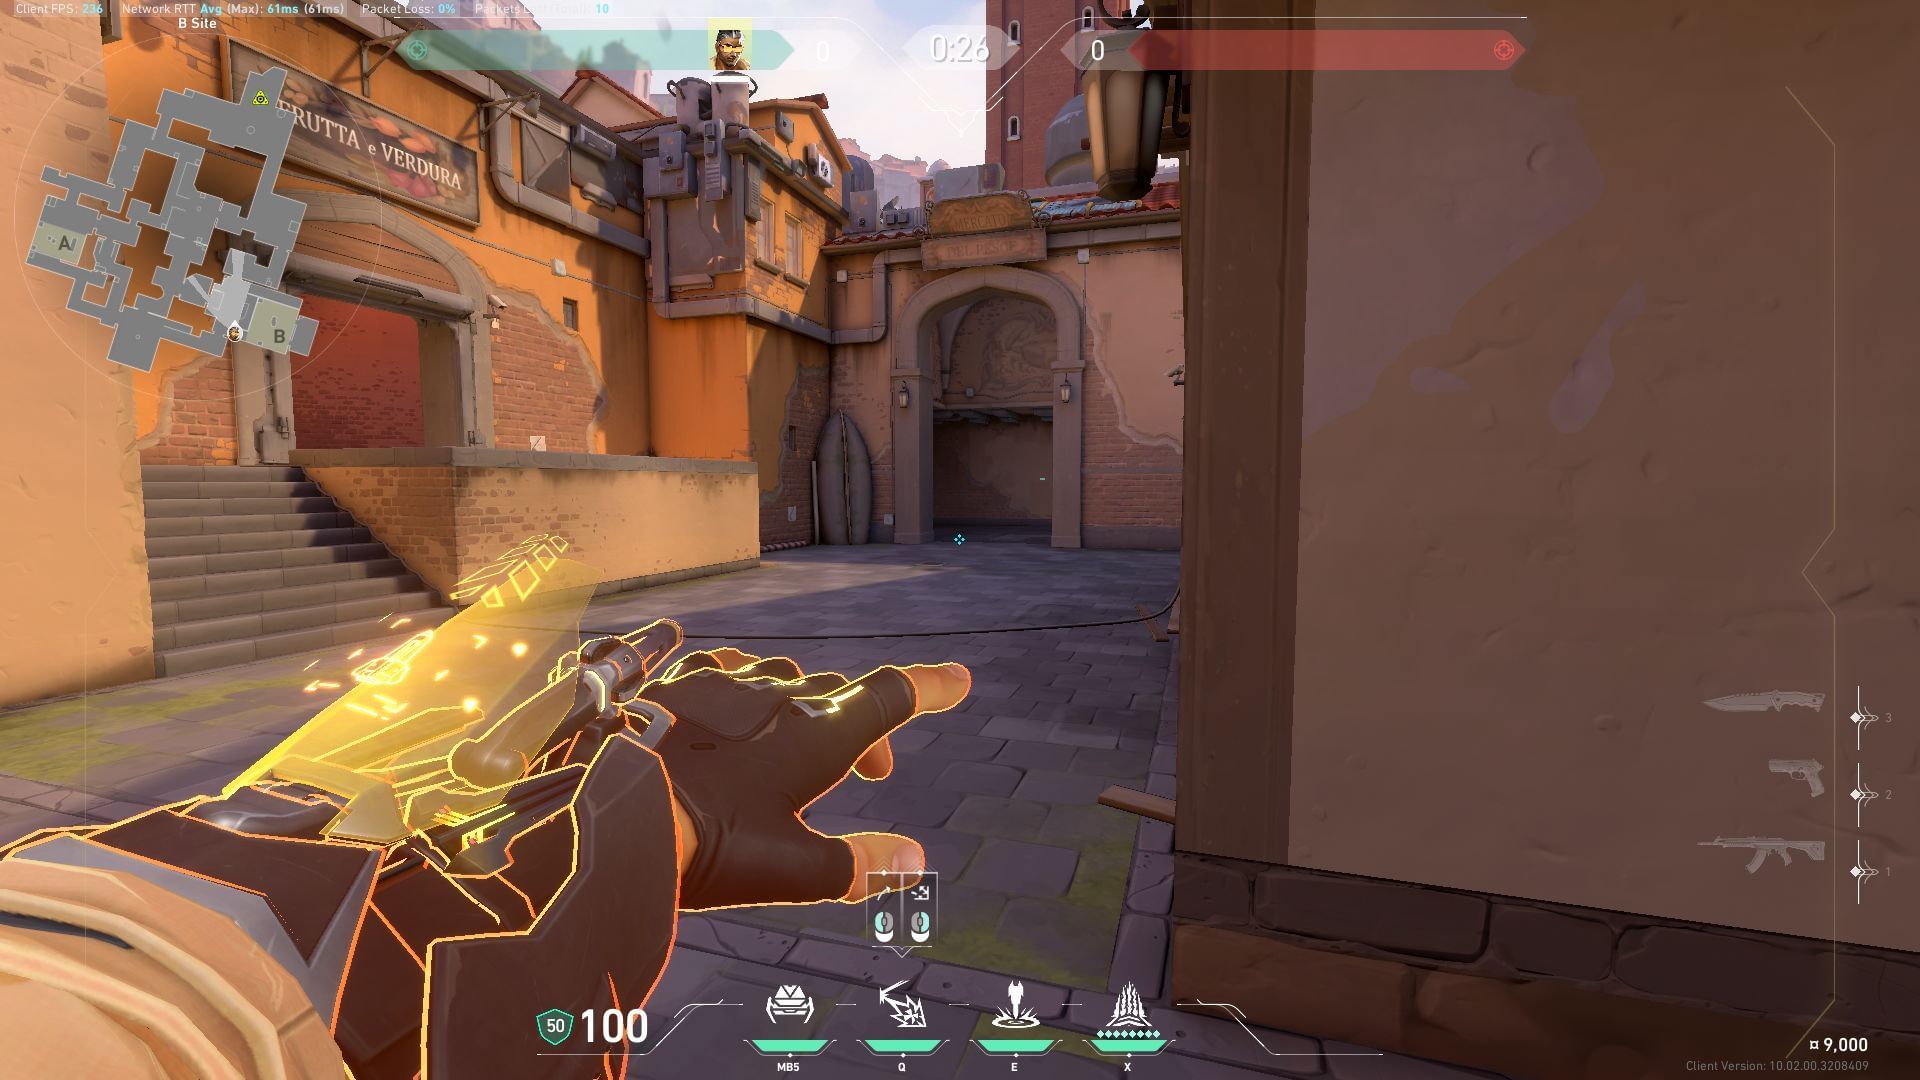
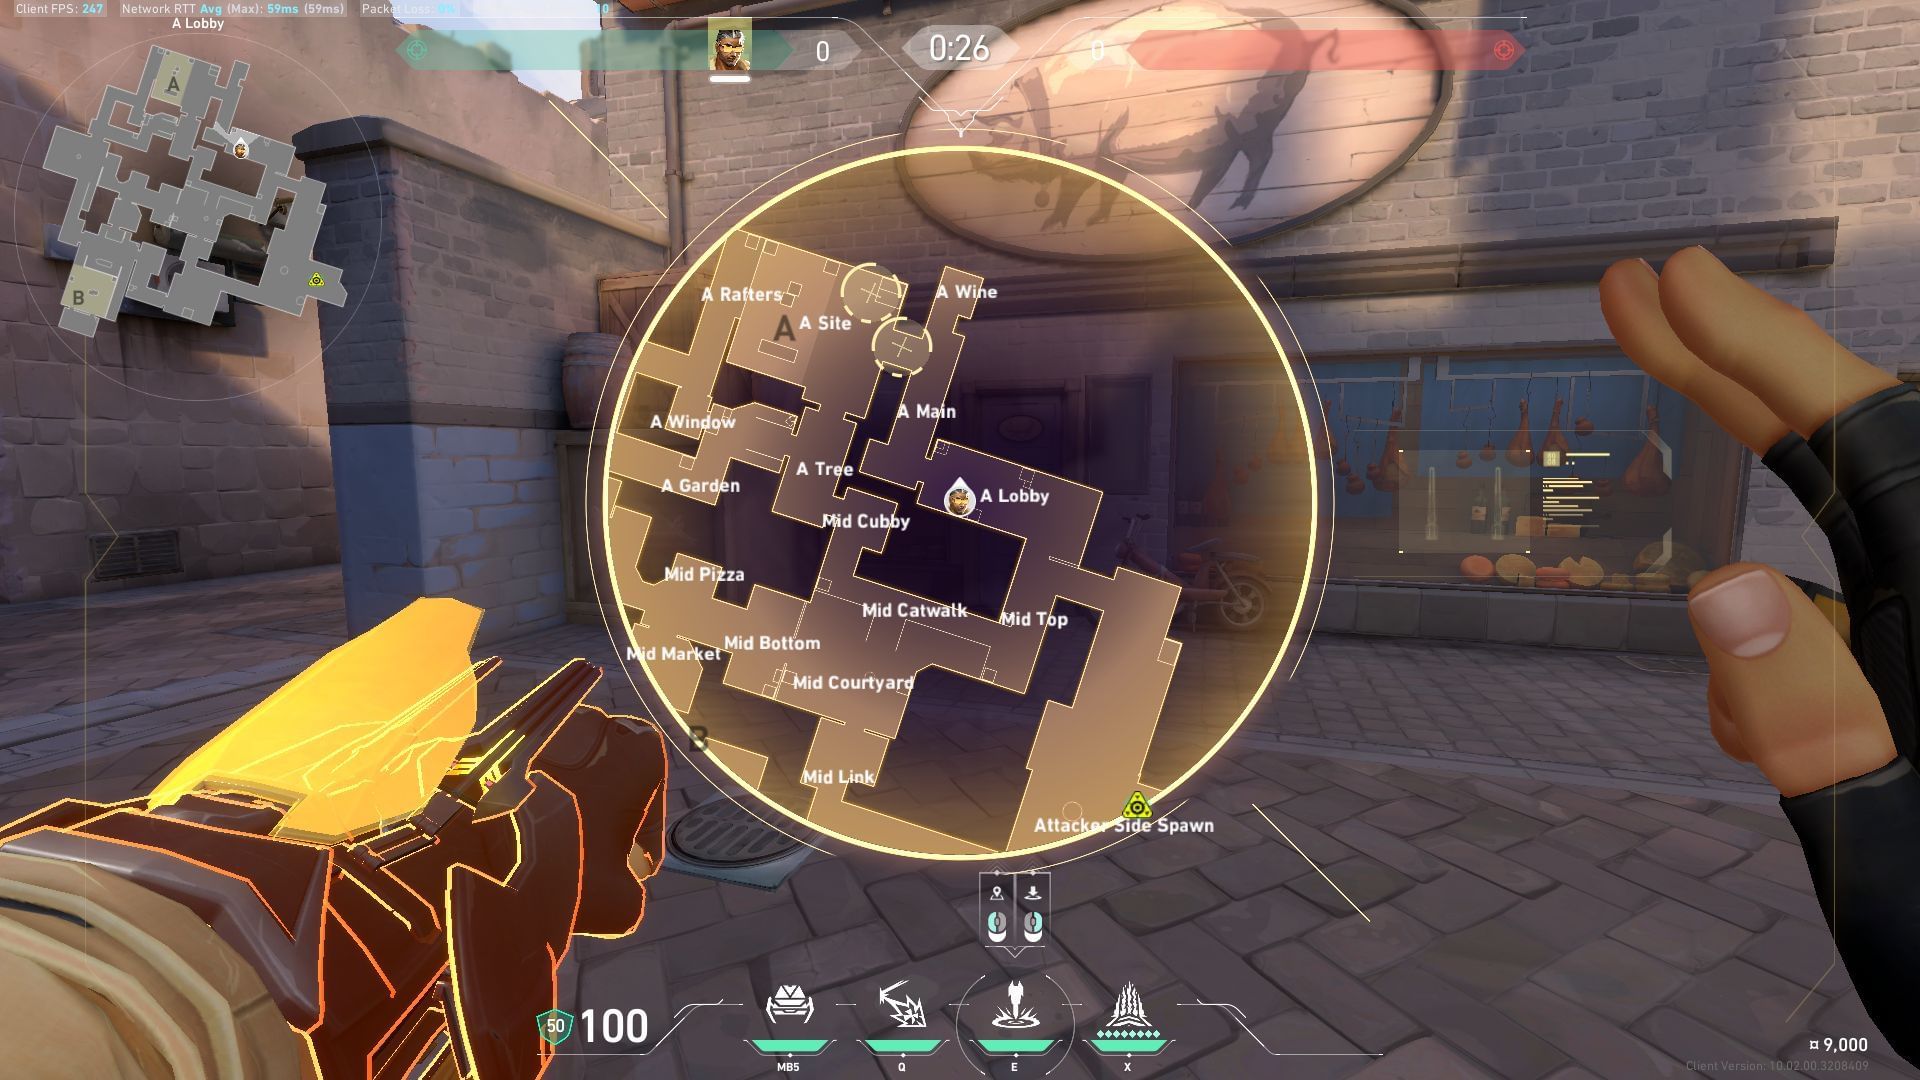
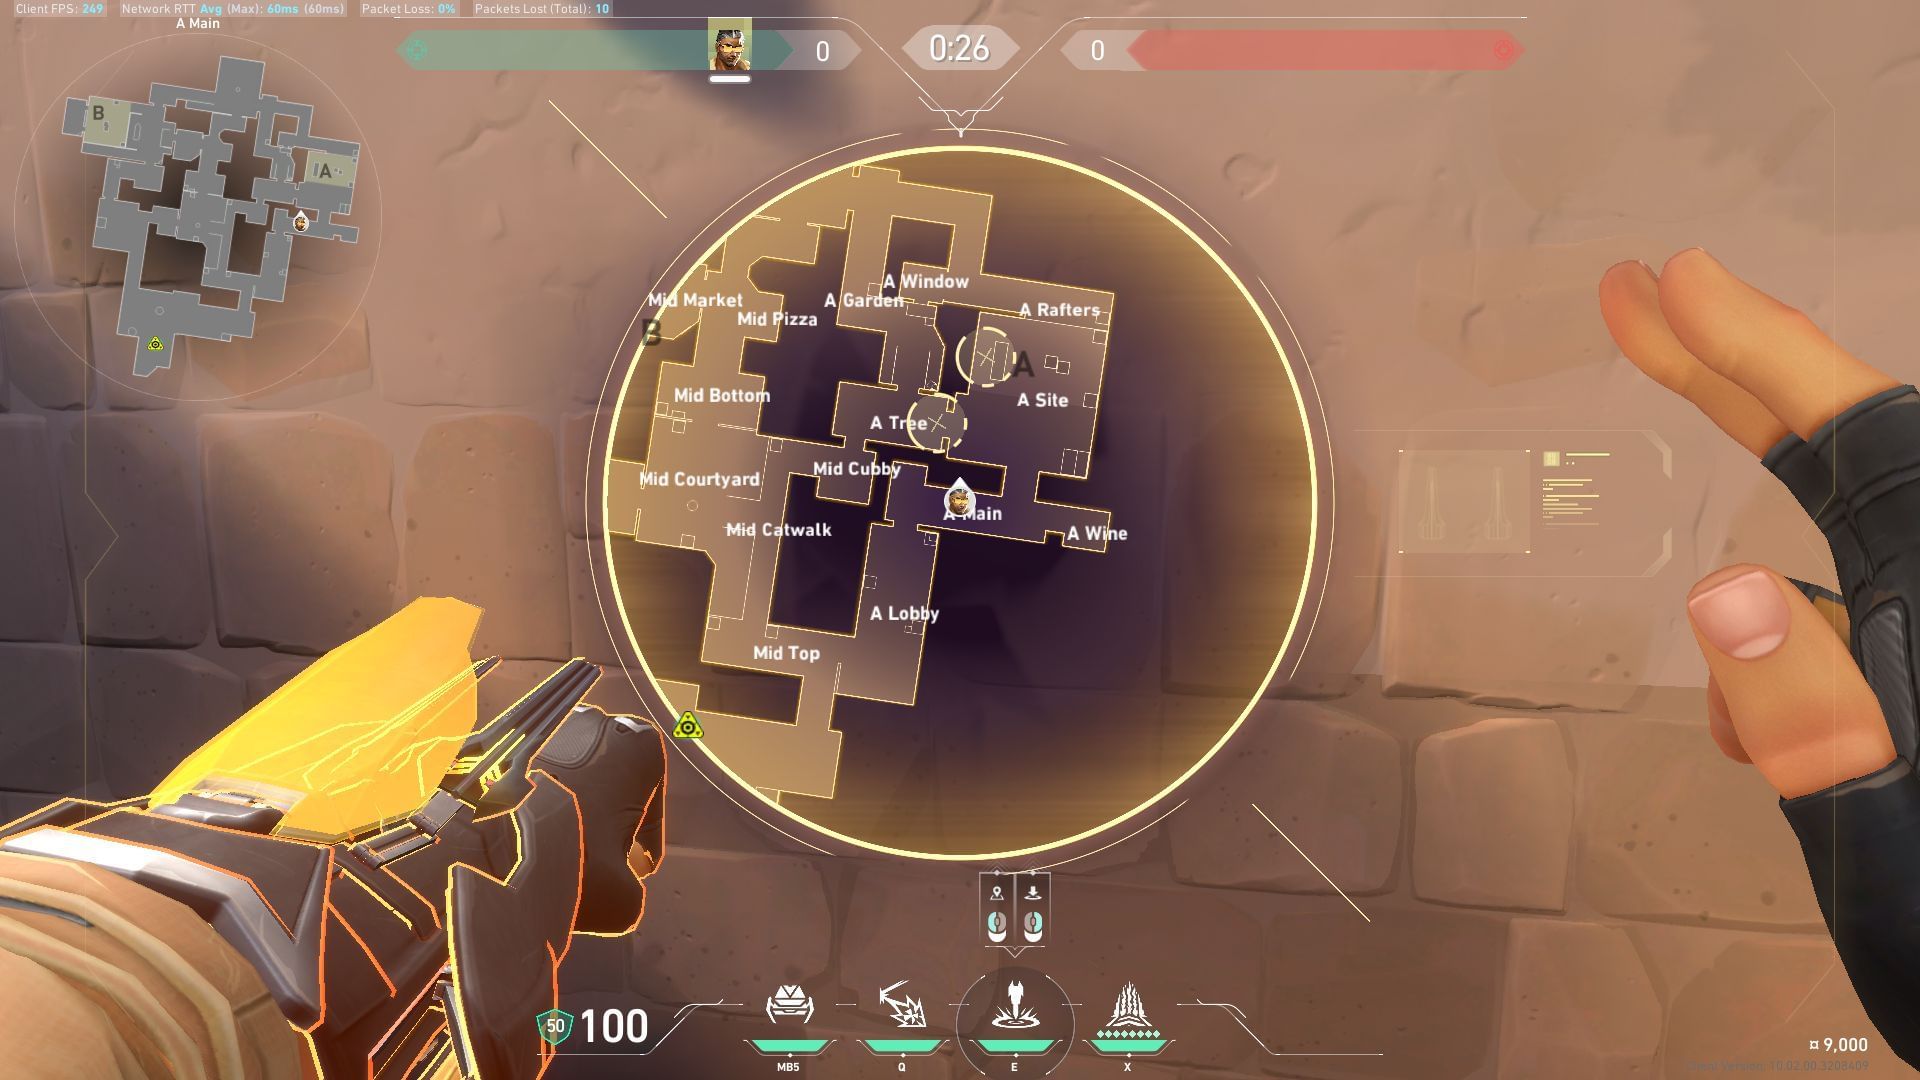
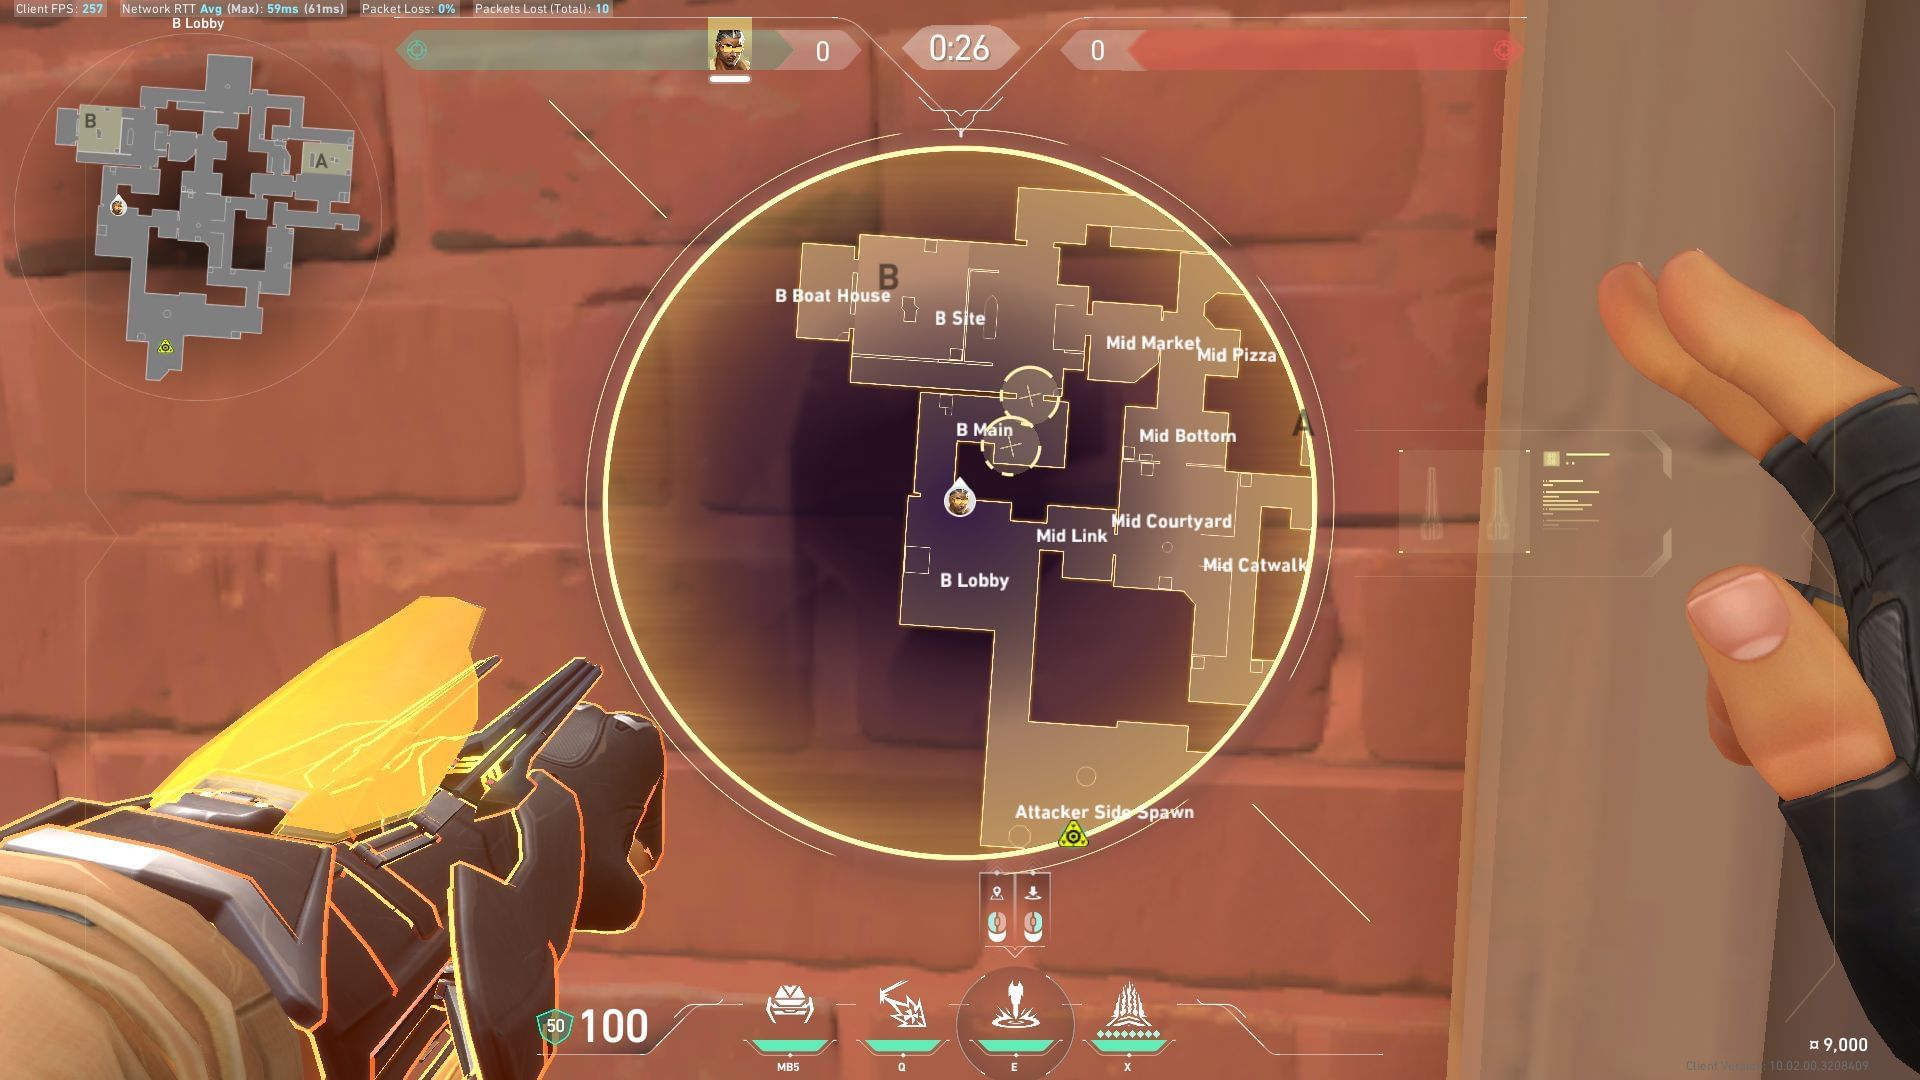
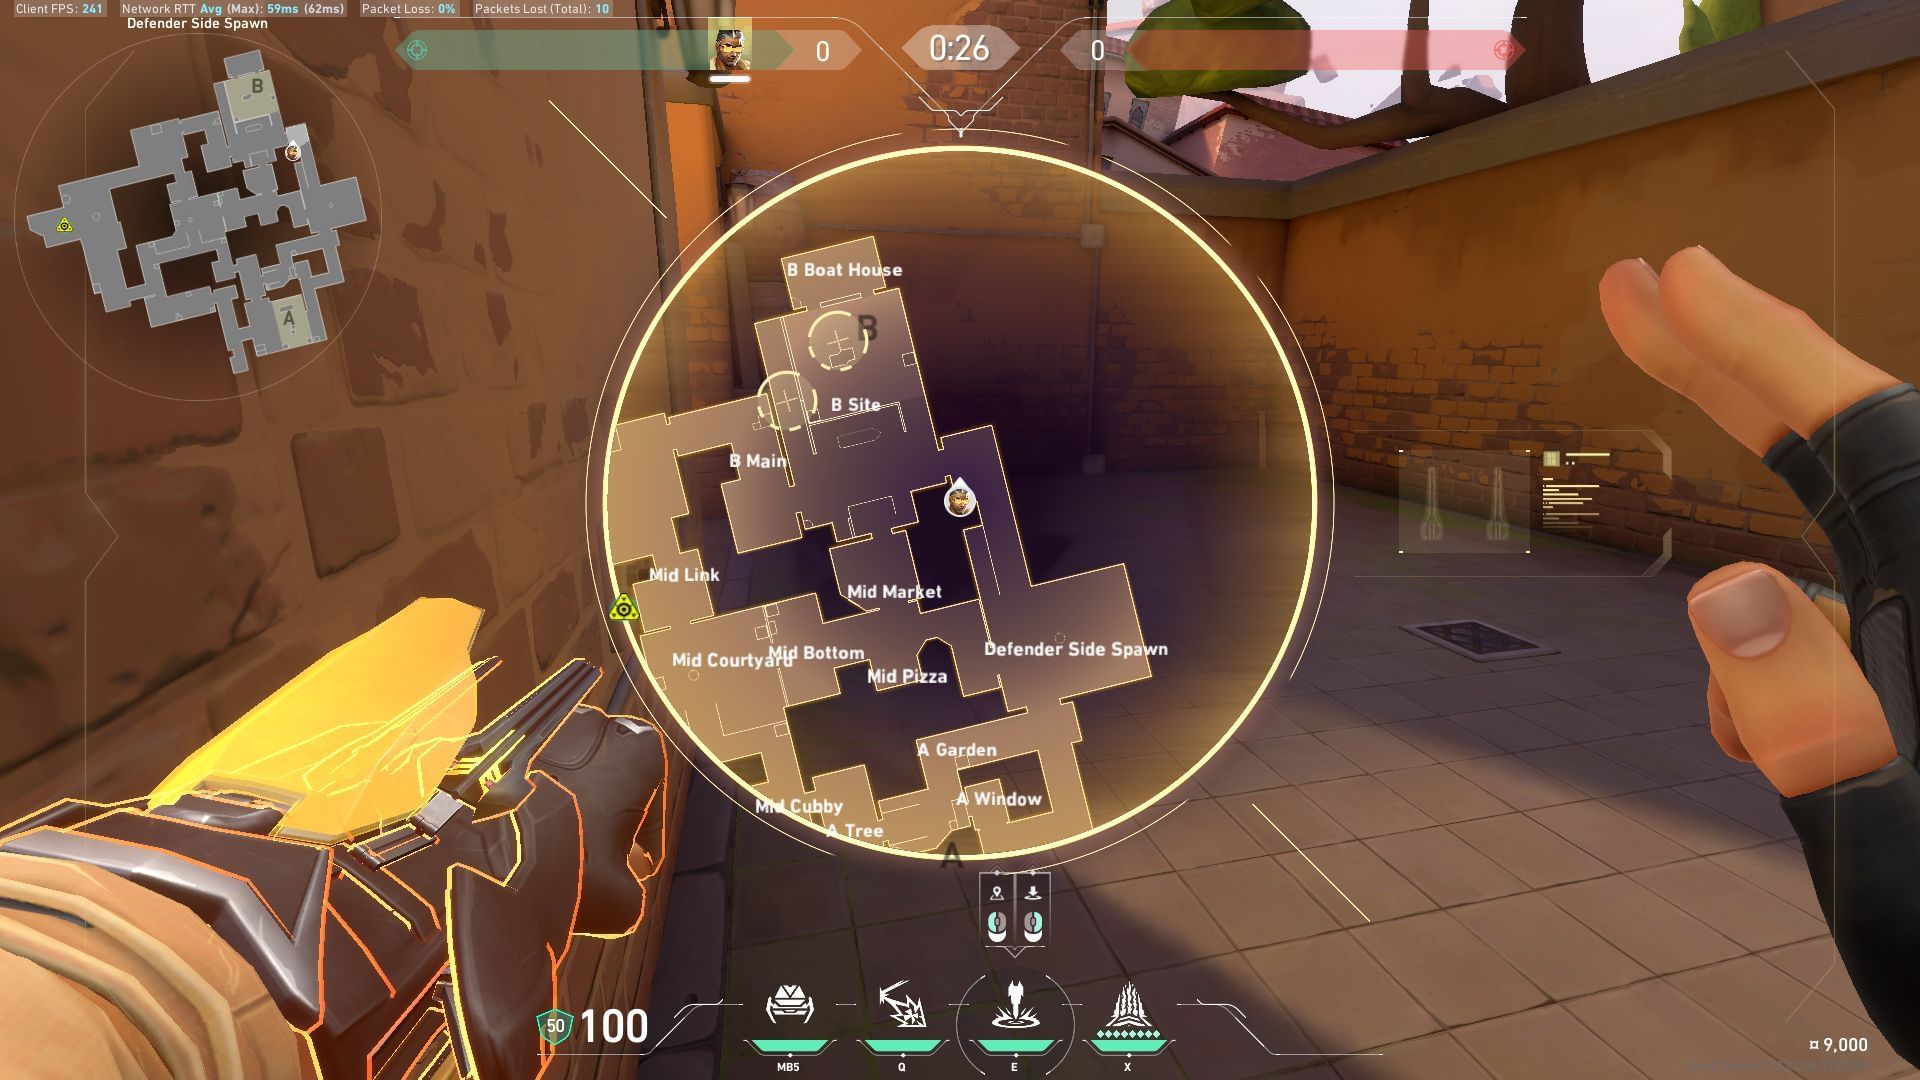
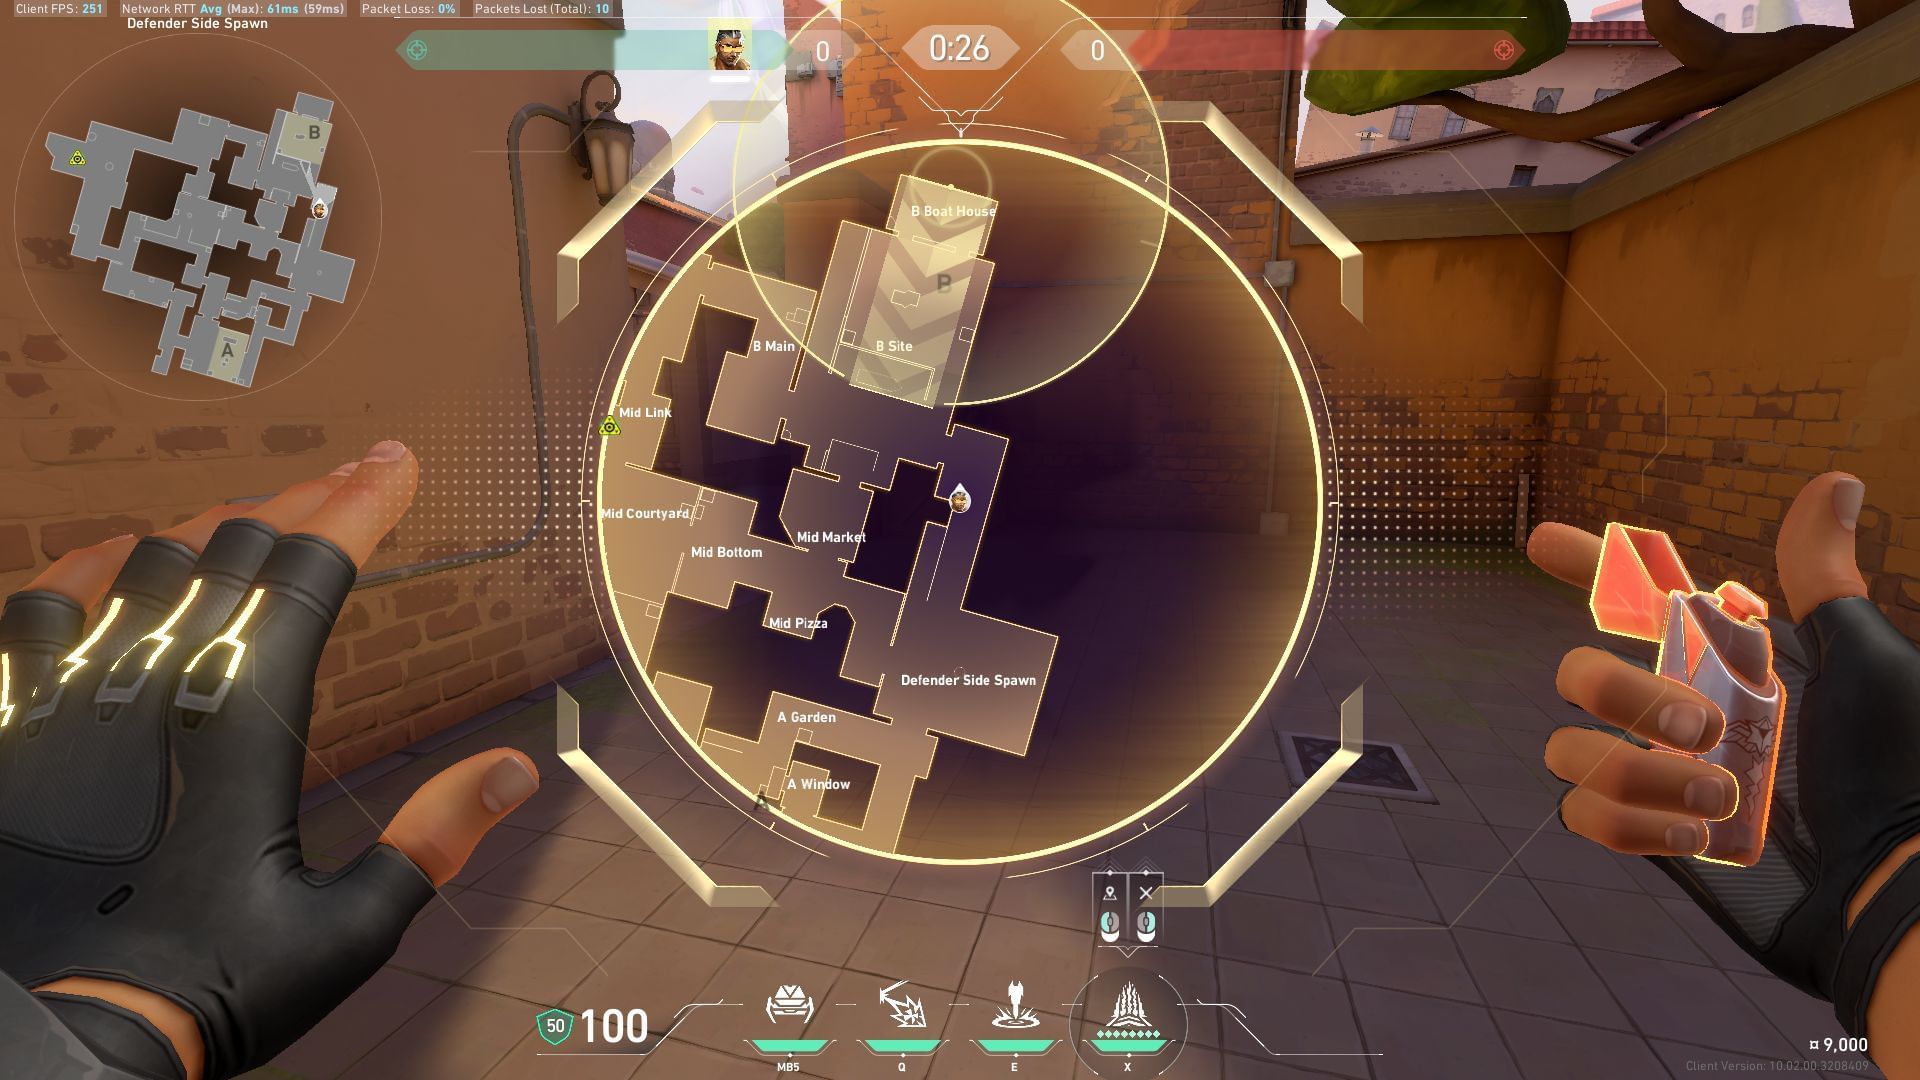
Launch the Stealth Drone as marked on the image to detect and suppress enemies holding positions.
Stealth Drone: Defense routes
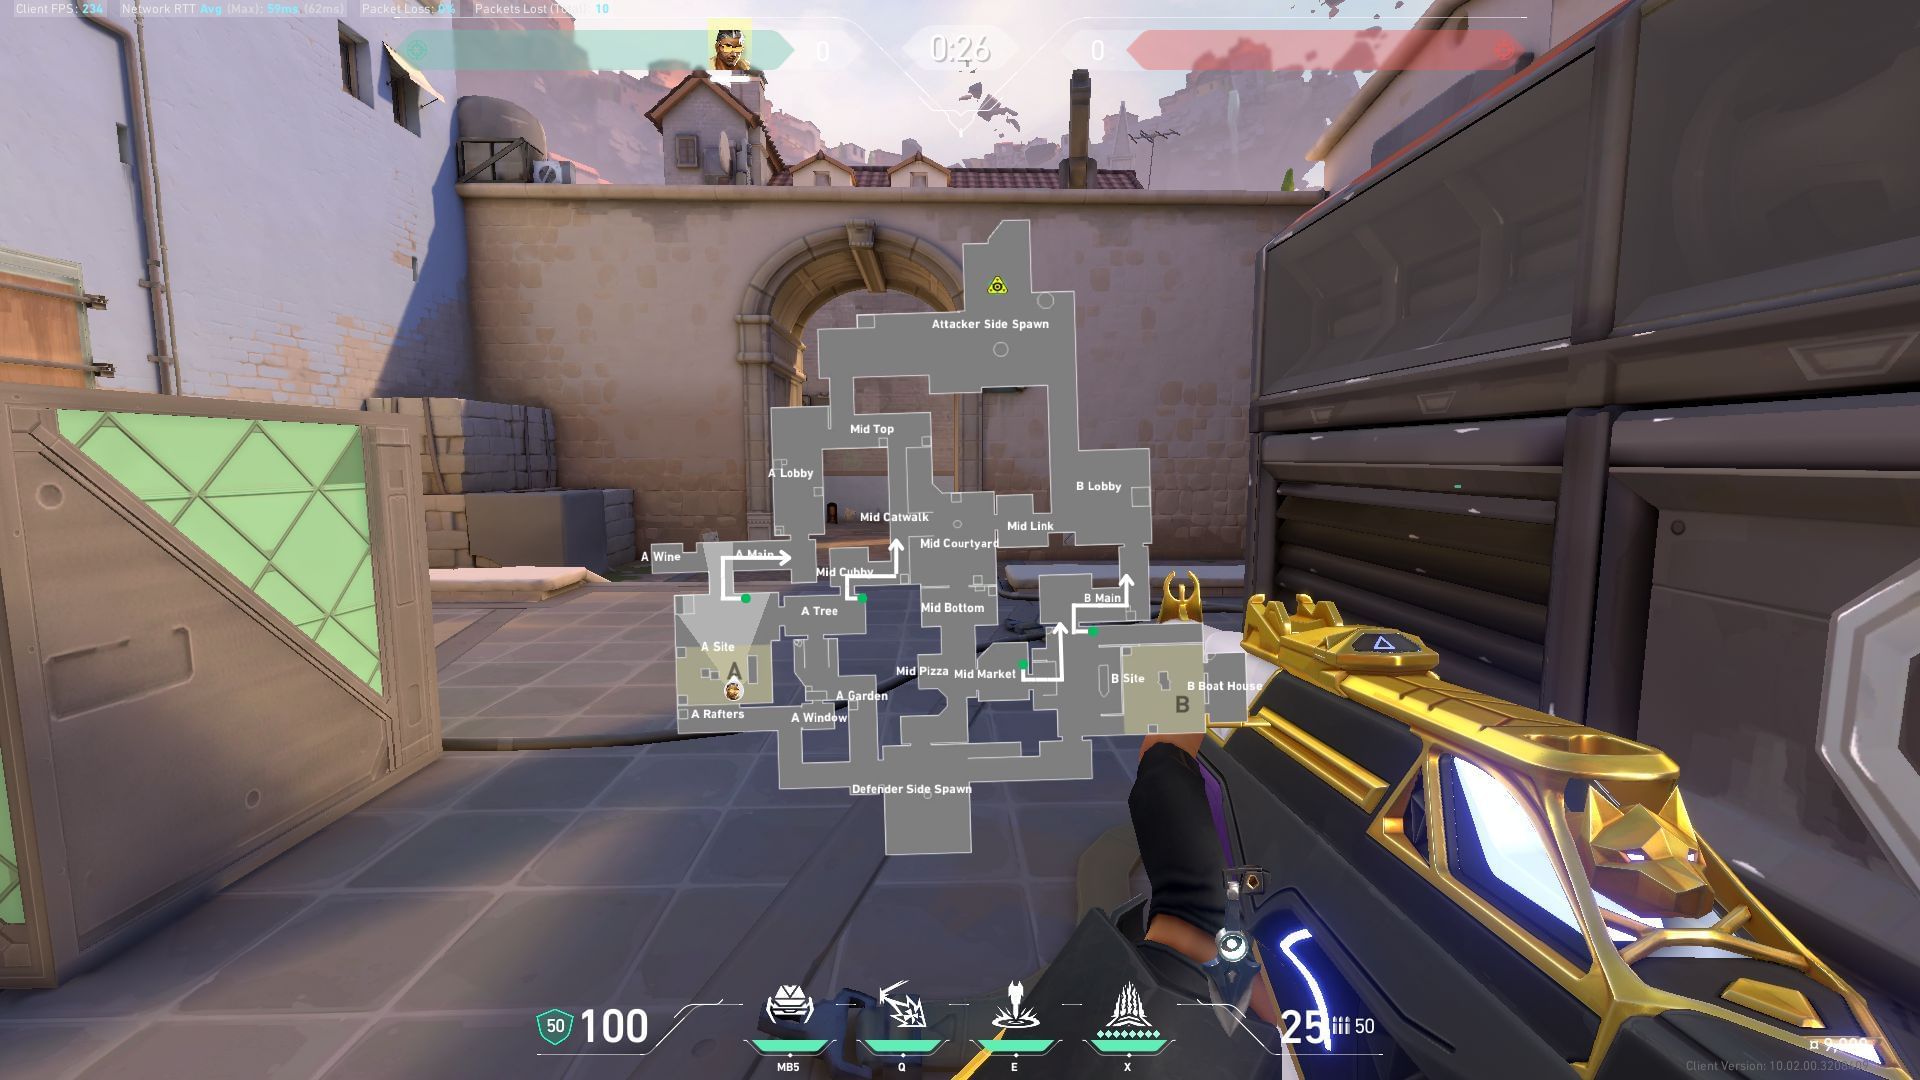
Launch the Stealth Drone towards the marked locations during the defense rounds to detect enemies approaching the site.
Valorant Tejo Ascent guide: How to use Special Delivery
Tejo carries a sticky grenade that explodes upon contact with a surface. His Special Delivery ability enables him to hit opponents within the grenade's blast radius. This grenade can distract enemies hiding in confined spaces or concuss them during close-range combat in Valorant.
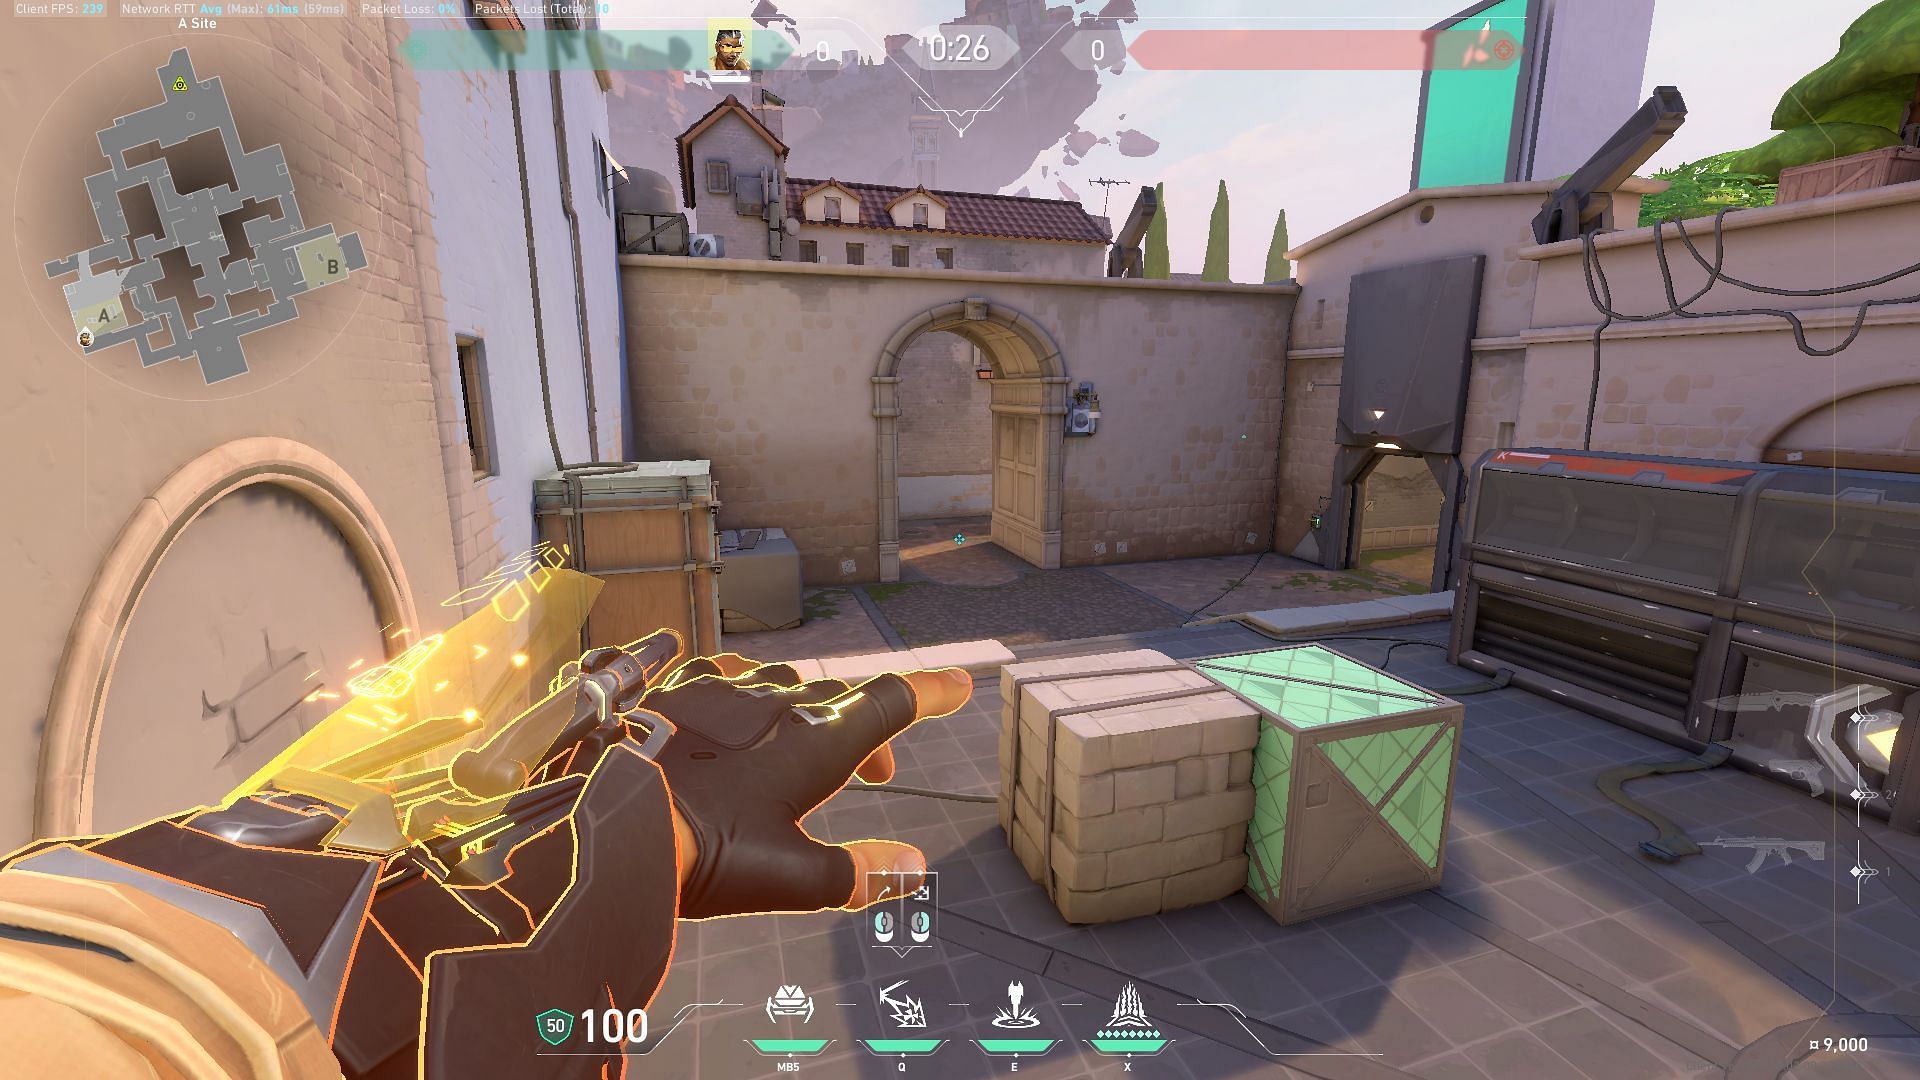
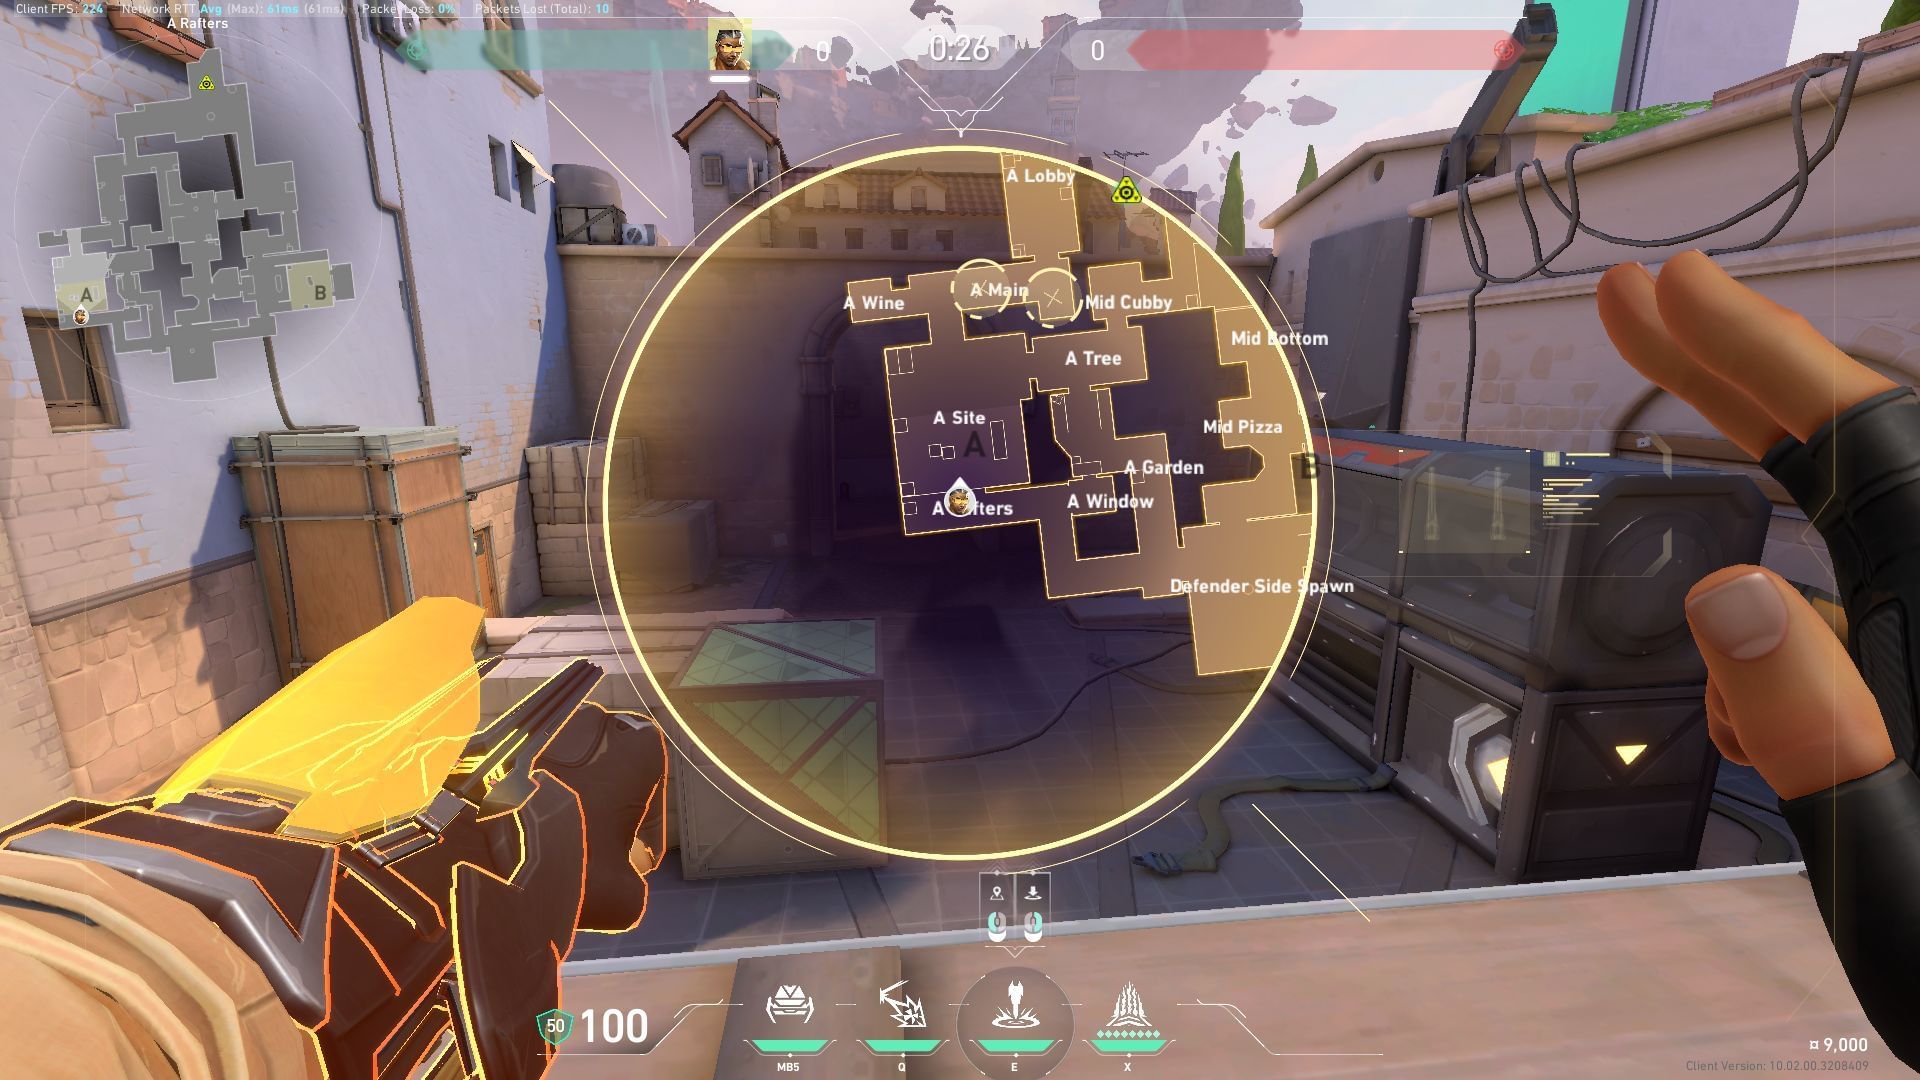
Attacking A-site option 1
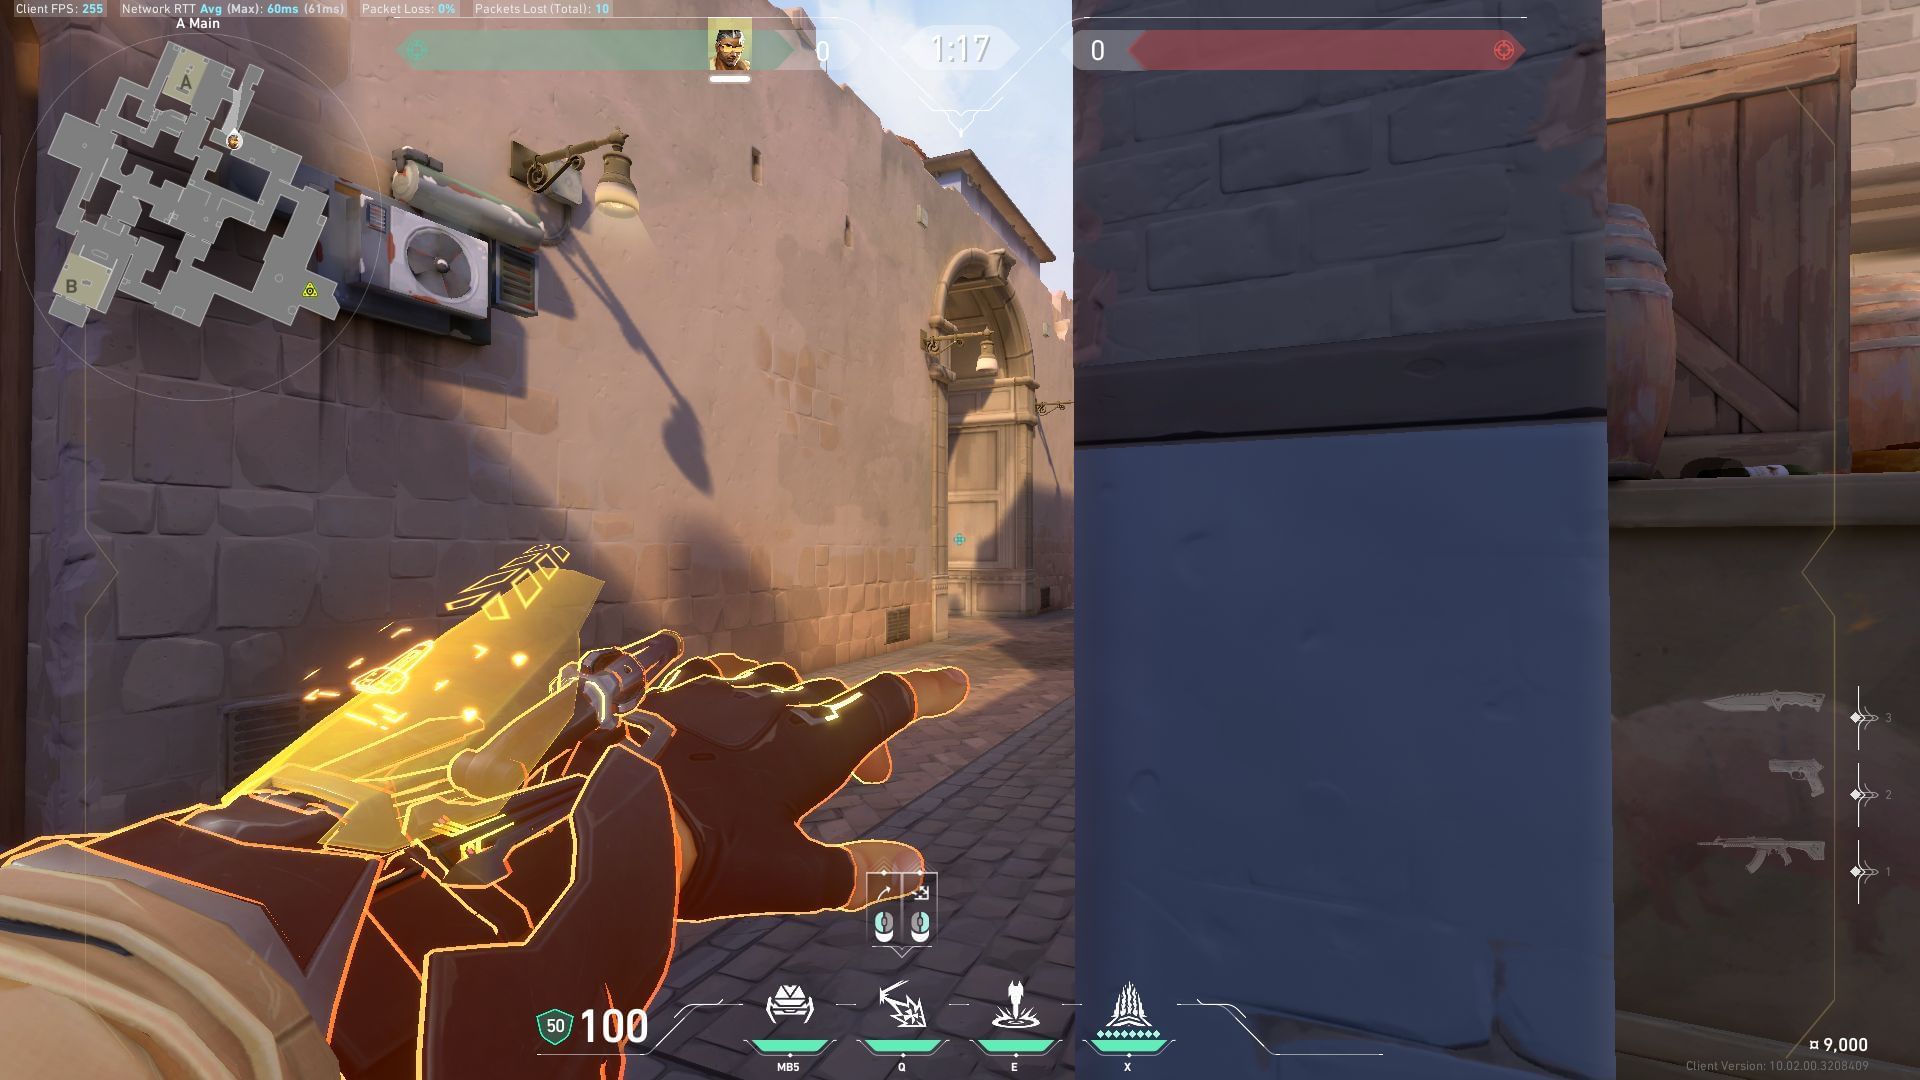
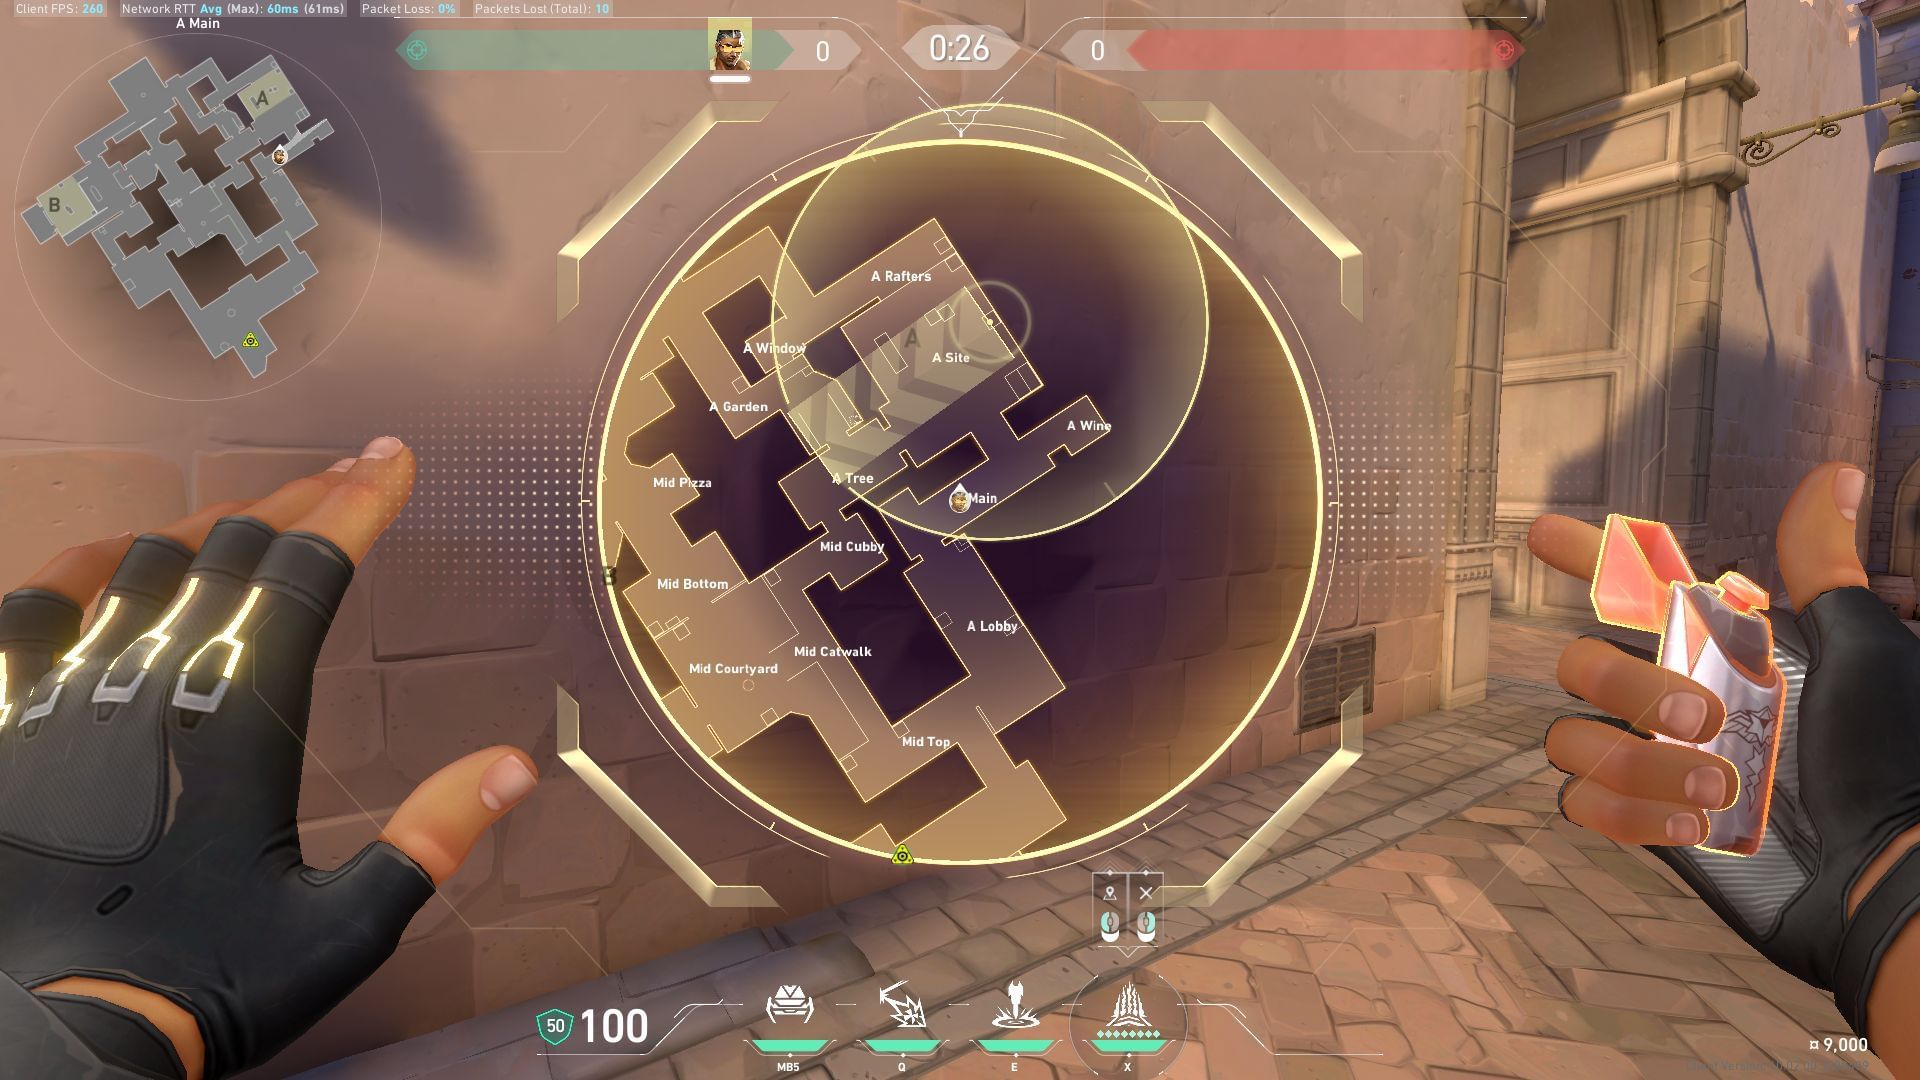
Launch the Special Delivery grenade towards A-Main to concuss enemies holding position.
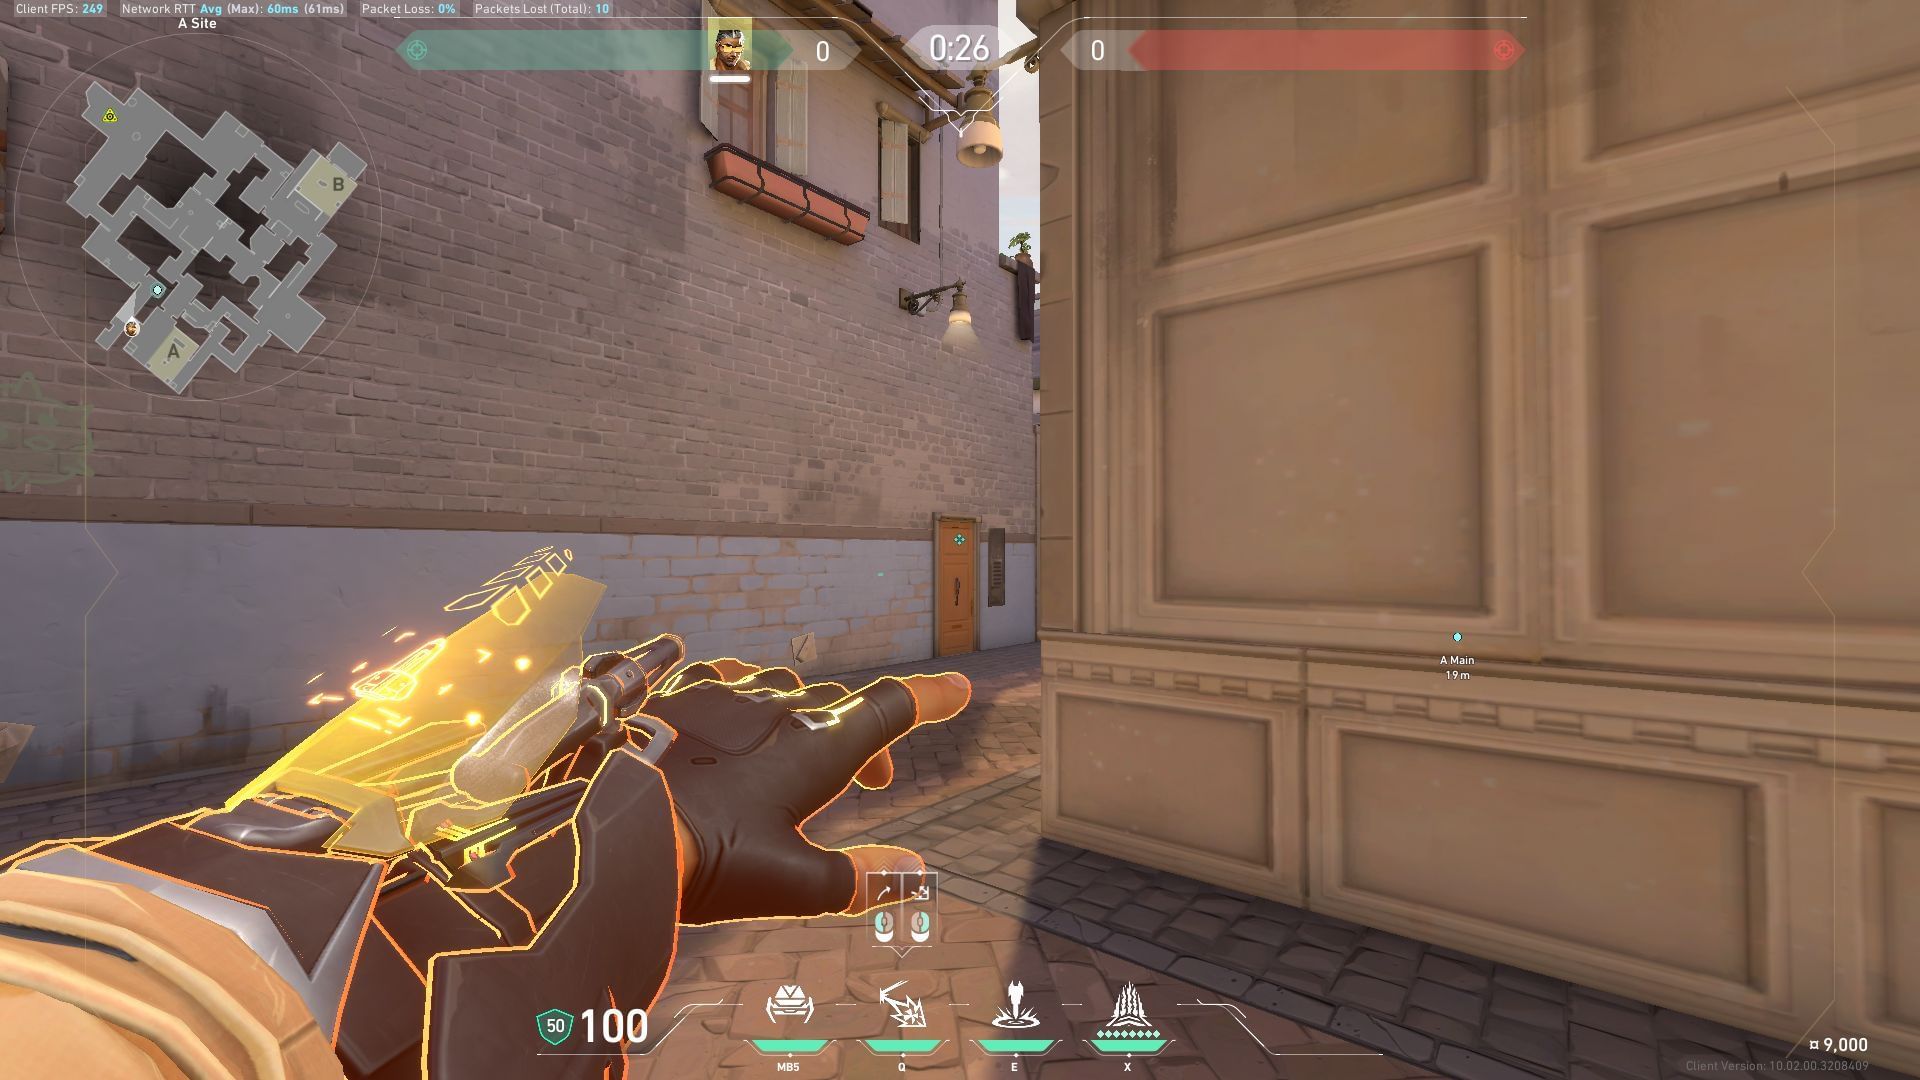
Attacking A-site option 2
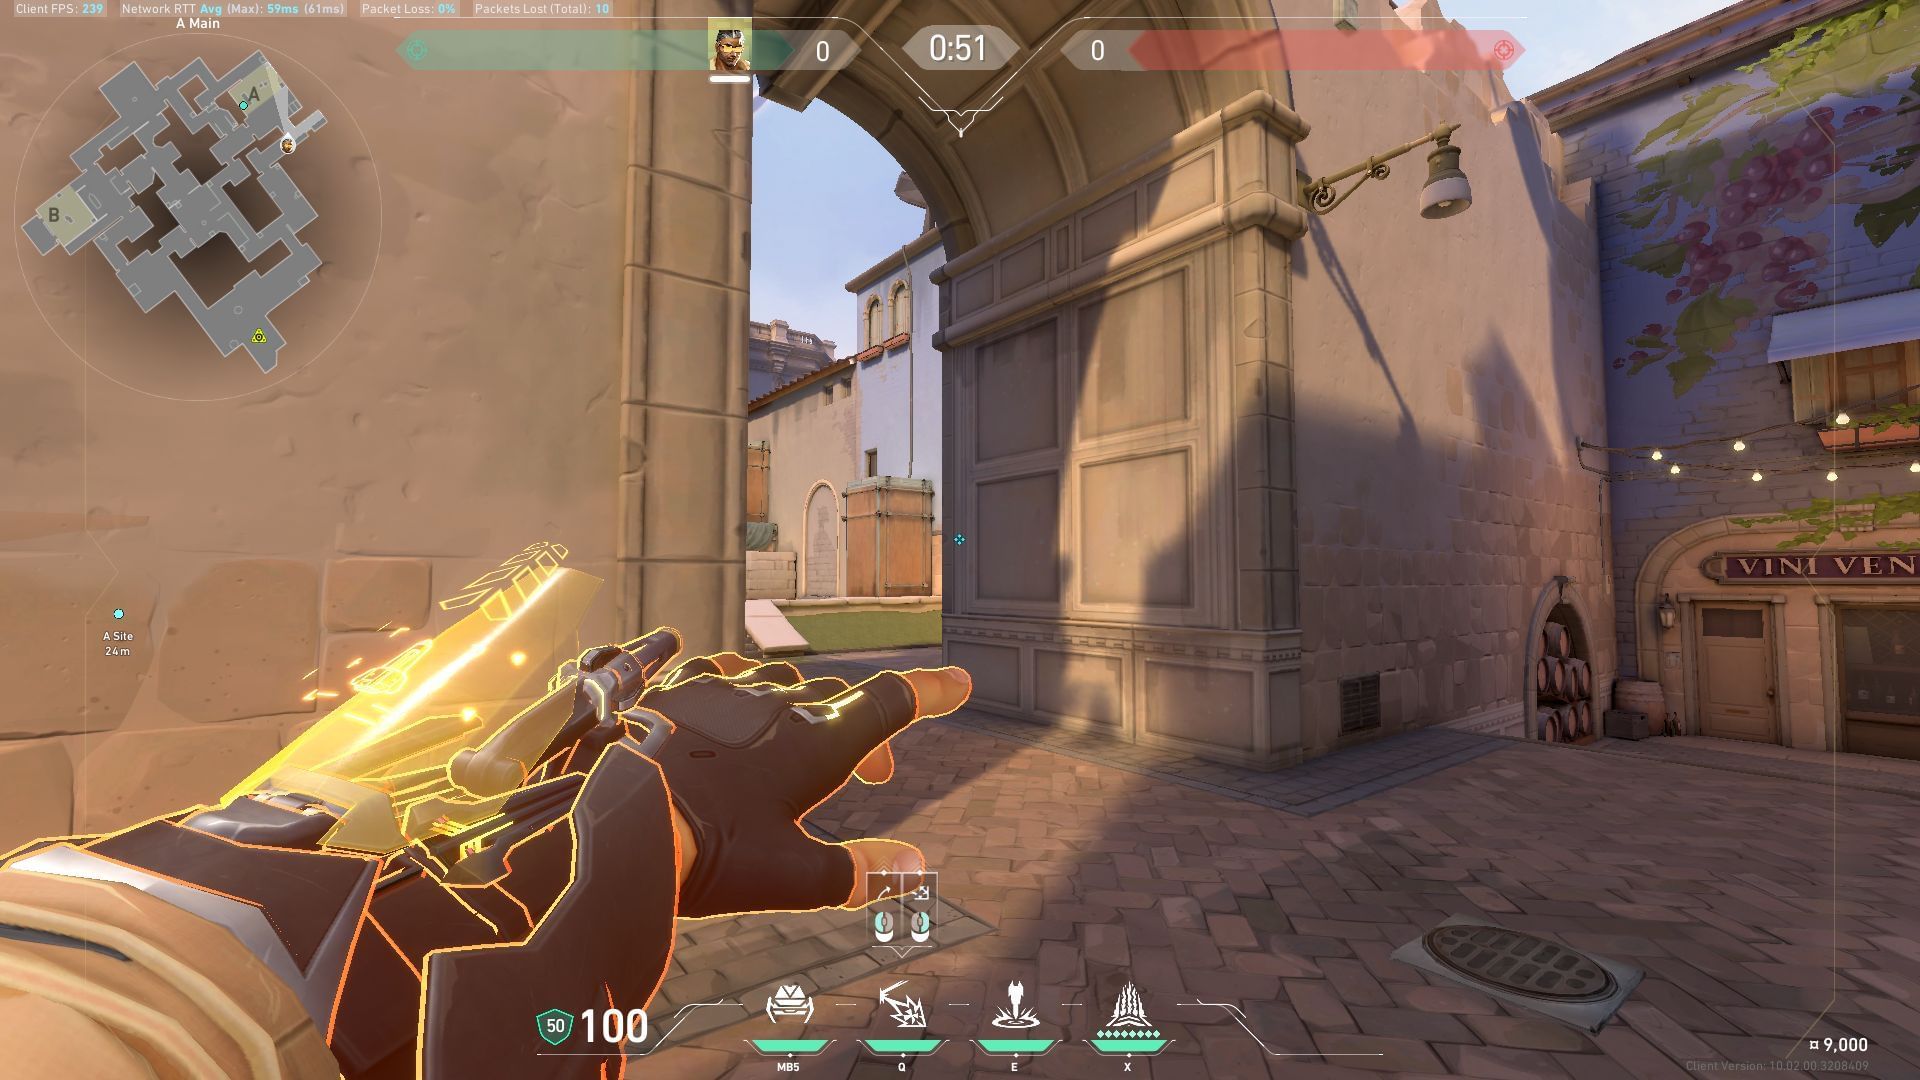
Right-click to enable a single bounce while launching the Special Delivery Grenade from A-Main to let it bounce off the wall and land near the A-Generator area.
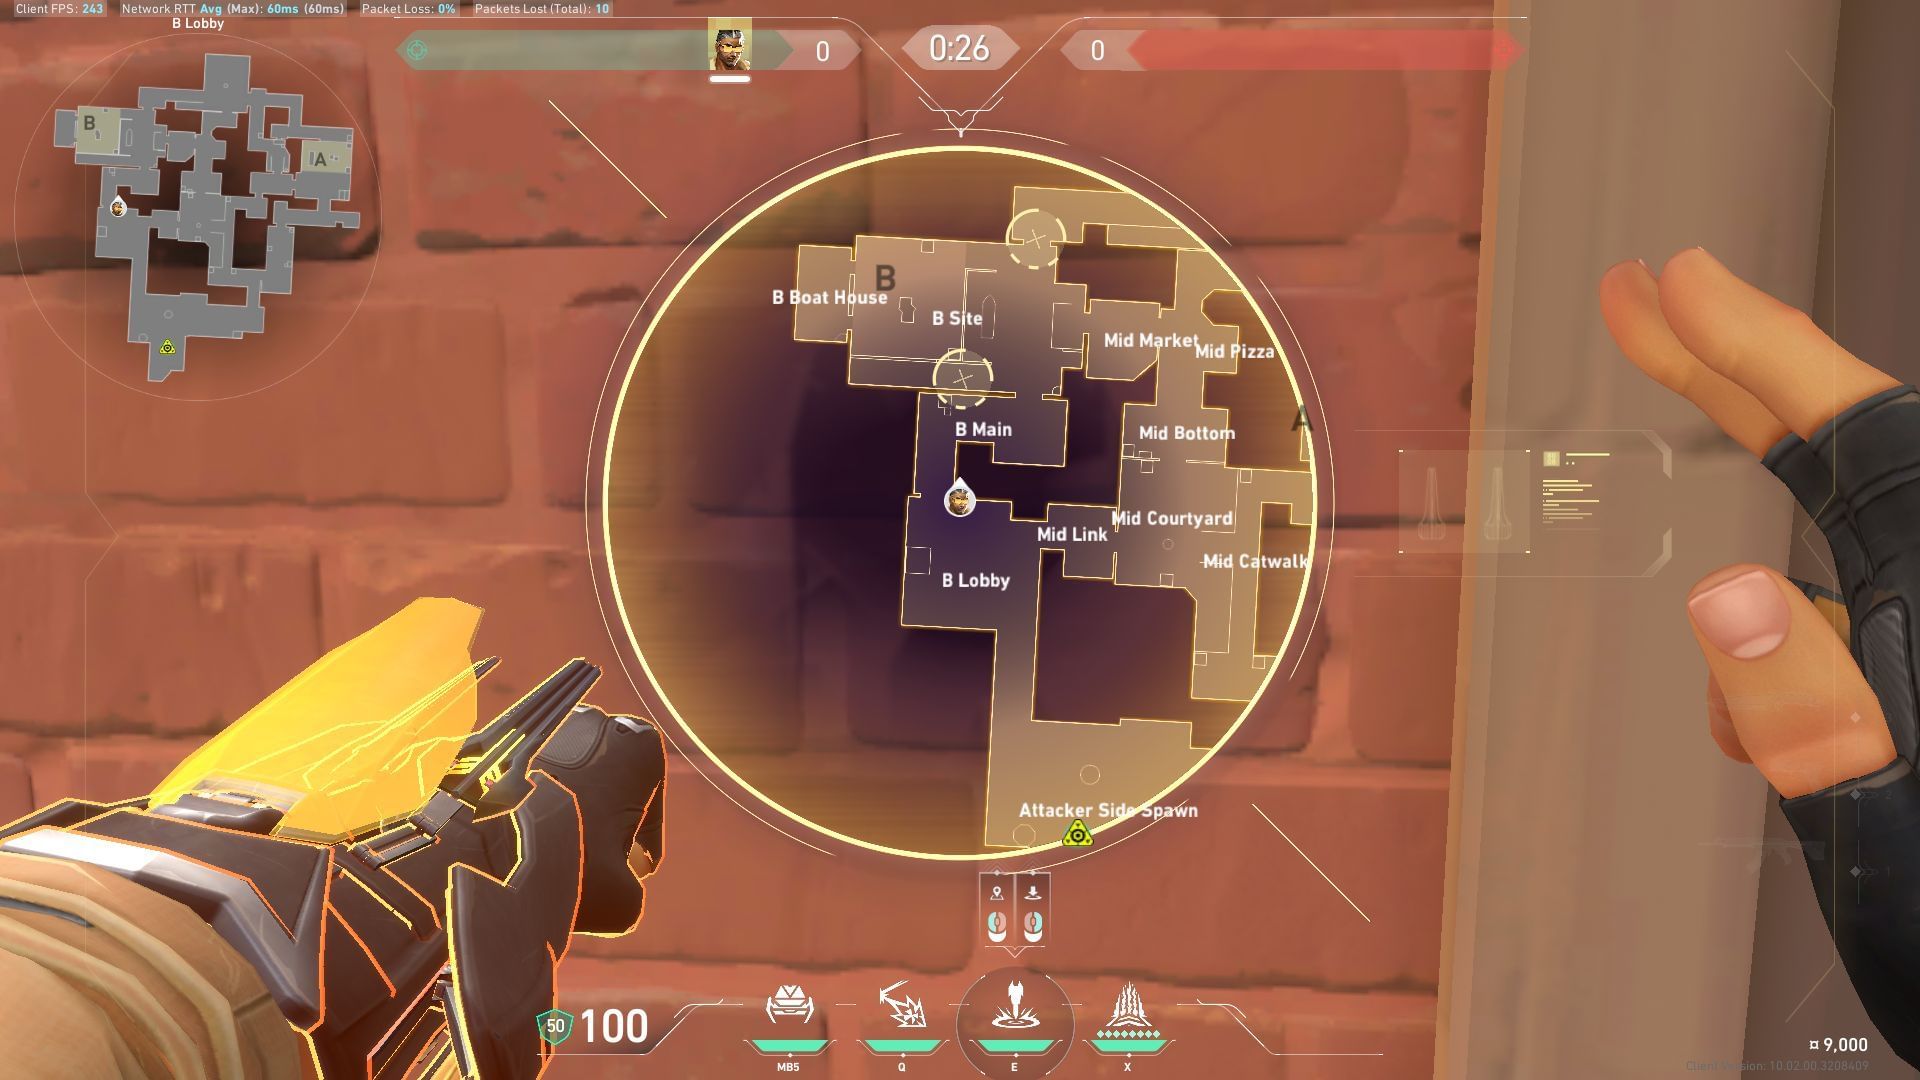
Attacking B-site option 1
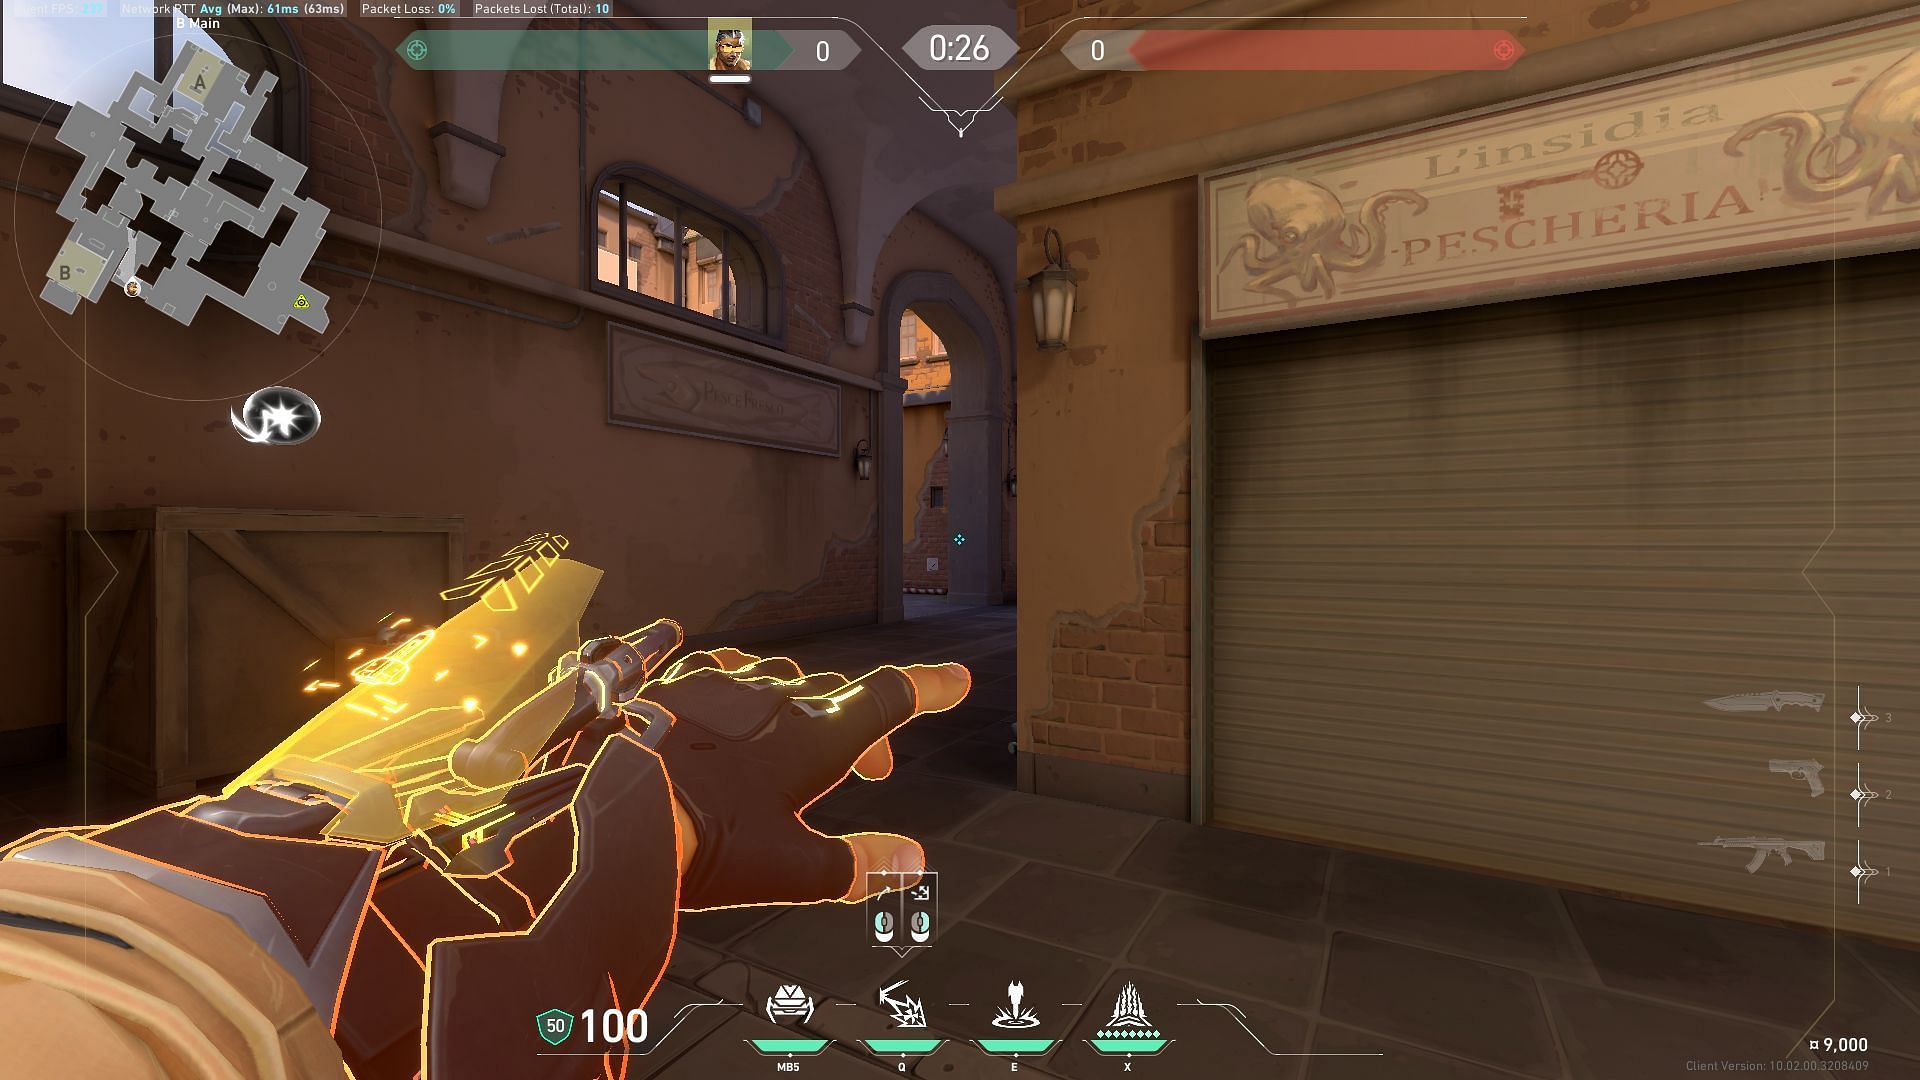
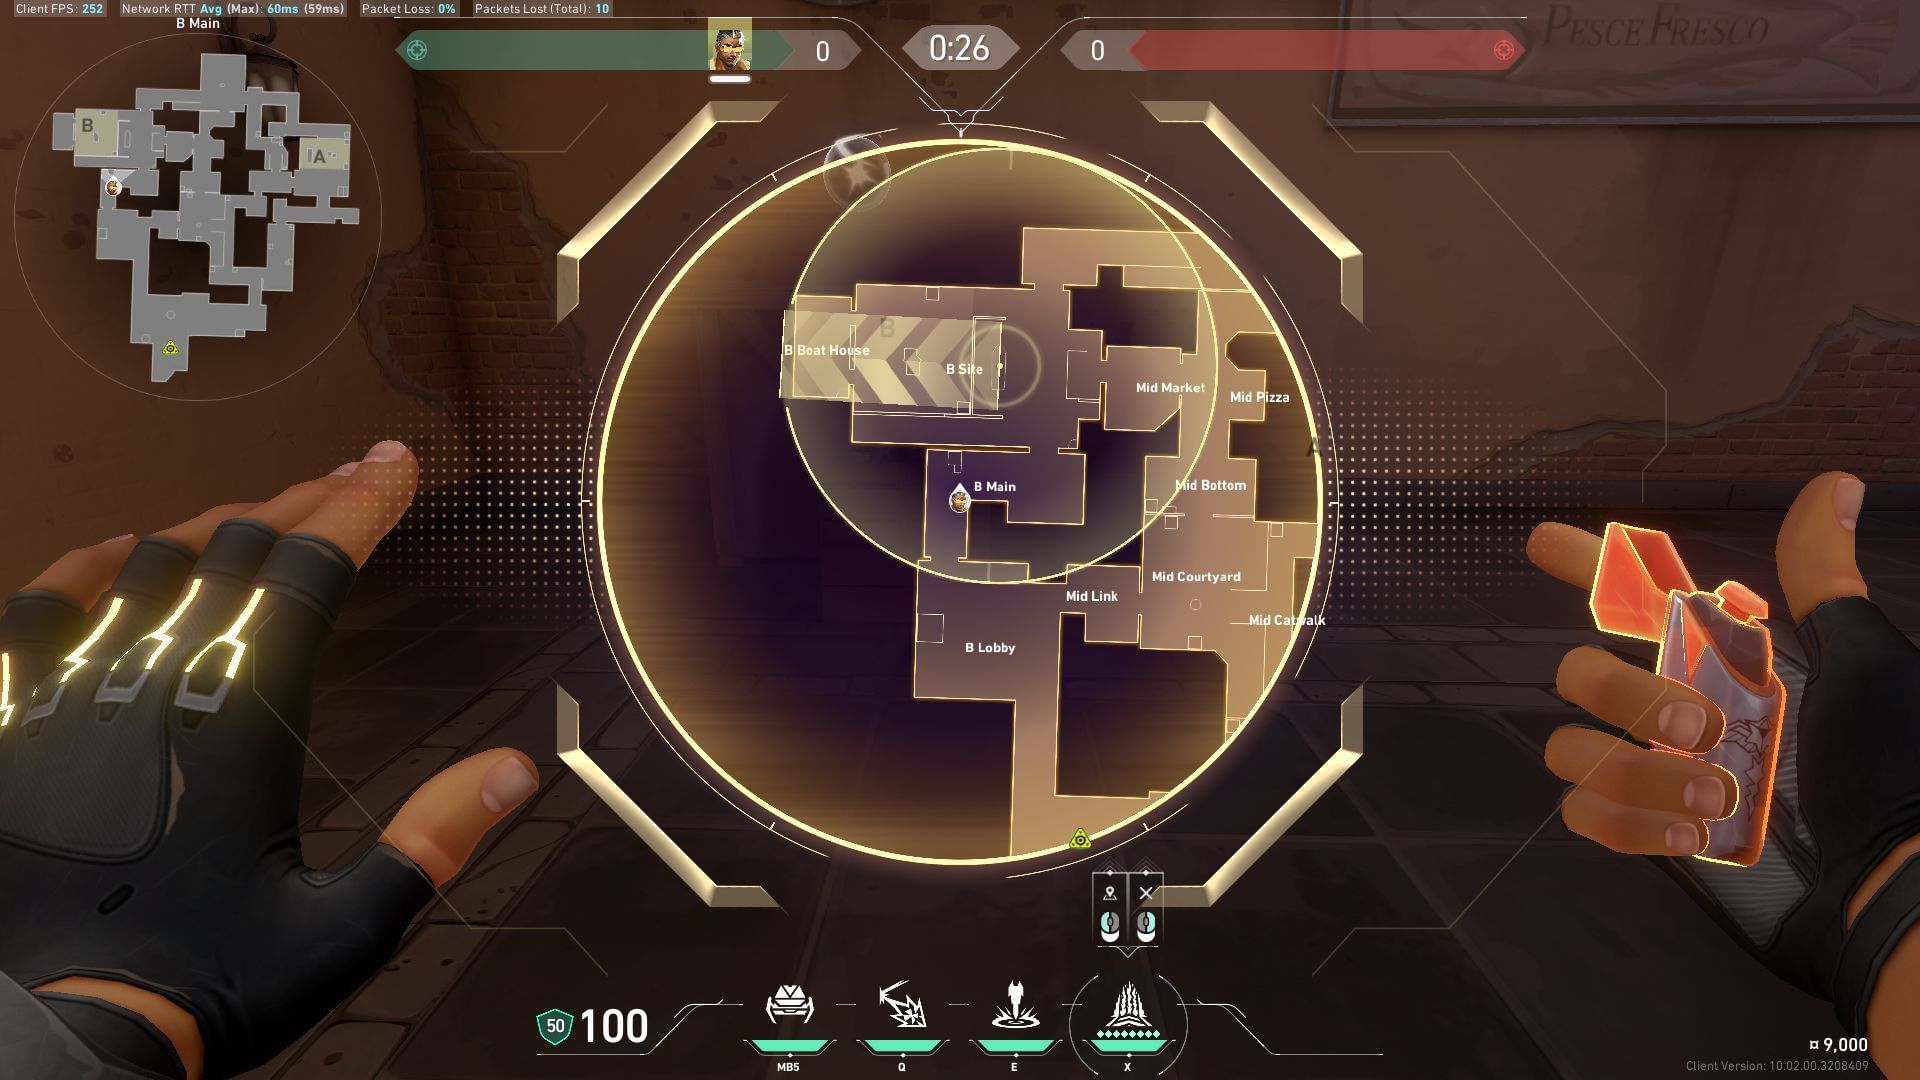
Launch the Special Delivery grenade on B-Main to concuss enemies holding position at the entry of B-site.
Attacking B-site option 2
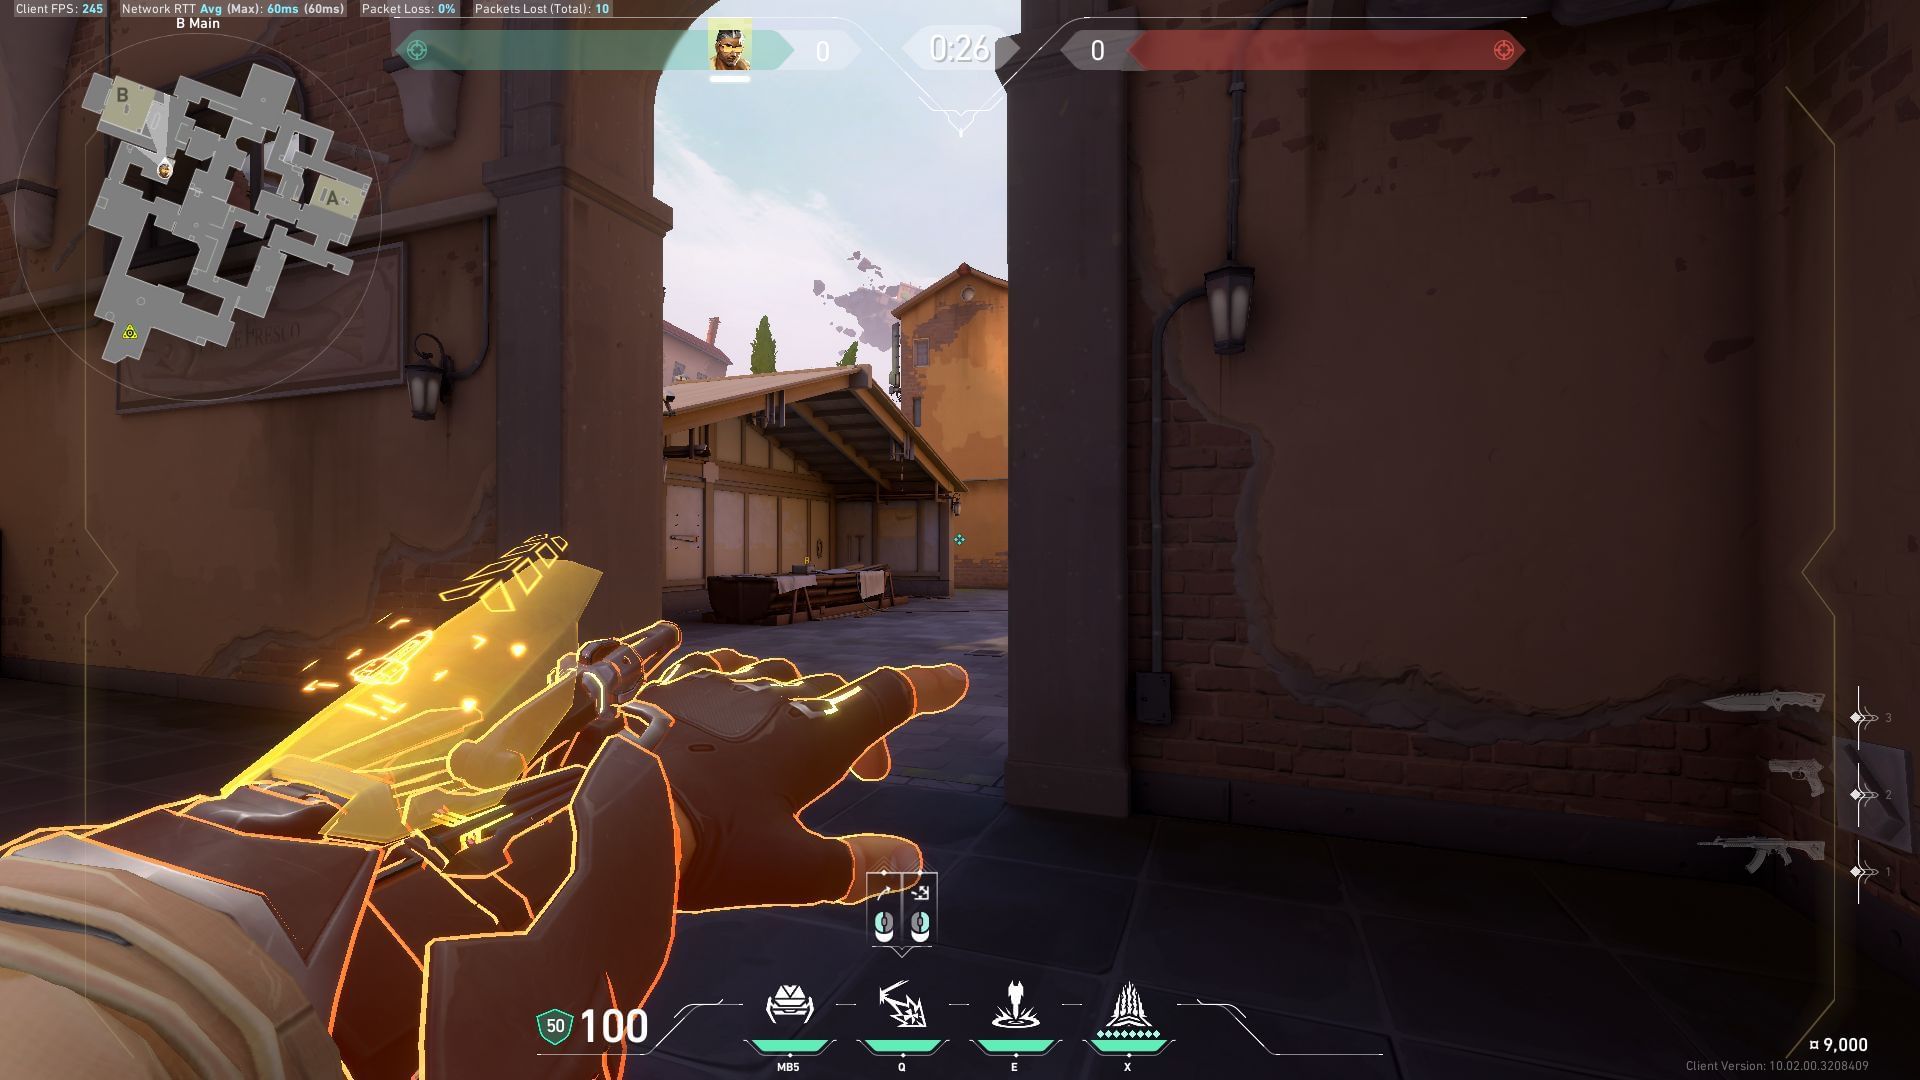
Launch the Special Delivery grenade towards the B-site to concuss enemies holding position near the B-market.
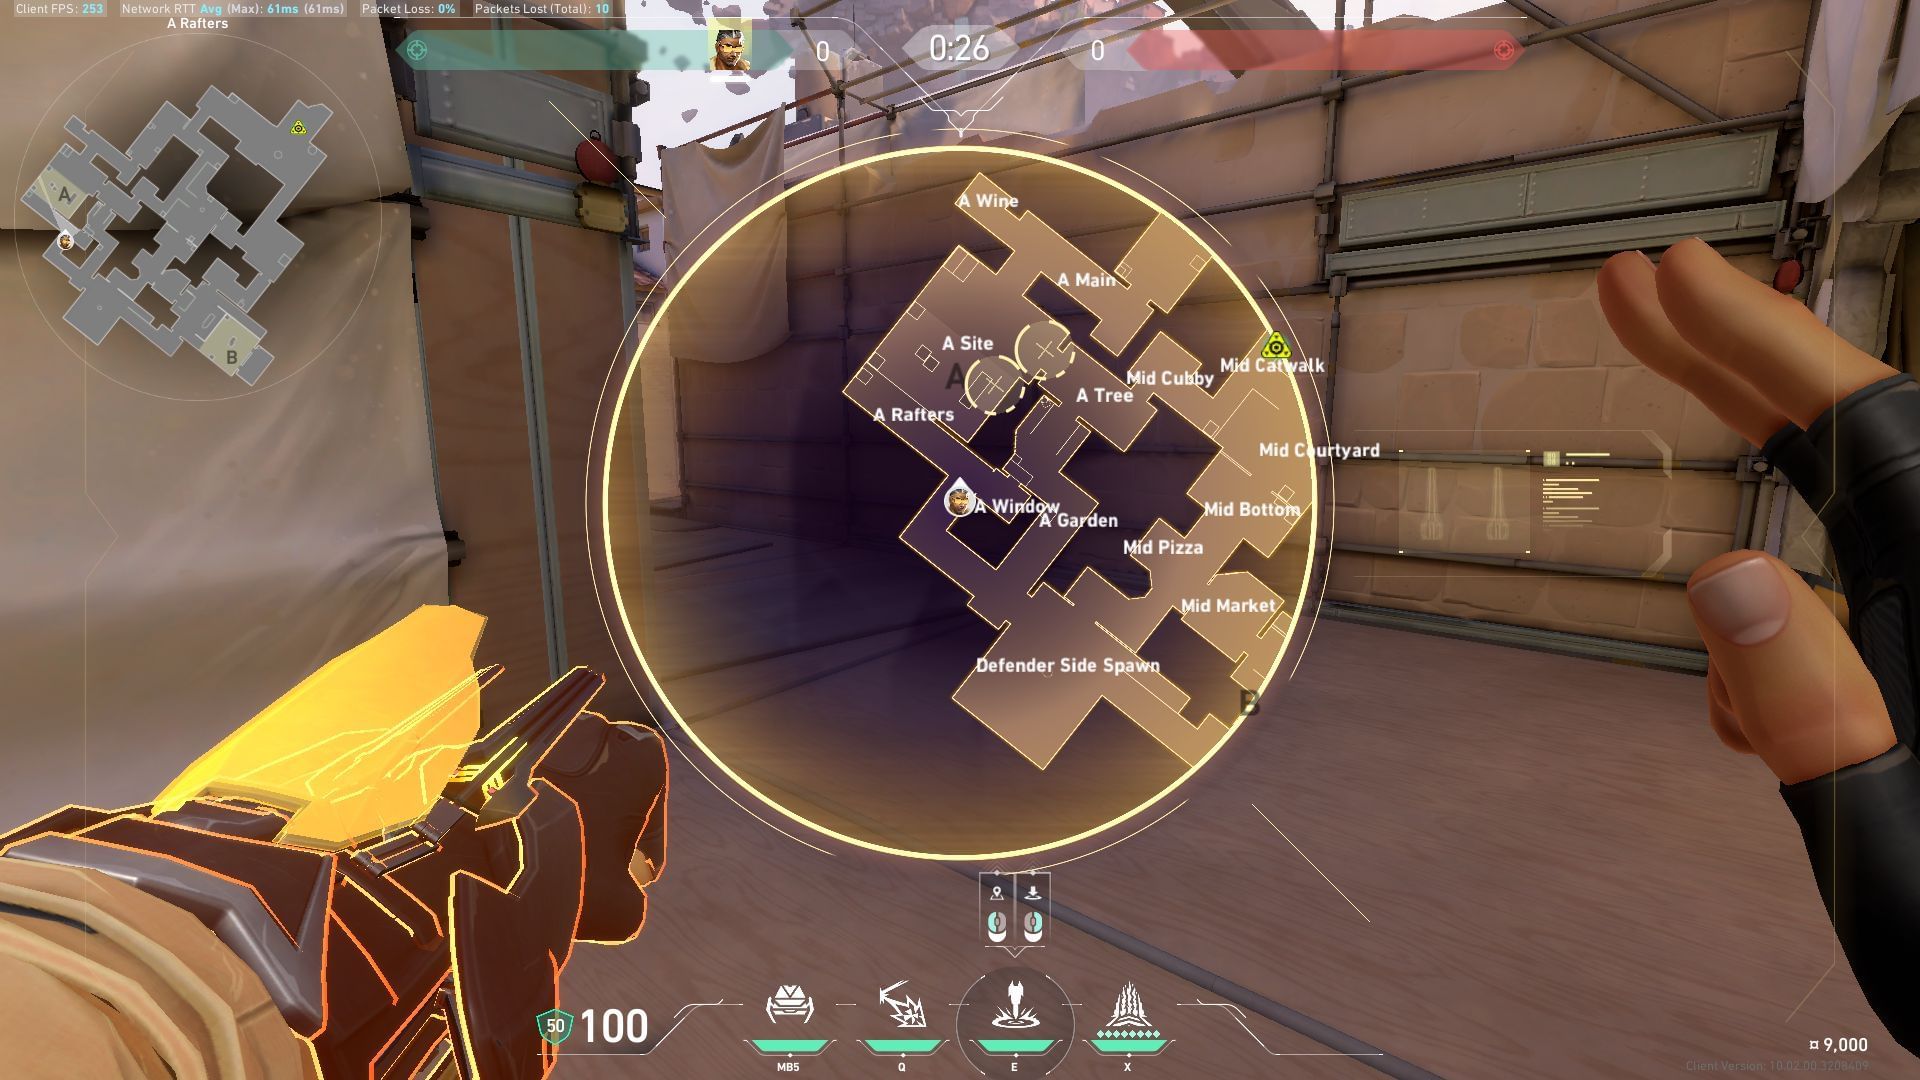
Defending A-site option 1
Launch the Special Delivery grenade towards A-main to concuss enemies pushing A-site.
Defending A-site option 2
Right-click to enable a single-bounce while launching the Special Delivery grenade to let it land at A-Main.
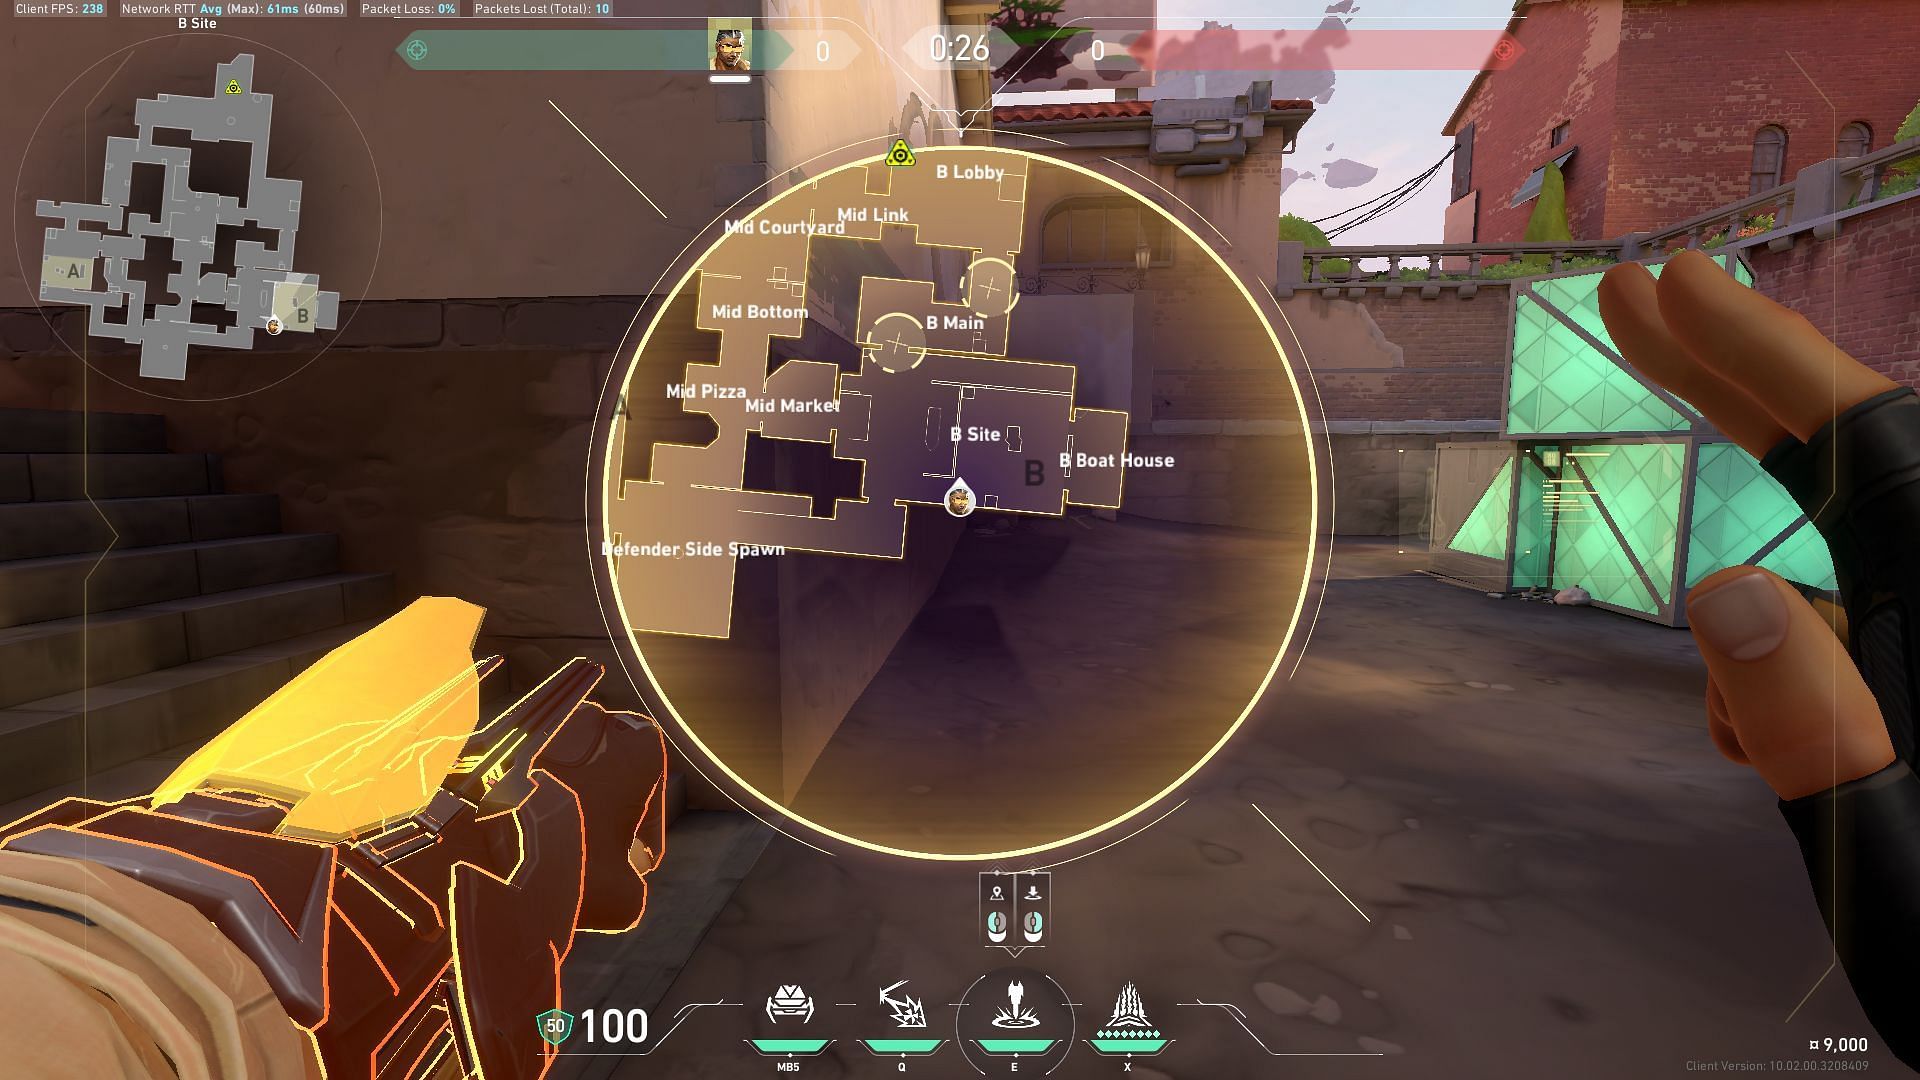
Defending B-site option 1
Launch the Special Delivery grenade on B-site entry to concuss enemies pushing the B-site.
Defending B-site option 2

Right-click to launch the Special Delivery grenade and let it bounce off the wall at B-site entry to land at B-Main.
Also read: Valorant Tejo Haven guide: Best lineups and tips
Valorant Tejo Ascent guide: How to use the Guided Salvo
The Guided Salvo signature ability allows Tejo to deploy an AR targeting system to select up to two locations on the map. Upon activation, the missiles autonomously navigate to the chosen spots and detonate upon arrival, effectively disrupting enemy positions. This ability can be efficiently used to destroy traps laid down by the enemy team.
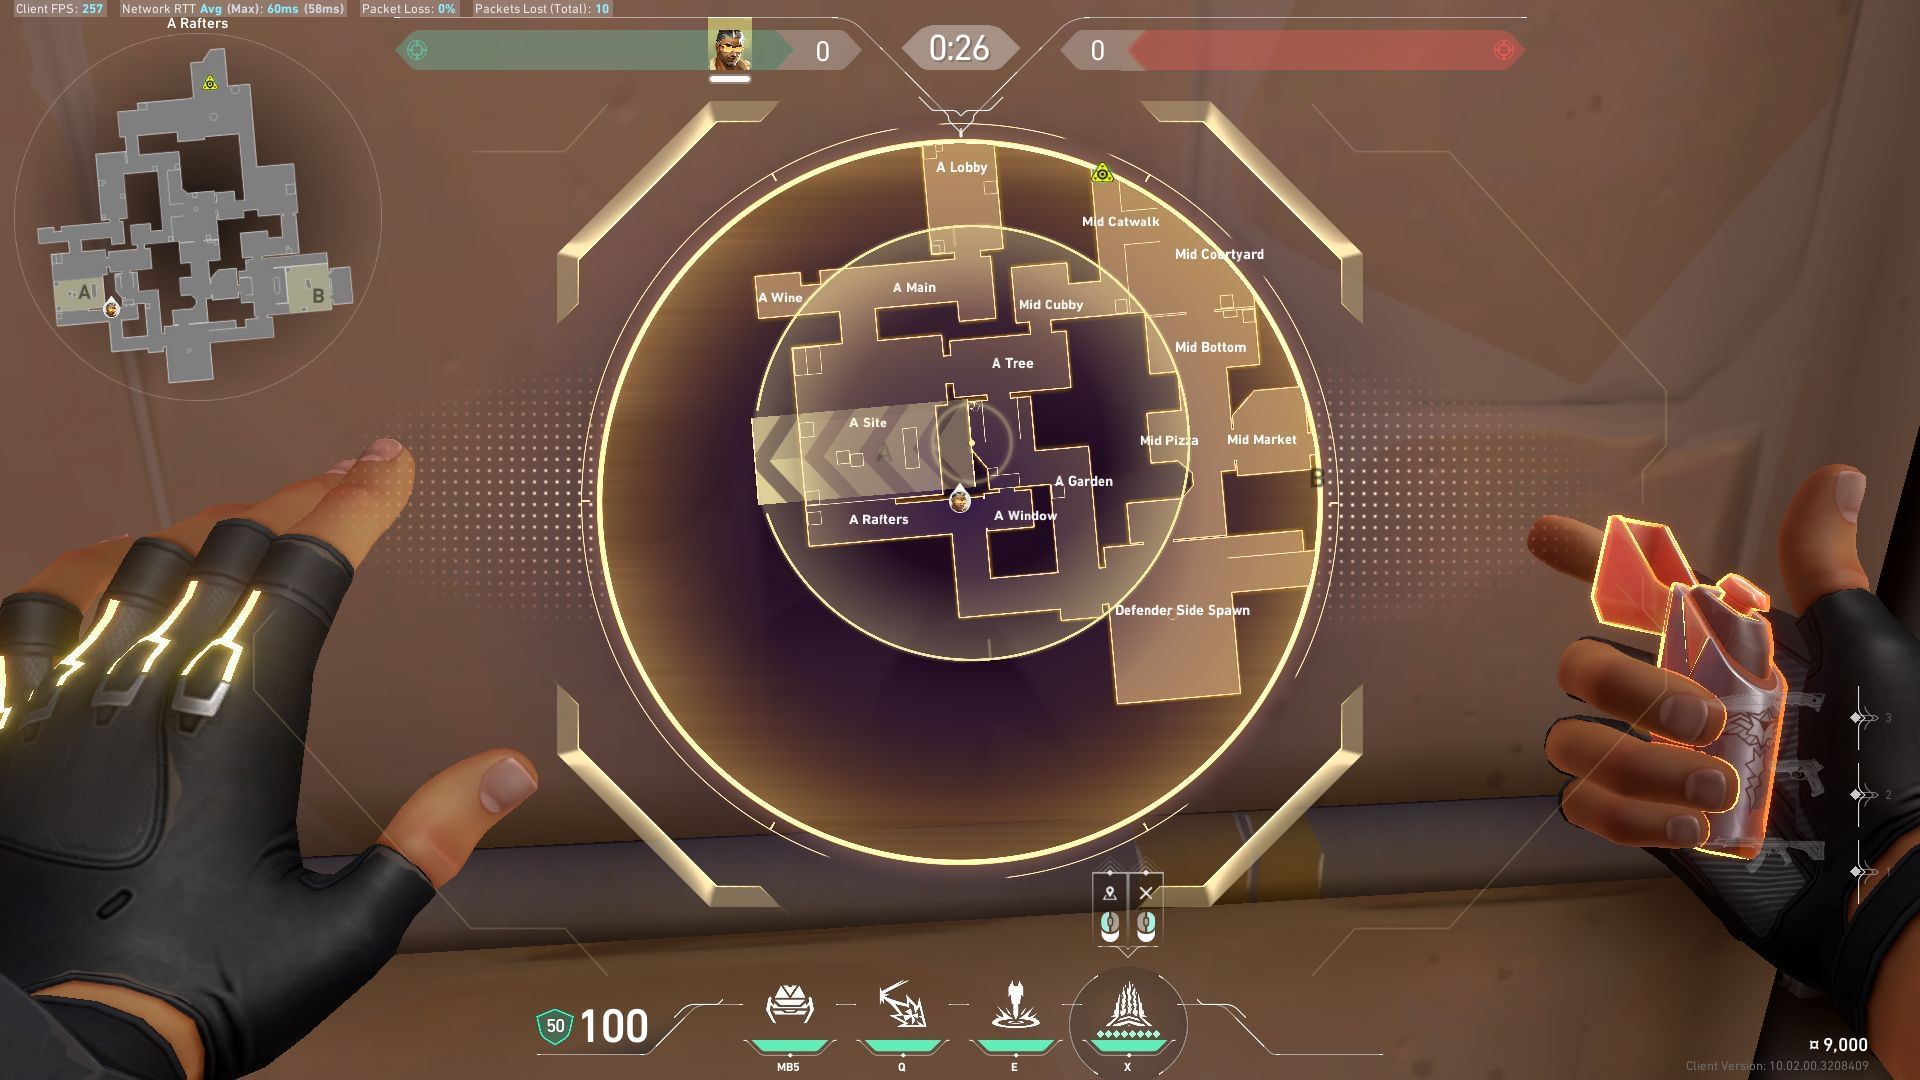
Attacking A-site option 1: A-Site entry
Deploy the missiles at the A-site entry and the boxes beside them to destroy Cypher Trapwires or Killjoy's Turret.
Attacking A-site option 2: A-Tree and A-Generator
Deploy the missiles on A-Tree and A-Generator to break the mechanical doors or throw off enemies holding position.
Attacking B-Site option 1: B-Main
Deploy the Guided Salvo missiles on both sides of B-Main to destroy traps and disrupt enemies holding positions.
Attacking B-Site option 2: B-Lane and Defender's Spawn
Launch the missiles on B-Site lane and Defender's Spawn area to destroy traps laid down by the opponent team.
Defending A-Site option 1: A-Main
Launch the missiles on A-Main to disrupt enemies pushing the A-site.
Defending A-Site option 2: A- Mechanical Door and A-Generator
Launch the Guided Salvo missiles on the A-Mechanical Door area and A-Generator to delay the enemy team's attempt to plant the spike.
Defending B-Site option 1: B-Main
Deploy the missiles on B-Main to slow down opponents pushing the B-Site.
Defending B-Site option 2: B-Default and B-Lane
Launch the missiles on B-Default and B-Lane to delay the enemy team's attempt to plant the spike.
Also read: Valorant Tejo Pearl guide: Best lineups and tips
Valorant Tejo Ascent guide: How to use the Armageddon ultimate
As Tejo's ultimate ability, Armageddon enables him to initiate a tactical strike by selecting a start and end point on the map. Once activated, a series of explosions occur along the designated path, compelling enemies to move out of the area or face significant damage. This ultimate is designed to flush out enemies and to maintain pressure and control over the battlefield in Valorant.
Attacking A-site
Launch the Armageddon ultimate during post-plant situations to delay the enemy team's attempt to defuse the spike.
Attacking B-site
Activate the Armageddon ultimate during post-plant situations to delay the opponent team's attempt to defuse the spike.
Defending A-site
If the enemy team has already taken over the site, launch the Armageddon ultimate to inflict damage while they are attempting to plant the spike. This will force them to change their positions, giving your team plenty of opportunities to take them out.
Defending B-Site
Launch the Armageddon ultimate to deal heavy damage on enemies that have taken over the site.
Also read: Valorant Tejo Fracture guide: Best lineups and tips
Stay tuned to Sportskeeda for more Valorant updates.