

'%20x='0'%20y='0'%20height='100%25'%20width='100%25'%20%0A%20%20%20%20%20%20%20%20%20%20xlink%3Ahref='data:image/jpg;base64,/9j/2wBDAAYEBQYFBAYGBQYHBwYIChAKCgkJChQODwwQFxQYGBcUFhYaHSUfGhsjHBYWICwgIyYnKSopGR8tMC0oMCUoKSj/2wBDAQcHBwoIChMKChMoGhYaKCgoKCgoKCgoKCgoKCgoKCgoKCgoKCgoKCgoKCgoKCgoKCgoKCgoKCgoKCgoKCgoKCj/wgARCAAGAAoDASIAAhEBAxEB/8QAFQABAQAAAAAAAAAAAAAAAAAAAAb/xAAVAQEBAAAAAAAAAAAAAAAAAAAEBf/aAAwDAQACEAMQAAAAnbwrm//EACAQAAAFBAMBAAAAAAAAAAAAAAECAwQRAAYSEwUUIpL/2gAIAQEAAT8AQ51wrxg9dowTUMc+qUcg8iMgaabXTavXS3W452YBli6CJ+a//8QAFREBAQAAAAAAAAAAAAAAAAAAAEH/2gAIAQIBAT8Aj//EABURAQEAAAAAAAAAAAAAAAAAAAAB/9oACAEDAQE/AK//2Q=='%3E%3C/image%3E%3C/svg%3E)
Our Valorant Tejo Icebox guide aims to provide players with the most effective tactics and lineups for use in the game. Tejo is an effective Initiator choice for Valorant's Icebox map. He can quickly gather intelligence and inflict damage, thanks to the map's standard design, which includes mechanical elements used for traveling from one location to another. To maximize his abilities on this map, one has to first understand them and then tactically apply them to win.
This article covers in-depth strategies for playing Tejo effectively on the Icebox map in Valorant.

Valorant Tejo Icebox guide: How to use Stealth Drone
Tejo deploys a Stealth Drone that he can control and navigate in the game. The drone is best suited for checking corners of a particular site, gathering intel on opponent positions, and detecting enemies. It fires a single pulse that suppresses as well as reveals enemies within its range.
Tejo is vulnerable to external attacks while using the Stealth Drone, thus, make sure to deploy it from a safe space.
Also read: Valorant: How to master Tejo.
Stealth Drone attacking route
Launch the Stealth Drone toward the locations highlighted on the map to detect and suppress enemies.
Stealth Drone defending route
Launch the Stealth Drone towards the areas as marked on the map to suppress and detect enemies pushing the site.
Valorant Tejo Icebox guide: How to use Special Delivery
The Special Delivery is a concussion grenade useful for disorienting enemies in sight or hiding in cheeky corners of the Icebox map in Valorant. By pressing ALT FIRE, you can allow the grenade to bounce off a surface and hit the targeted spot.
Also read: Valorant: Tejo Pearl guide.
Attacking A-site option 1
Right-click to launch the Special Delivery grenade to let it bounce off the wall and land on A-Pipes.
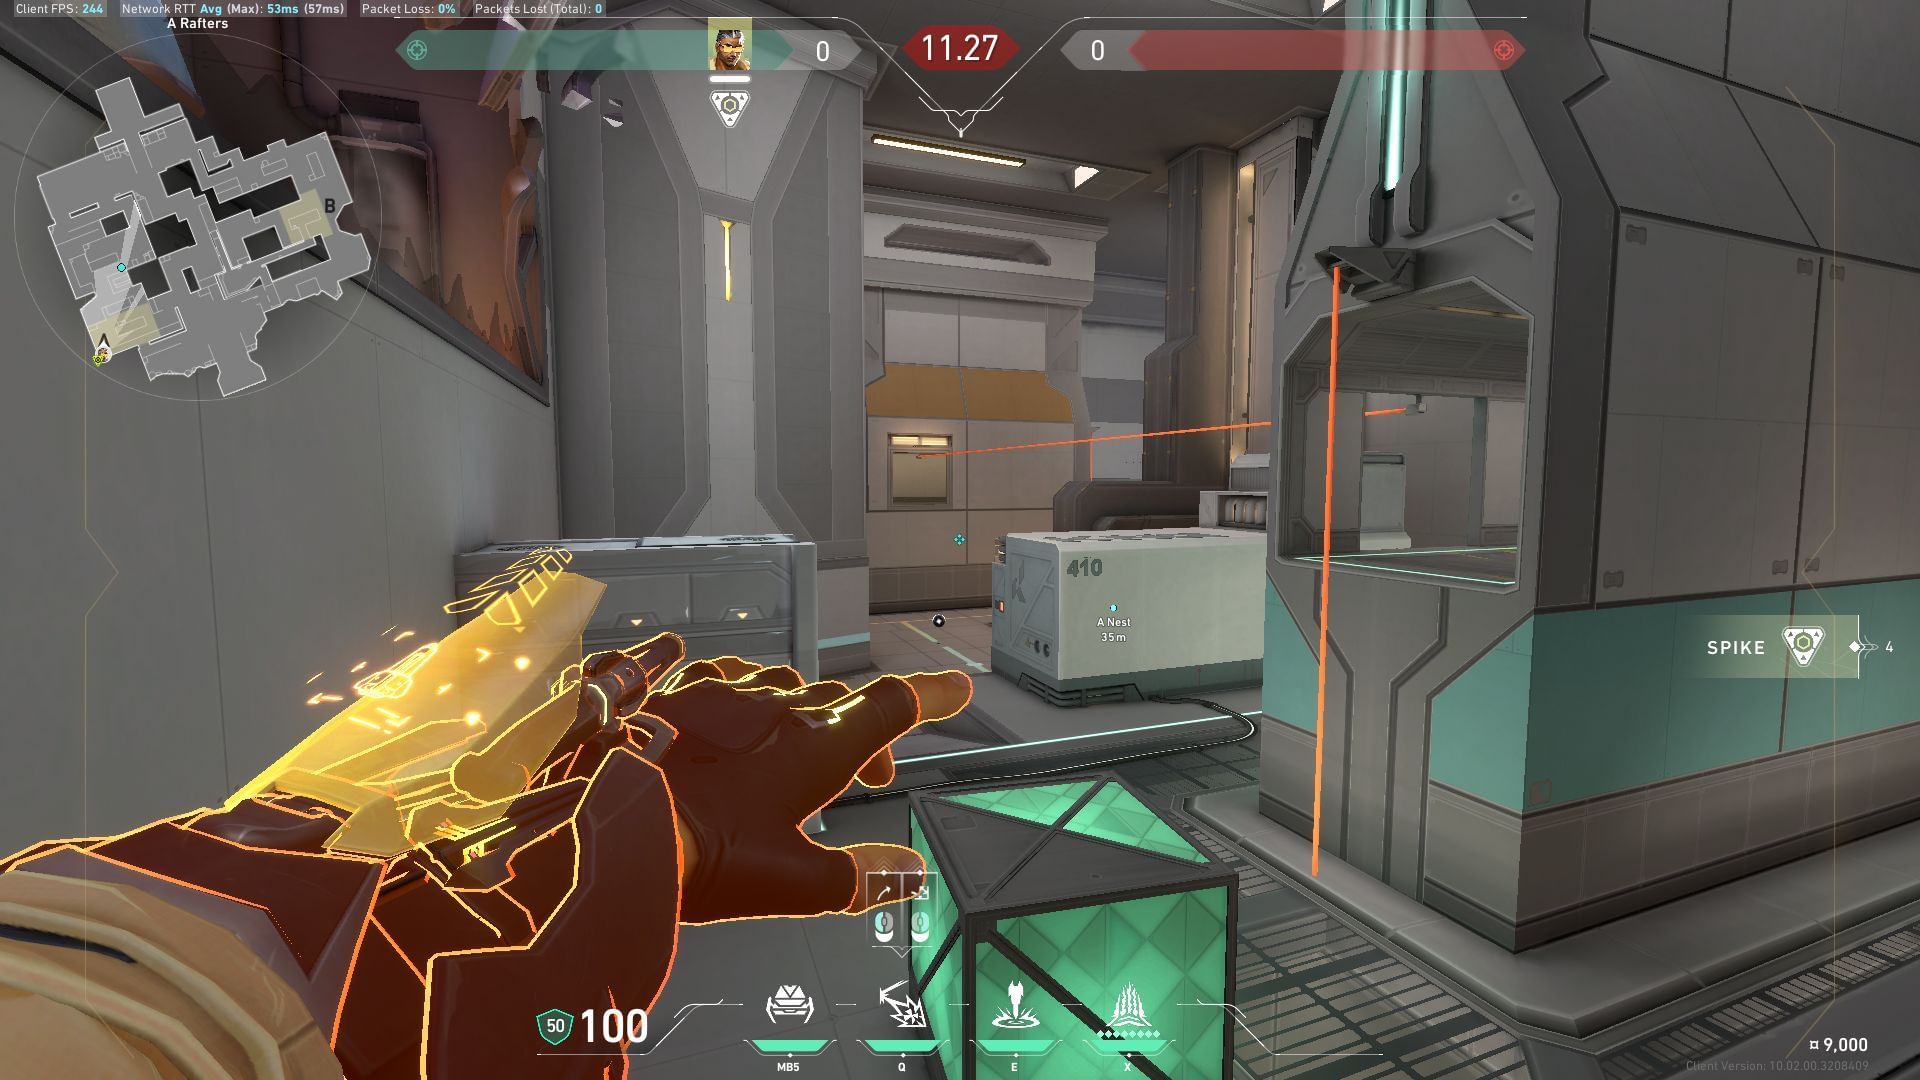
Attacking A-site option 2
Launch the grenade towards A-Rafters to concuss enemies holding that position.
Attacking B-site option 1
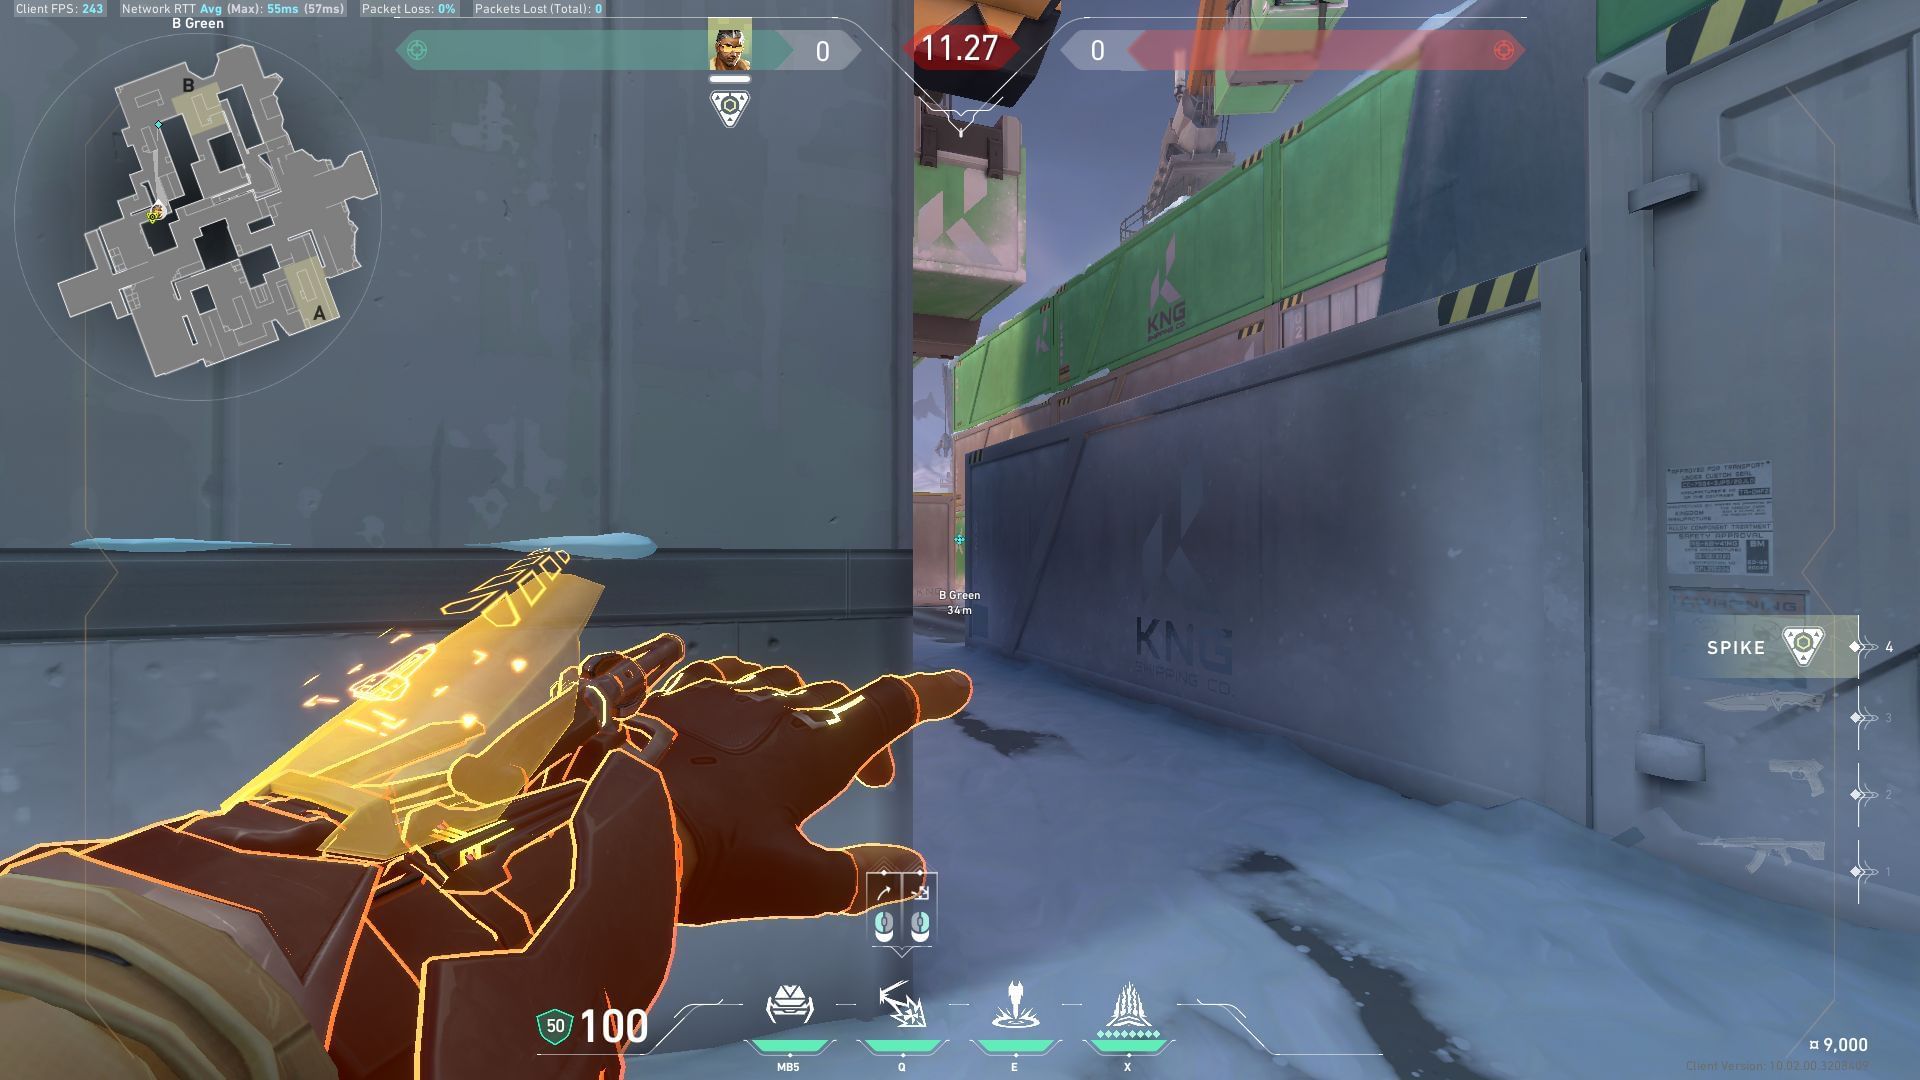
Launch the grenade towards B-Green to concuss enemies hiding behind the containers.
Attacking B-site option 2
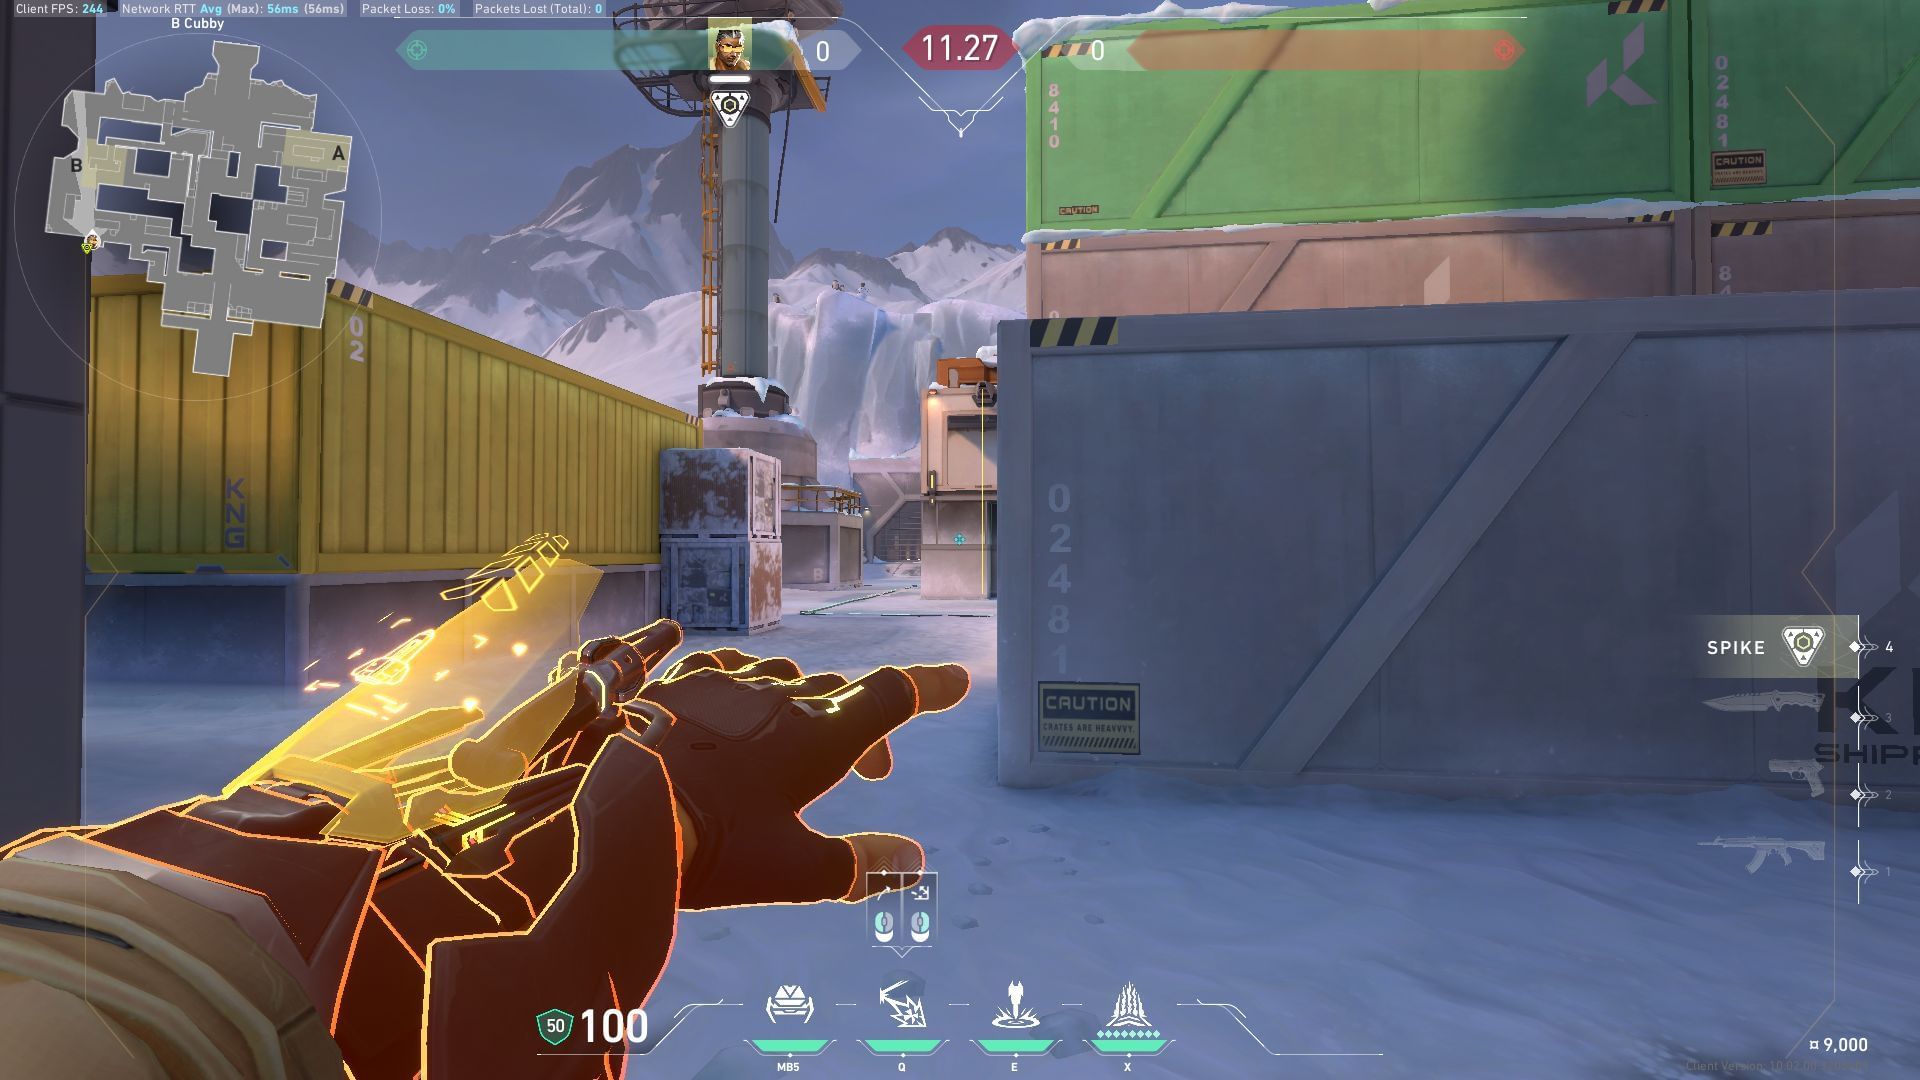
Launch the grenade towards the B-site to concuss enemies holding position at B-Ascender.
Defending A-site option 1
Launch the Special Delivery grenade towards A-Nest to concuss enemies pushing towards the A-Site.
Defending A-site option 2
Launch the Special Delivery grenade towards the default spot at A-Site to delay the enemies’ attempt to plant the spike.
Defending B-site option 1

Launch the grenade towards B-Green to disorient enemies pushing B-site.
Defending B-site option 2
Right-click to enable the single-bounce launch of the Special Delivery grenade and let it land behind the yellow container at B-site.
Valorant Tejo Icebox guide: How to use Guided Salvo
Tejo's Guided Salvo ability allows him to target up to two locations on the map and deploy autonomous missiles that detonate with multiple explosive pulses. This effectively clears out enemies hiding in tricky spots or forces them out of position. Additionally, Guided Salvo is ideal for destroying trap setups laid down by the opposite team.
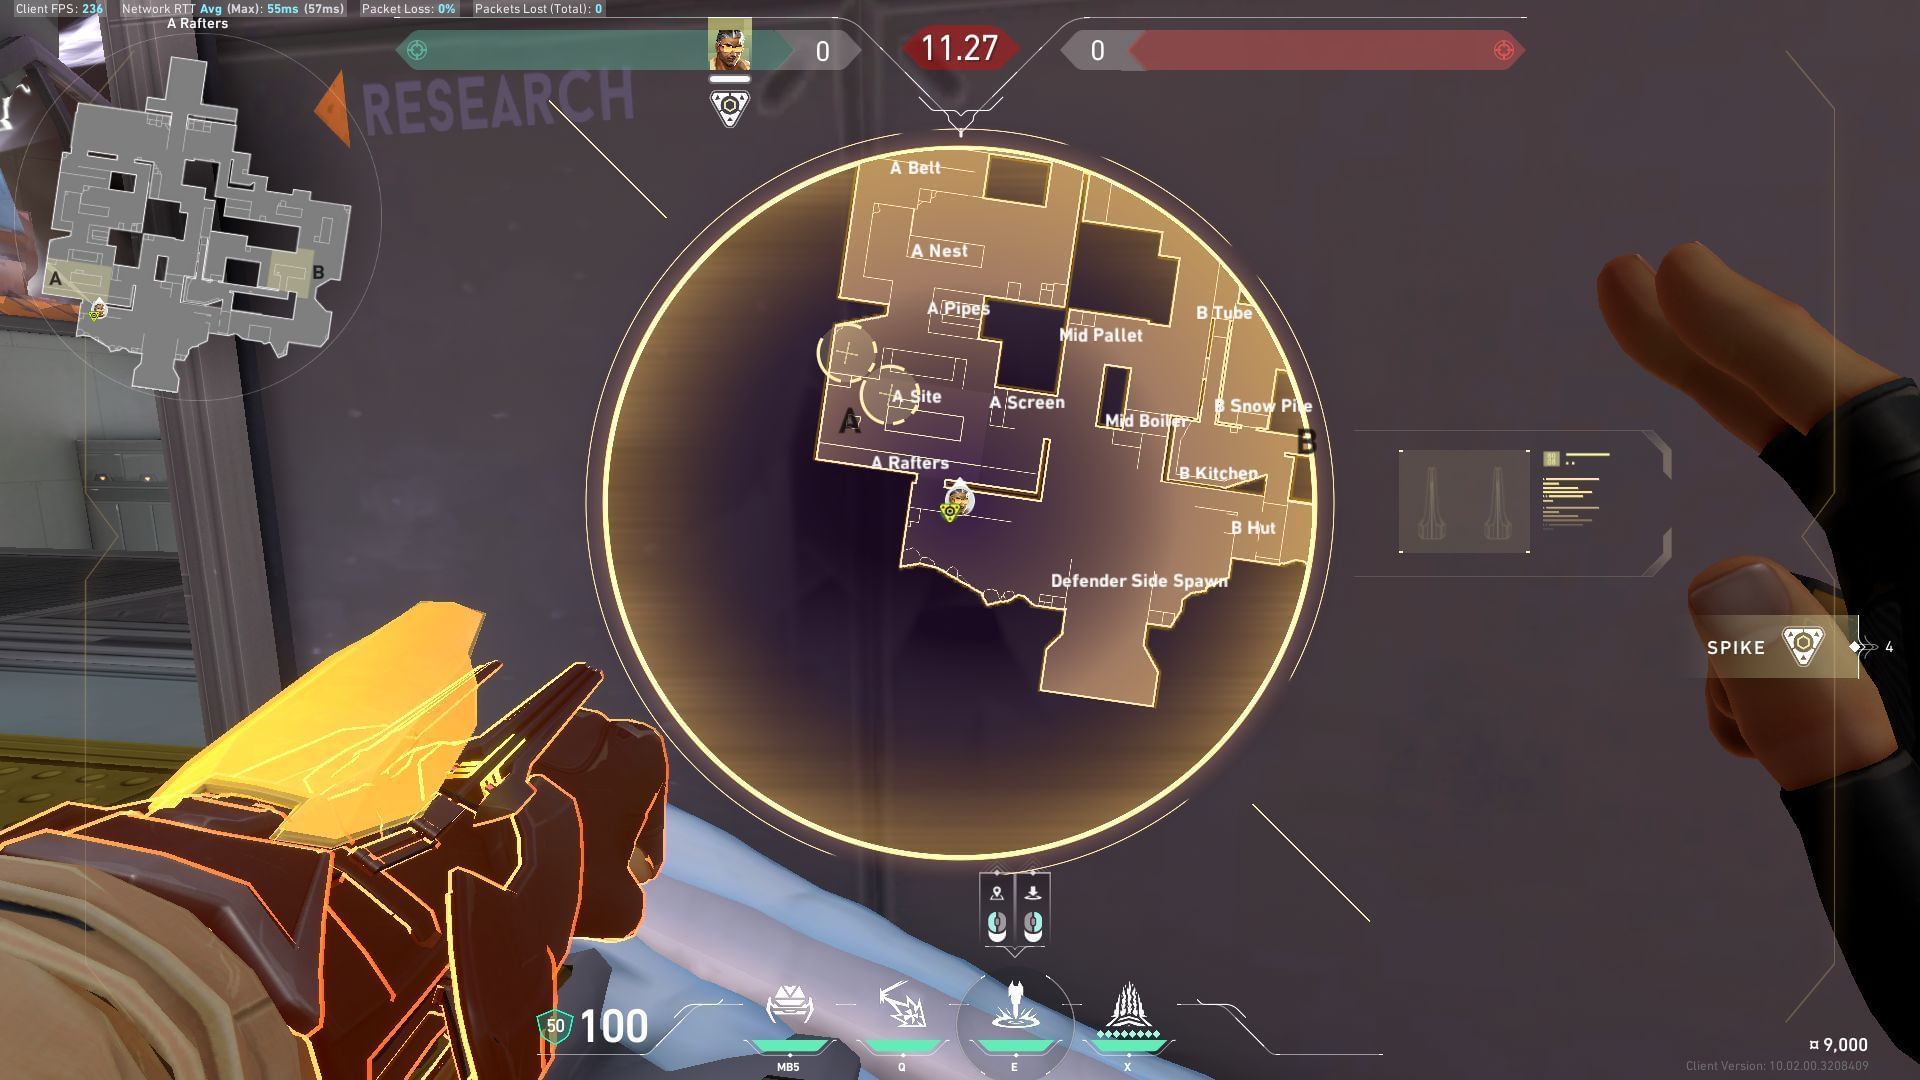
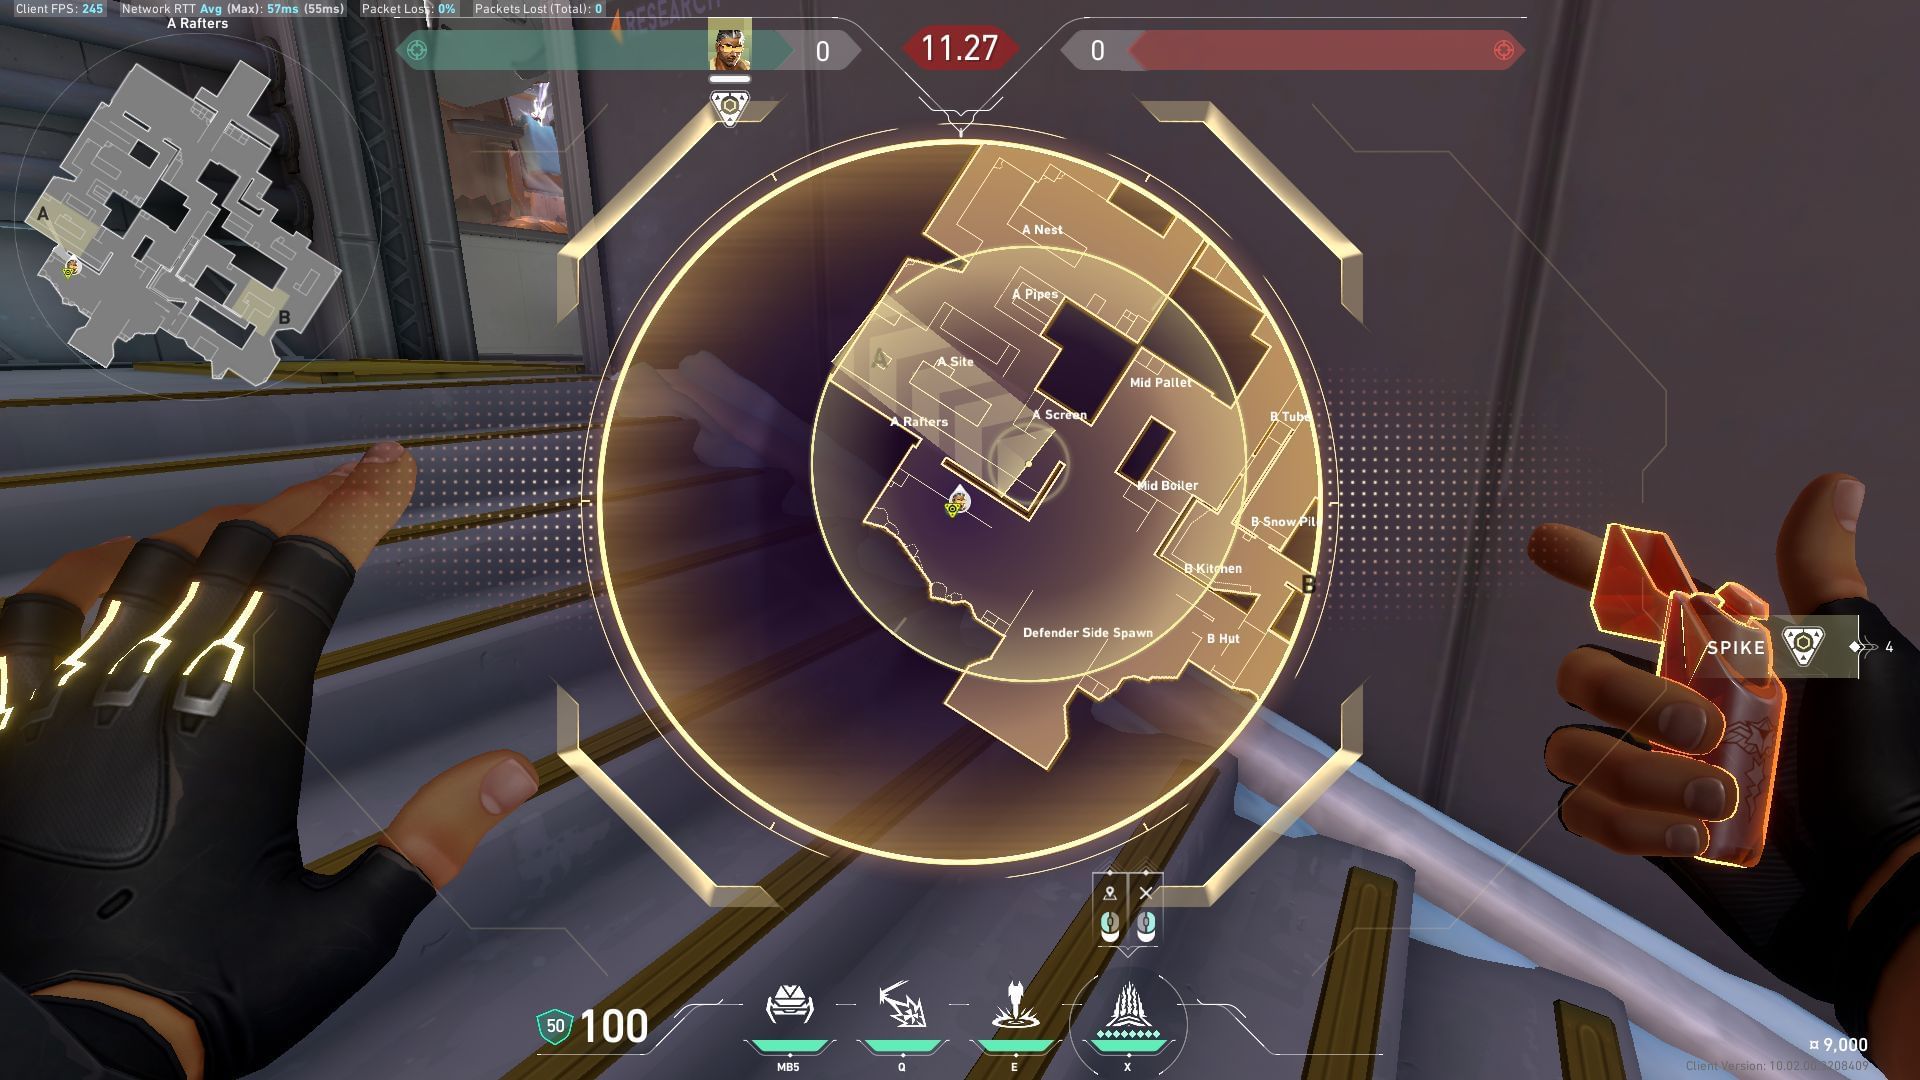
Attacking A-site option 1: A-Ascender and A-Rafters
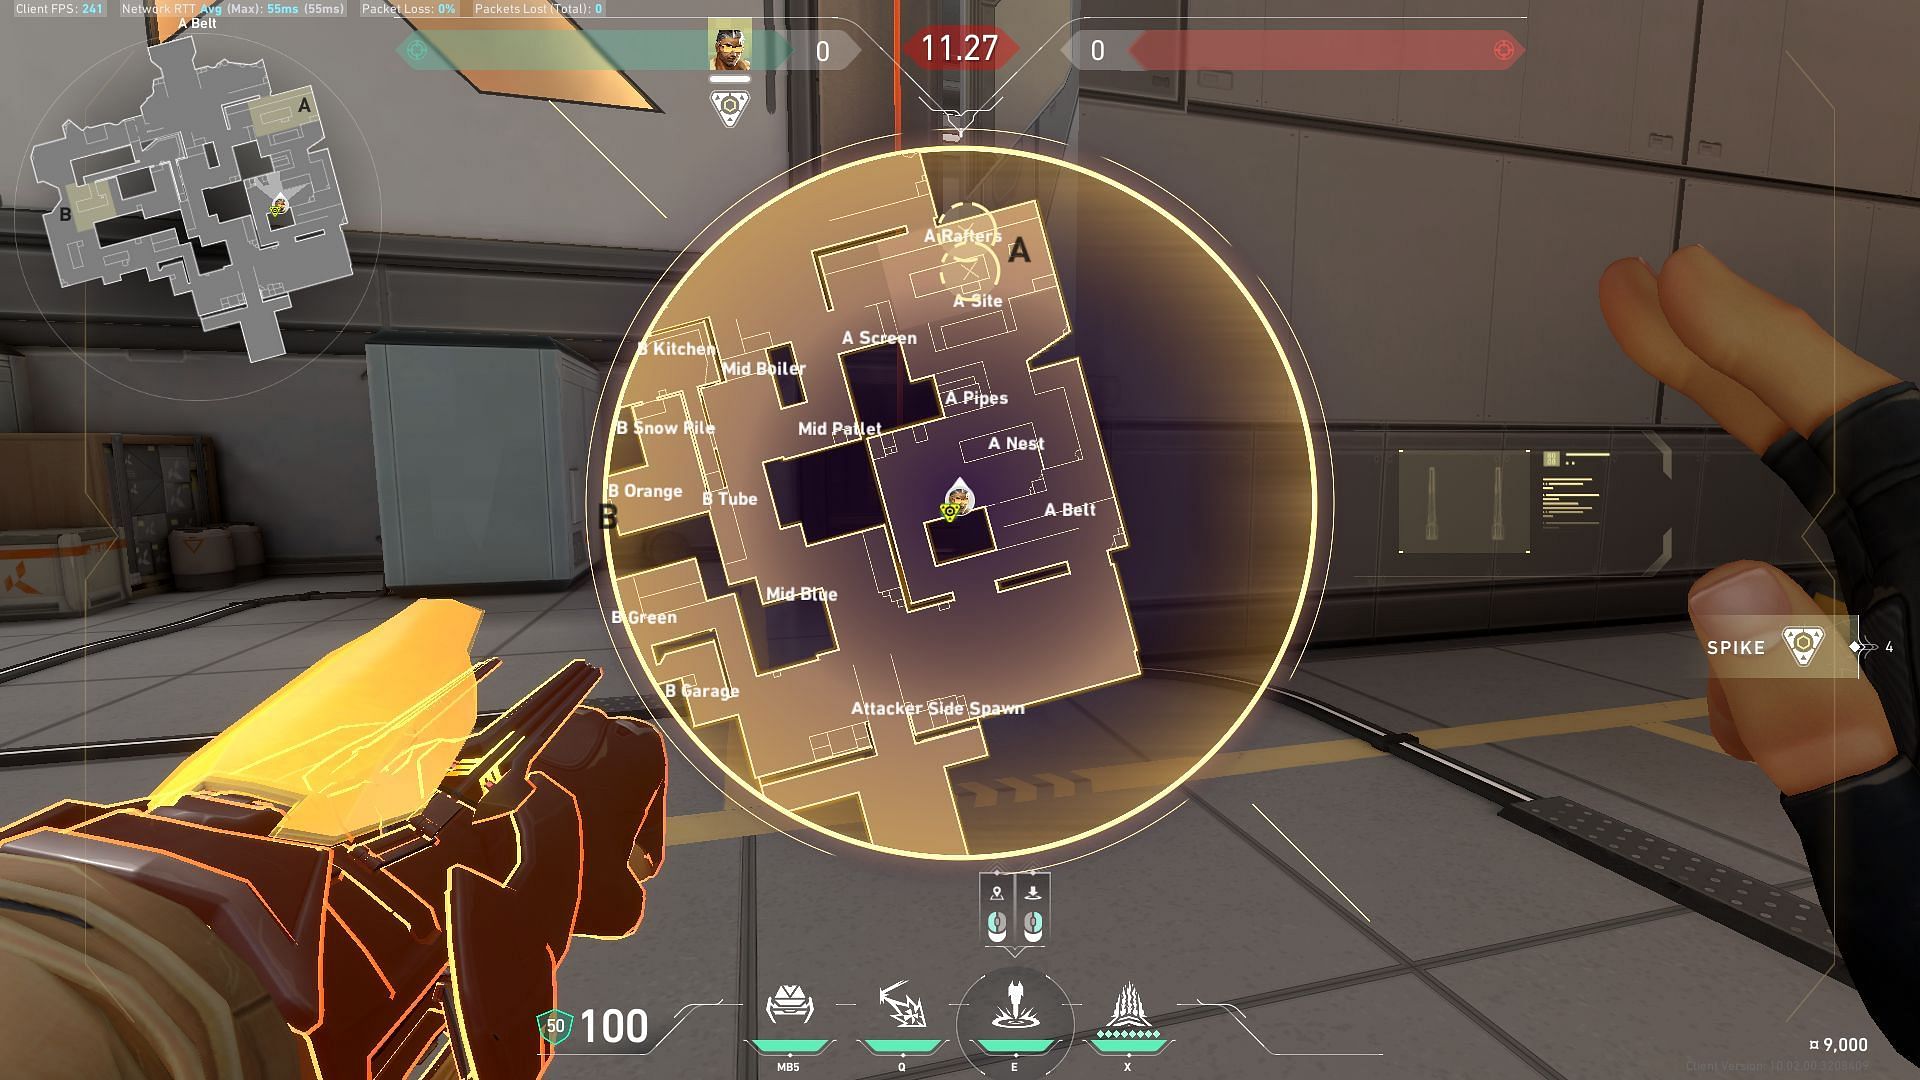
Launch the Guided Salvo missiles at the locations marked on the image to throw enemies off their positions.
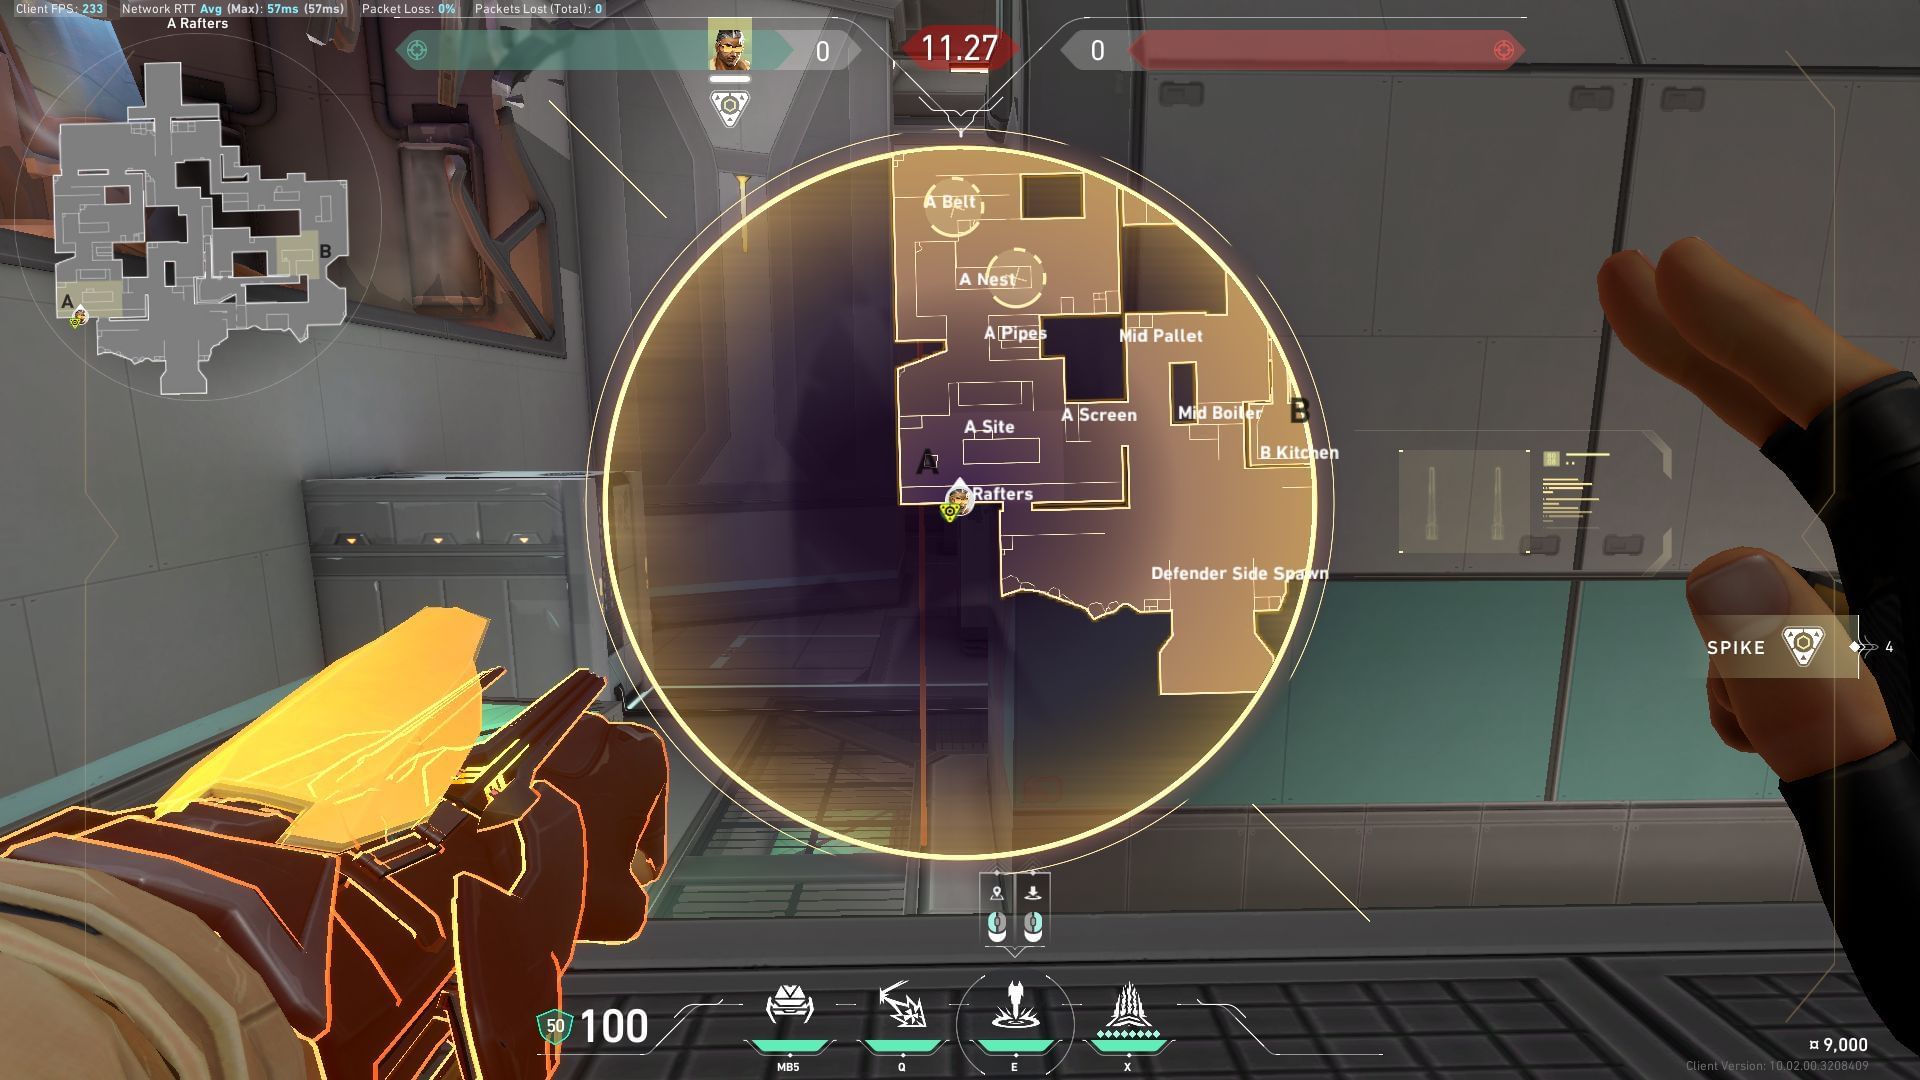
Attacking A-site option 2: A-site and A - Pipes
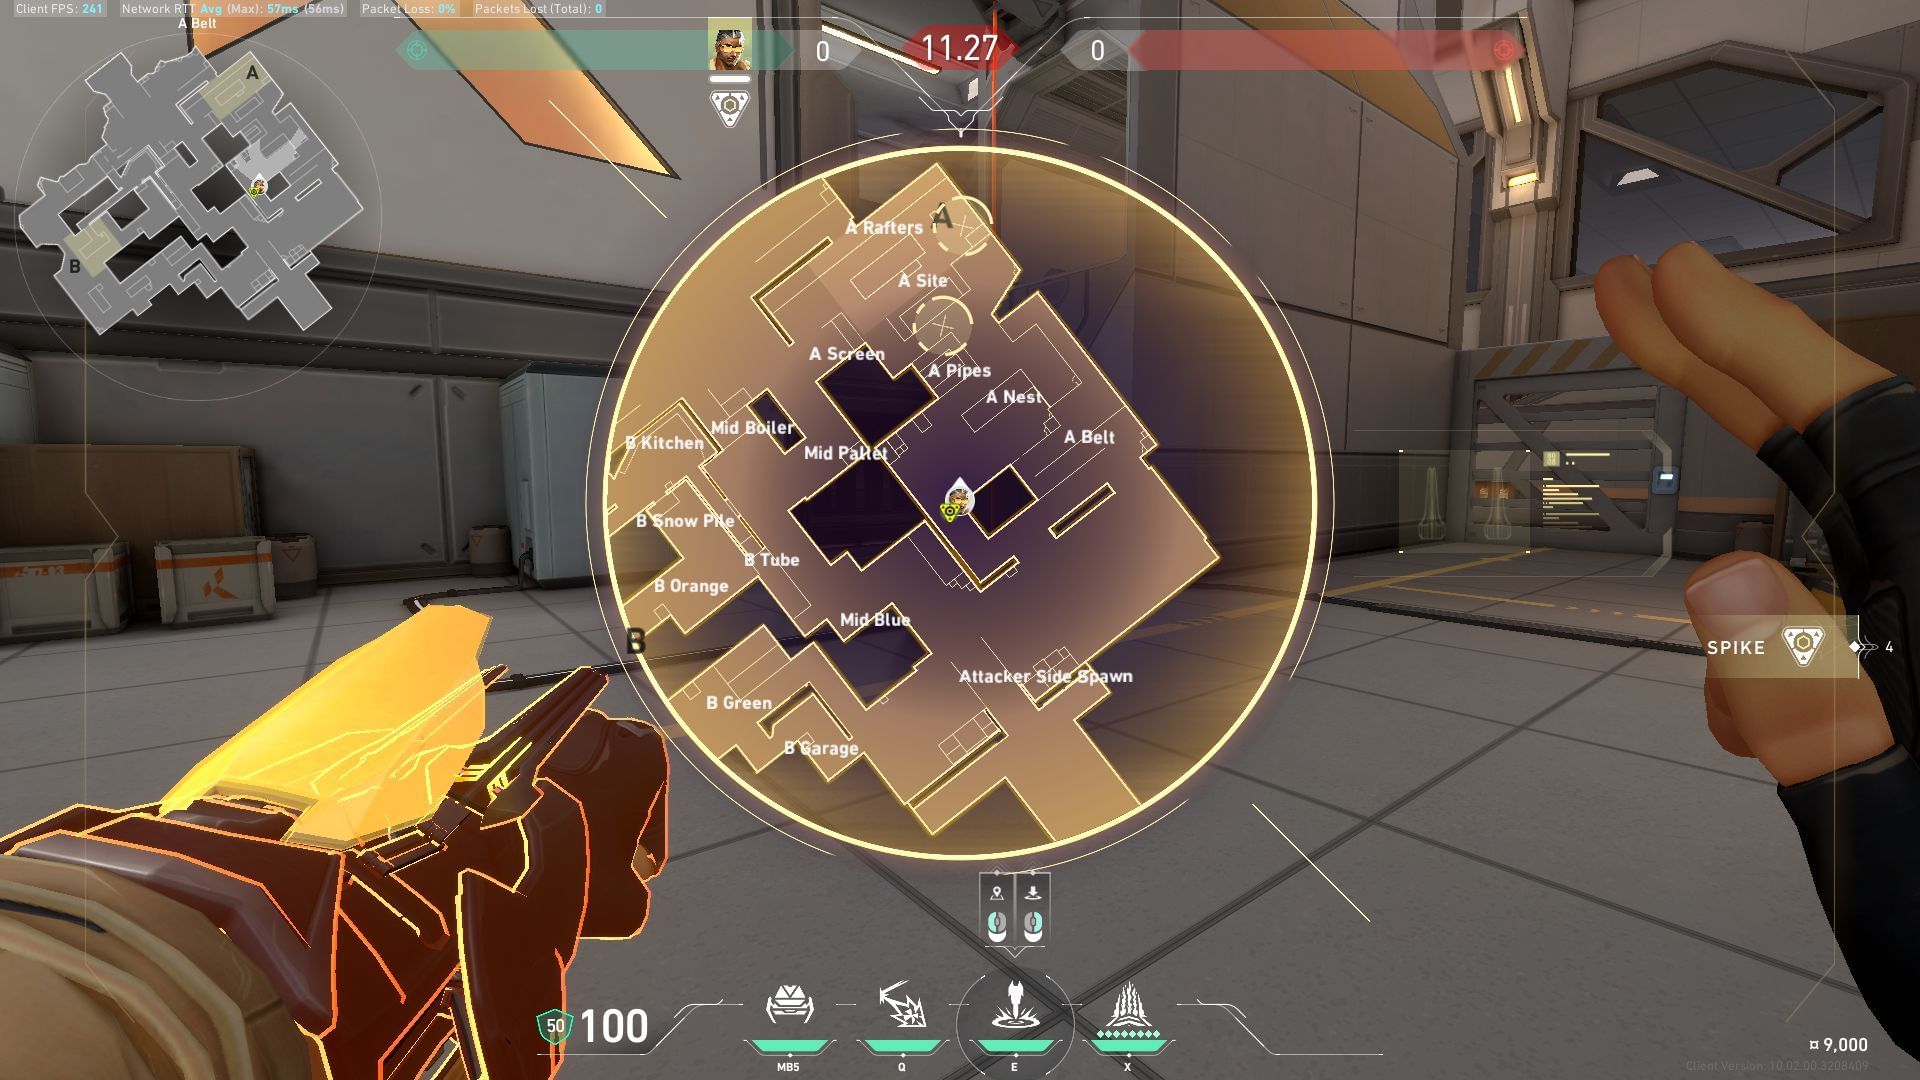
Launch the missiles on the marked locations as shown in the picture to destroy trap setups laid down by the enemy.
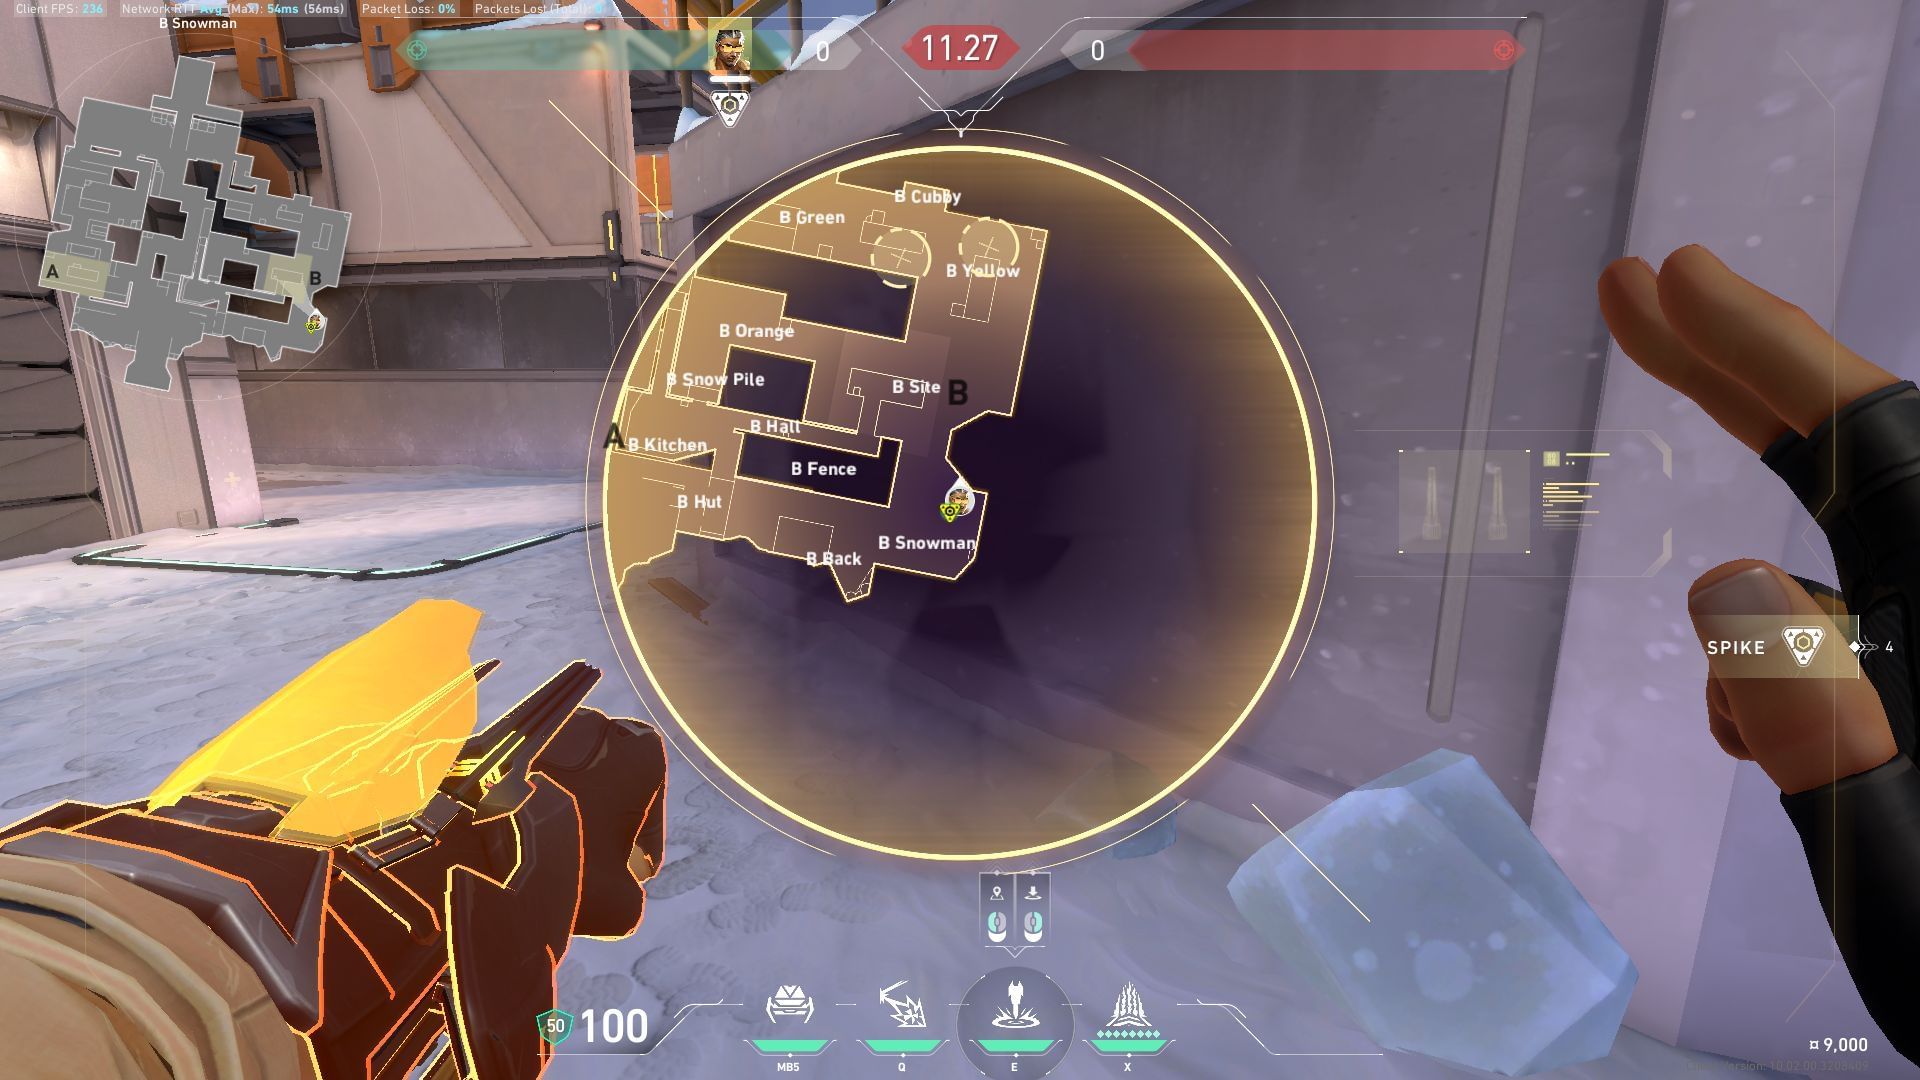
Attacking B-site option 1: B-Yellow and B-Site
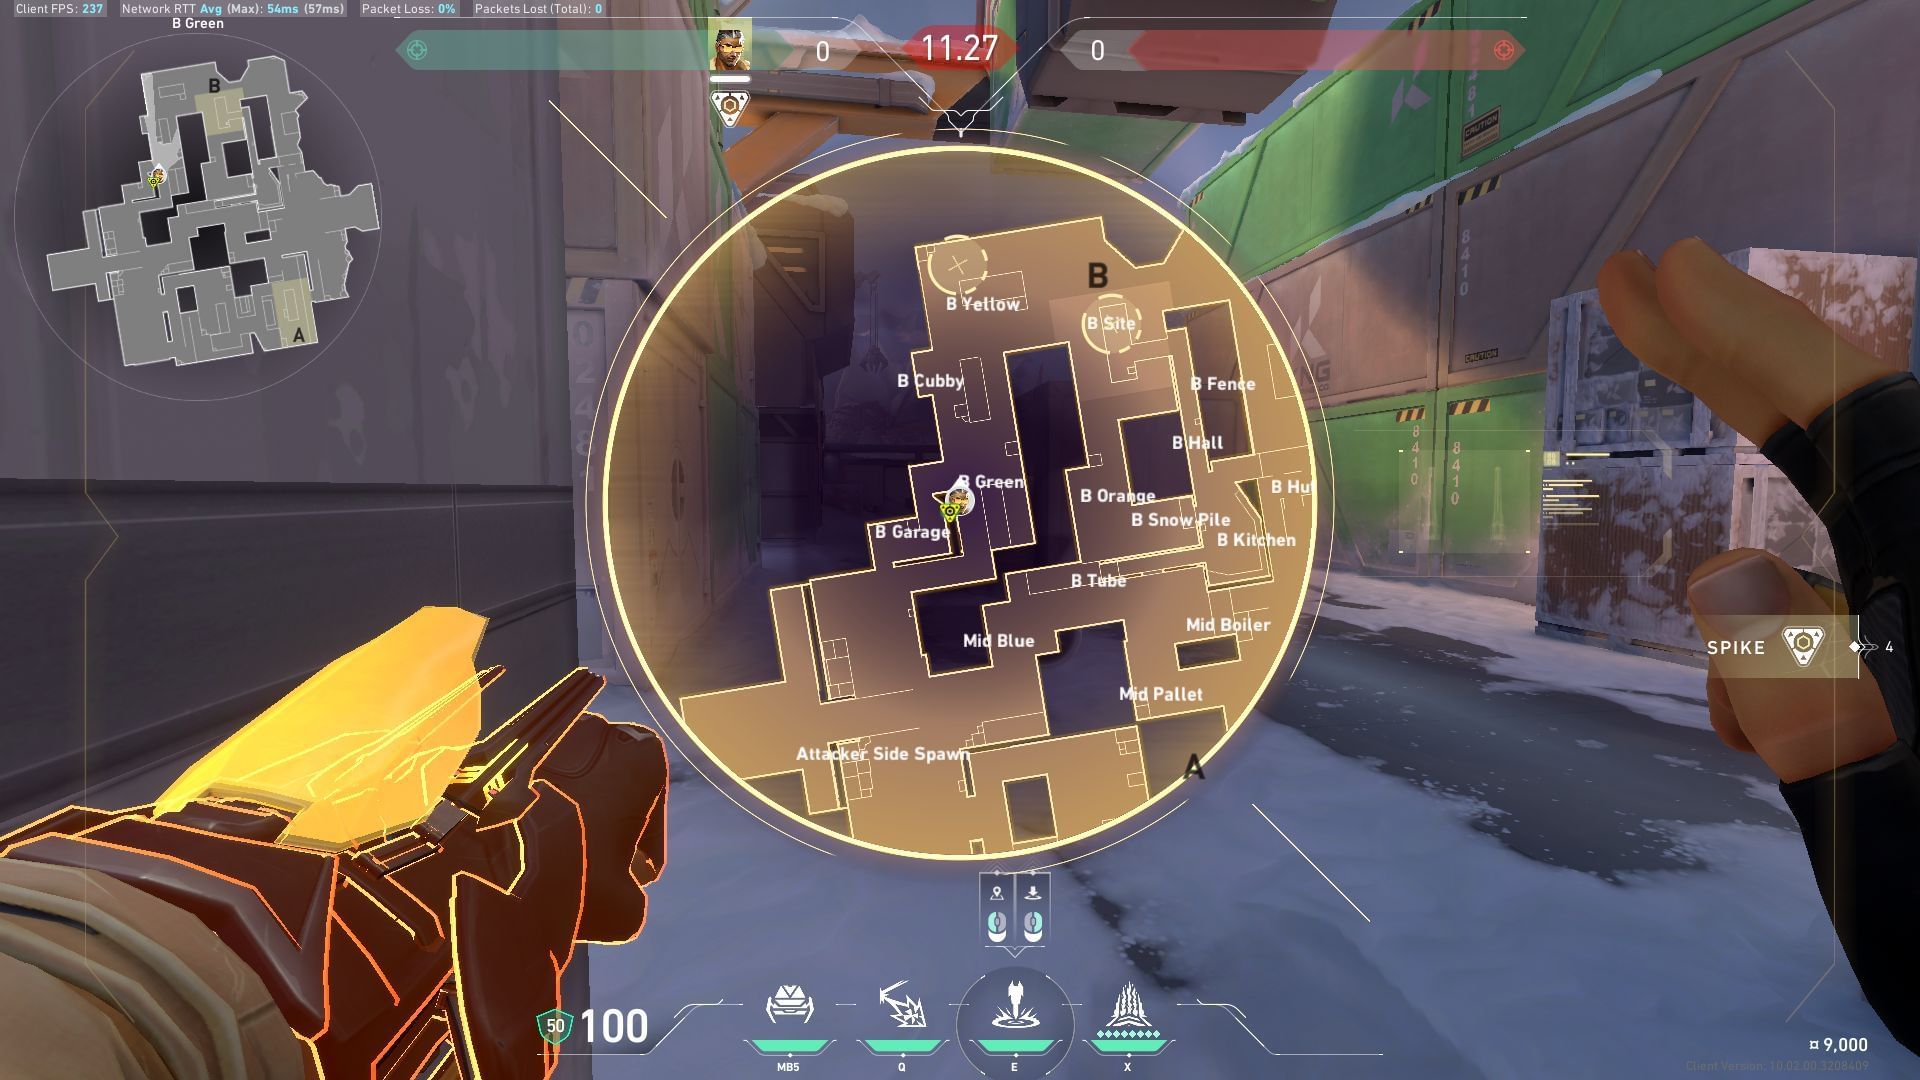
Deploy the Guided Salvo missiles on B-Yellow and B-Site to throw off enemies peeking with an Operator rifle or to destroy trap setups.
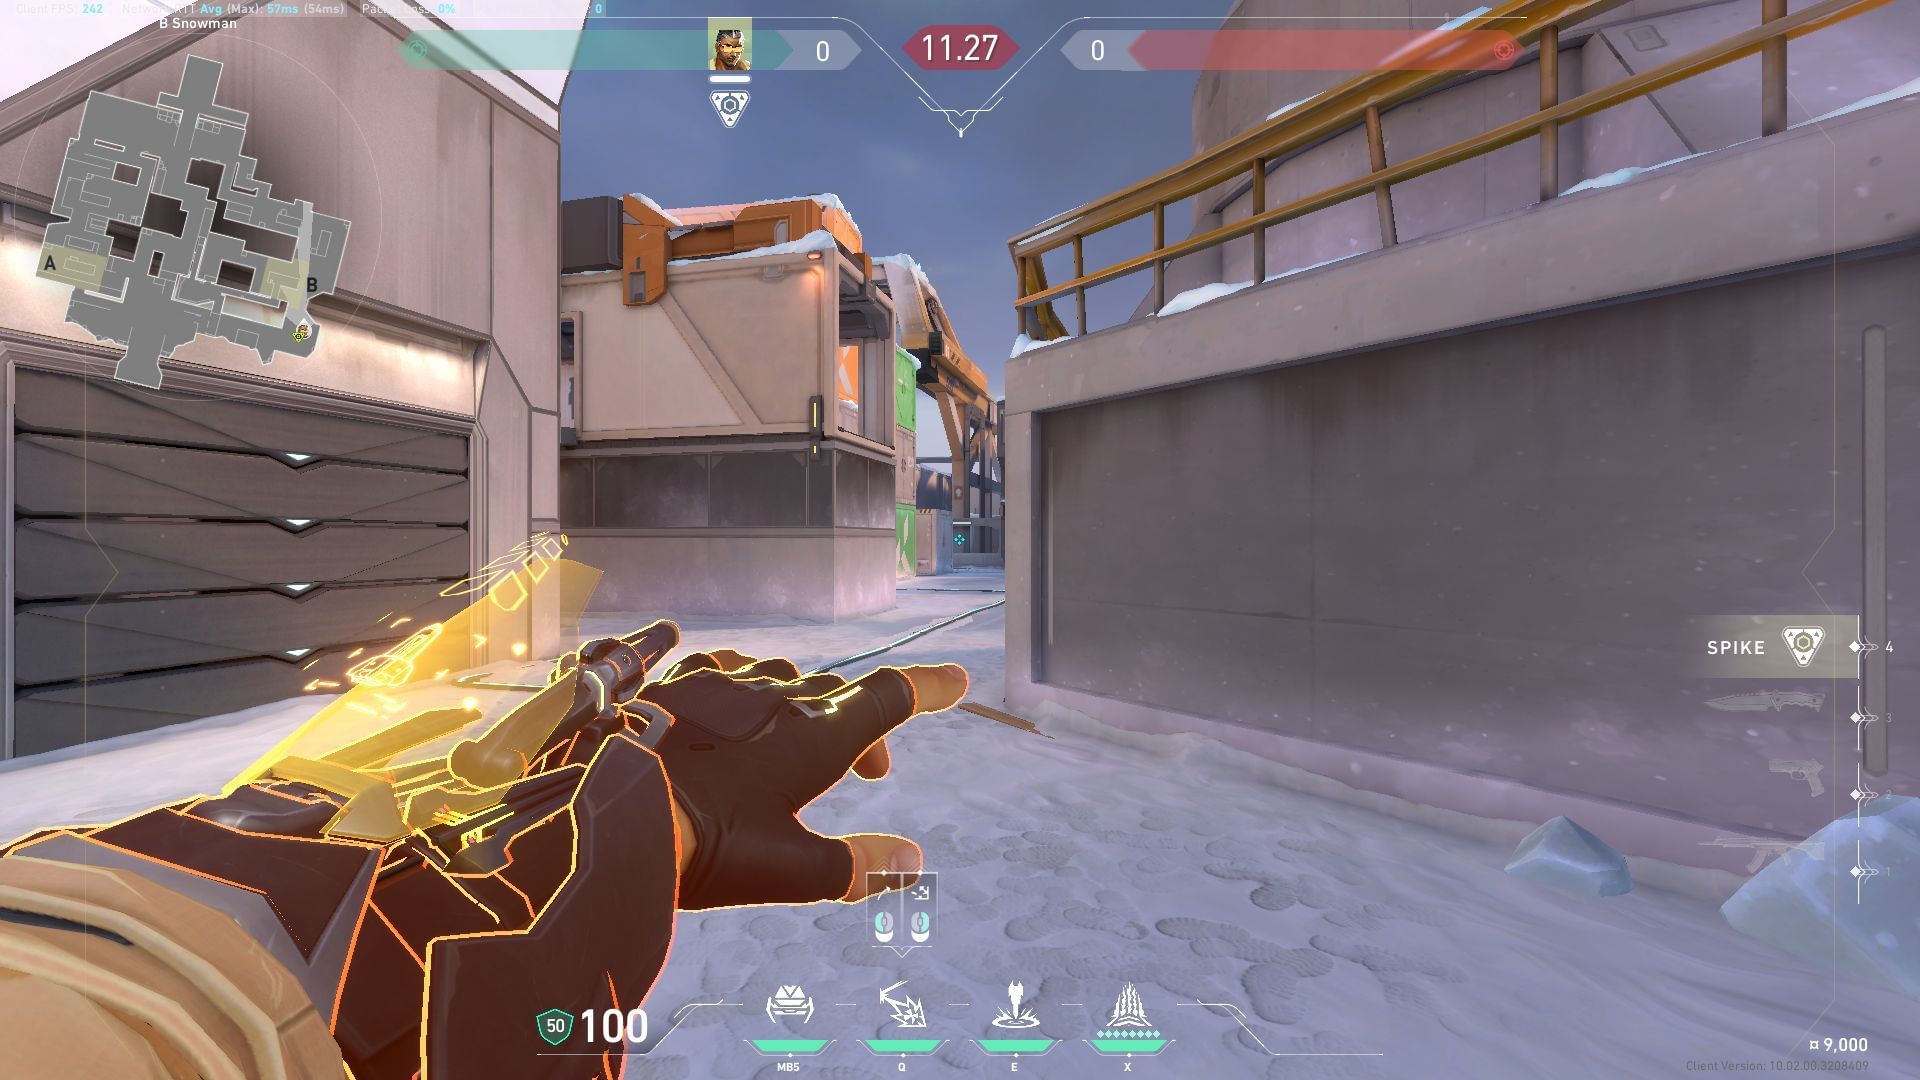
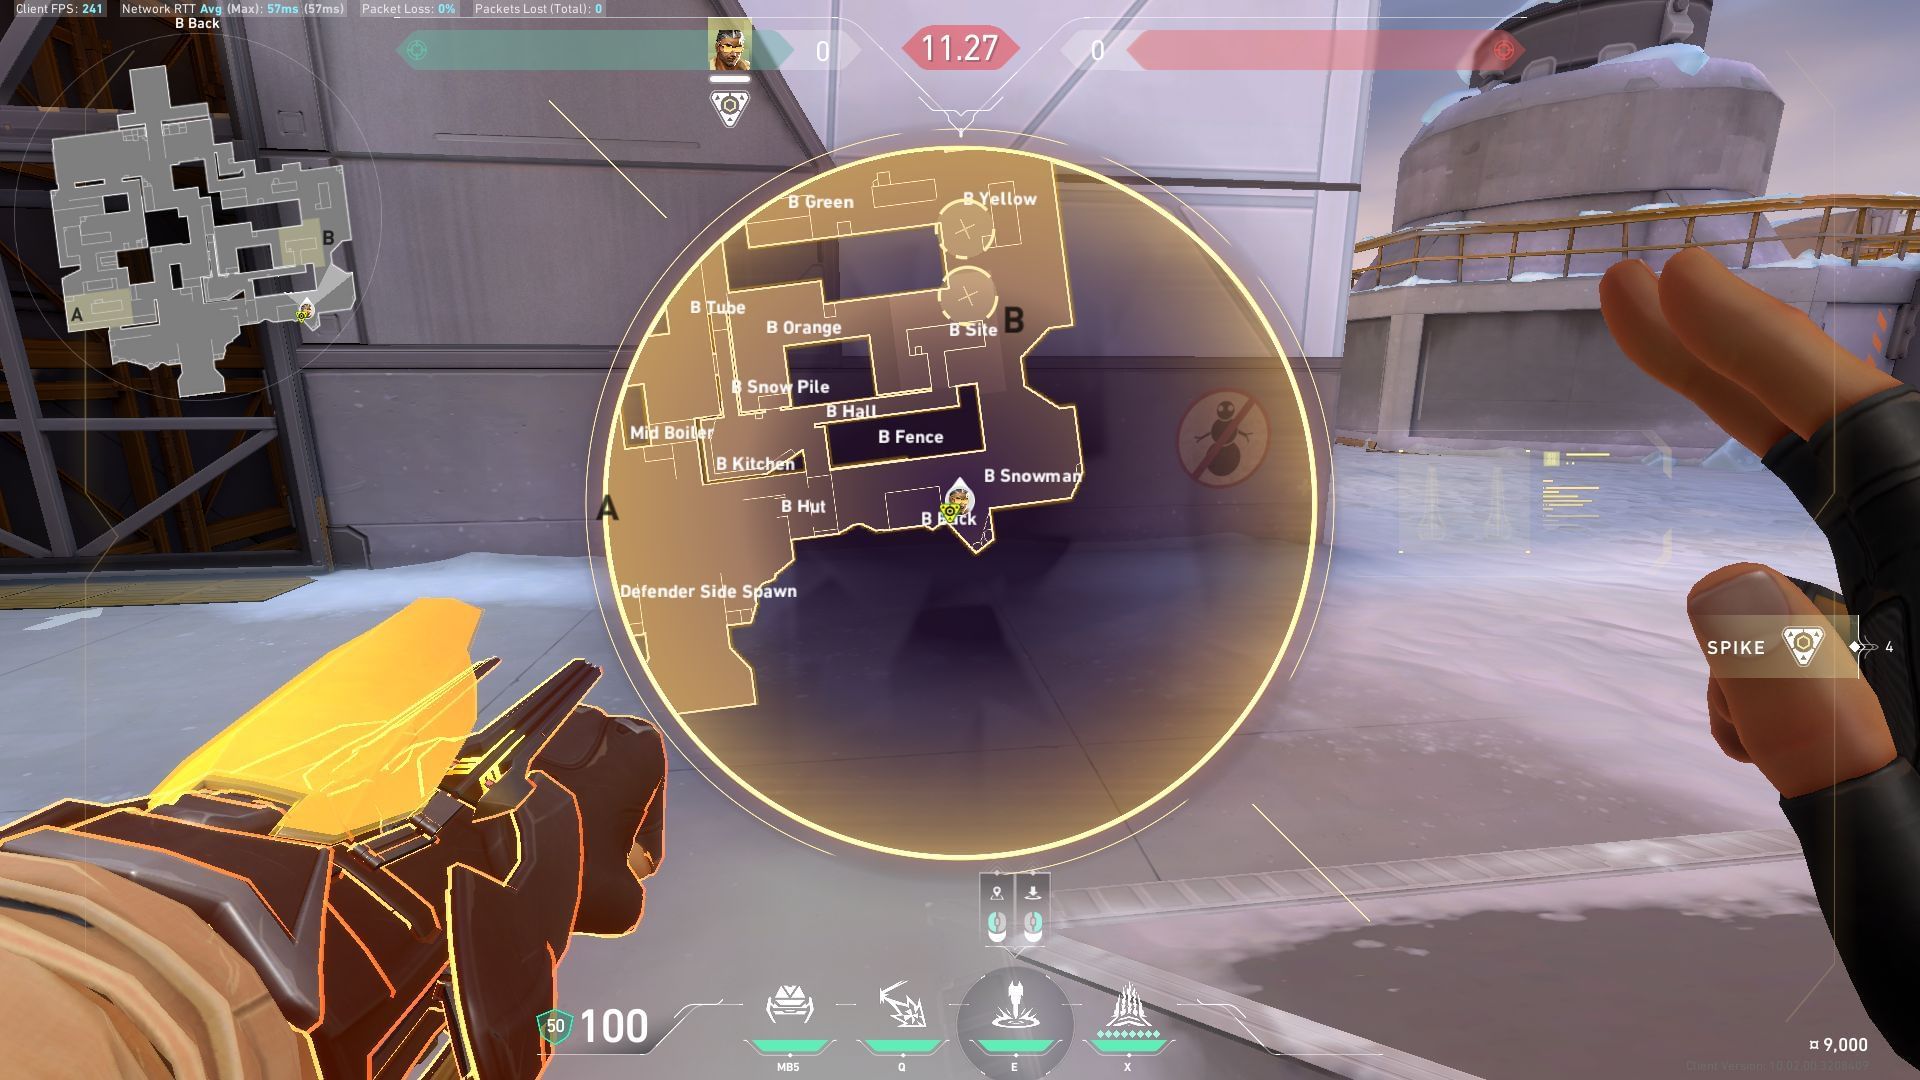
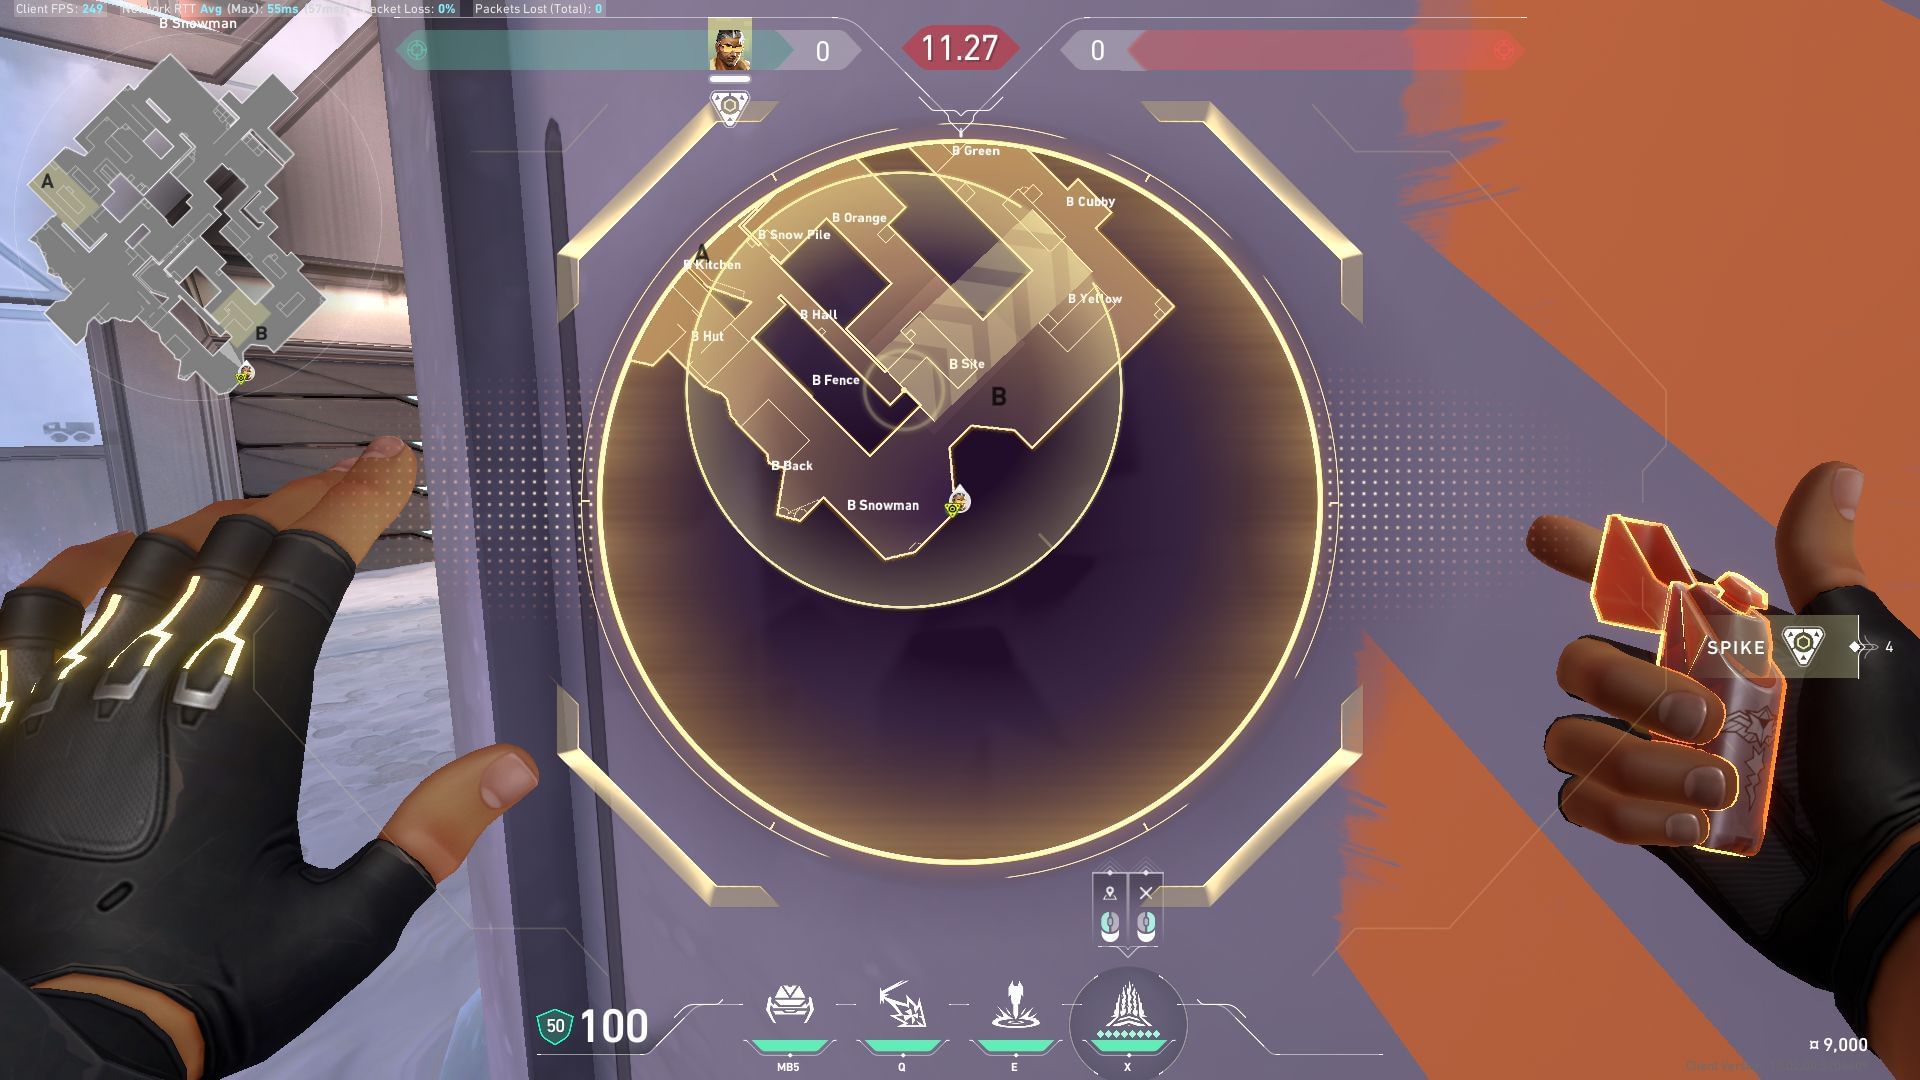
Attacking B-site option 2: B-Site and B-Snowman

Launch the missiles on the locations shown in the picture to force enemies out of their positions.
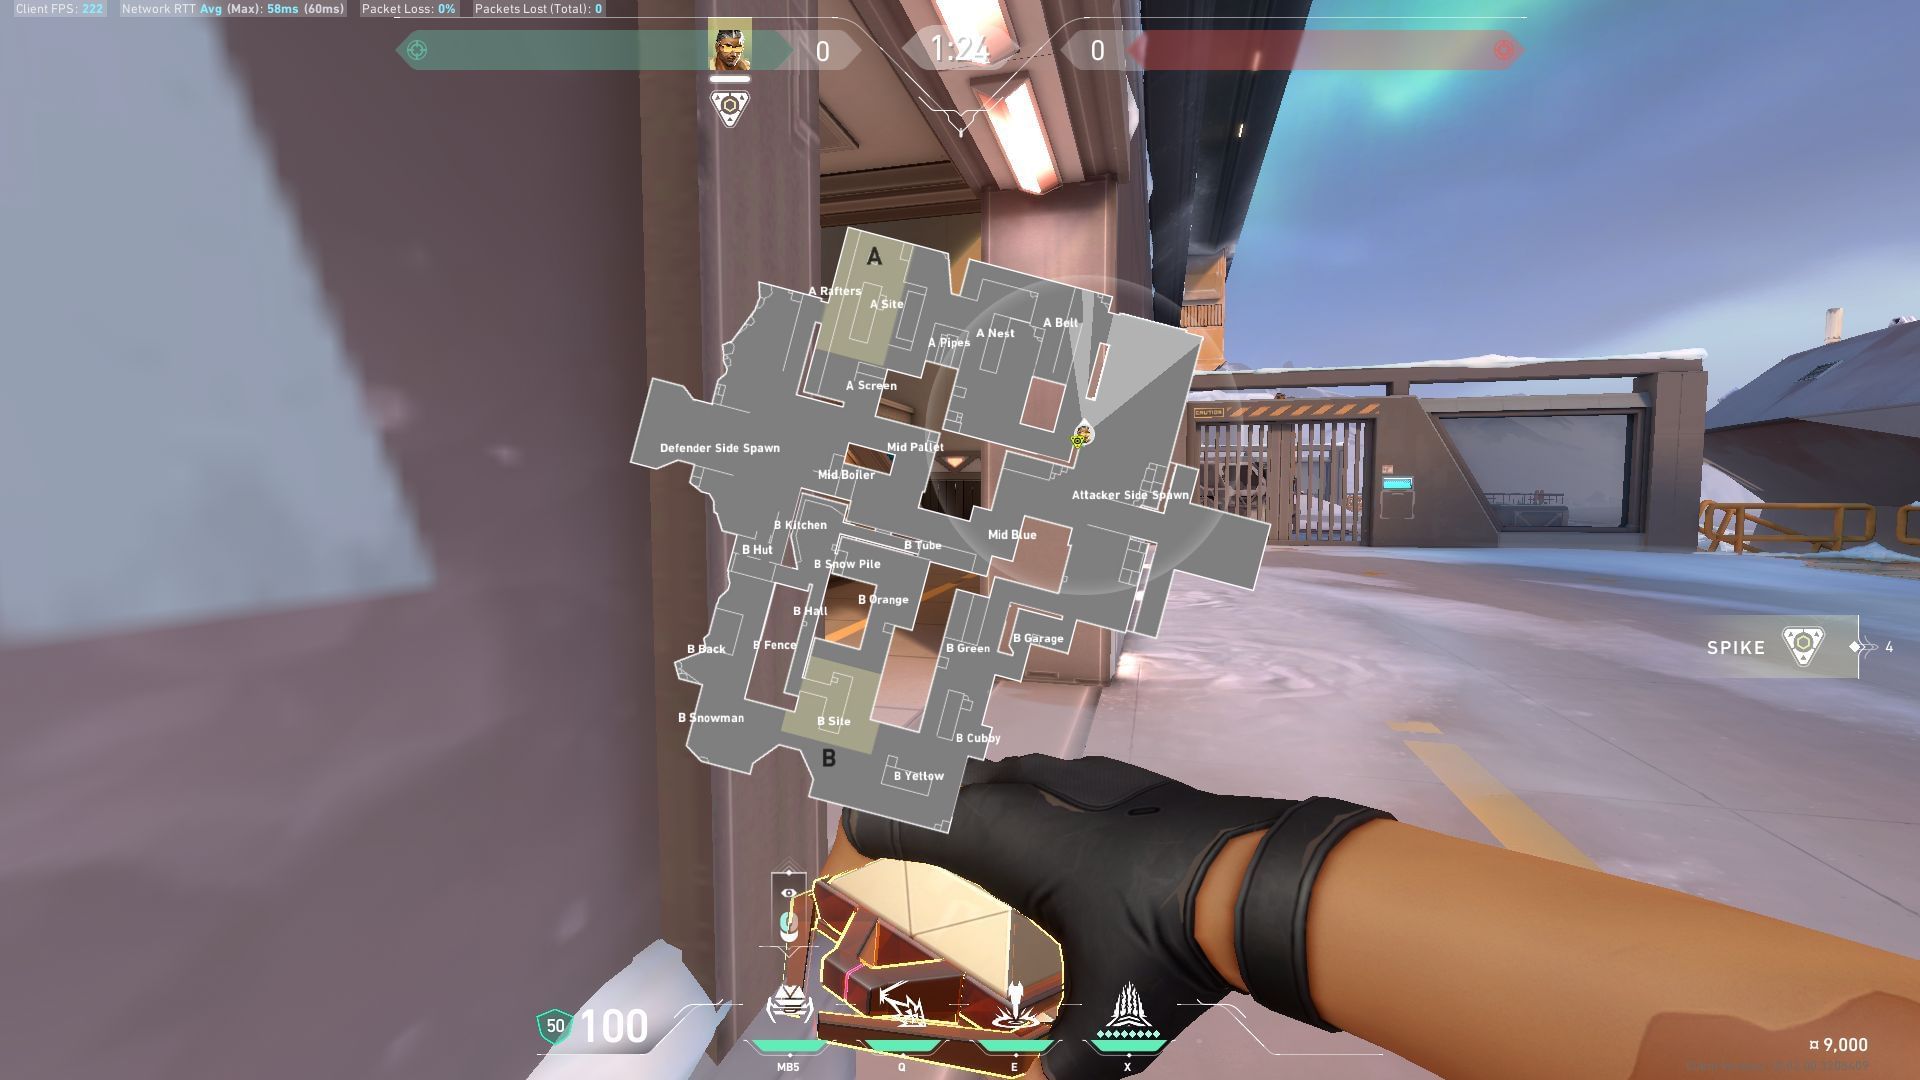
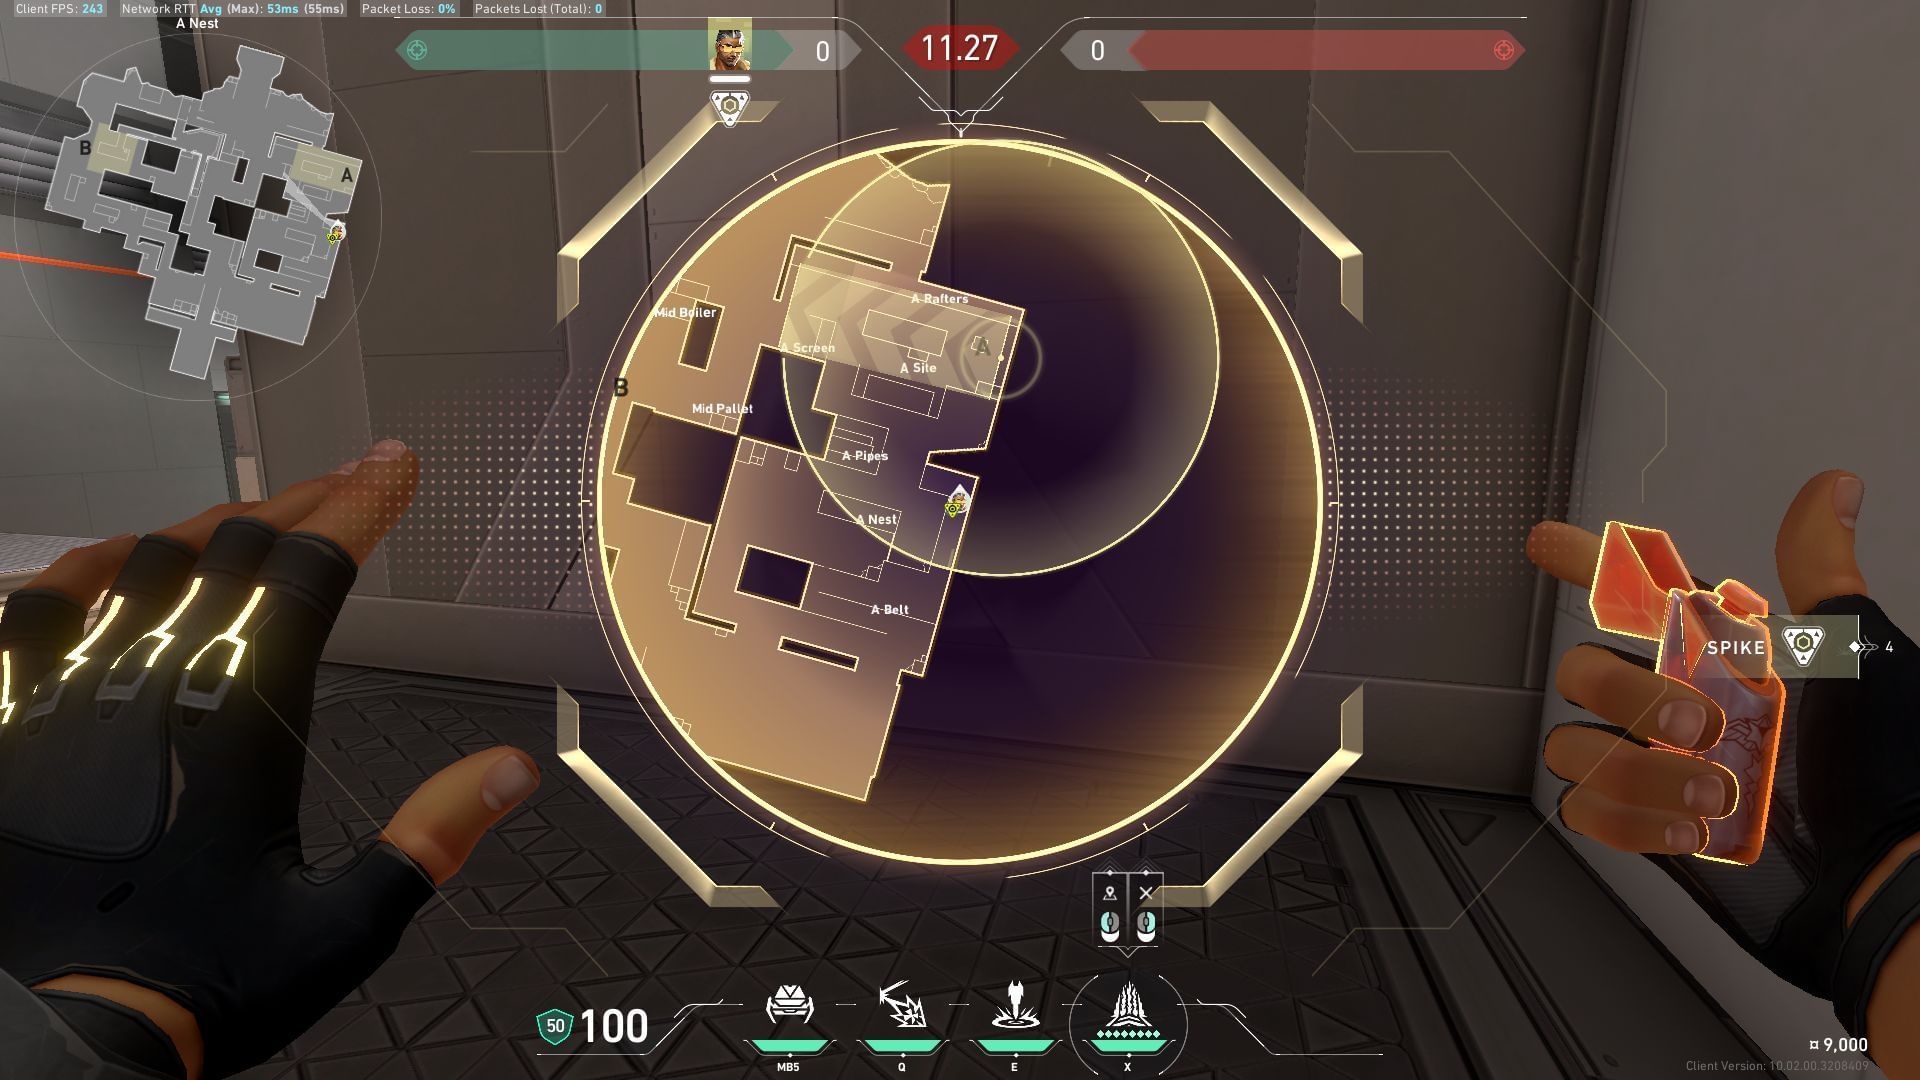
Defending A-site option 1: A-site
Launch the Guided Salvo missiles on the locations shown in the picture to delay the enemy team's attempt to plant the spike.
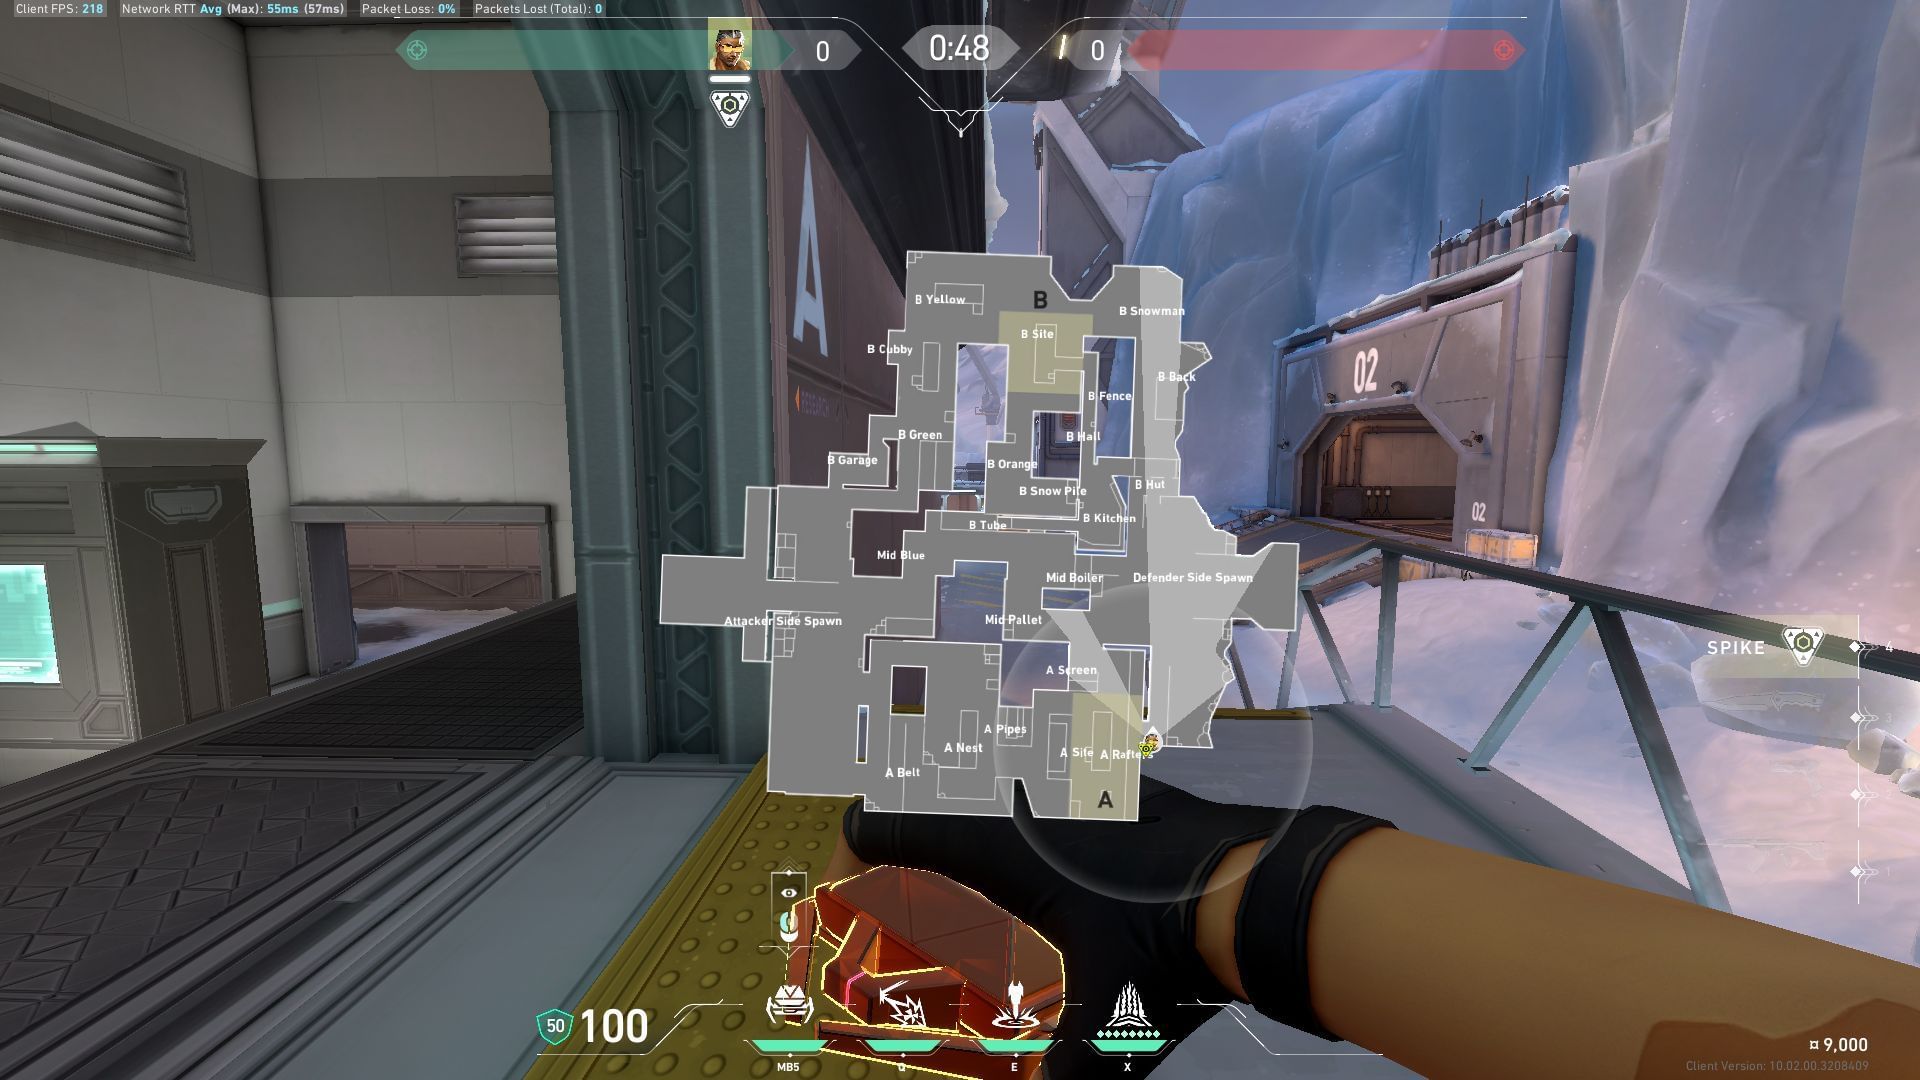
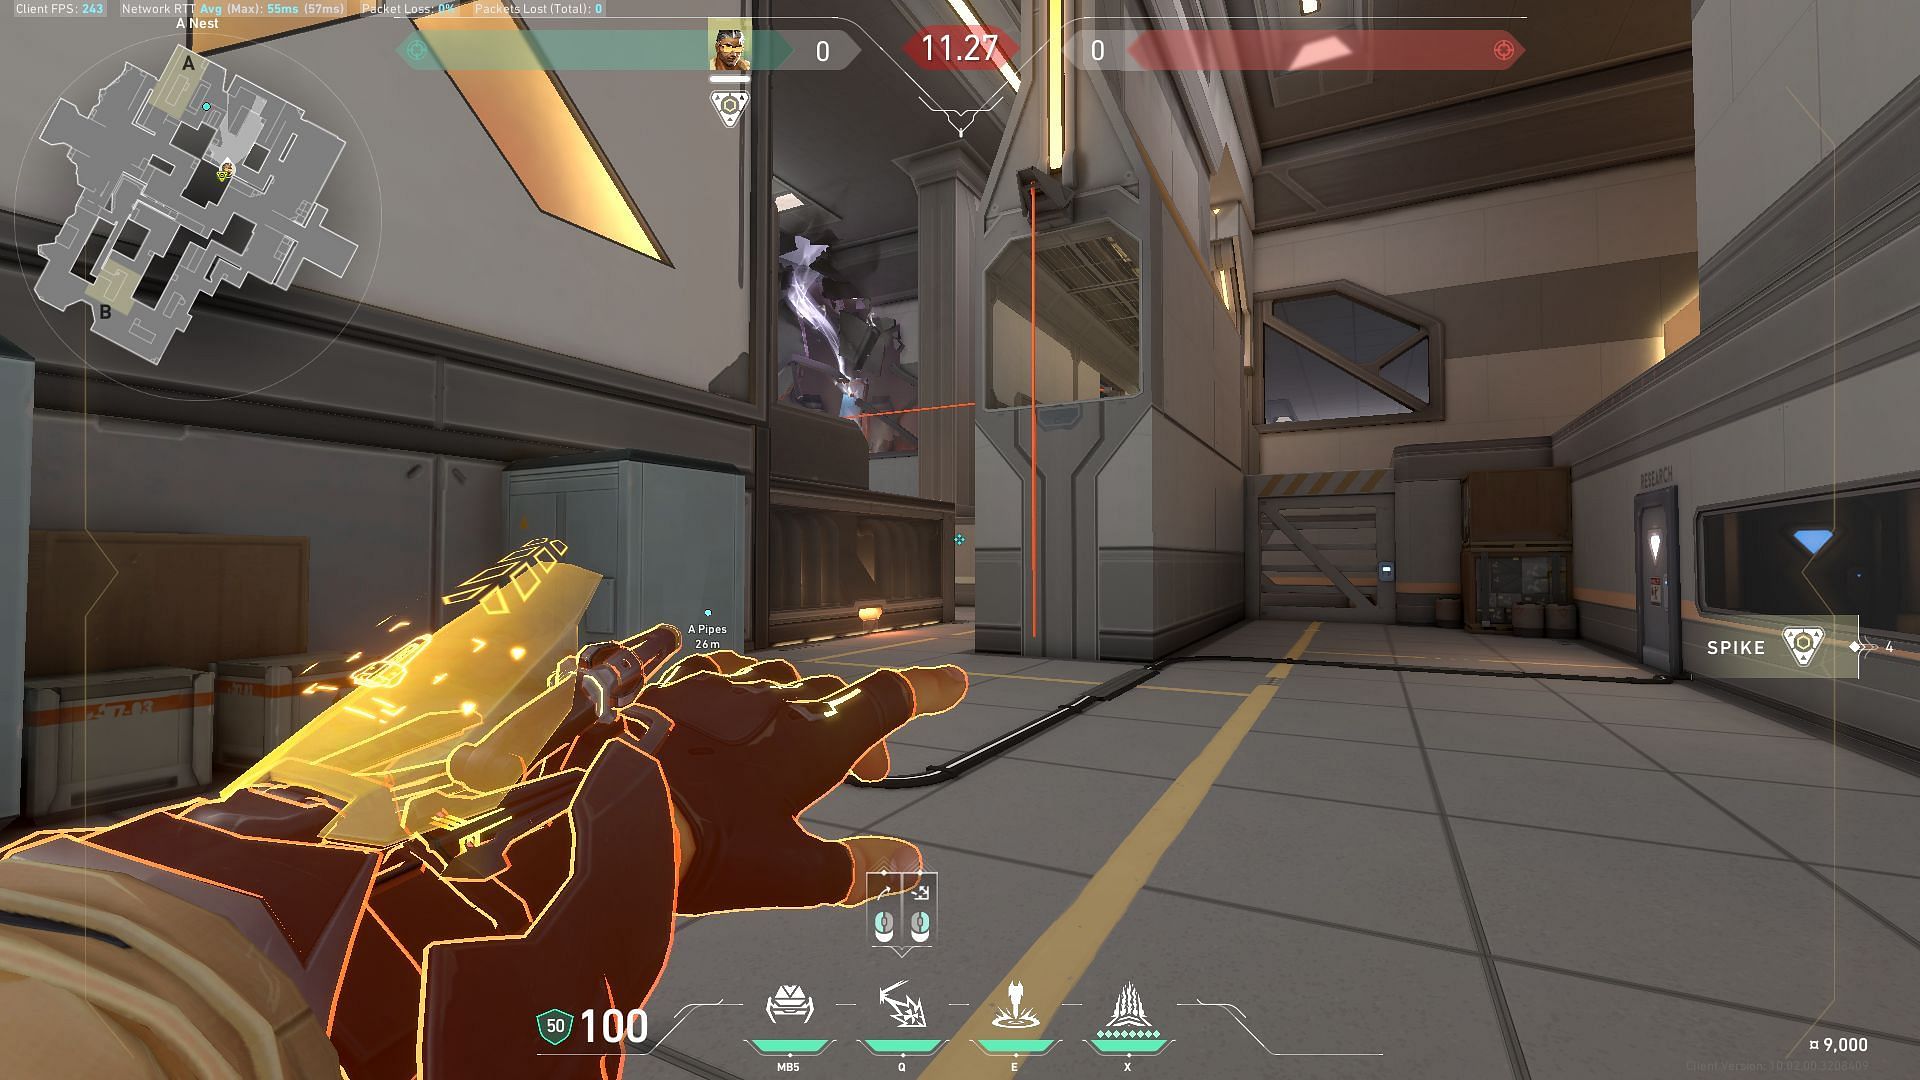
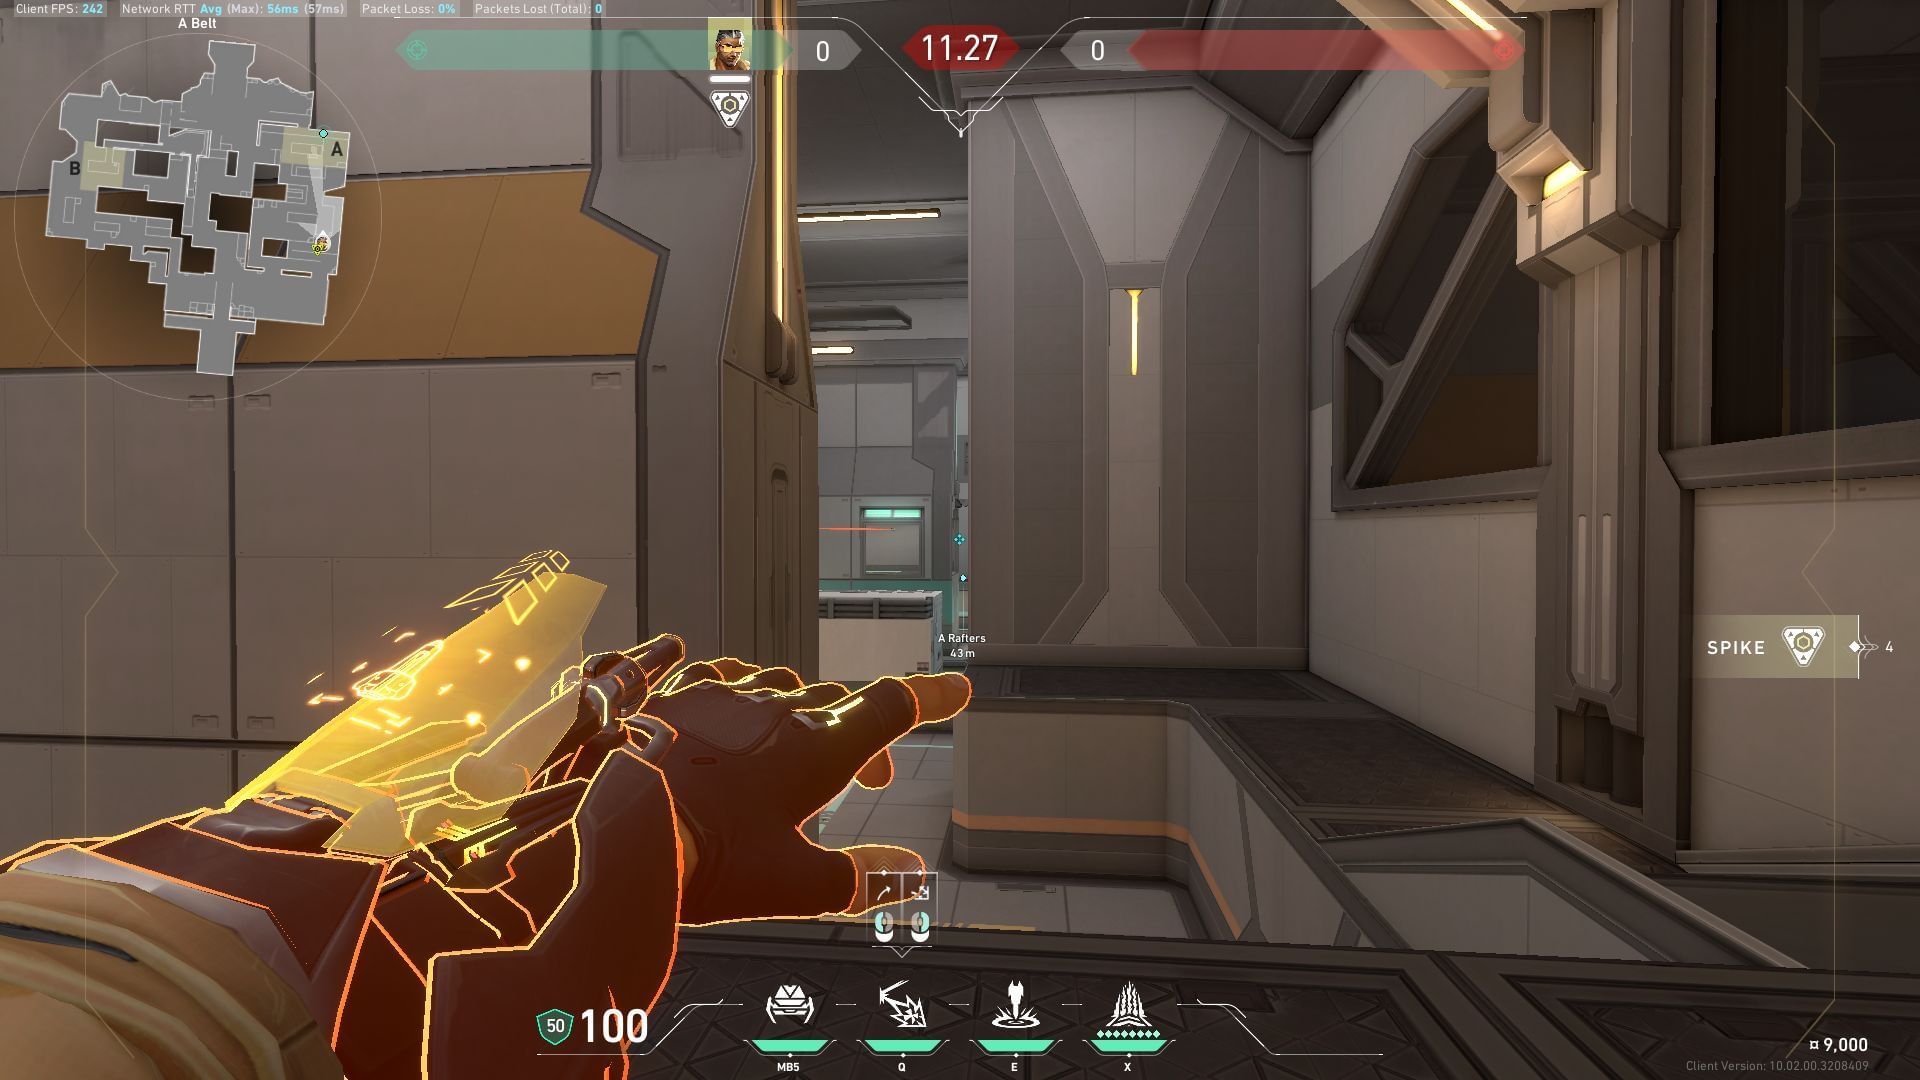
Defending A-site option 2: A-Belt and A-Nest
Deploy the missiles on A-Nest and A-Belt to disrupt the enemy team's movement while pushing the A-Site.
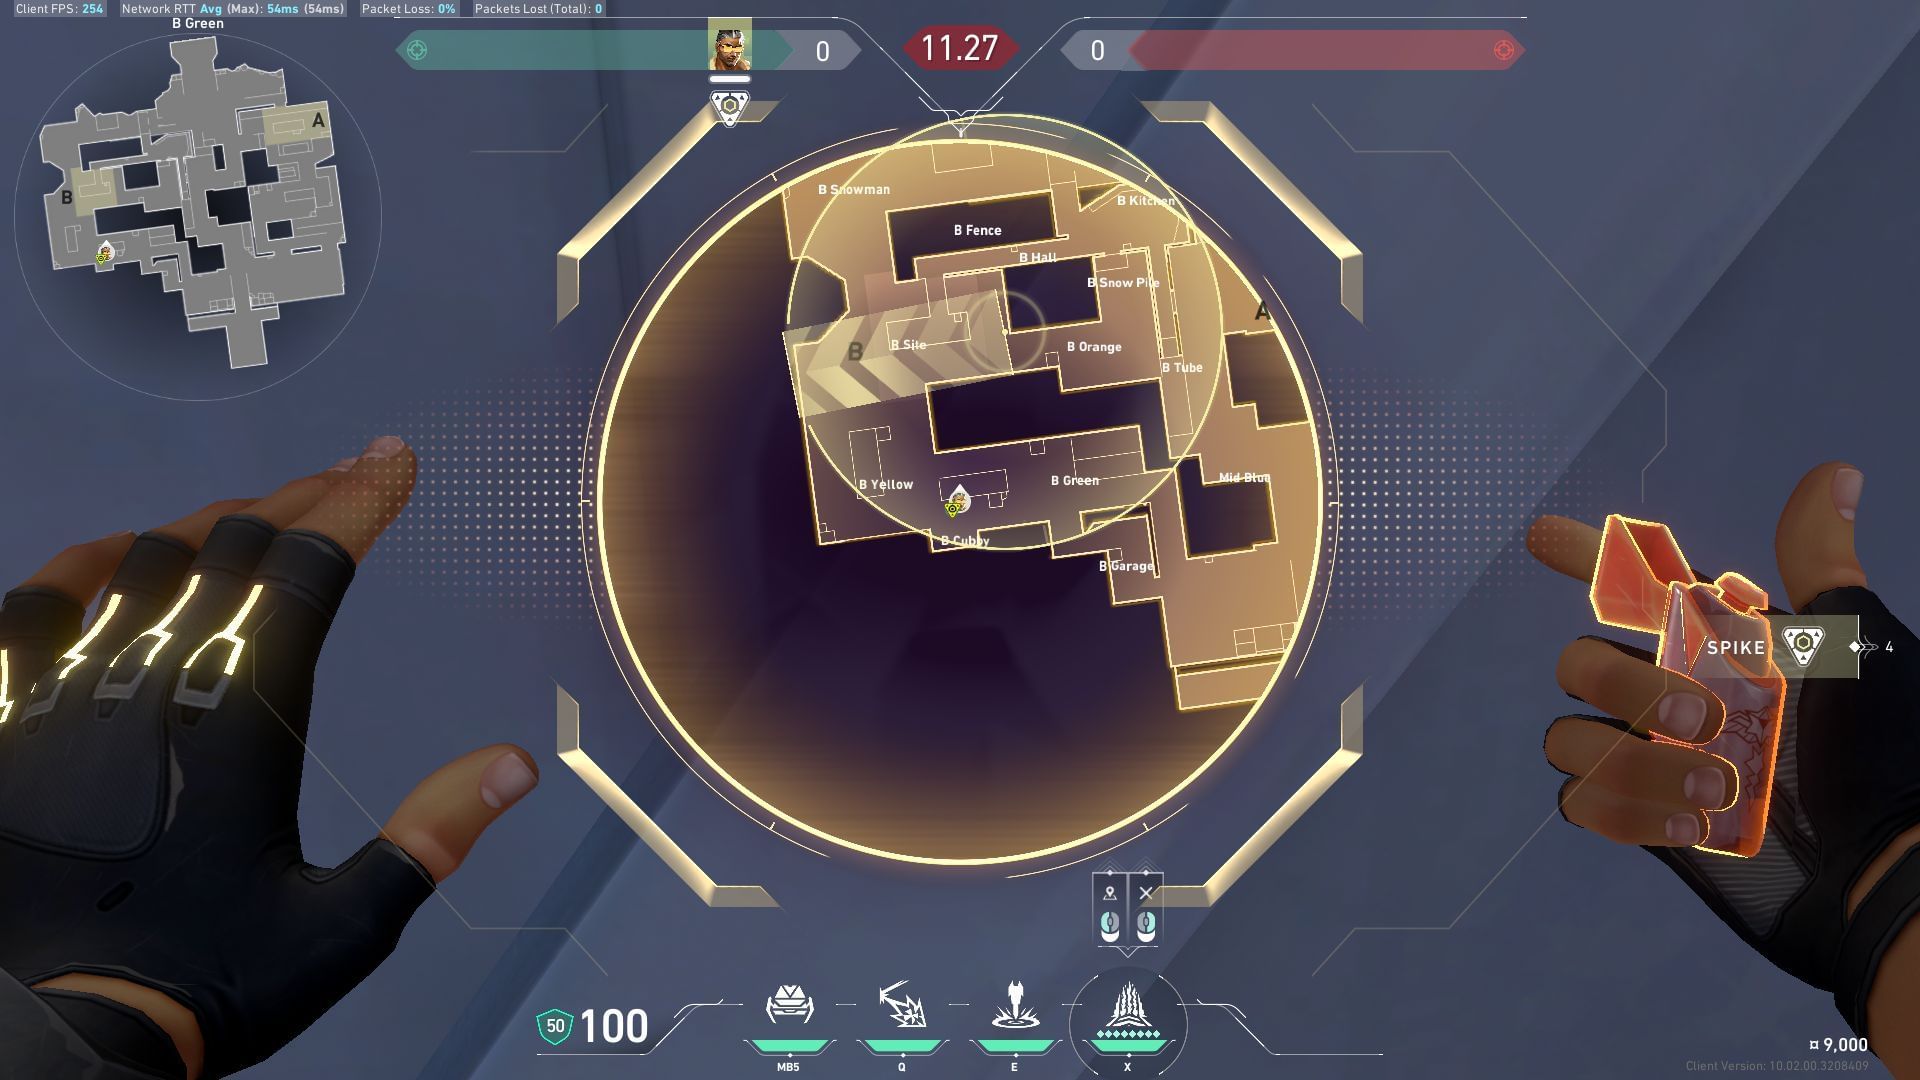
Defending B-site option 1: B-Yellow and B-Containers
Launch the missiles at B-Yellow and B-Containers to slow their movement toward the B-site.
Defending B-site option 2: B-site and B-Yellow
Launch the Guided Salvo missiles at B-Site to disrupt the enemy team's attempt to plant the spike.
Valorant Tejo Icebox guide: How to use Armageddon ultimate
The Armageddon ultimate ability unleashes a strong tactical strike on a selected area of the map. Pressing FIRE marks the starting point, and another click determines the endpoint, resulting in a series of explosions along the chosen path. This ability is important in both offensive and defensive settings, causing significant damage to opponents.
To get the most out of this ultimate, combine it with Breach's ultimate to limit enemy movement and make them simpler to kill.
You may also like: Valorant Tejo Ascent guide: Best lineups and tips.
Attacking A-site
Activate the Armageddon ultimate to take control of post-plant situations at A-site.
Attacking B-site
Launch the Armageddon ultimate to take control of post-plant situations at B-site.
Defending A-site
Activate the ultimate while the opponent team is attempting to plant the spike at A-site to inflict maximum damage.
Defending B-site
Launch the ultimate while the opponent team is attempting to plant the spike at B-site to inflict maximum damage.
Follow Sportskeeda for more updates.