
'%20x='0'%20y='0'%20height='100%25'%20width='100%25'%20%0A%20%20%20%20%20%20%20%20%20%20xlink%3Ahref='data:image/jpg;base64,/9j/2wBDAAYEBQYFBAYGBQYHBwYIChAKCgkJChQODwwQFxQYGBcUFhYaHSUfGhsjHBYWICwgIyYnKSopGR8tMC0oMCUoKSj/2wBDAQcHBwoIChMKChMoGhYaKCgoKCgoKCgoKCgoKCgoKCgoKCgoKCgoKCgoKCgoKCgoKCgoKCgoKCgoKCgoKCgoKCj/wgARCAAGAAoDASIAAhEBAxEB/8QAFgABAQEAAAAAAAAAAAAAAAAAAAUH/8QAFAEBAAAAAAAAAAAAAAAAAAAAAv/aAAwDAQACEAMQAAAAwukAf//EACAQAAIBBAEFAAAAAAAAAAAAAAECAwAEESEGEjEzUdL/2gAIAQEAAT8AuJ+mZY58tEI9LGAo32z72aXjts6hxeSgNvwD7r//xAAXEQEAAwAAAAAAAAAAAAAAAAABAAIR/9oACAECAQE/ACpk/8QAFxEAAwEAAAAAAAAAAAAAAAAAAAECEf/aAAgBAwEBPwC6en//2Q=='%3E%3C/image%3E%3C/svg%3E)
The Nether activity in Destiny 2 Heresy brought back the fan-favorite Dreadnaught, which many players are acquainted with. Some know this location via the King's Fall Raid, and others through the open-world Patrol destination in Destiny 1. However, the new Heresy episode took a different route and presented the Dreadnaught as a hybrid between seasonal activity and an explorable open-world region.
Due to this, several secrets are hidden in different corners of the Dreadnaught. Finding them will grant progression towards the seasonal seal completion. This article lists the locations of one of those secrets called Wormspawns. They are needed for the "Dreadnaught Collector" triumph associated with the "Heretic" seal.
Note: As of Act I of Heresy, eight available Wormspawns are only available across four locations of The Nether. Since the triumph requires 10, Bungie is expected to add another location in the following acts with the remaining Wormspawns. This article will be updated then.
Ravenous Wormspawn location guide in Destiny 2 The Nether
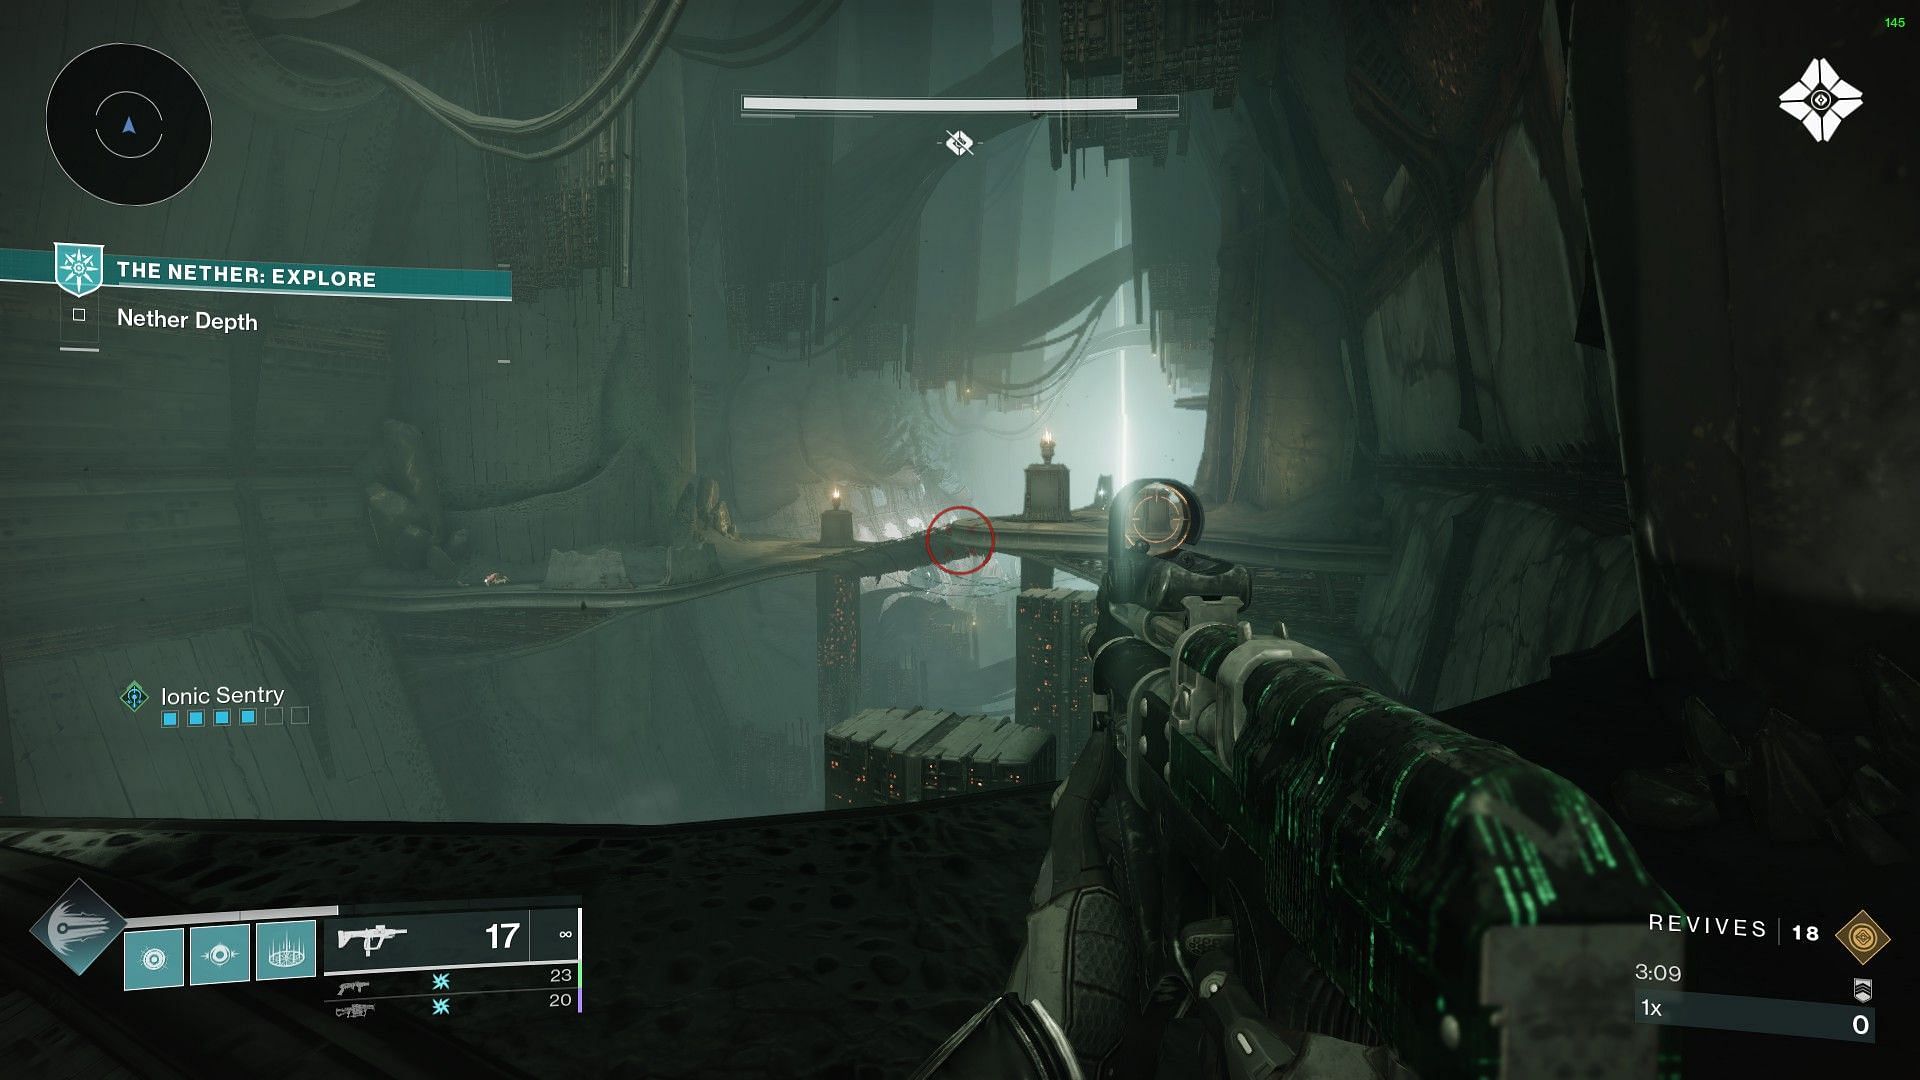
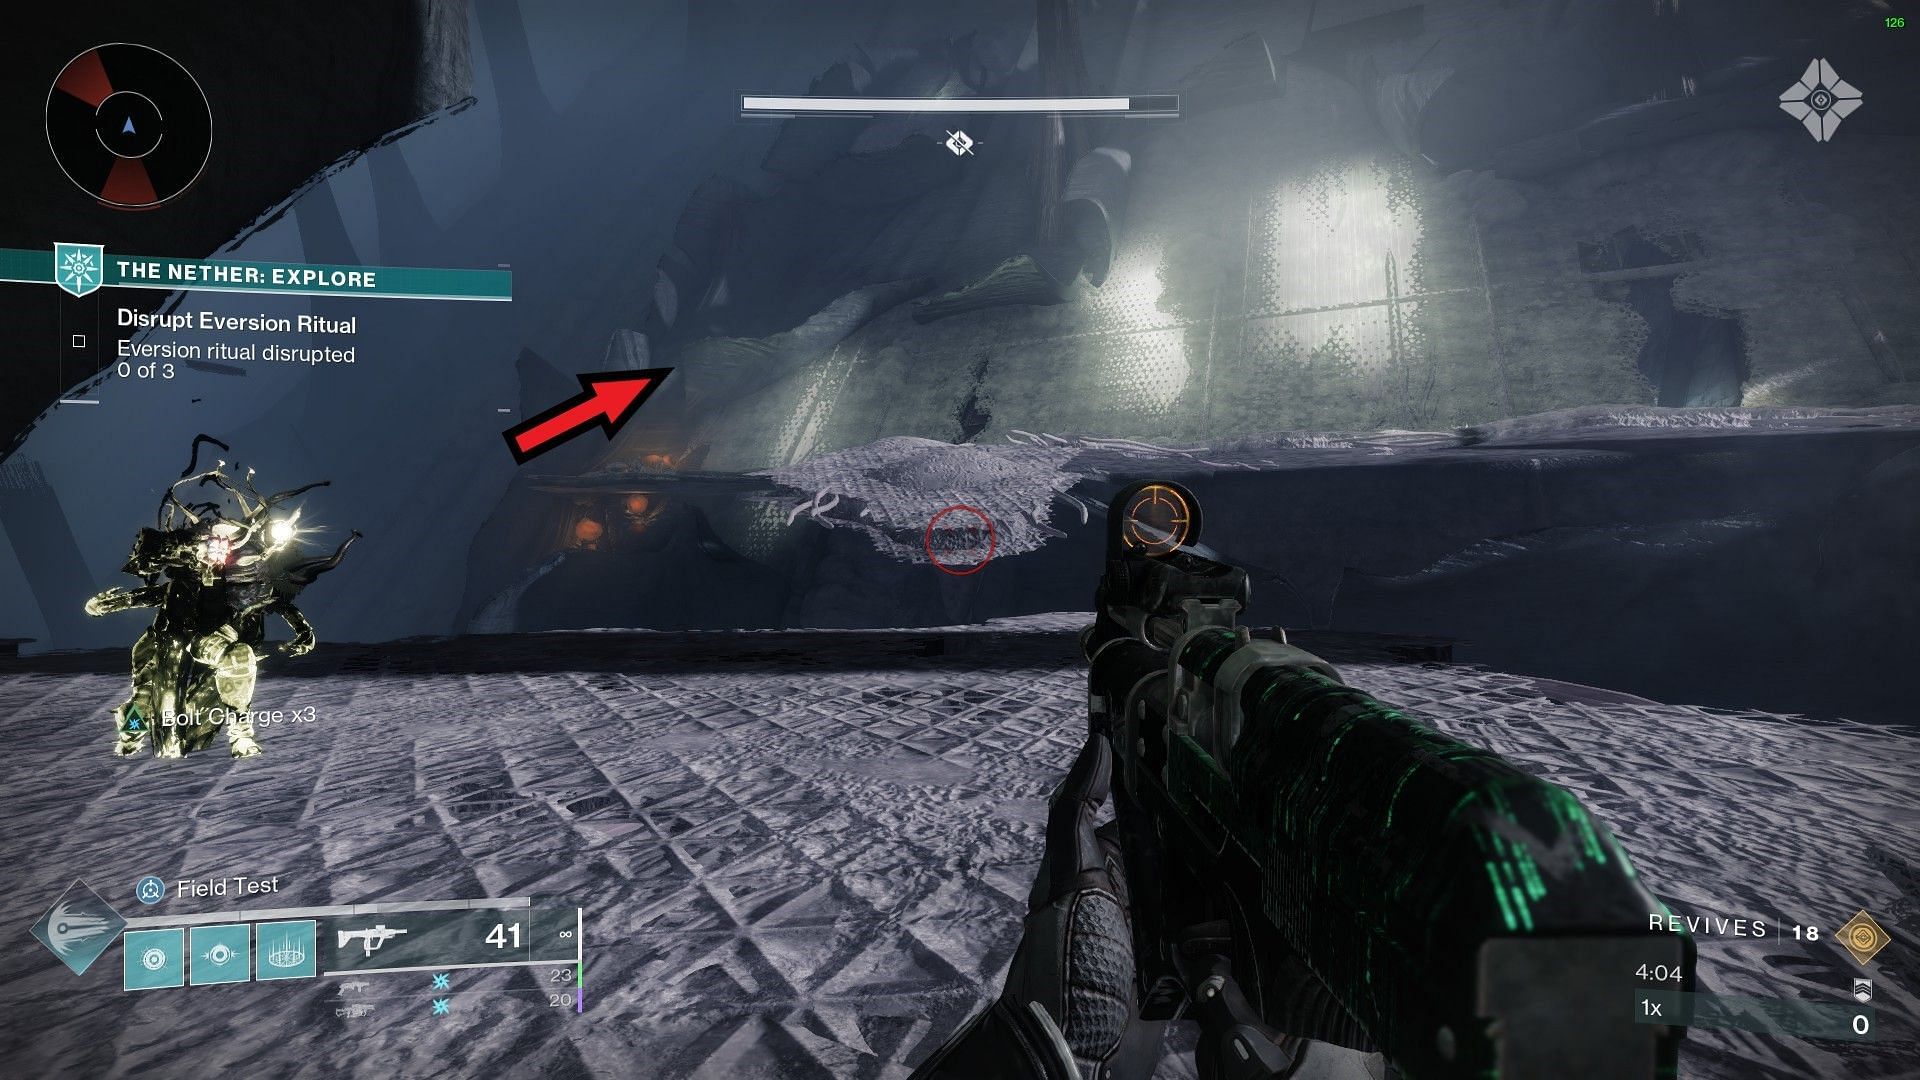
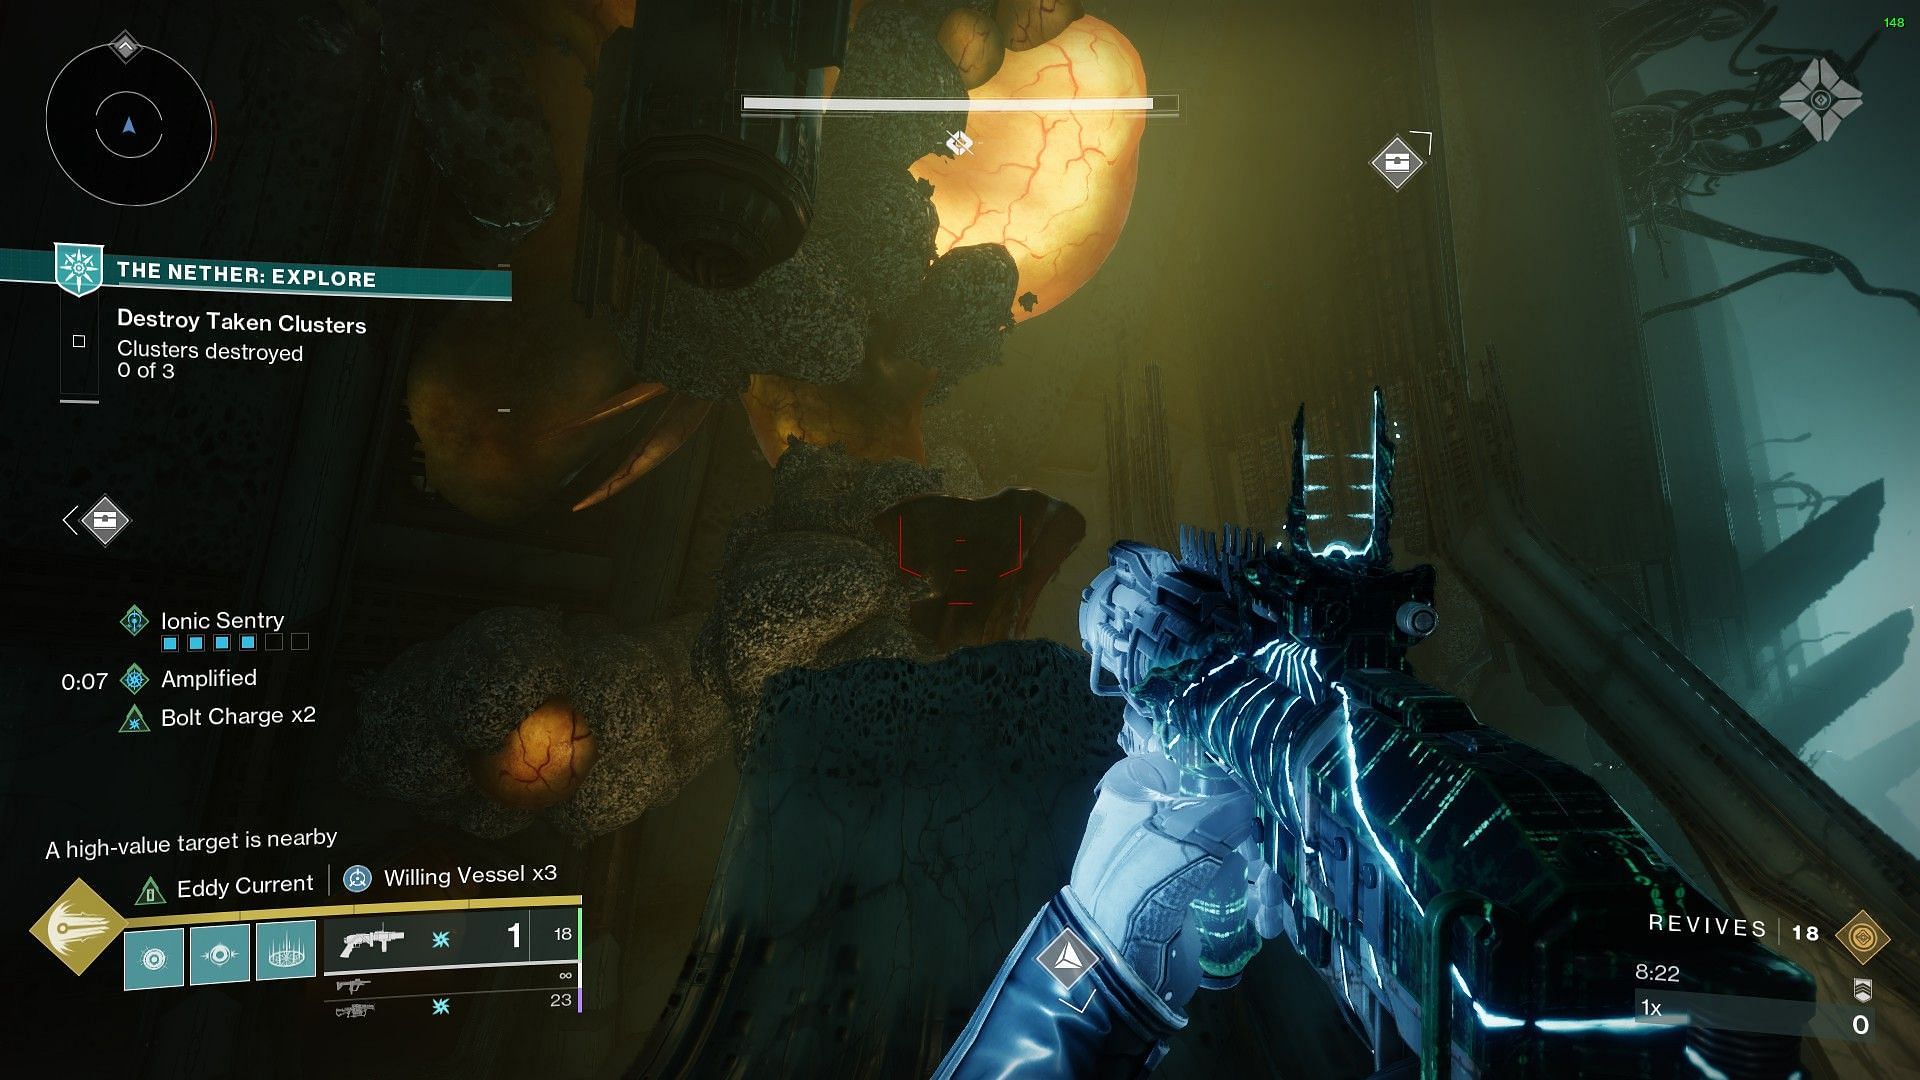
1) Hall of Souls
This section lists the two locations where you can find Wormspawns in the Hall of Souls. The image of the Hall of Souls has been given below. Once you are here, follow the path ahead.
Head to the middle platform of the Hall of Souls where the encounter boss spawns. Look straight at the Blight located to the back of the platform, and then take a sharp left. You will see the first Worm located below another platform. Jump across to get it.
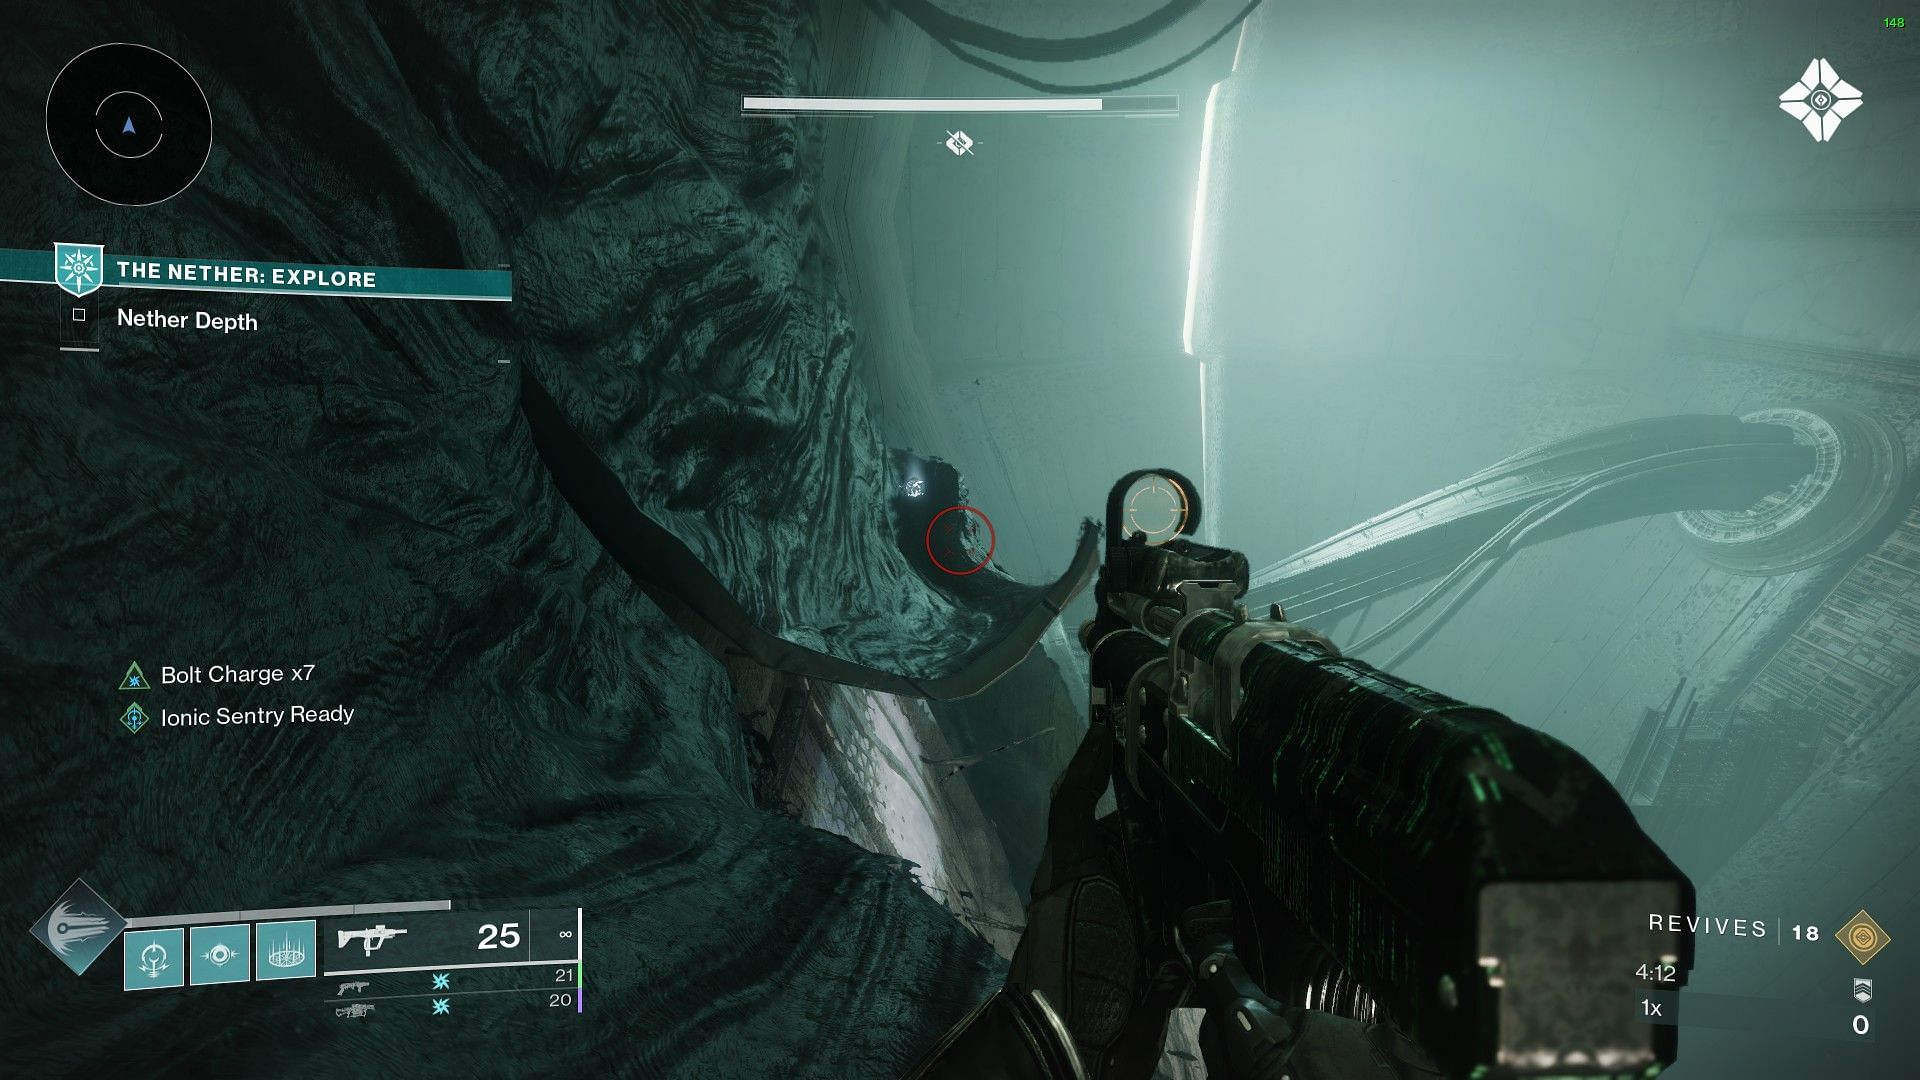
For the second Wormspawn in Hall of Souls, head back to the middle platform and take a sharp right to the section displayed in the image below.
Here, hug the left wall and climb using the opening ledges. You will find the Wormspawn at the back of these deformed ledges.
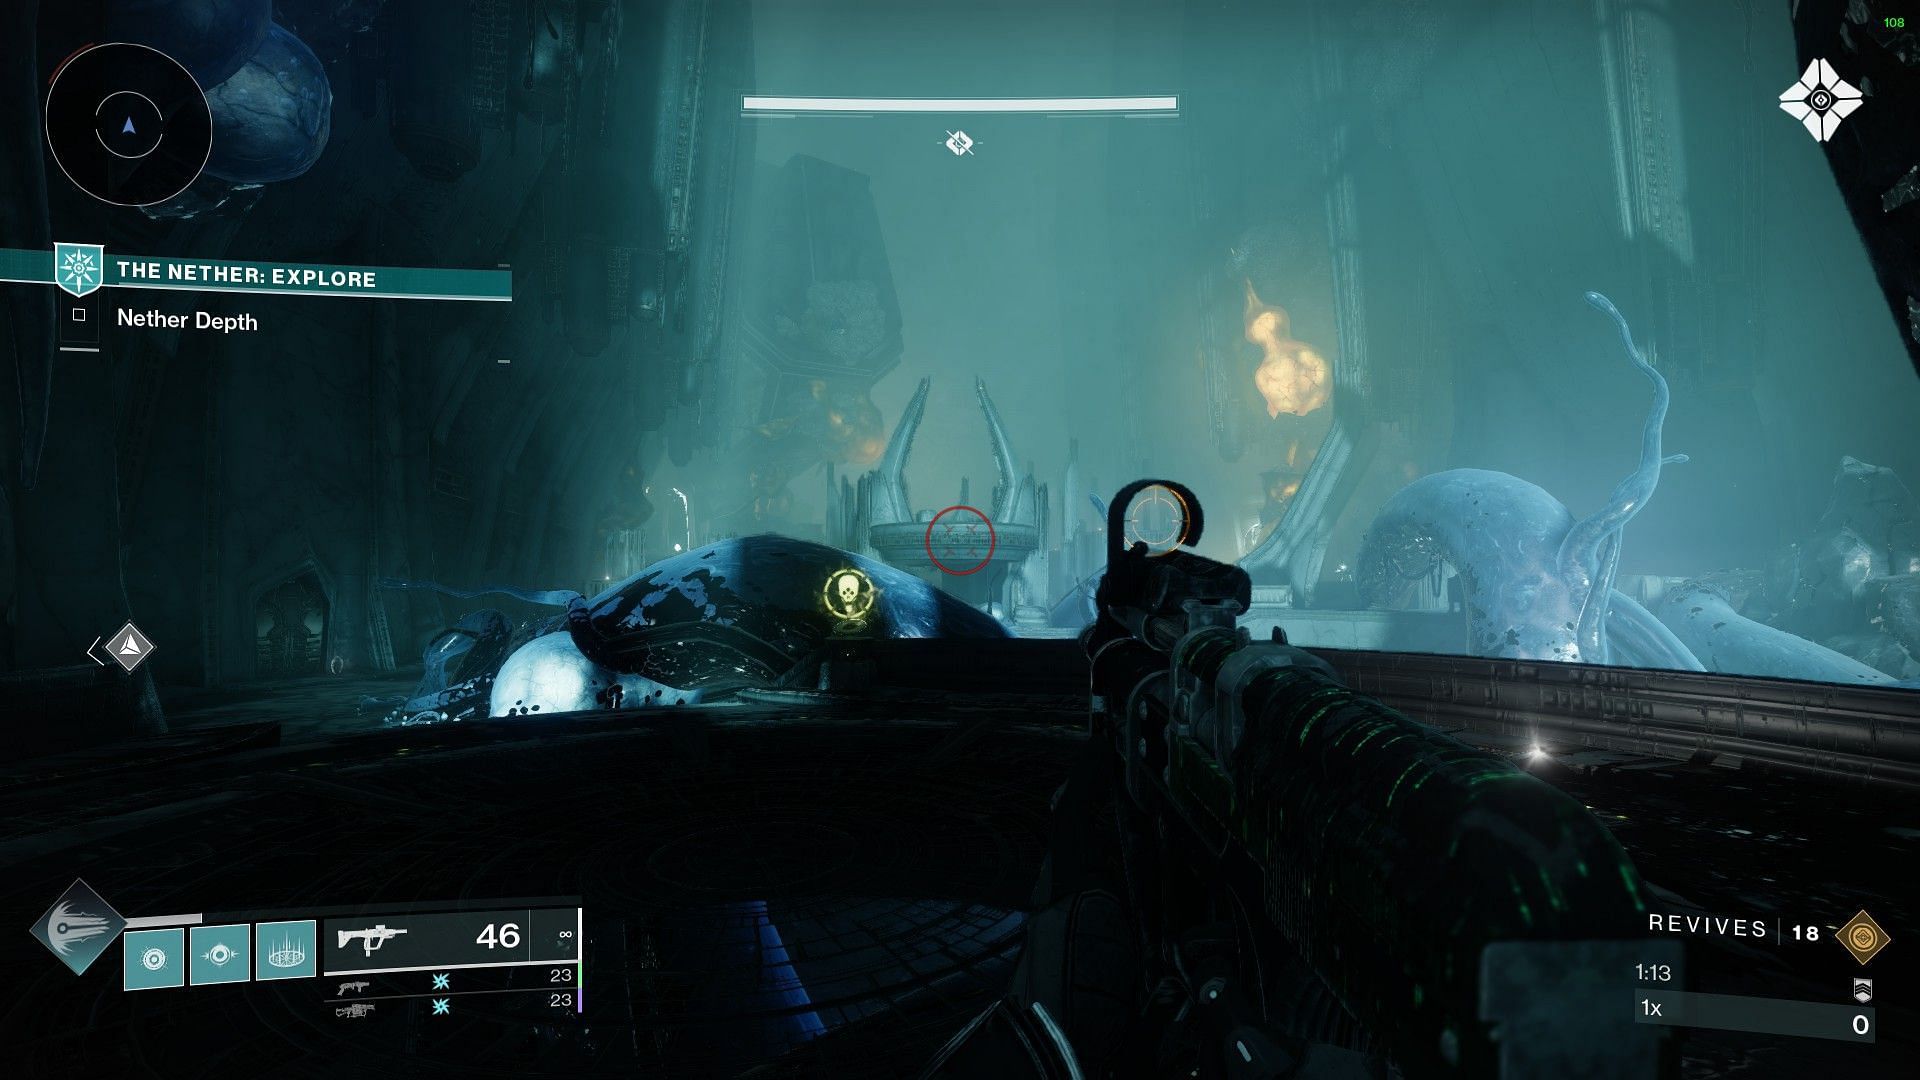
2) Trenchway
The Trenchway is the outside area of Dreadnaught where the Tormentor boss spawns.
Once you spawn in, head toward the Tormentor boss and climb to the top of the left pillar with a Taken portal. The Wormspawn should be present there.
Next, take the path outside the arena, cross the bridge, and take a left.
The Wormspawn should be on top of the ledge above the orange clusters at the back side of the area.
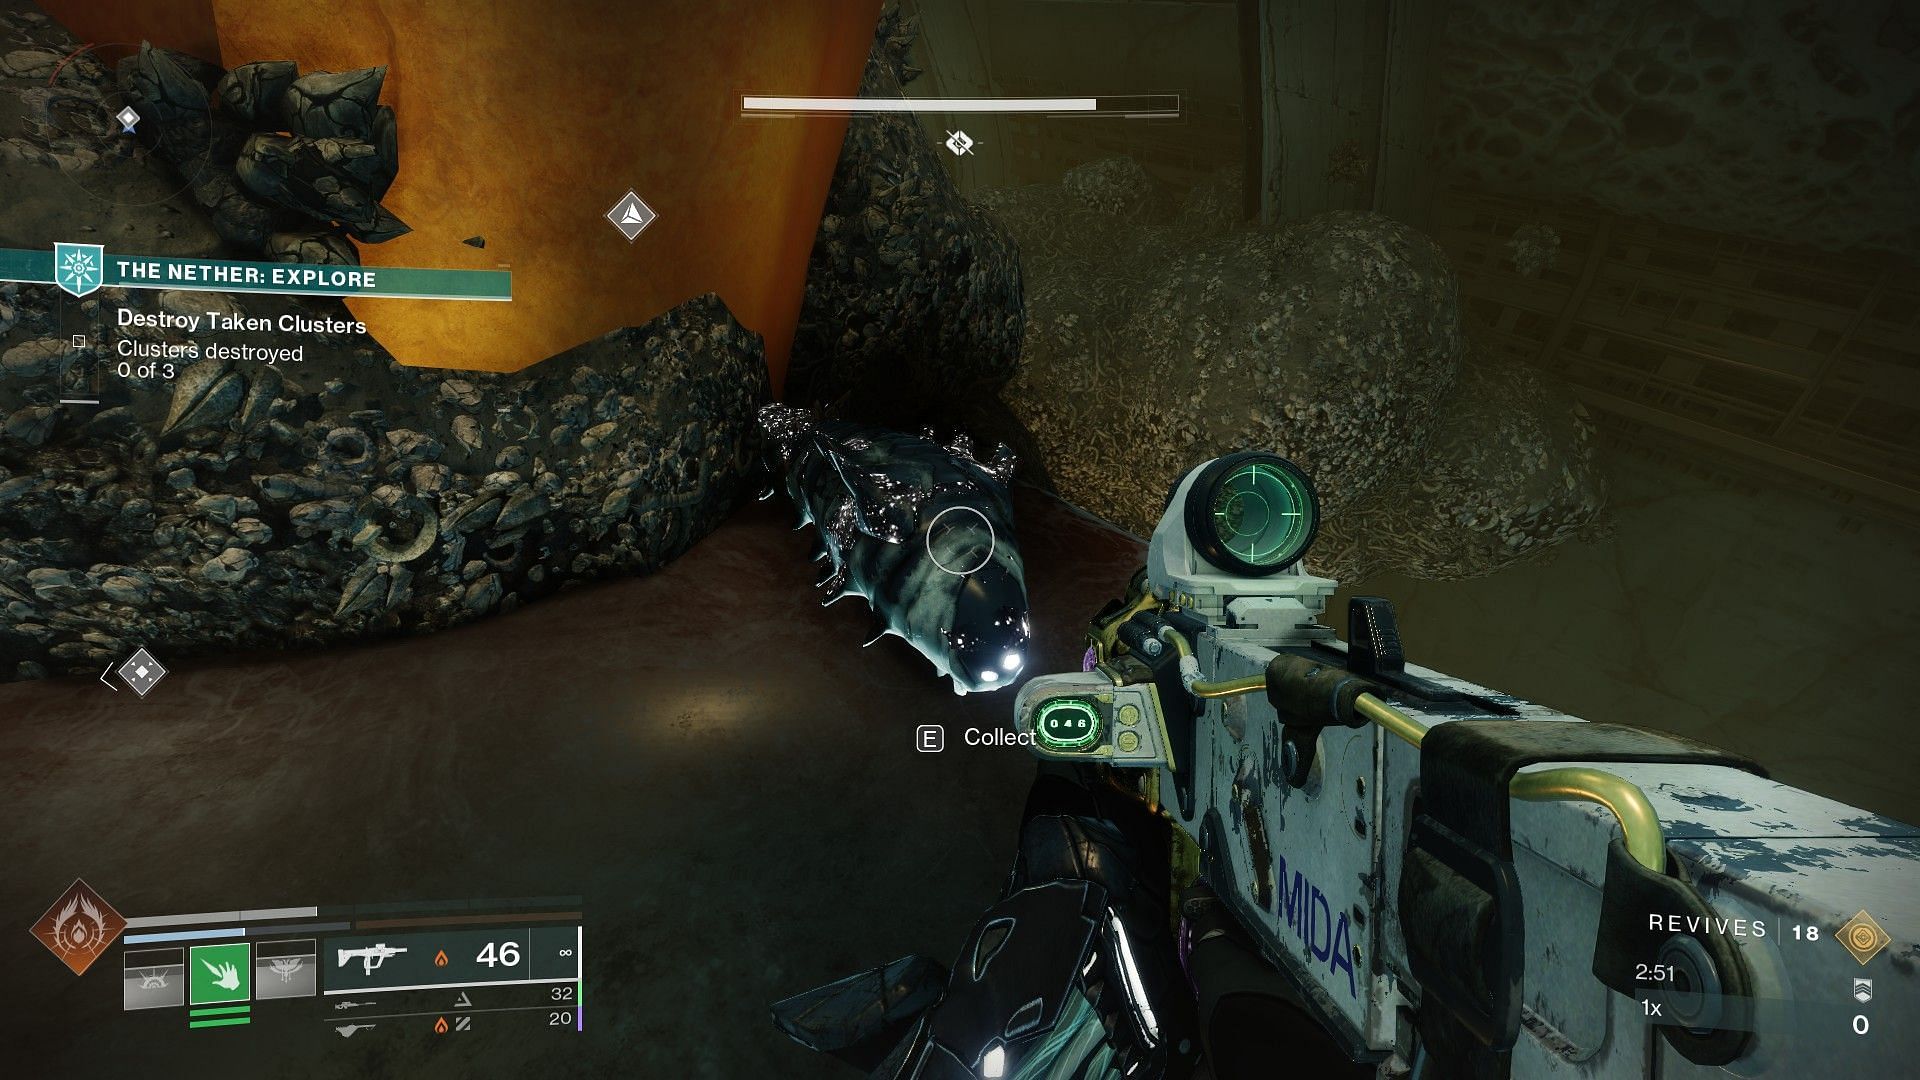
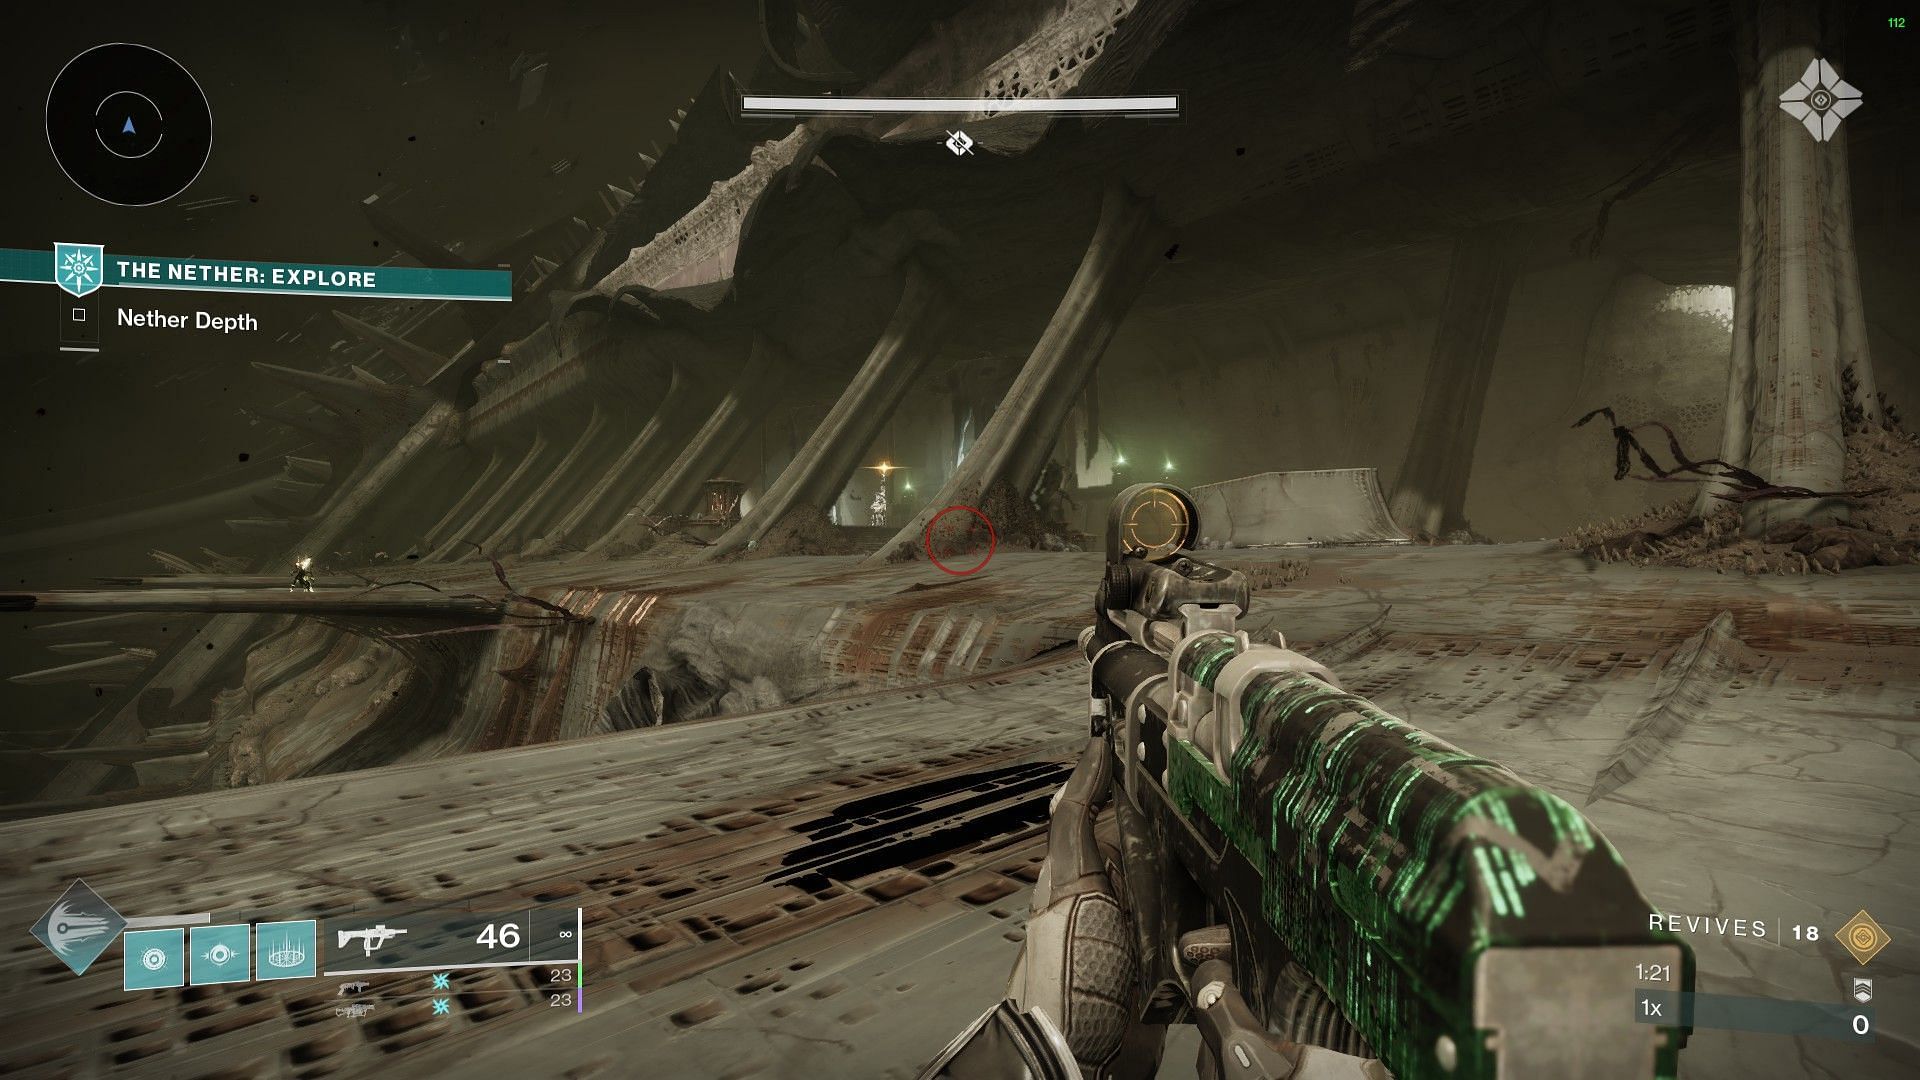
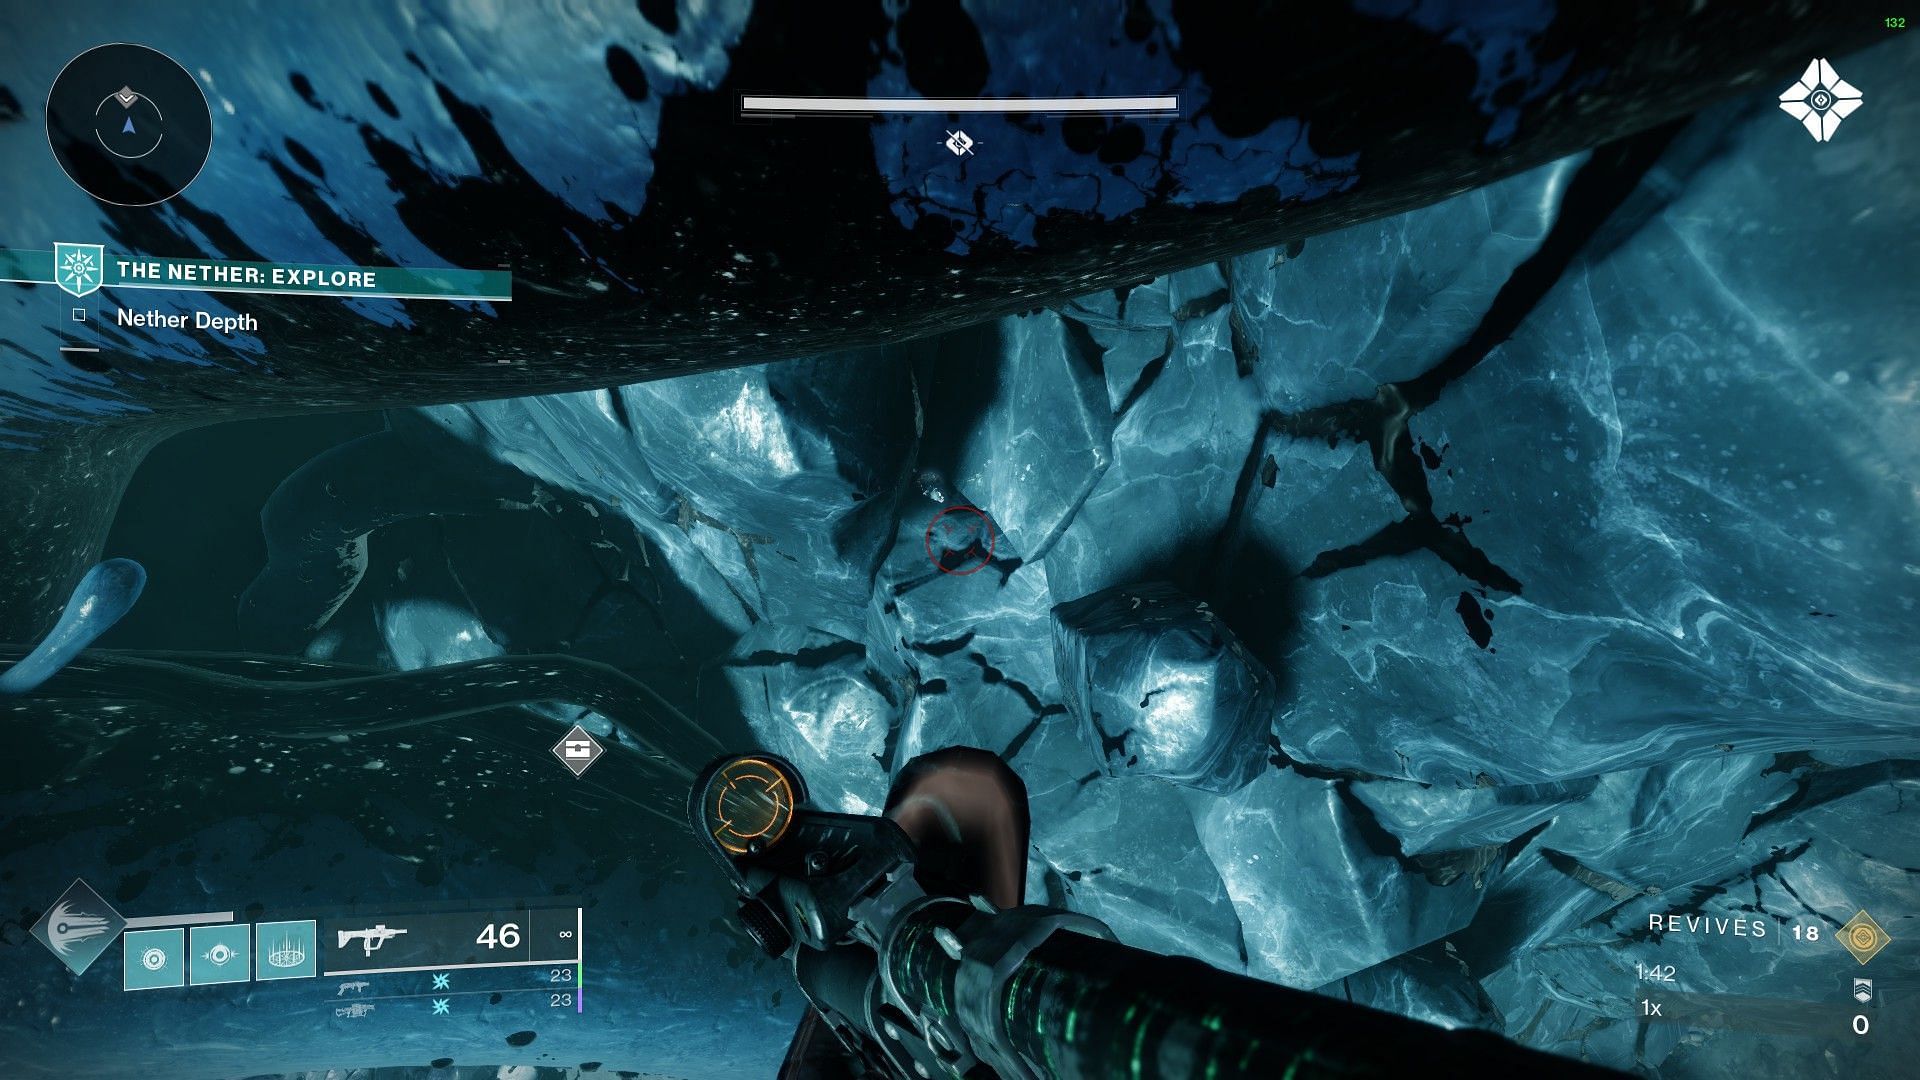
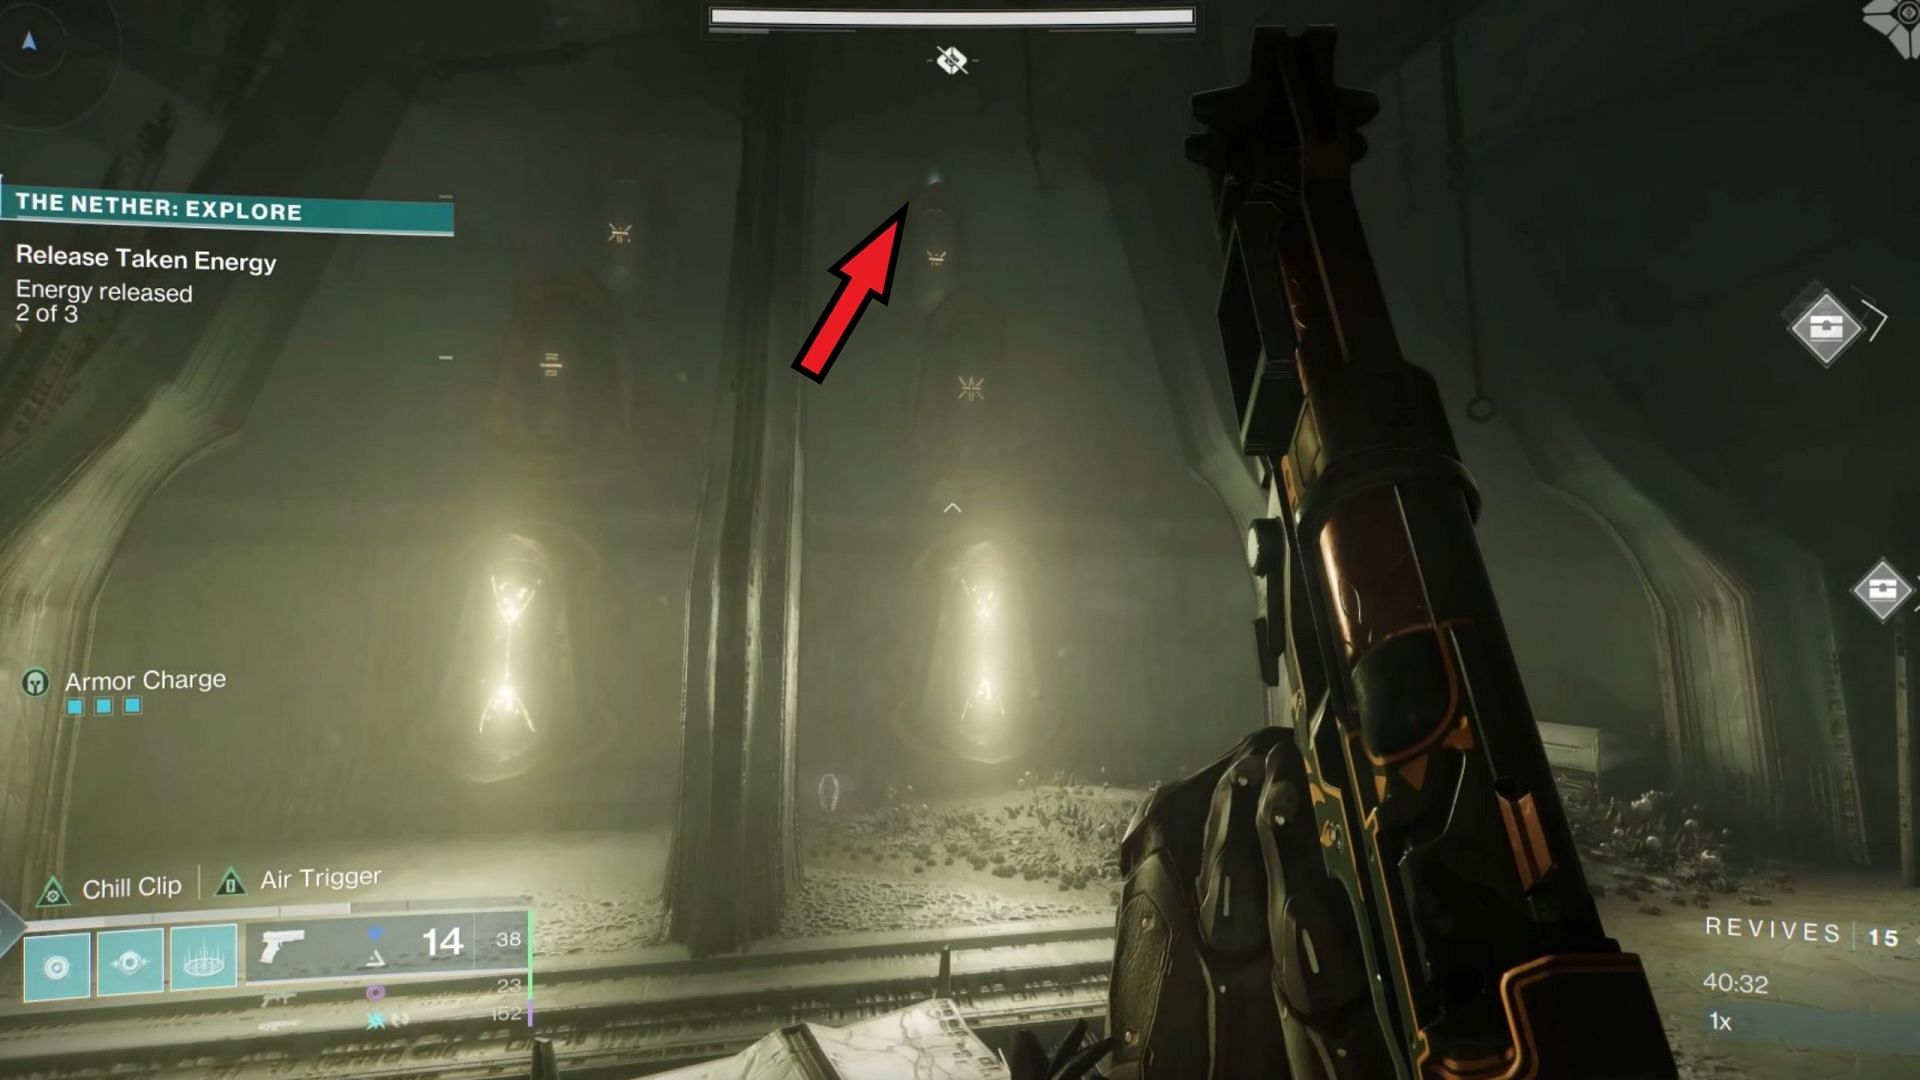
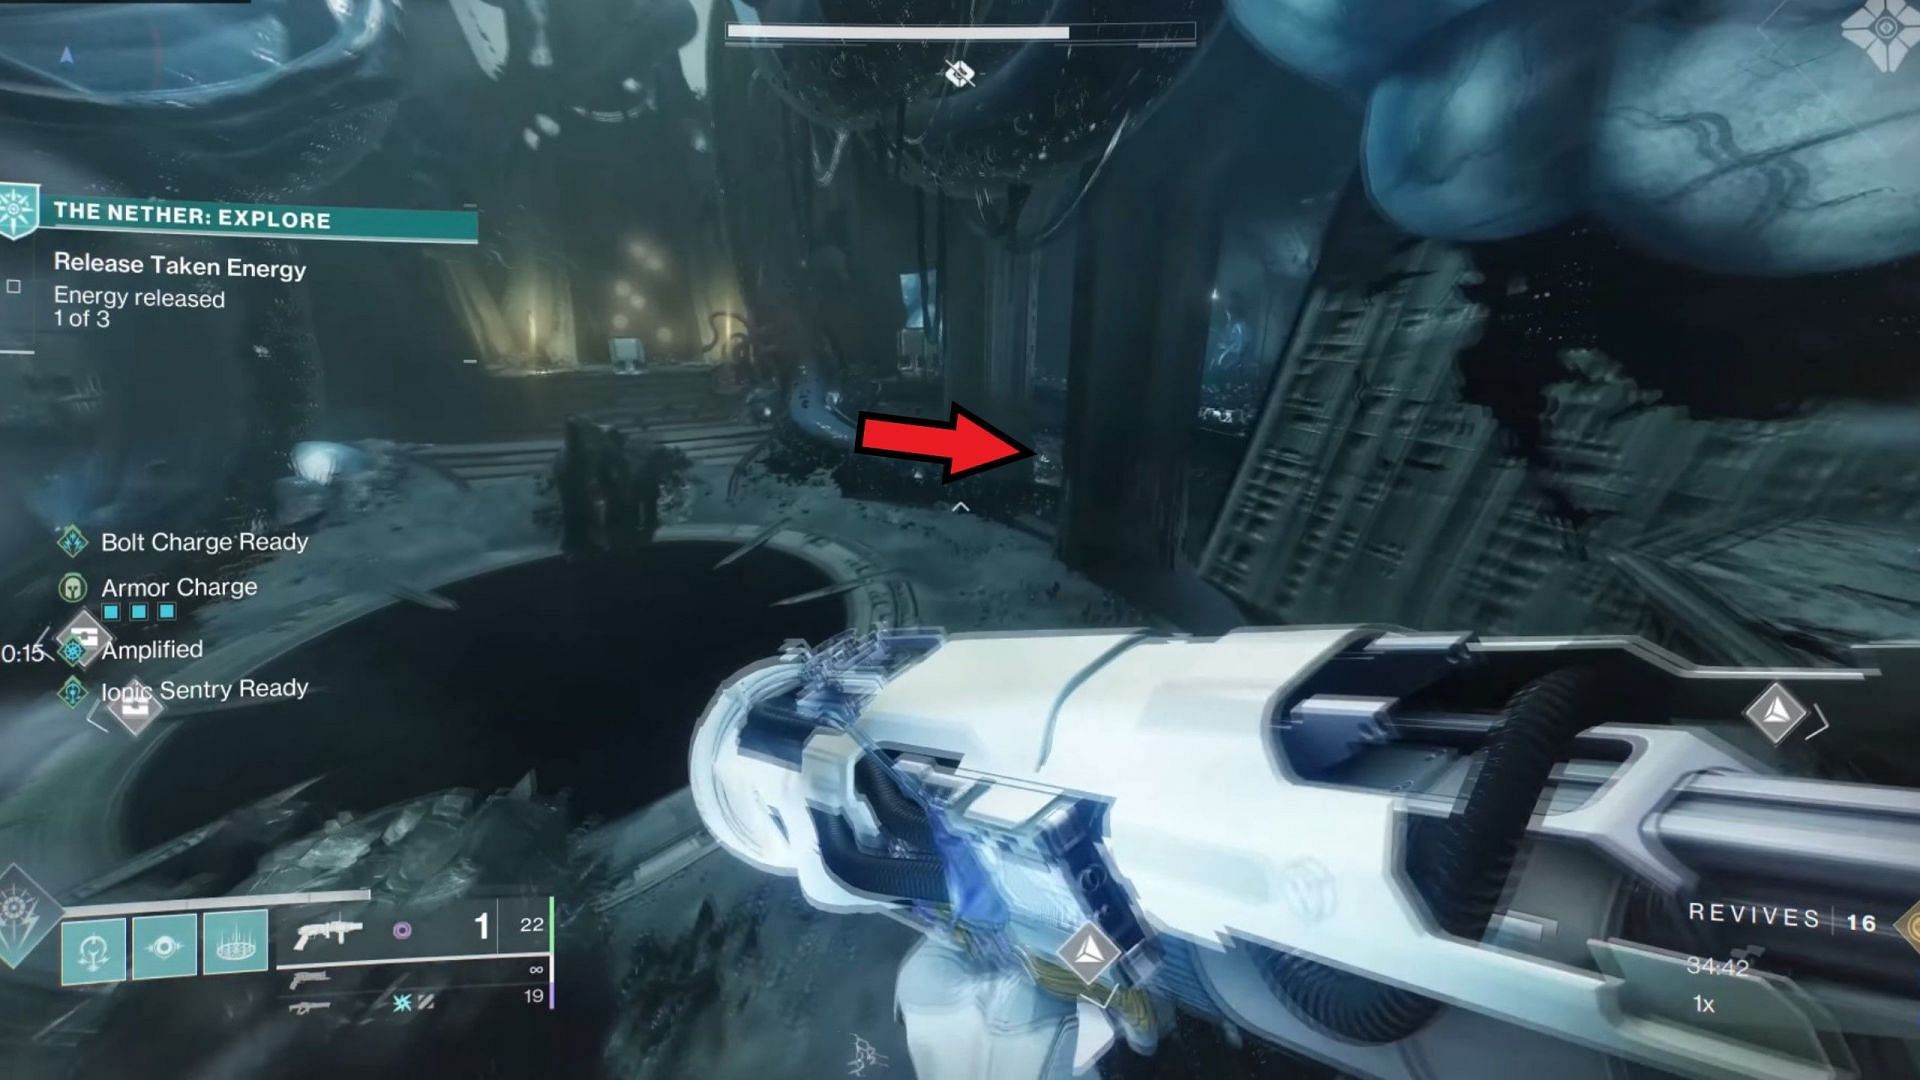
3) The Mausoleum
The Mausoleum is a dark area of the Dreadnaught where you take hold of Hive plates and destroy the clusters.
Once you spawn in the Mausoleum, take a hard right and hop on the blue tentacle. After a while, you must jump down, but not all the way. Follow the image below, and leap on one of the ledges beneath the tentacle.
Head back to the main area of the Mausoleum, take a right, and go to the second Hive plate. From there, look behind on a ledge attached with a few orange clusters on the wall.
Jump on the ledge to collect the Wormspawn.
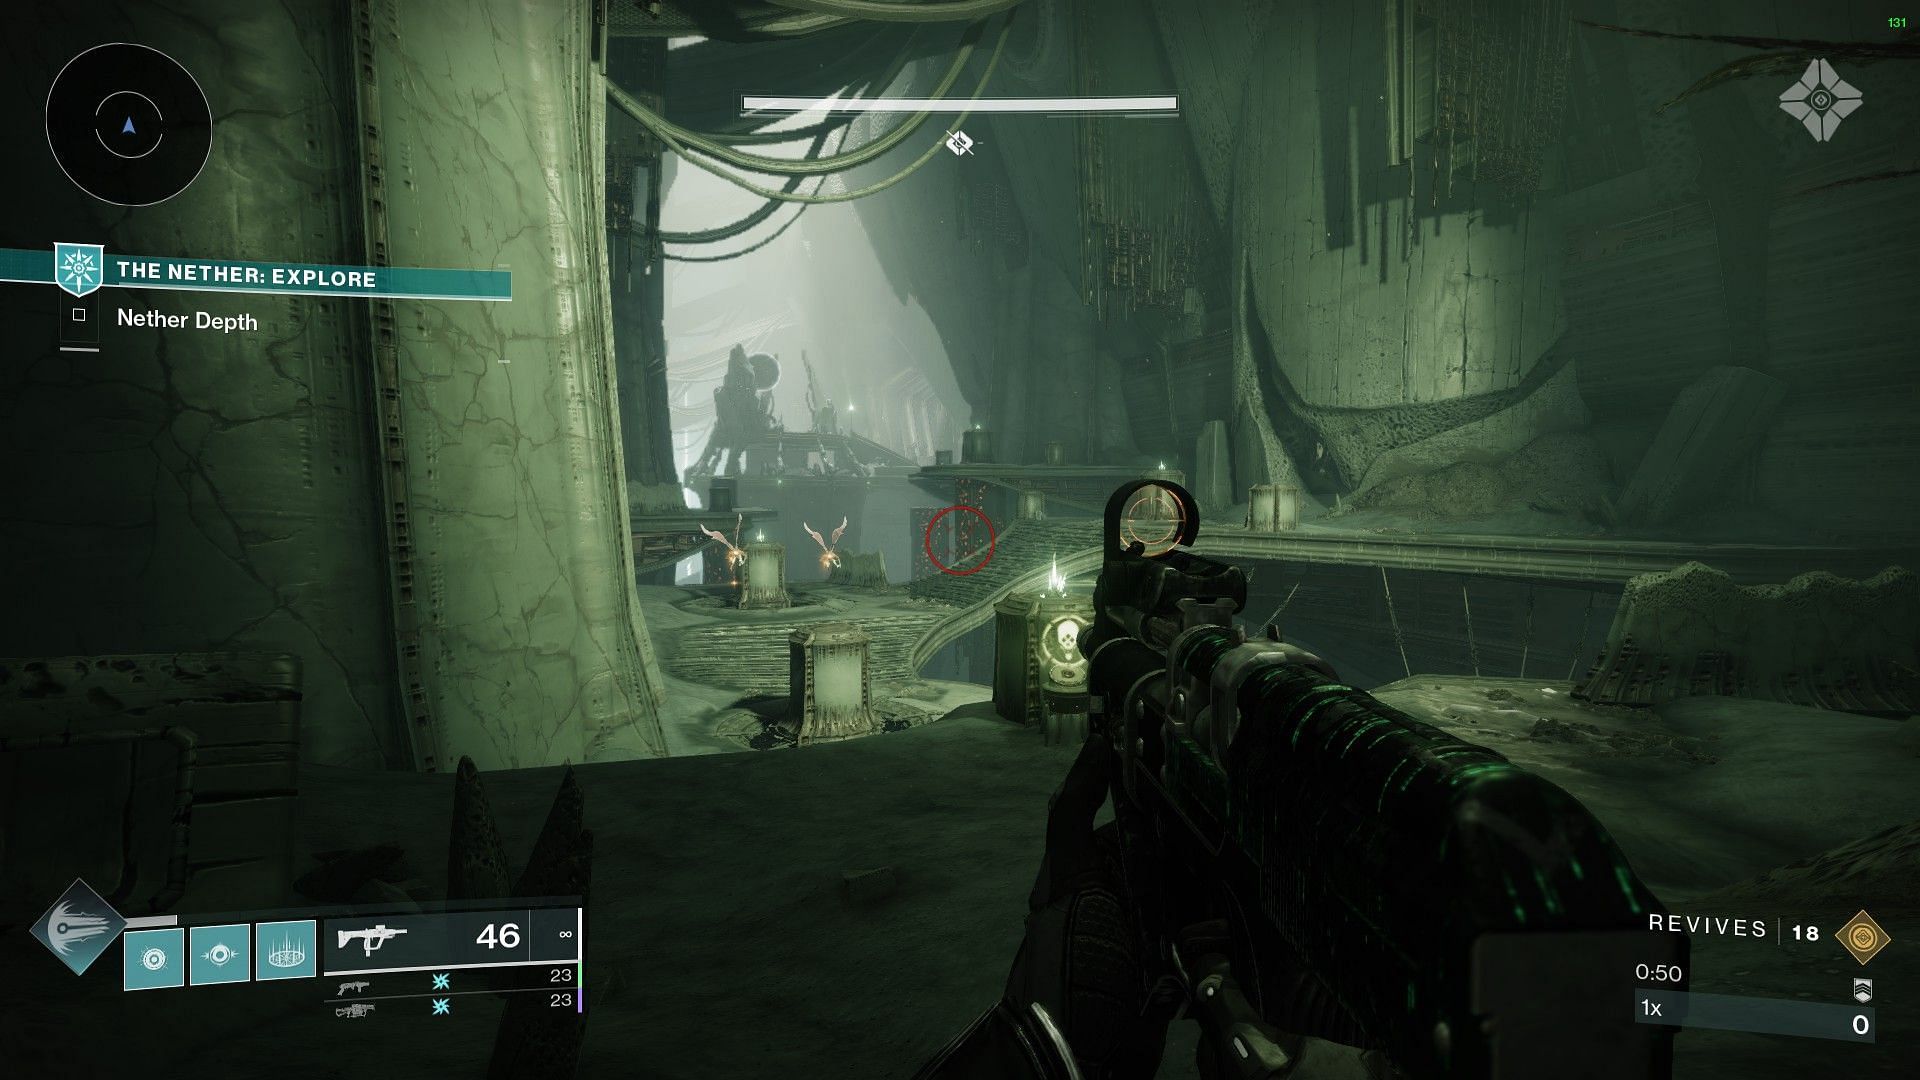
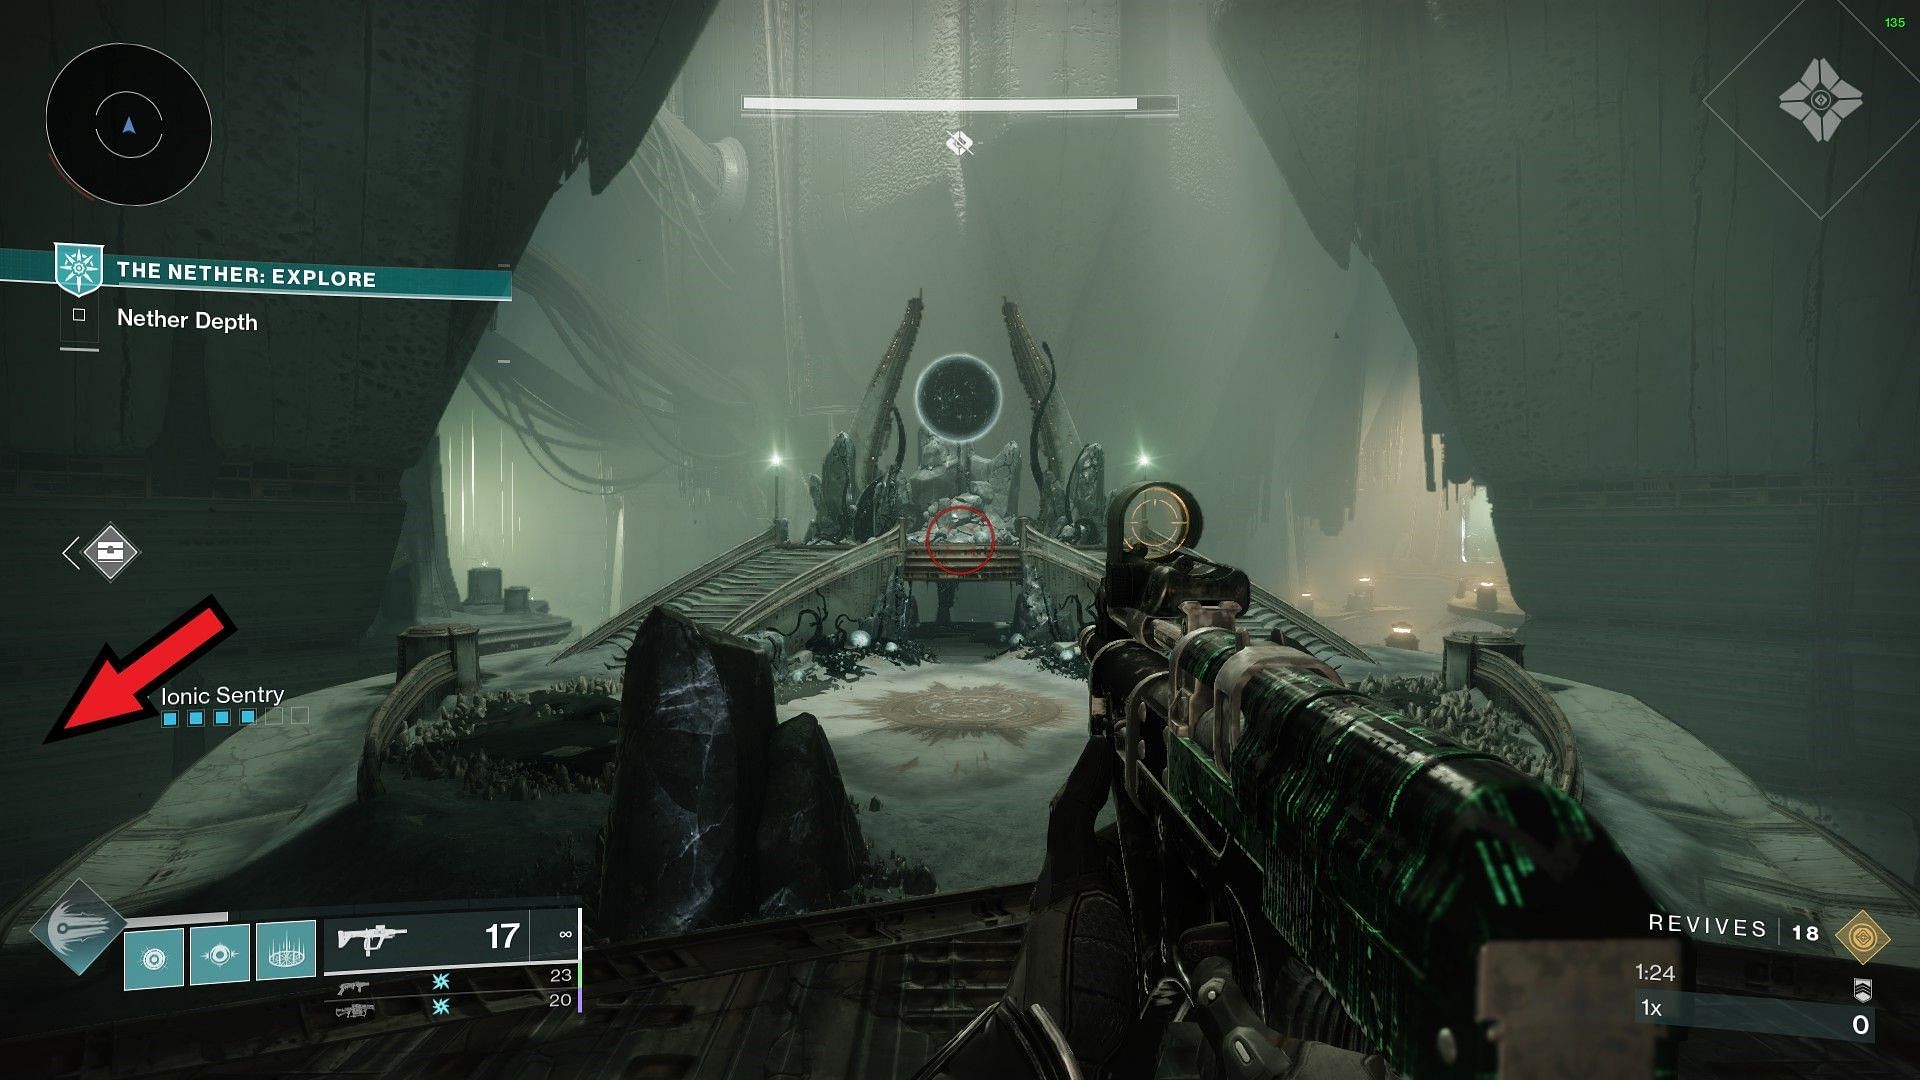
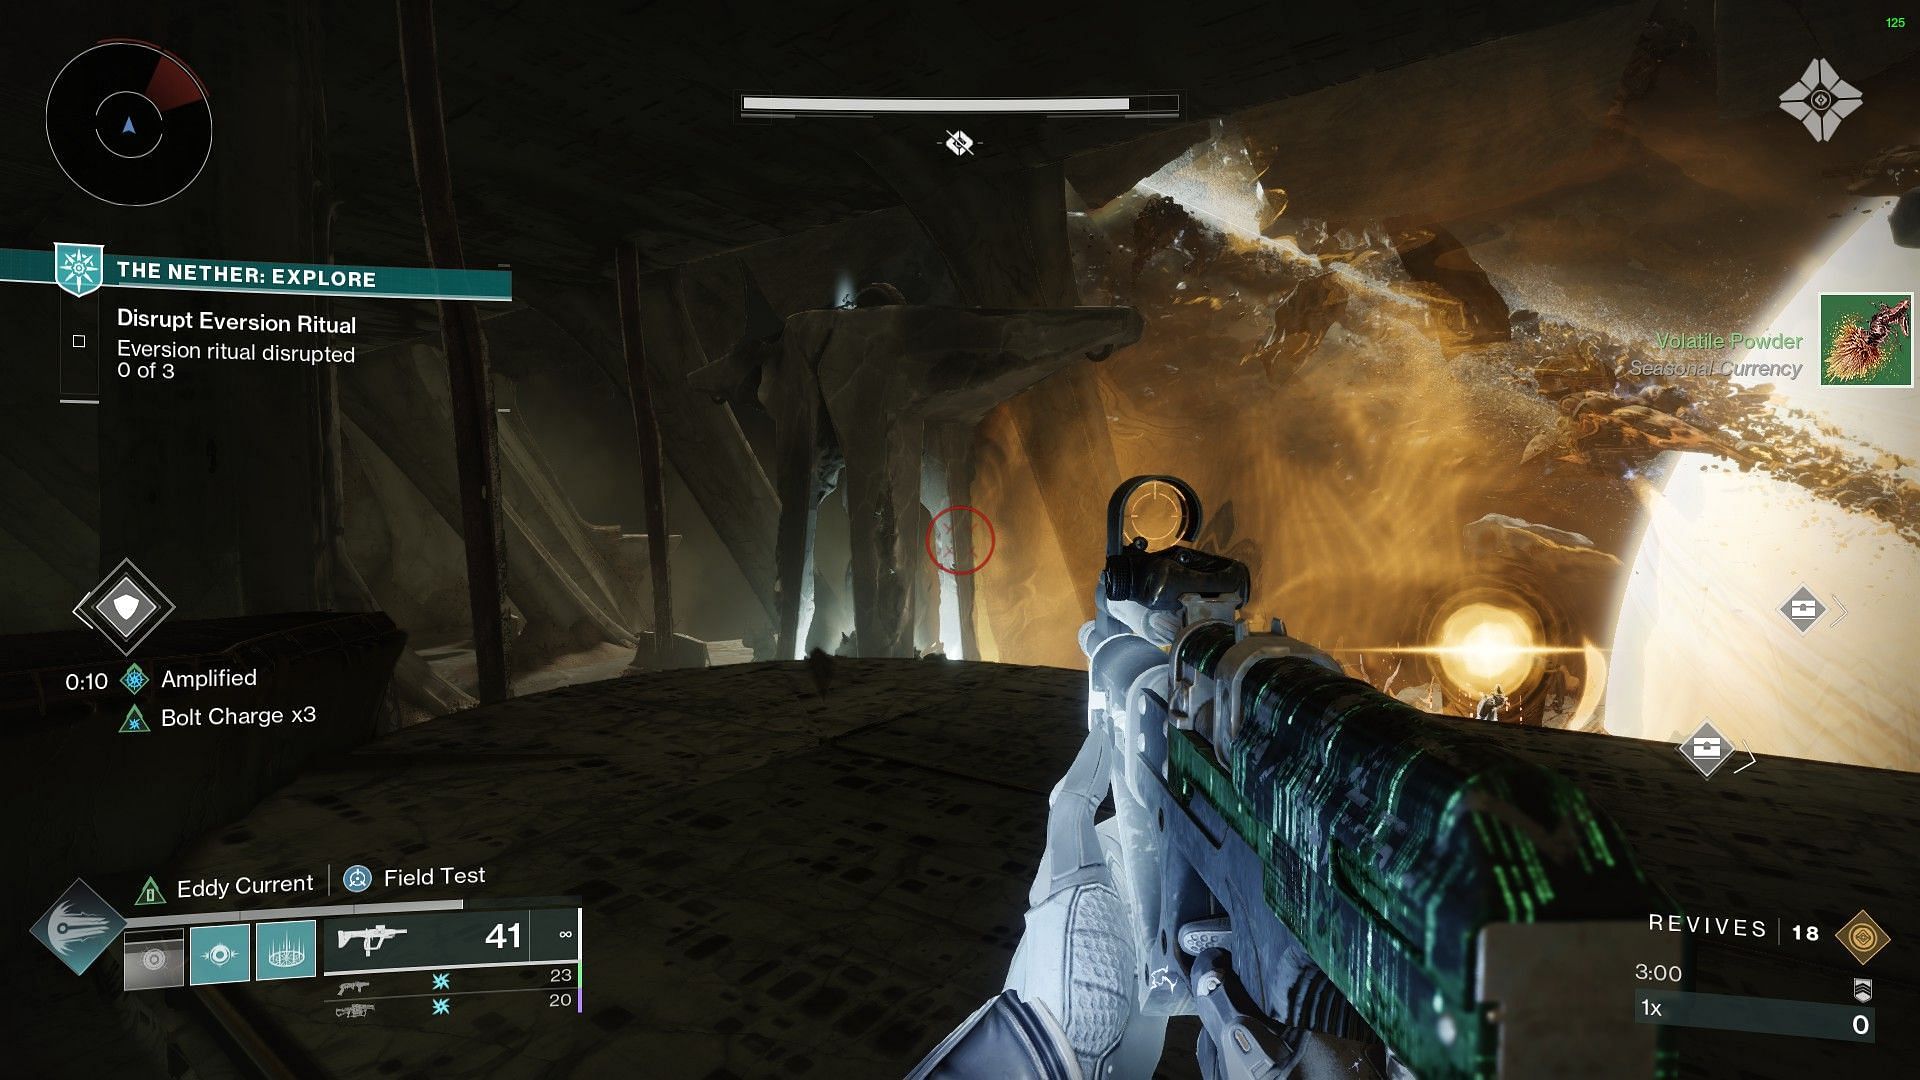
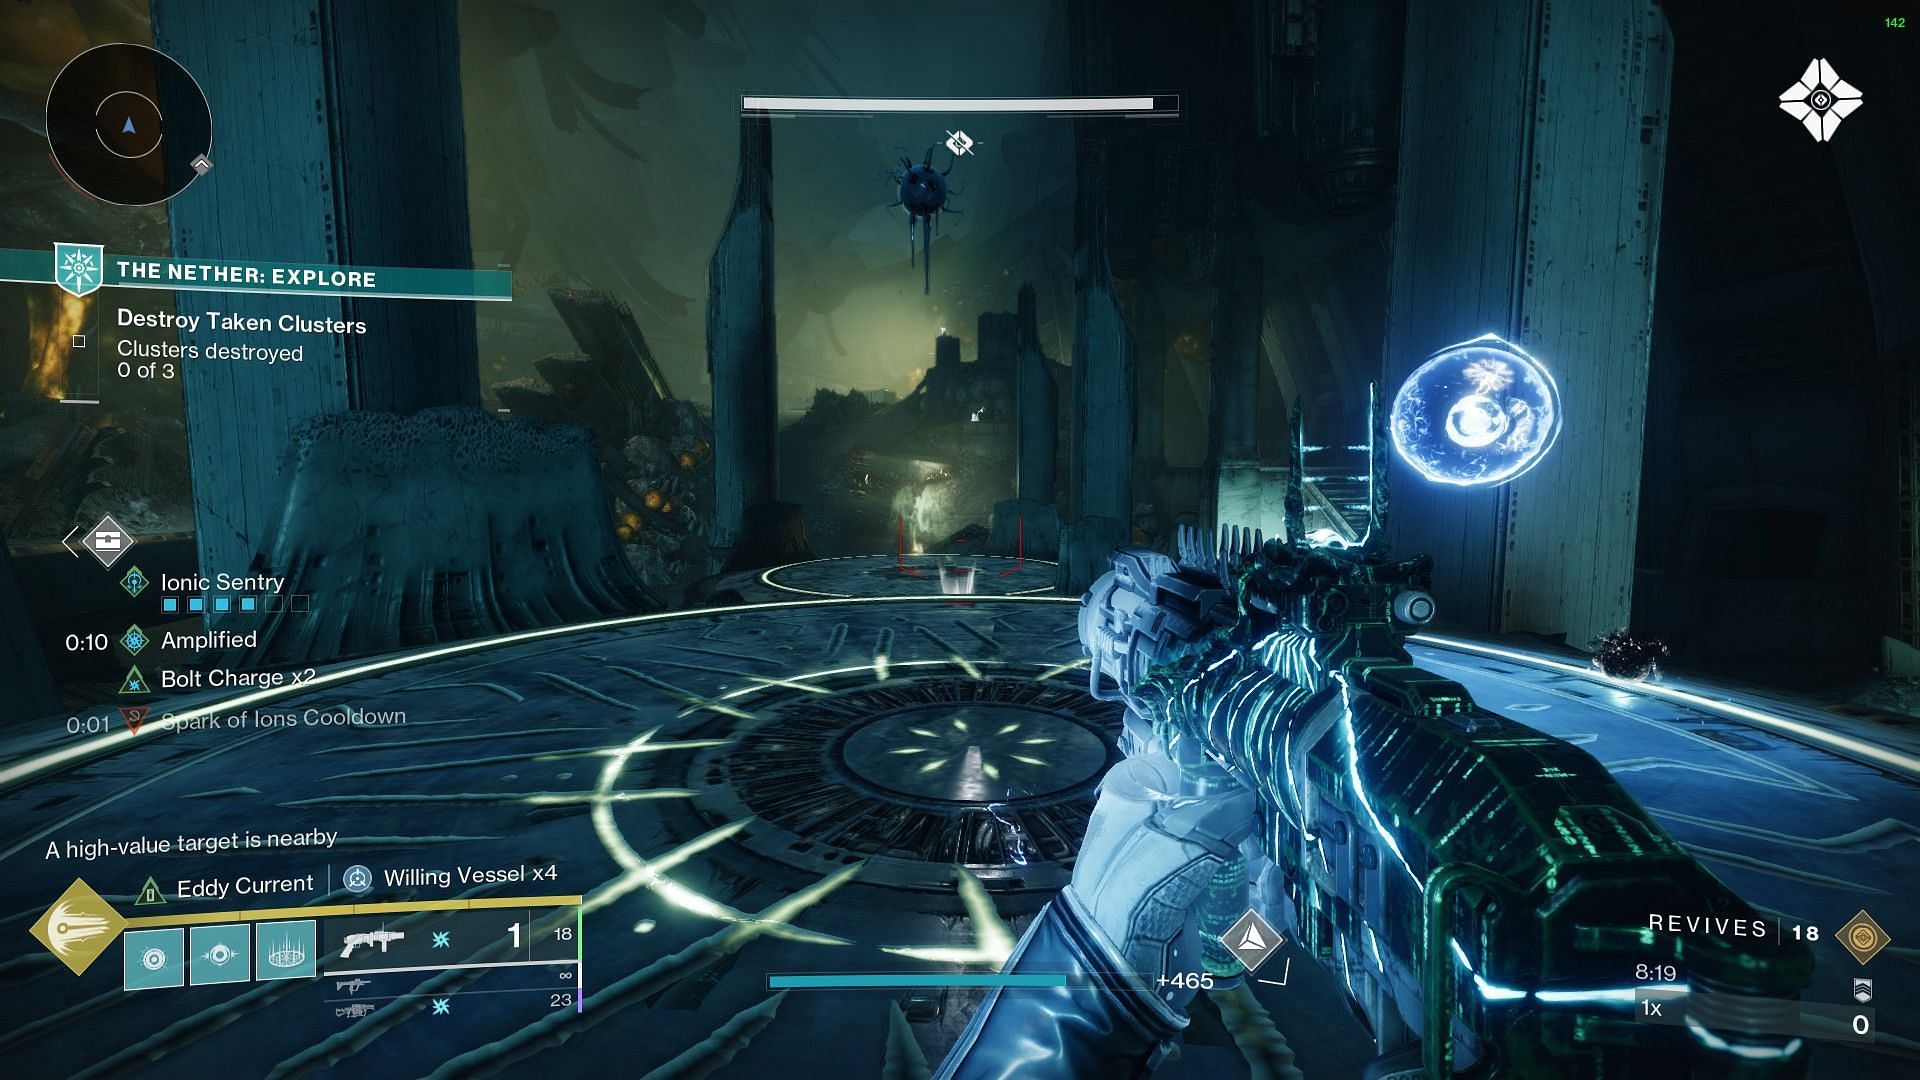
4) The Founts
The Founts is where you face the Taken Servitor boss at the end. You will also find a chained Hive mechanism in the middle, with several sections connected.
The Founts can only be accessed randomly after beating at least one full encounter rotation in one of the three areas mentioned above.
For the first Wormspawn, take a left from the middle area, and head towards the lighted podiums with Hive symbols. You will see two lighted podiums, as shown in the image below.
Jump on the topmost symbol of the right podium to find the first Wormspawn.
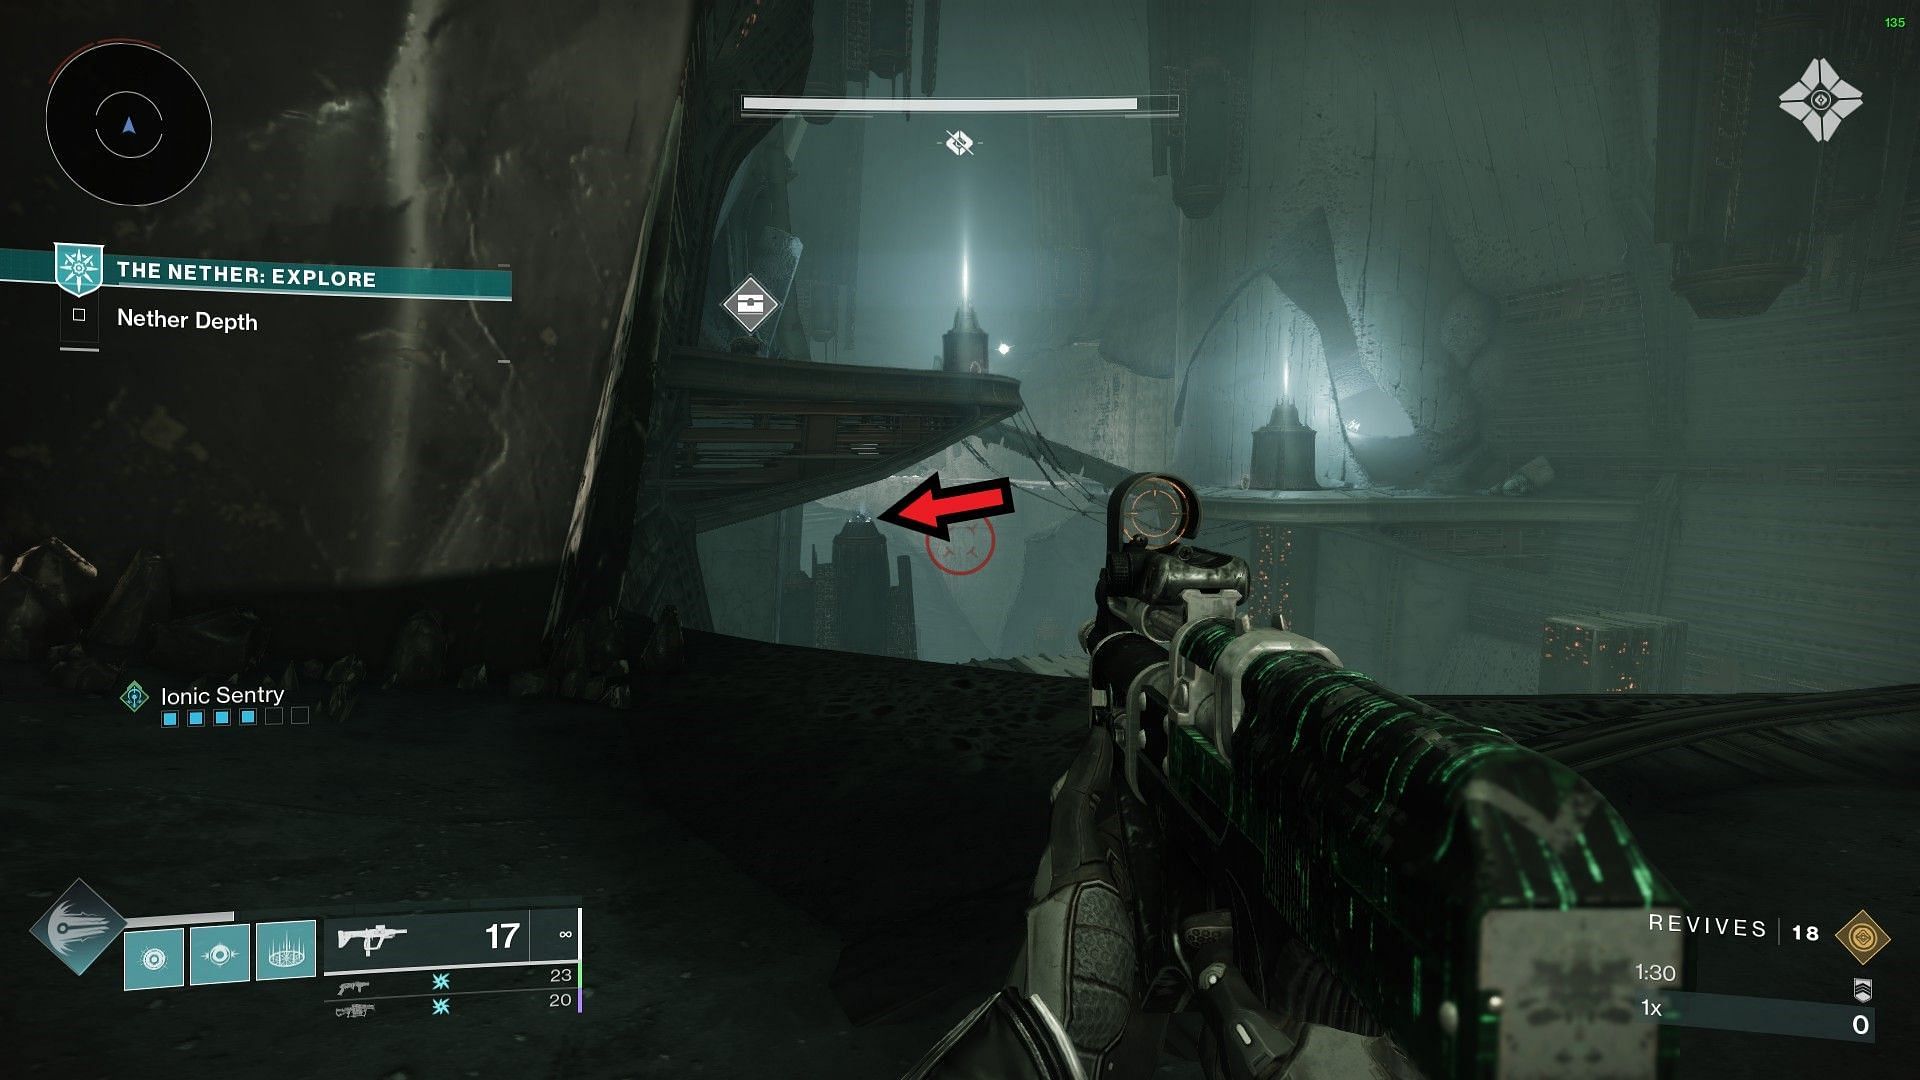
For the final Wormspawn, return to the middle area, followed by the dark arena towards the back. Look for a small entrance to an underground section on the right.

Once you enter it, look for the Wormspawn in a corner of the area.
Follow Sportskeeda for more Destiny 2 guides and news:
- All Destiny 2 Exotic weapon changes in Heresy Act I
- Imminence Destiny 2 god roll guide
- Non-Denouement god roll guide
- Psychopomp god roll guide
- Better Devils god roll guide
- Breachlight god roll guide
- Lost Signal god roll guide
- Patron of Lost Causes god roll guide
- Critical Anomaly god roll guide
- Episode Heresy weekly reset
- Adamantite god roll guide
- Tome of Want explained
- Essence of Desire farm guide
- Best ways to heal in The Nether
- Easiest way to get The Queenbreaker Catalyst
- Sundered Doctrine loot table for all encounters
