

'%20x='0'%20y='0'%20height='100%25'%20width='100%25'%20%0A%20%20%20%20%20%20%20%20%20%20xlink%3Ahref='data:image/jpg;base64,/9j/2wBDAAYEBQYFBAYGBQYHBwYIChAKCgkJChQODwwQFxQYGBcUFhYaHSUfGhsjHBYWICwgIyYnKSopGR8tMC0oMCUoKSj/2wBDAQcHBwoIChMKChMoGhYaKCgoKCgoKCgoKCgoKCgoKCgoKCgoKCgoKCgoKCgoKCgoKCgoKCgoKCgoKCgoKCgoKCj/wgARCAAGAAoDASIAAhEBAxEB/8QAFQABAQAAAAAAAAAAAAAAAAAAAAf/xAAUAQEAAAAAAAAAAAAAAAAAAAAA/9oADAMBAAIQAxAAAACQTcP/xAAcEAACAgMBAQAAAAAAAAAAAAABAgMFAAQSUSL/2gAIAQEAAT8Aor7W0aeDSNbDJ8gO3IHR9ydleeRkXlGYkL4M/8QAFBEBAAAAAAAAAAAAAAAAAAAAAP/aAAgBAgEBPwB//8QAFBEBAAAAAAAAAAAAAAAAAAAAAP/aAAgBAwEBPwB//9k='%3E%3C/image%3E%3C/svg%3E)
Kerrev The Erased is the final boss encounter for Destiny 2 Sundered Doctrine Dungeon. After going through multiple hurdles and mechanics, this challenging foe is the final obstacle standing between the players and the completion of this dungeon.
This article lists the basics of the final boss encounter in Sundered Doctrine, allowing you to defeat Kerrev The Erased.
Note: This article explains the mechanics related only to the Kerrev boss fight, and does not explain the mechanics of the previous encounters. Readers are requested to refer to our guides on the Sundered Doctrine's first encounter and Zoetic Lockset boss fight for a clearer idea.
How to defeat Kerrev The Erased in Destiny 2
As mentioned above, players attempting this encounter are requested to complete the previous two encounters of the Dungeon, as the tied mechanics here are being carried over.
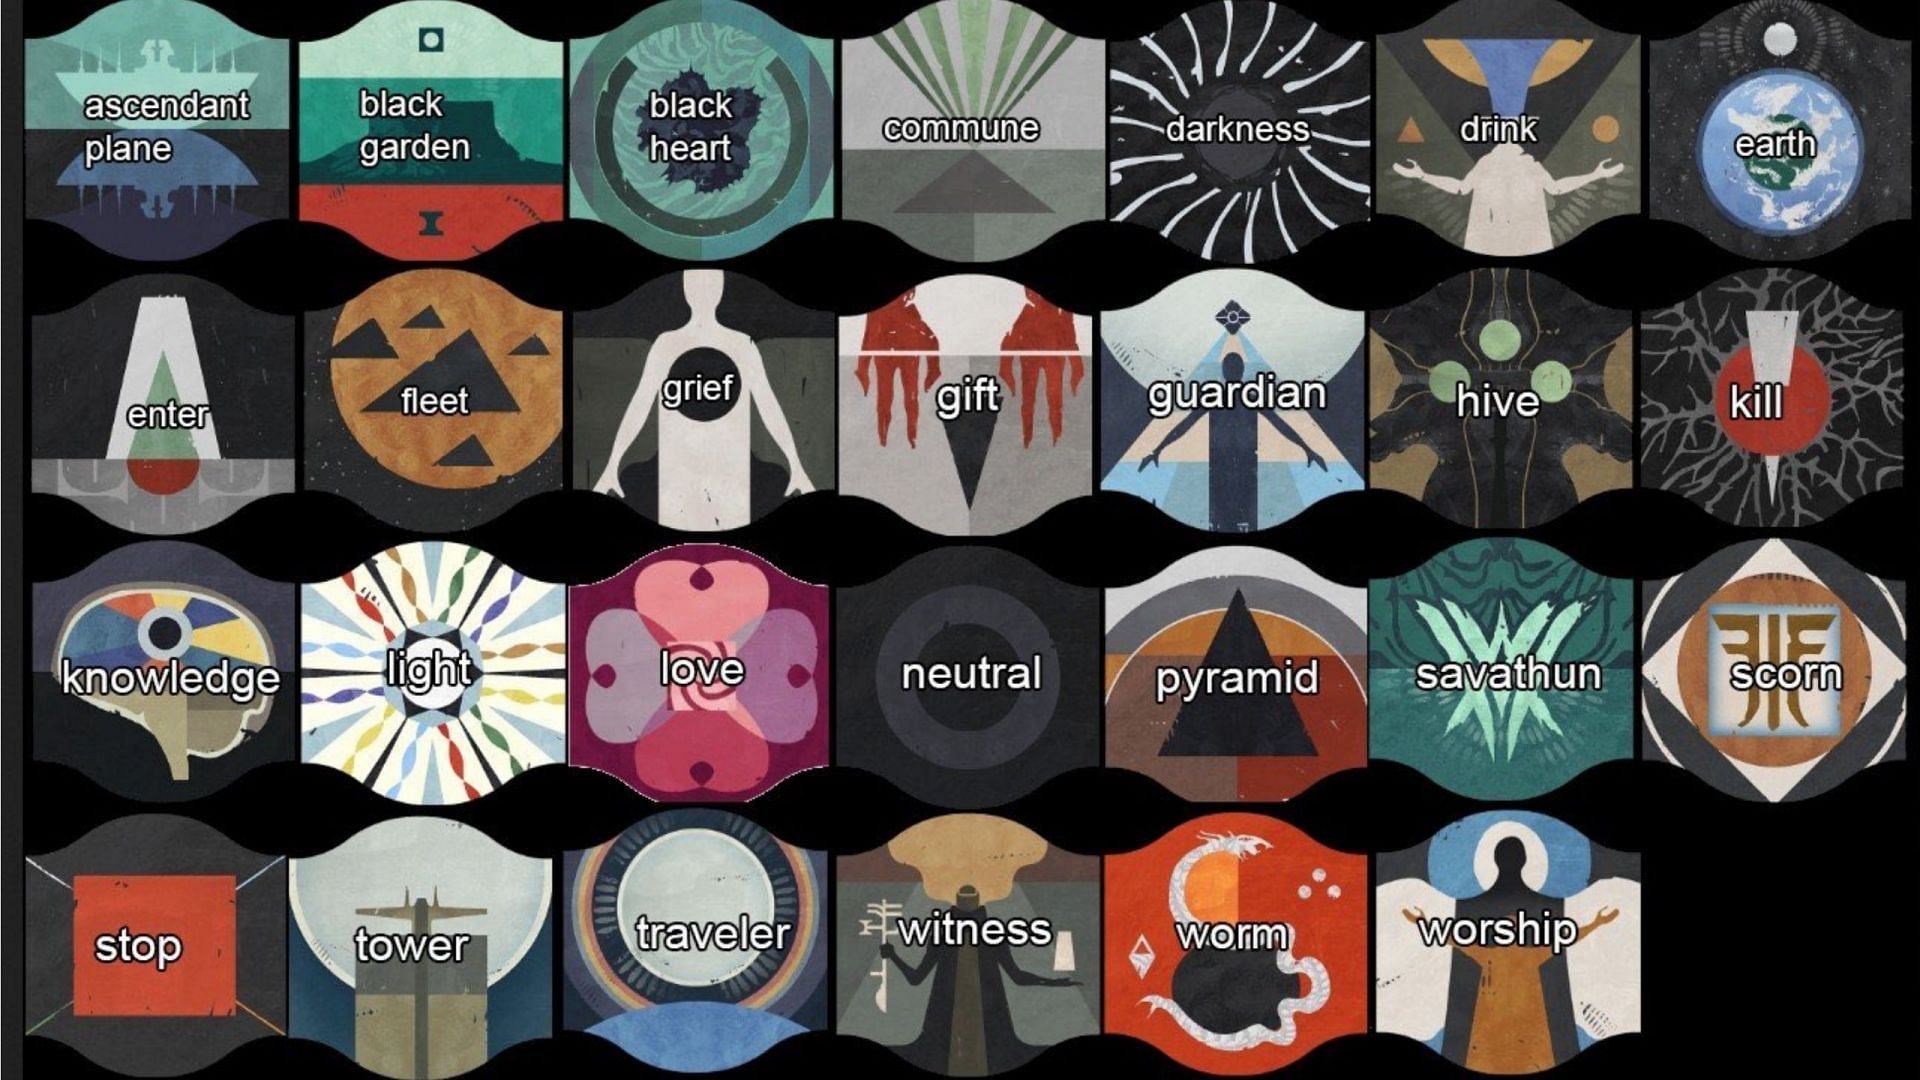
The primary task still revolves around Pyramid symbols, so here is a diagram to make things easier.
1) Room layout
The entire boss arena includes a middle area with the boss, a large room on the right, a small room underground that connects to the middle area, and lastly, another room on the right connected to the middle area. Each room, including the middle area, has a set of Pyramid symbols on the wall.
Here is a rough layout of the room presented by a renowned content creator, Fallout Plays on YouTube.
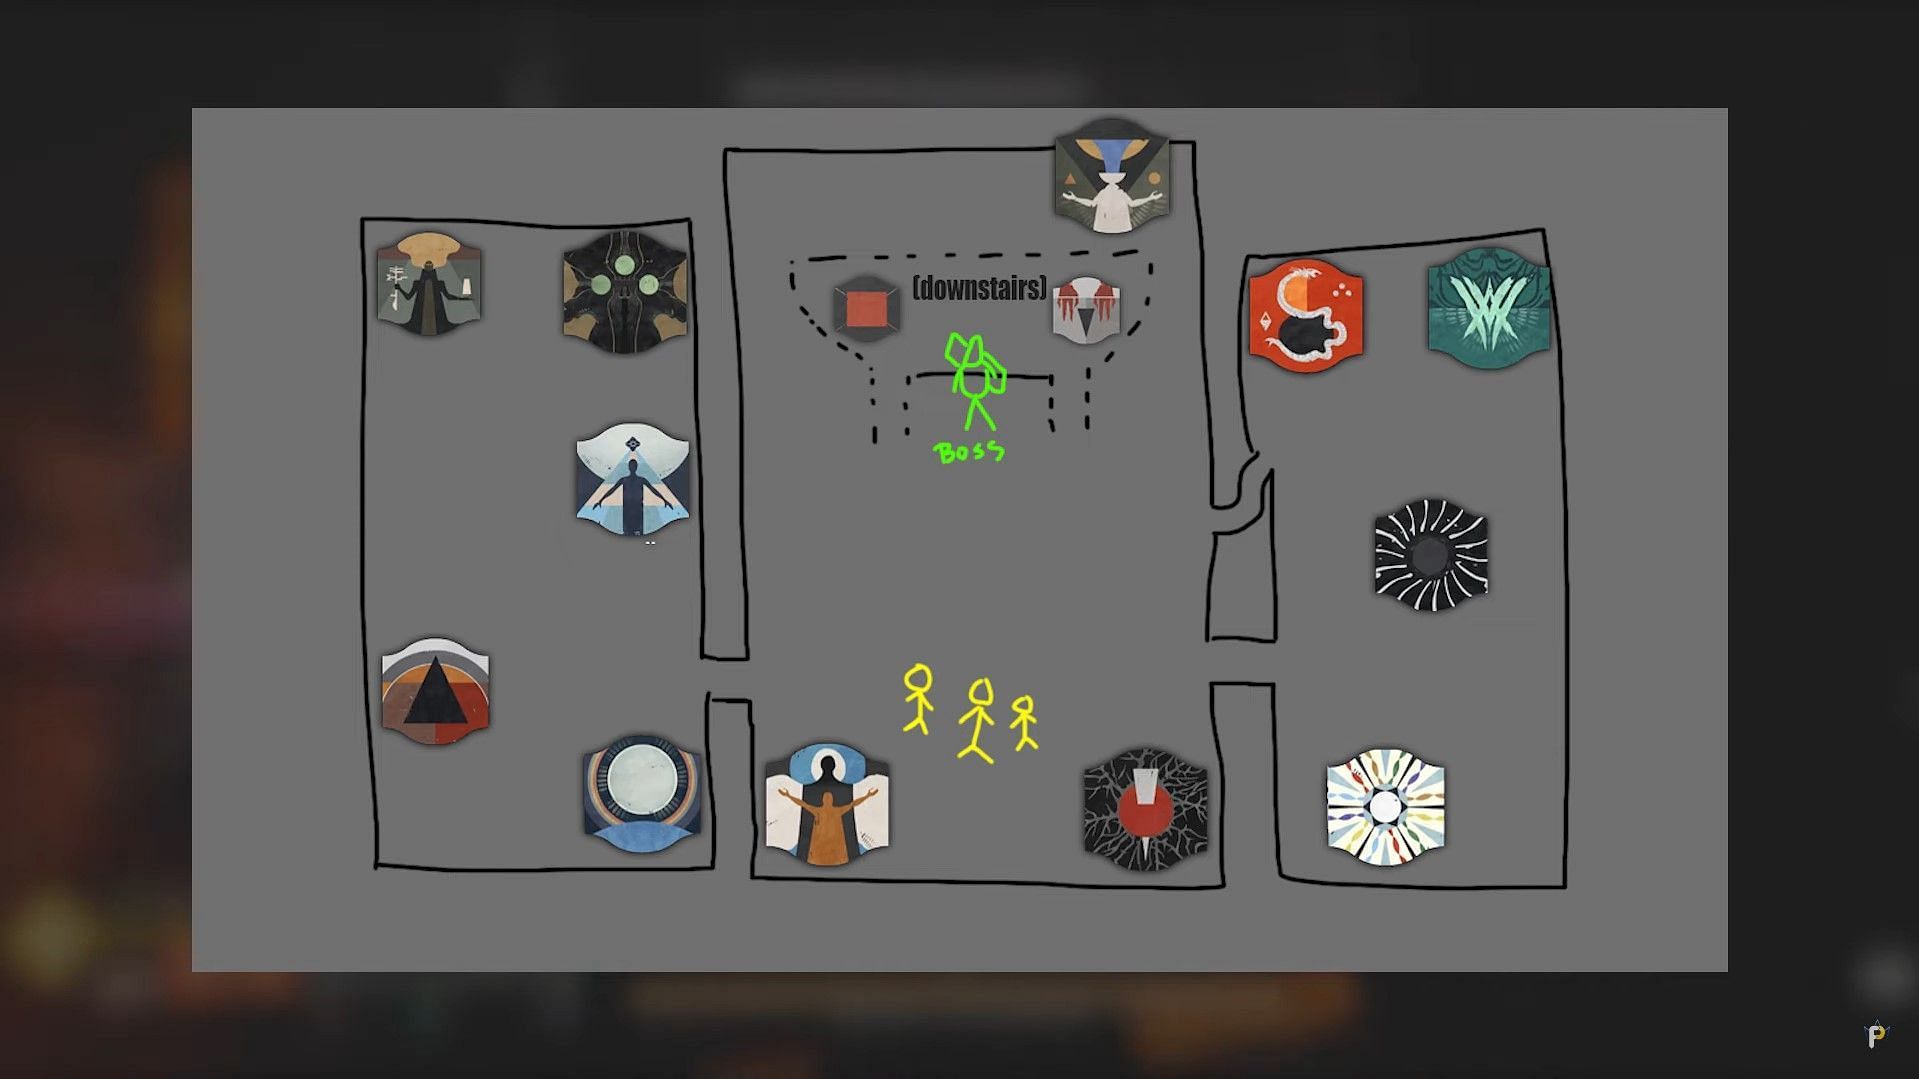
The Pyramid symbols in the walls will always be intact no matter how many times you run the encounter. Hence, it is a good idea to memorize them before starting the mechanics.
2) Basic mechanics
Here are the basic tasks you must perform to start the damage phase on Kerrev:
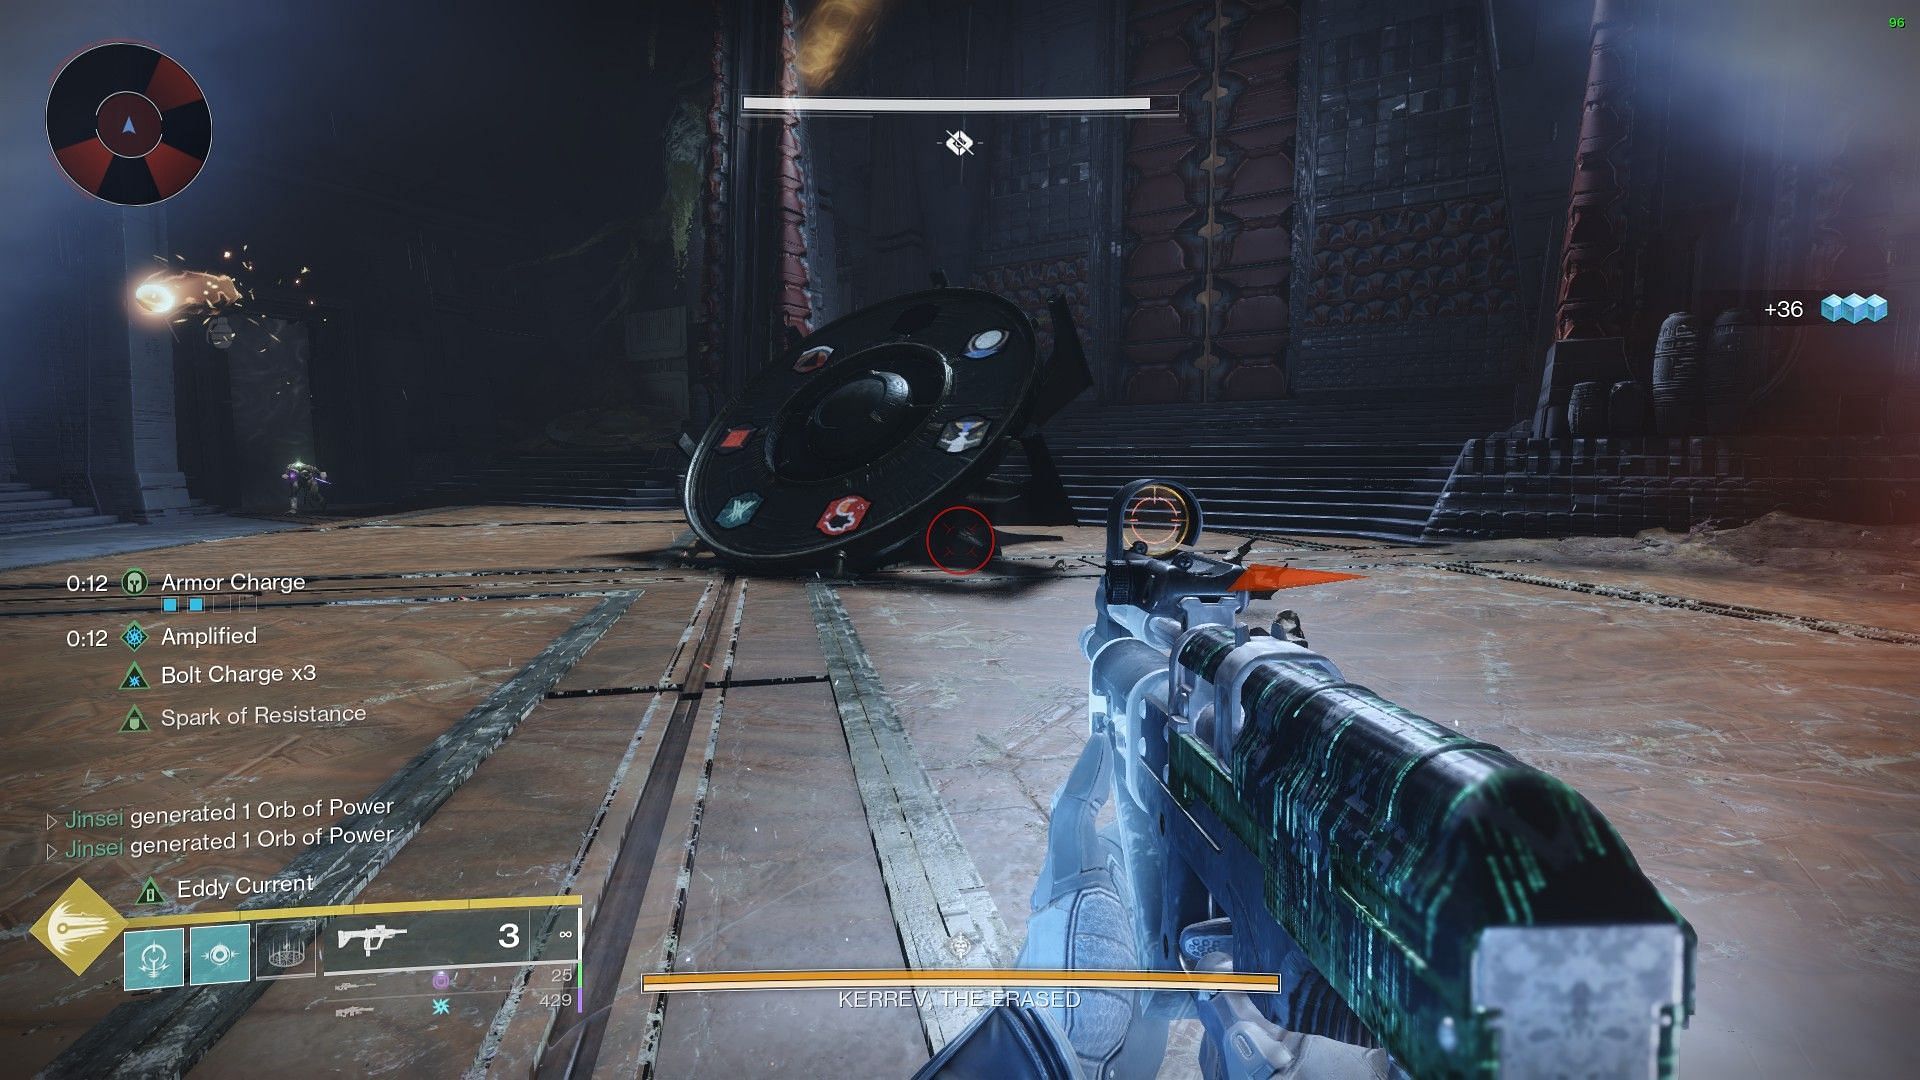
- In the middle room, you will find a wheel with six Pyramid symbols. Split these symbols in two, keeping three on the left, and three on the right.
- Look for the specific symbol that is glowing, and keep tabs on that symbol.
- Next, look for Truth Seeker Grim in one of the rooms depicted above. Memorize the symbol that drops from the Truth Seeker.
- Now, your job is to look at the wheel, match the dropped symbol from the Truth Seeker, and extinguish the glow on all three symbols on the same side as the dropped symbol. At the same time, you should also make the three symbols on the opposite side of the wheel glow.
- For example, the left side of the wheel has Witness, Drink, and Light. The right side of the wheel has Pyramid, Kill, and Worm. If the Truth Seeker drops Drink, your objective is to stop Witness, Drink, and Light from glowing, and align the glow towards Pyramid, Kill, and Worm.
- Once all three symbols are glowing, interact with the Podium in front of the wheel, and hide behind any one of the pillars.
- The entire arena will glow red, and the boss' shield will slowly deplete.
- Now, you are free to damage the boss. Repeat the process until he is dead.

Here's how to align each lens:
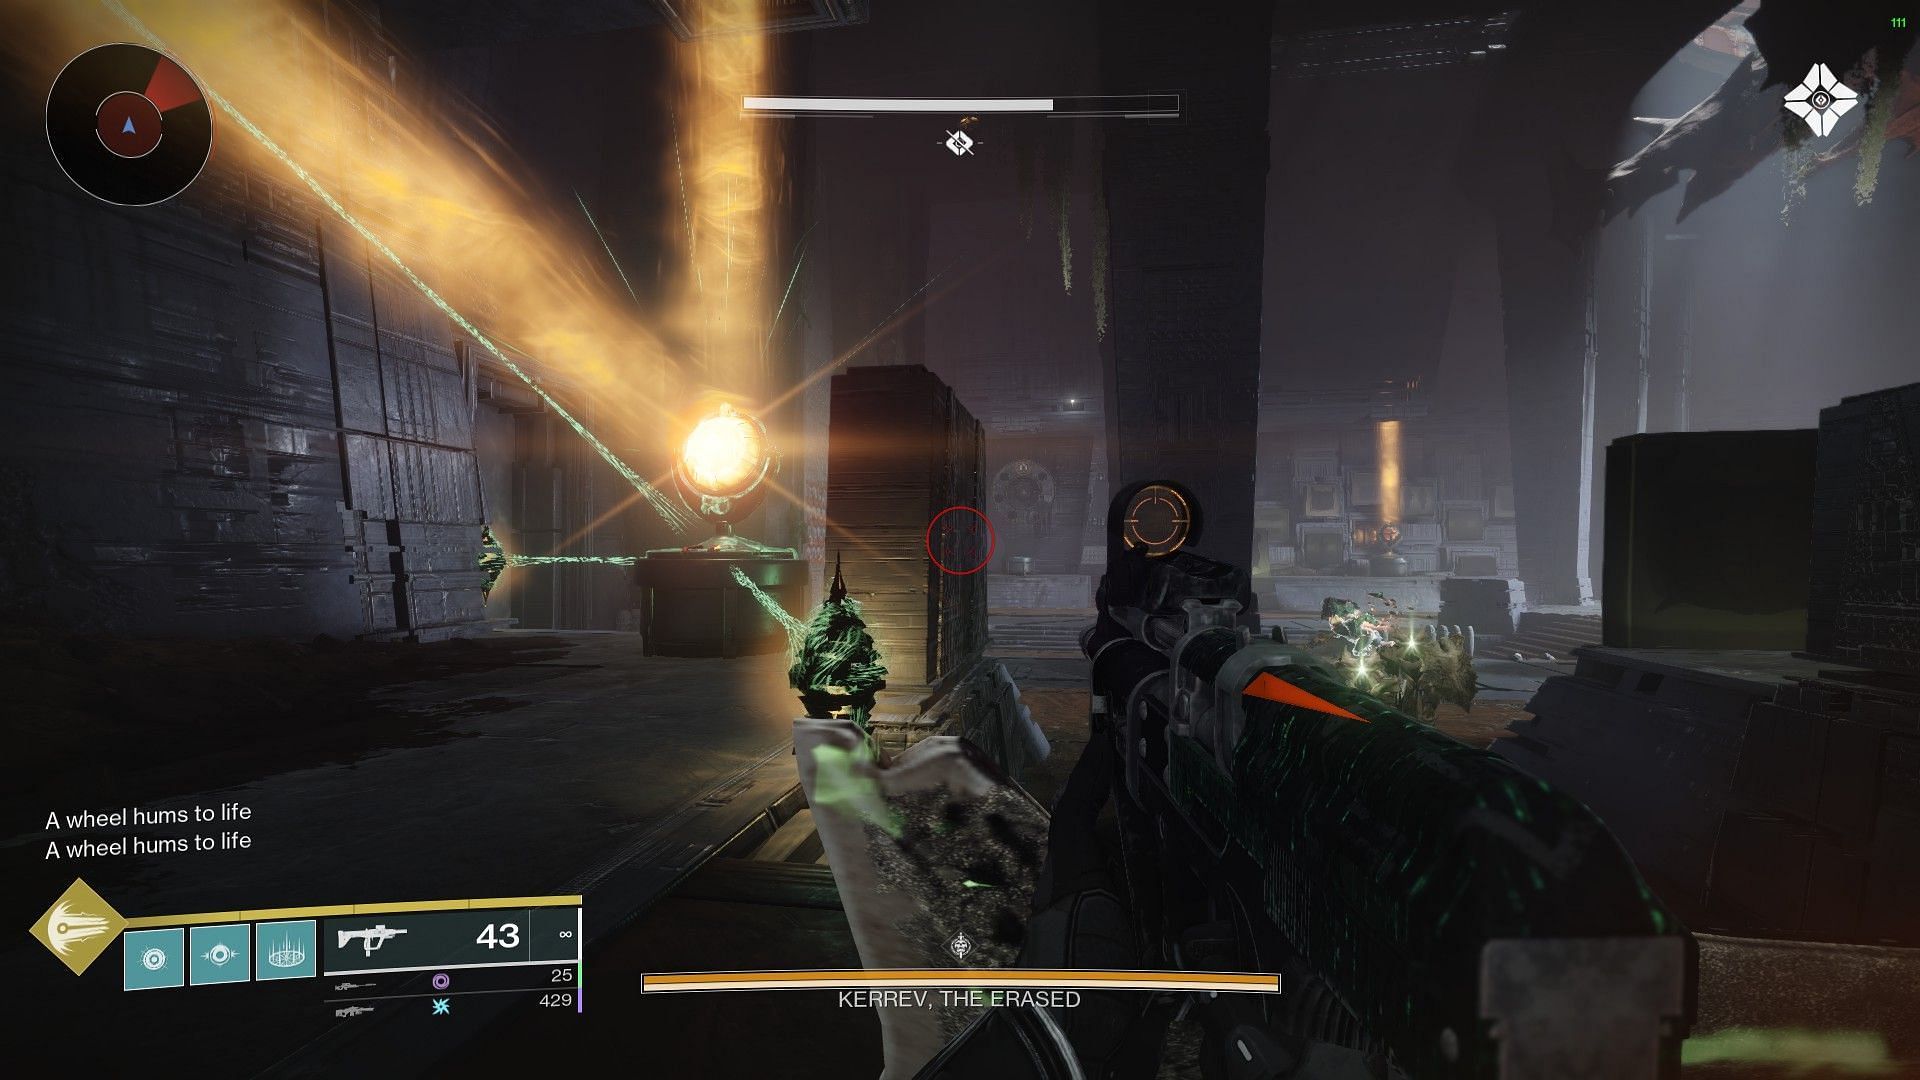
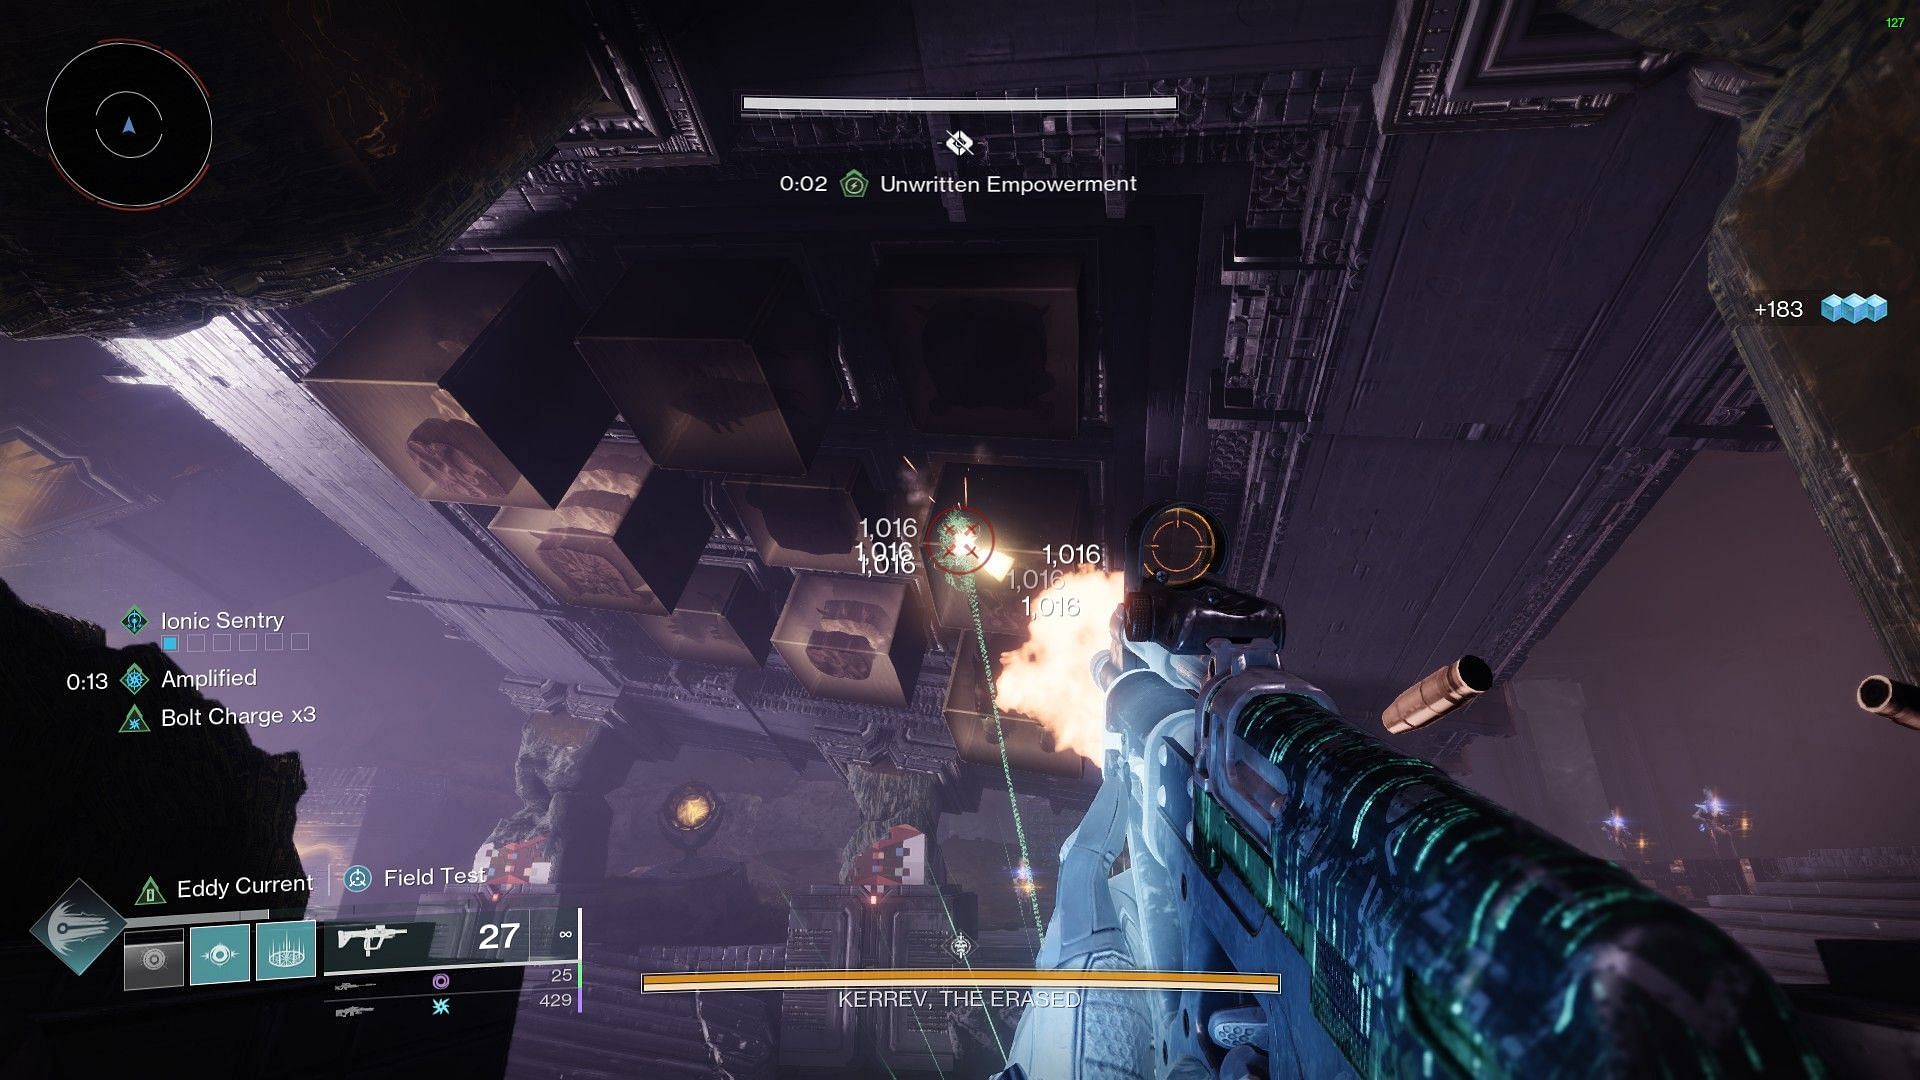
- In each room, you will find a few lenses jammed with Stand ropes. You must find a Dread Weaver enemy called "Unwritten Attendant." Kill them to gain a buff called "Unwritten Empowerment."
- Simply shoot the Darkness Crux surrounding the tied lens to free it. To switch the glow from the lens, shoot the solid Darkness Crux to block or enable the light from the final lens.
Lastly, here's how to enter each room:
- The middle area and the underground rooms have open entrances, so it shouldn't be hard to find them.
- To access the left room, shoot the door until it glows orange, and opens up just enough for you to pass through. Run across quickly before it can close on you, killing you in the process.
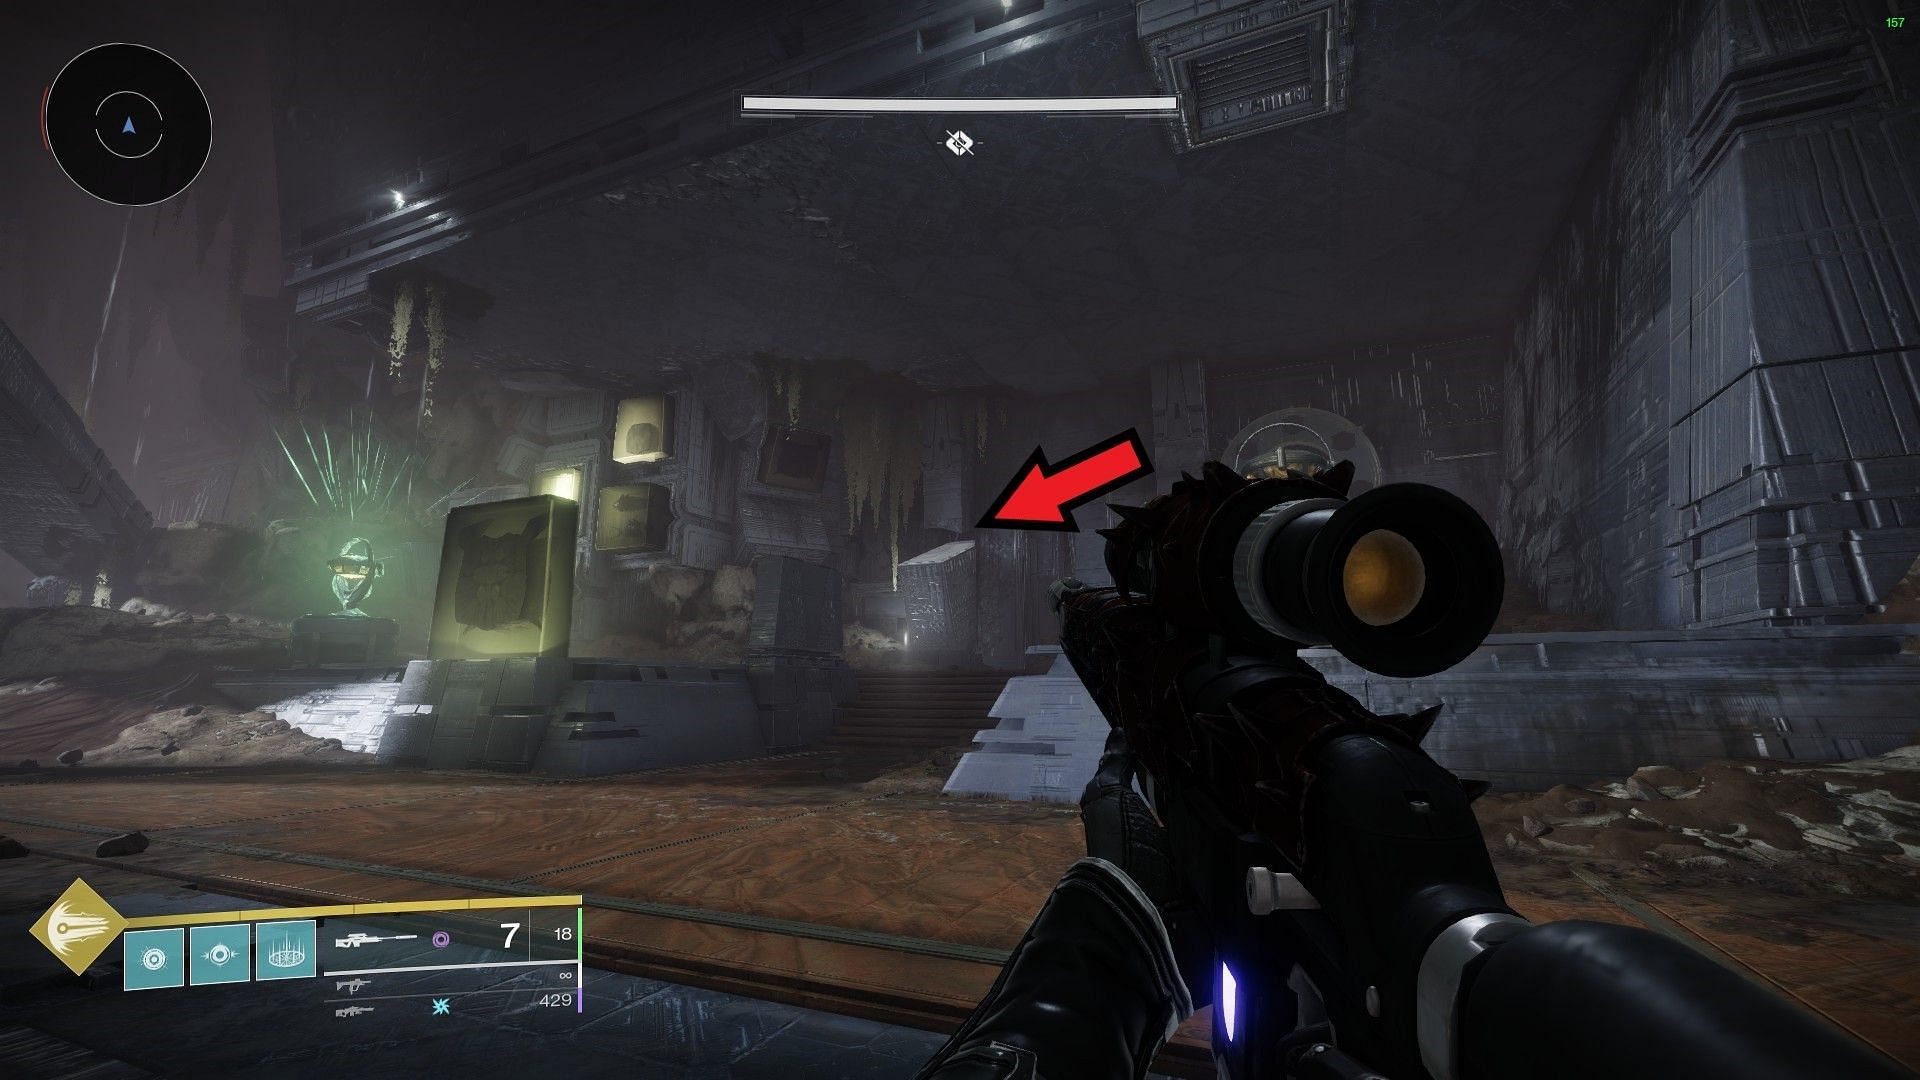
- To access the right room, look for a tiny space on the wall as shown in the image below.
Great options for inflicting damage upon Kerrev The Erased include Rocket Launchers, Divinity with Linear Fusion Rifles, and Swords.
Follow Sportskeeda for more Destiny 2 guides and news:
- All Destiny 2 Exotic weapon changes in Heresy Act I
- Imminence Destiny 2 god roll guide
- Non-Denouement god roll guide
- Psychopomp god roll guide
- Better Devils god roll guide
- Breachlight god roll guide
- Lost Signal god roll guide
- Patron of Lost Causes god roll guide
- Critical Anomaly god roll guide
- Episode Heresy weekly reset
- Adamantite god roll guide
- Tome of Want explained
- Essence of Desire farm guide
- Best ways to heal in The Nether
- Easiest way to get The Queenbreaker Catalyst
