
'%20x='0'%20y='0'%20height='100%25'%20width='100%25'%20%0A%20%20%20%20%20%20%20%20%20%20xlink%3Ahref='data:image/jpg;base64,/9j/2wBDAAYEBQYFBAYGBQYHBwYIChAKCgkJChQODwwQFxQYGBcUFhYaHSUfGhsjHBYWICwgIyYnKSopGR8tMC0oMCUoKSj/2wBDAQcHBwoIChMKChMoGhYaKCgoKCgoKCgoKCgoKCgoKCgoKCgoKCgoKCgoKCgoKCgoKCgoKCgoKCgoKCgoKCgoKCj/wgARCAAGAAoDASIAAhEBAxEB/8QAFgABAQEAAAAAAAAAAAAAAAAAAAQH/8QAFQEBAQAAAAAAAAAAAAAAAAAAAQL/2gAMAwEAAhADEAAAAMWhG//EACEQAAIBAwMFAAAAAAAAAAAAAAECBAAFEQMGIRIiMXHB/9oACAEBAAE/ANwXiMtiW36EEQ47MG6NF2cE45buPHqjtOQTlXjFT4yWHyv/xAAYEQACAwAAAAAAAAAAAAAAAAABAgADEf/aAAgBAgEBPwCtQowT/8QAFxEBAAMAAAAAAAAAAAAAAAAAAQACA//aAAgBAwEBPwDaypP/2Q=='%3E%3C/image%3E%3C/svg%3E)
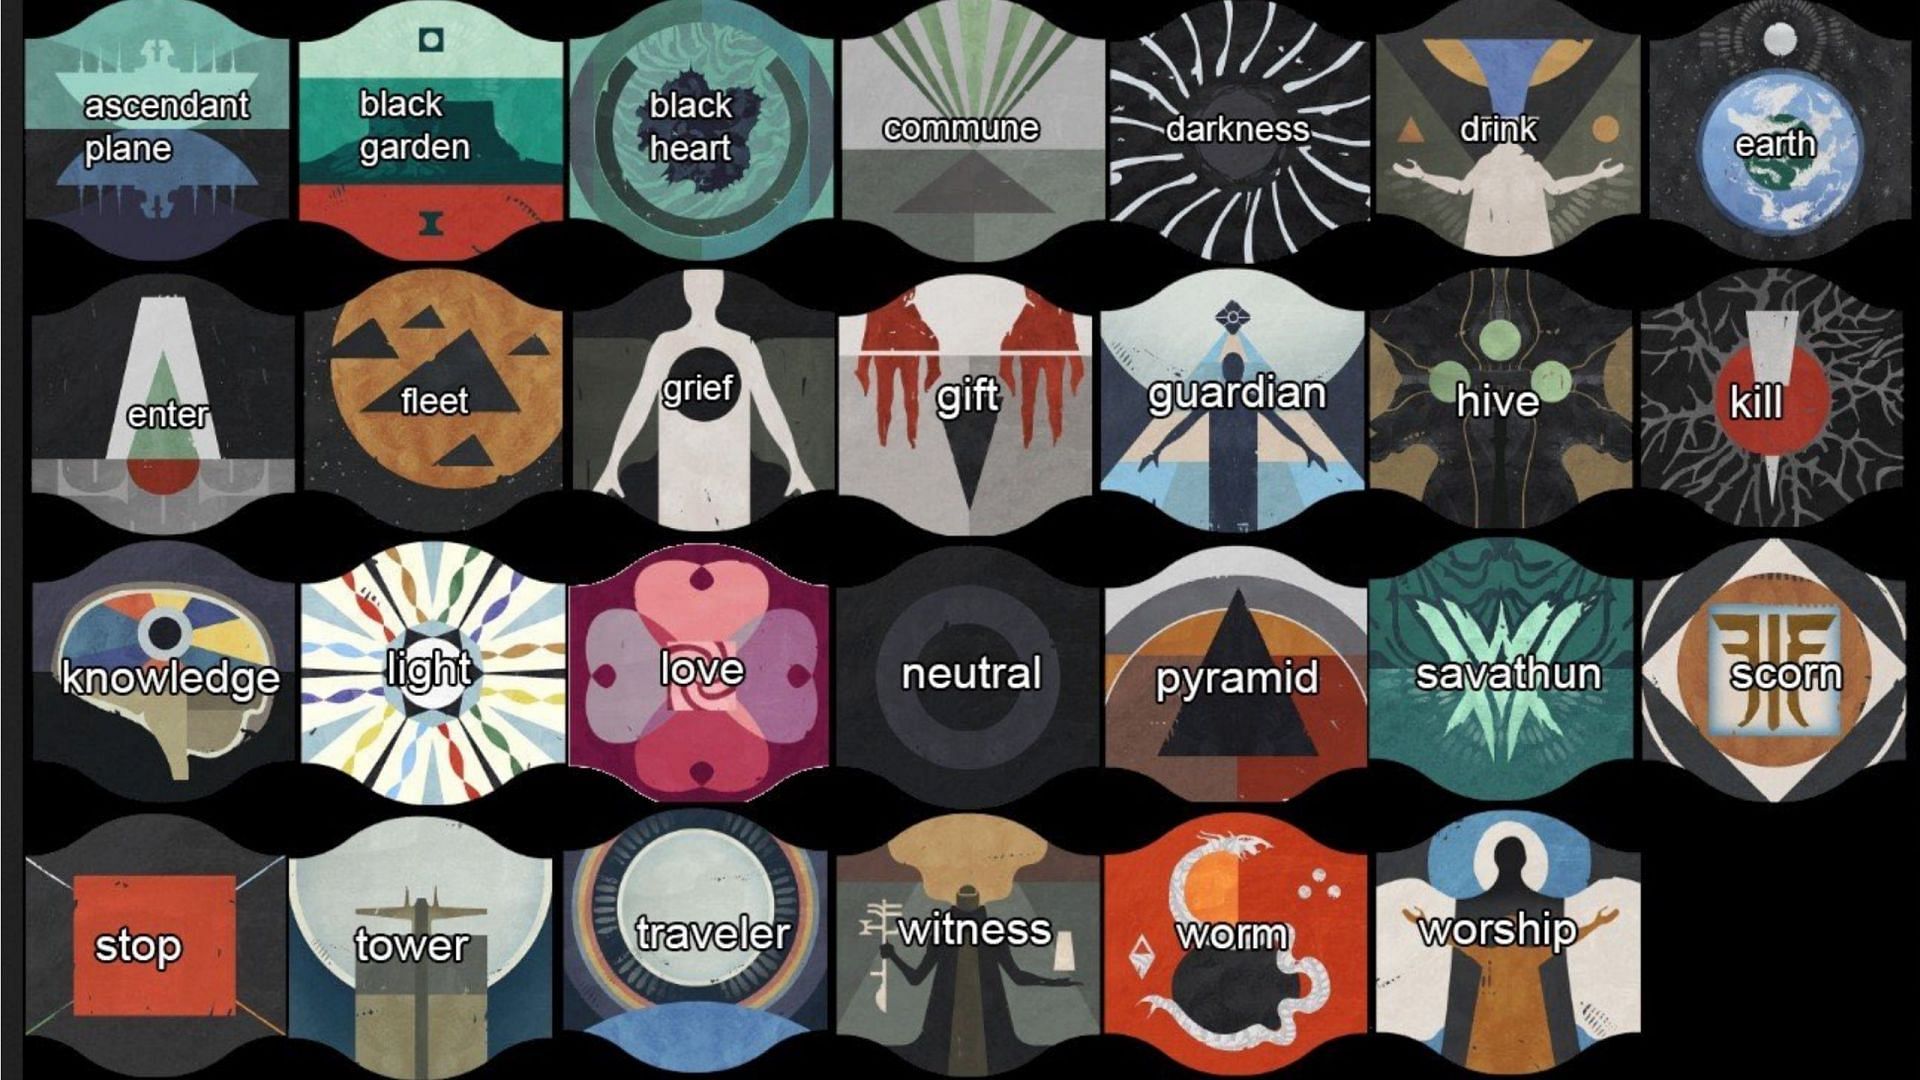
The first encounter in the Sundered Doctrine Dungeon in Destiny 2 brings back several memories from the Rhulk's Pyramid. Players must get accustomed to the Pyramid symbols, and act accordingly. These symbols are the same as the ones introduced in the Vow of the Disciple Raid.
Everyone attempting is recommended to get familiar with the symbol calls, especially if they plan to run the encounters in a fireteam.
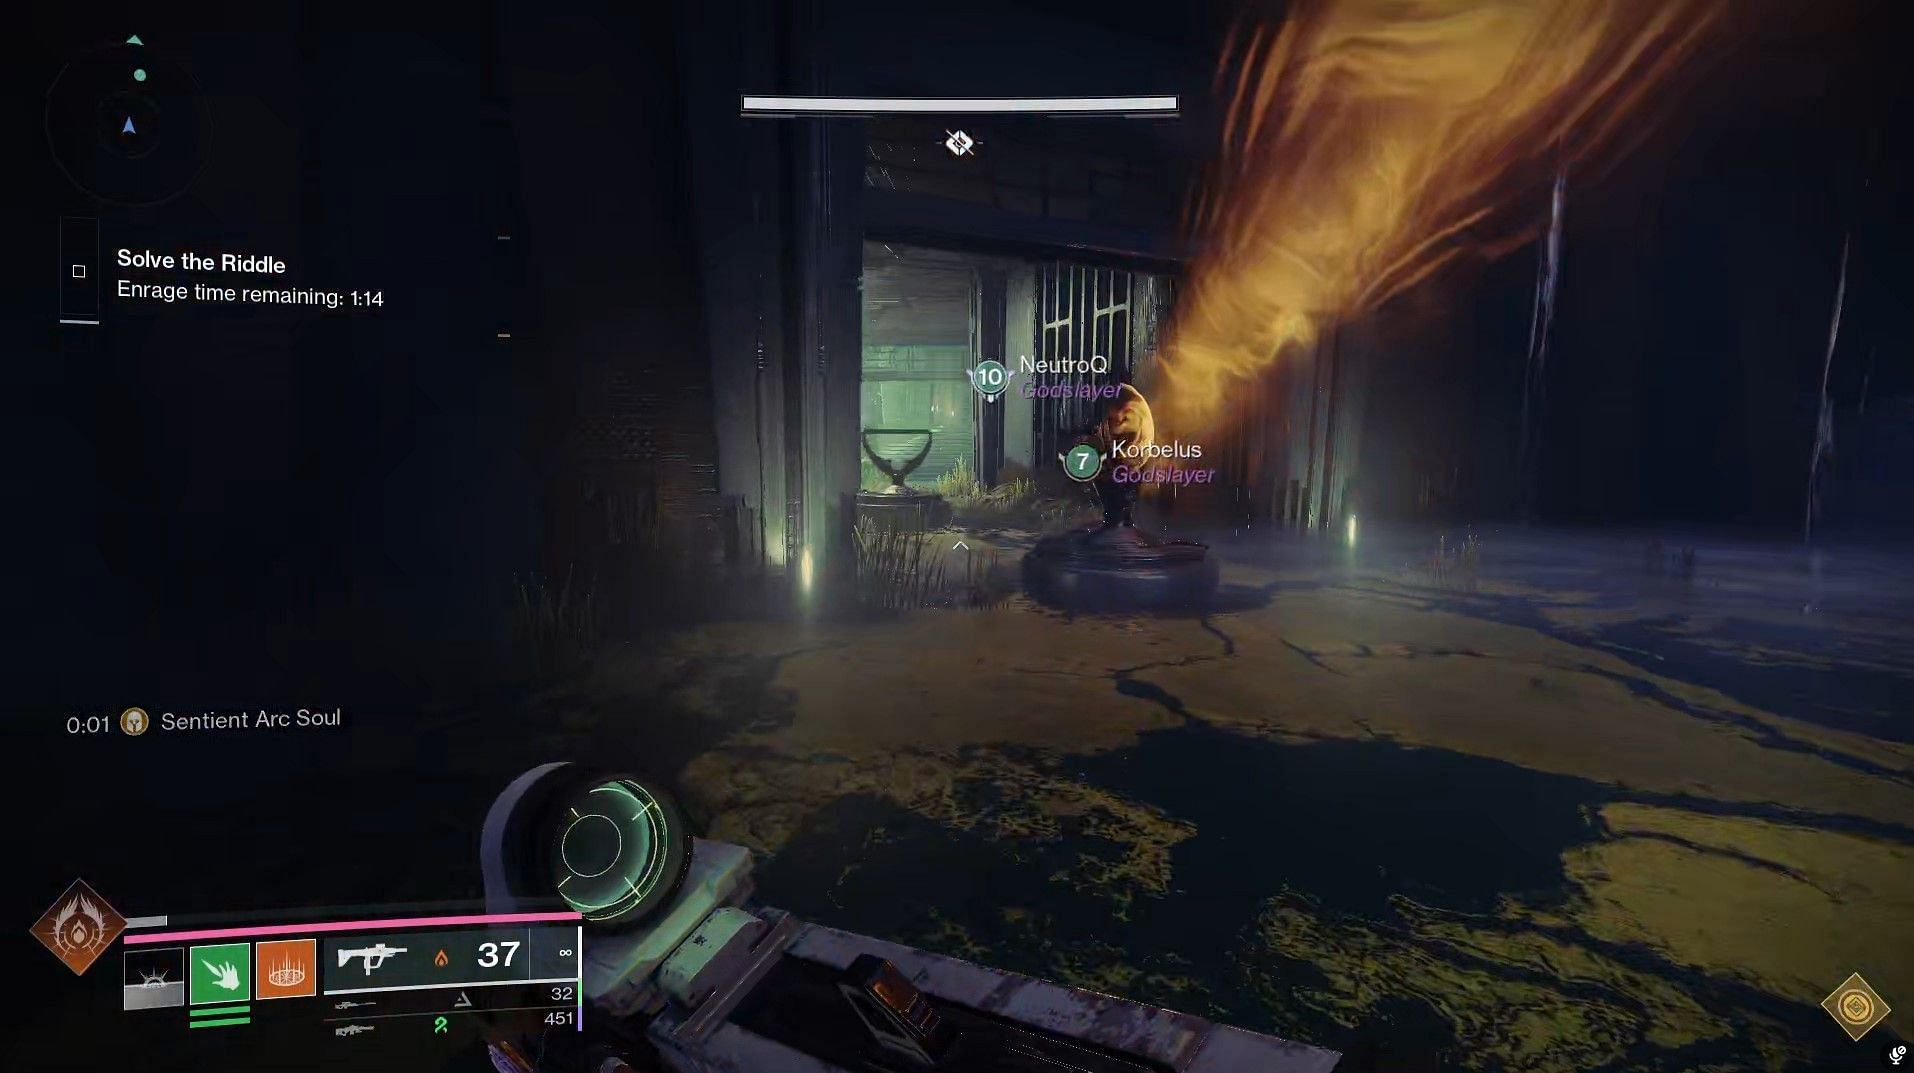
This article lists the basics of the first encounter in the Sundered Doctrine Dungeon. Note that a unique Enrage mechanic is active between February 7 and 9, 2025, forcing all players to complete the encounter within a time limit.
How to complete the first encounter in Destiny 2 Sundered Doctrine
1) How to reach the first encounter
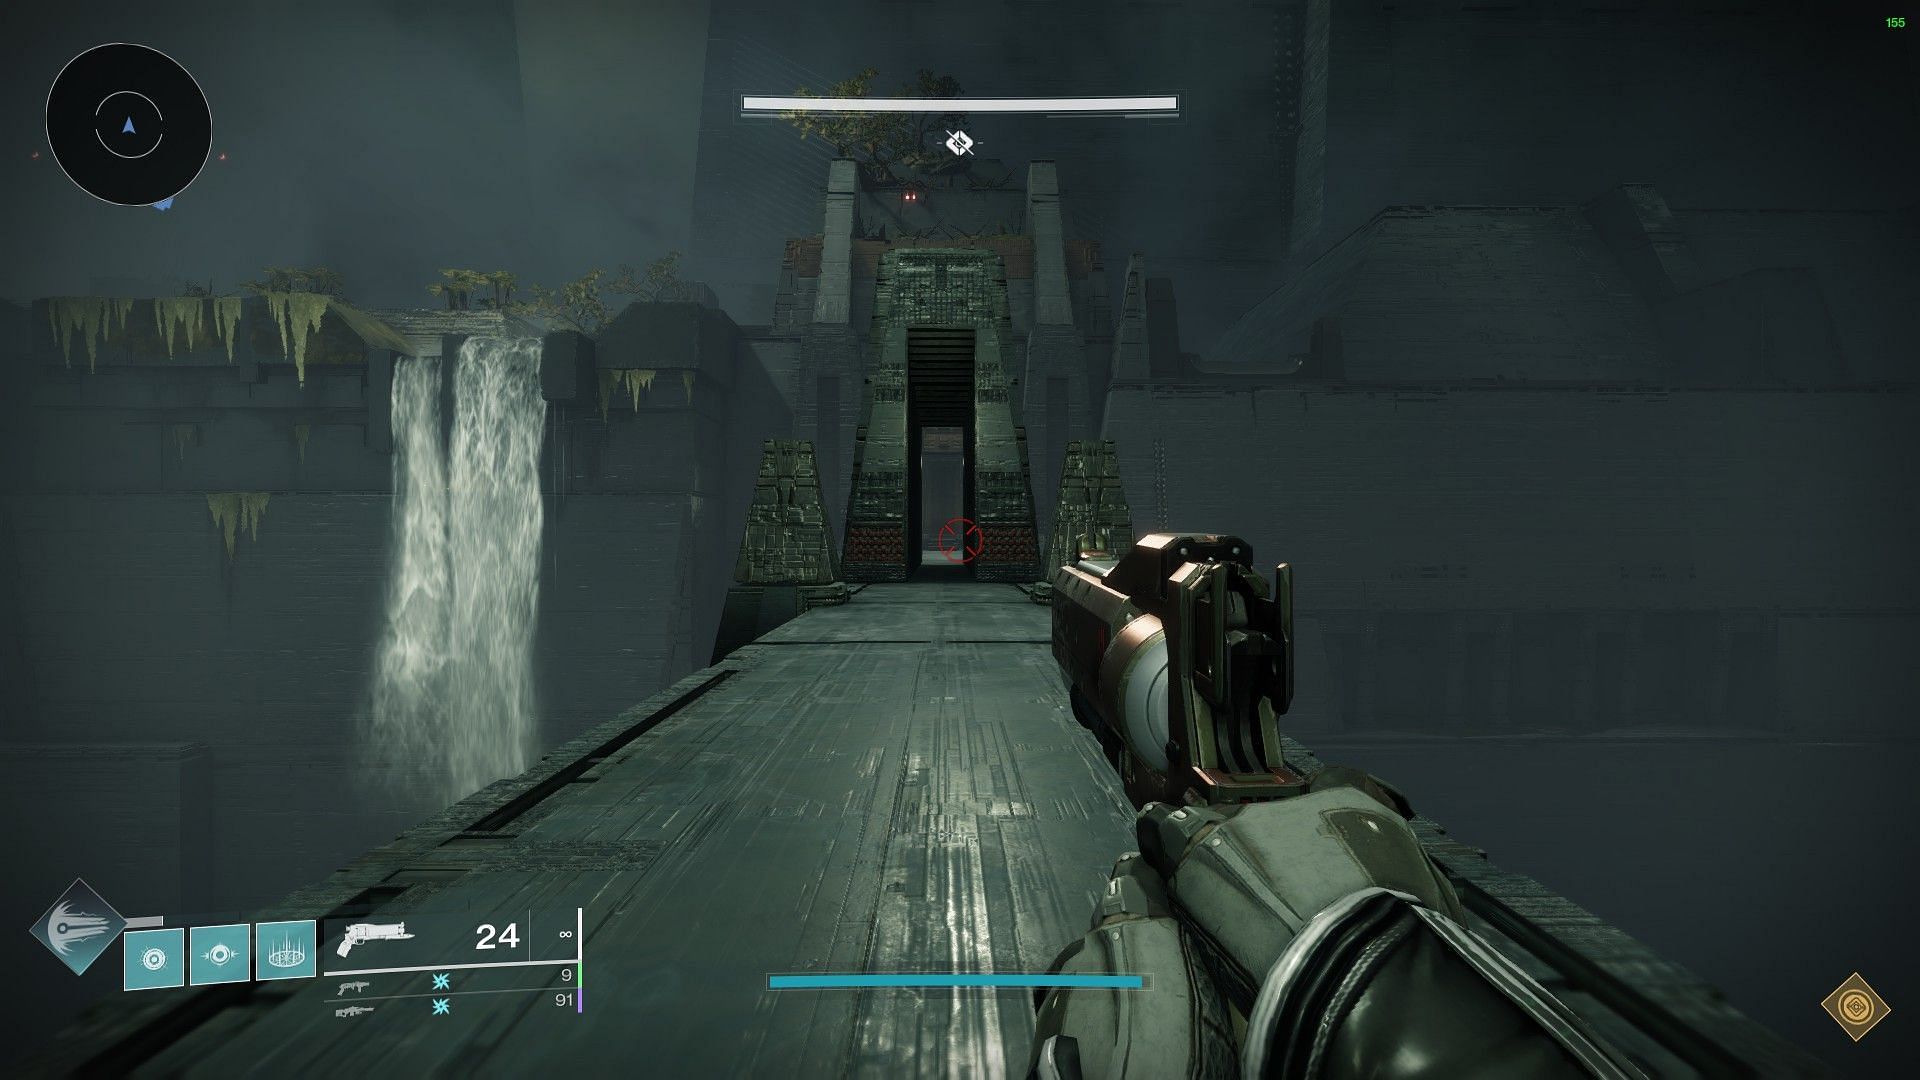
After spawning in the outside open area, look for a waterfall across the long bridge in the middle. That is your first destination, as the path heading deep inside the Dungeon starts from behind the waterfall.
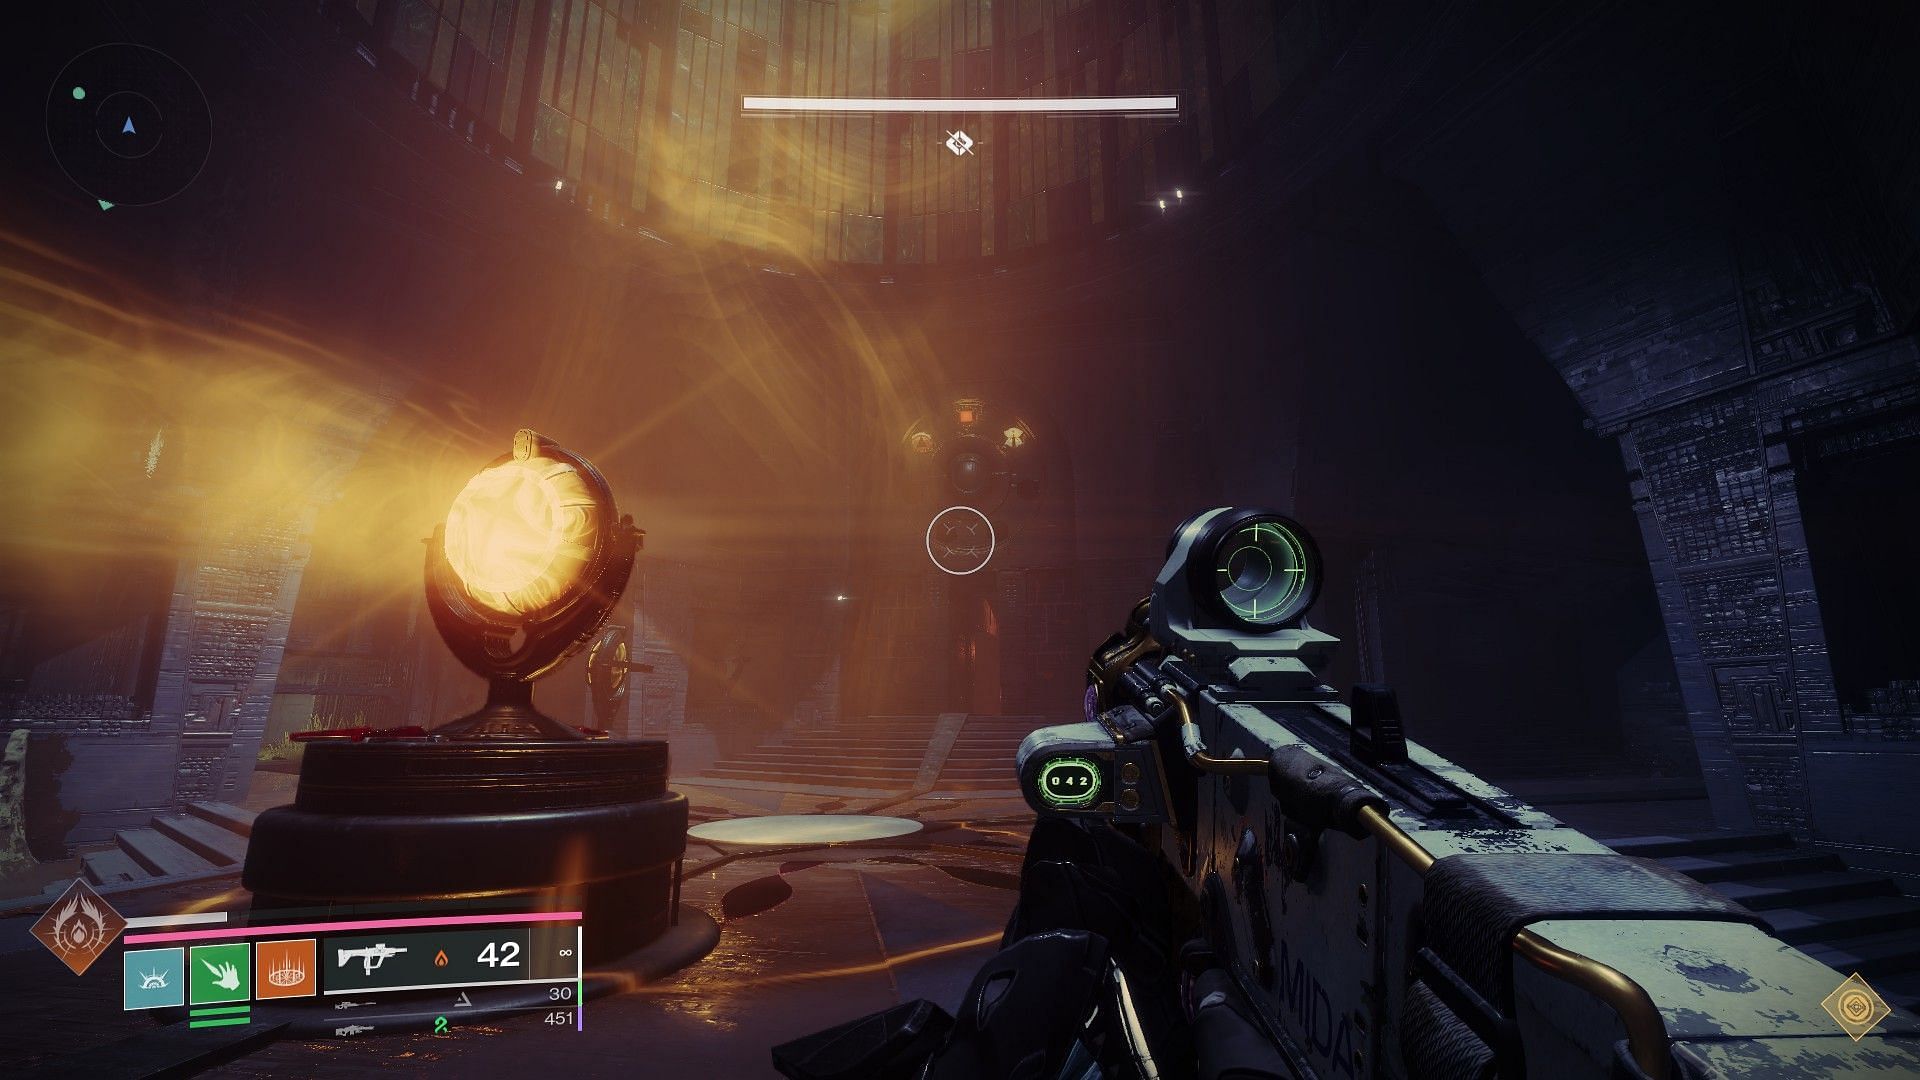
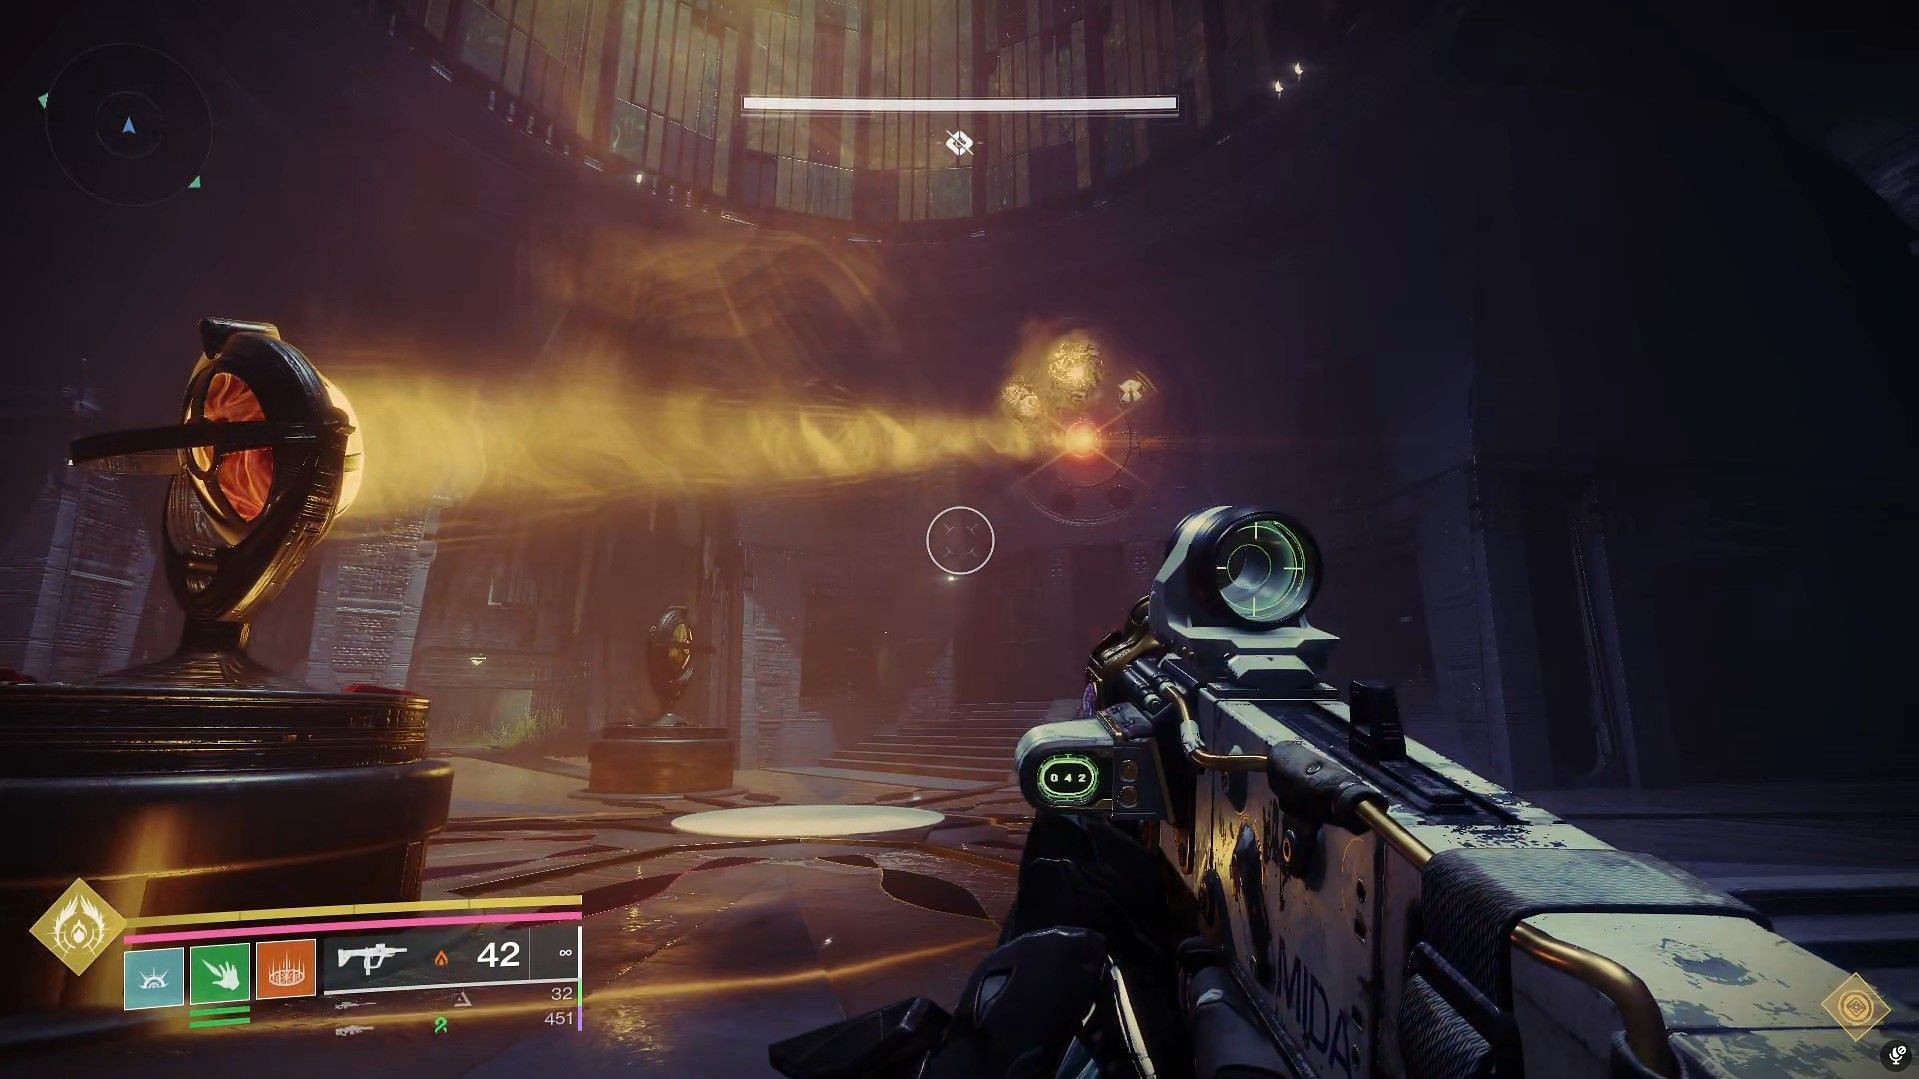
Proceed while defeating all enemies along the way until you come across a room with a Darkness ray and lens. This is the room for the first encounter.
2) Basic mechanics
There are four rooms on four sides of the arena and a section in the middle. Once you are familiar with all the symbols showcased earlier in the intro, you can follow these mechanics:
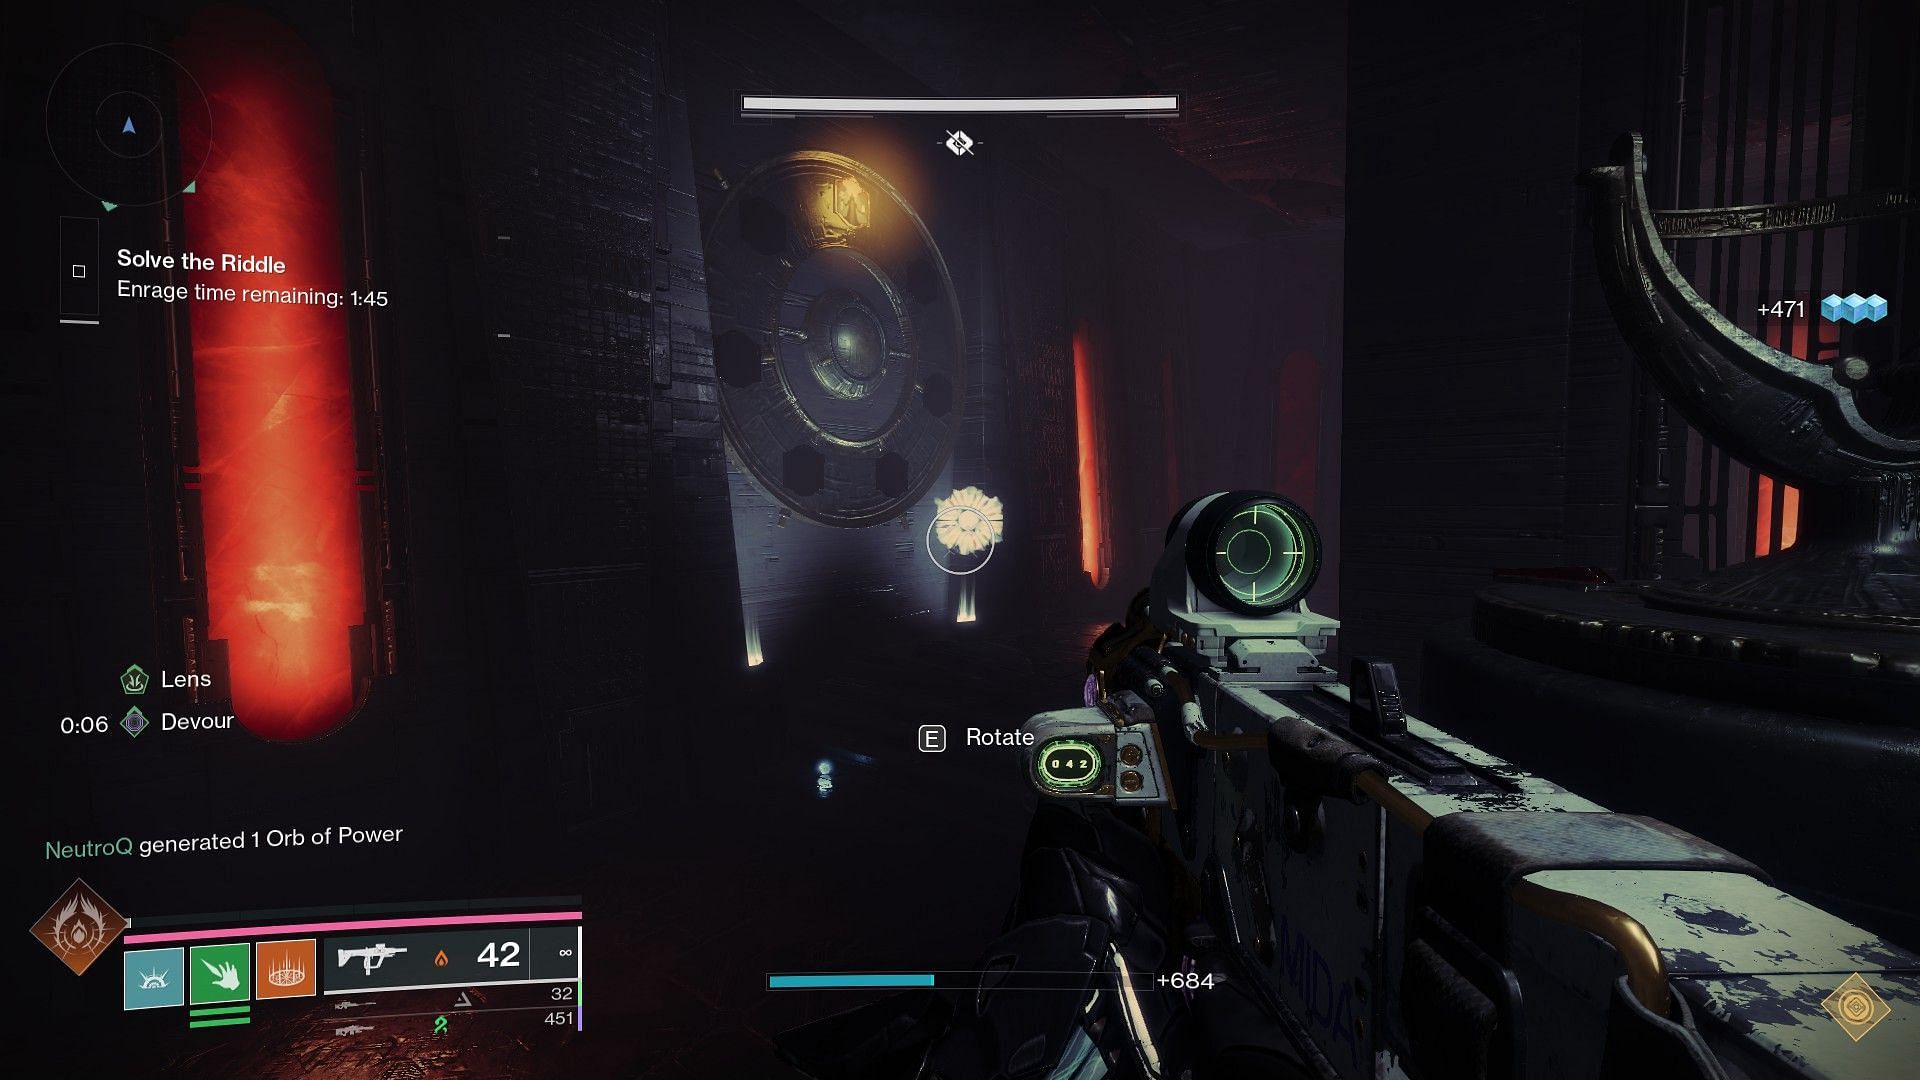
- Rotate the glowing lens to start the encounter.
- In the middle room, you will find three symbols on the wall. In each rotation, you must find the symbol(s) missing during the encounter. The number of missing symbols will increase with each passing rotation.
Primary objective:
- Look for a special enemy called Truth Seeker (a Dread Grim Bat) in one of the four rooms. Kill the Grim, and call out the symbol that drops from it. Now, look for the room with the dropped symbol on the wall. For example, if the "Hive Eyes" symbol drops from the Truth Seeker, the task is to find a room with the "Hive Eyes" symbol on the wall.
- Next, you will find a Subjugator boss in each of the rooms. Defeating each of these mini-bosses will drop a lens, and each player can carry only one. Throughout the arena, you will find multiple slots for lenses from the middle to each room.
- Once a player calls out the room with the dropped symbol, align the ray of Darkness from the middle room to the room with the symbol. To do this, defeat the Subjugator, take the lens, and place it in a lens slot to carry the ray from the middle to the correct room.
There are three rotations in the encounter. At first, you must look for one Truth Seeker for one symbol. Once done, you need two Truth Seekers for two symbols for the second rotation, and three Seekers for three symbols in the final rotation.

With each passing rotation, the number of alignment processes will increase from one to two, and finally, three.
Follow Sportskeeda for more Destiny 2 guides and news:
- All Destiny 2 Exotic weapon changes in Heresy Act I
- Imminence god roll guide
- Non-Denouement god roll guide
- Psychopomp god roll guide
- Better Devils god roll guide
- Breachlight god roll guide
- Lost Signal god roll guide
- Patron of Lost Causes god roll guide
- Critical Anomaly god roll guide
- Episode Heresy weekly reset
- Adamantite god roll guide
- Tome of Want explained
- Essence of Desire farm guide
- Best ways to heal in The Nether
- Easiest way to get The Queenbreaker Catalyst
