
'%20x='0'%20y='0'%20height='100%25'%20width='100%25'%20%0A%20%20%20%20%20%20%20%20%20%20xlink%3Ahref='data:image/jpg;base64,/9j/2wBDAAYEBQYFBAYGBQYHBwYIChAKCgkJChQODwwQFxQYGBcUFhYaHSUfGhsjHBYWICwgIyYnKSopGR8tMC0oMCUoKSj/2wBDAQcHBwoIChMKChMoGhYaKCgoKCgoKCgoKCgoKCgoKCgoKCgoKCgoKCgoKCgoKCgoKCgoKCgoKCgoKCgoKCgoKCj/wgARCAAGAAoDASIAAhEBAxEB/8QAFQABAQAAAAAAAAAAAAAAAAAAAAb/xAAUAQEAAAAAAAAAAAAAAAAAAAAF/9oADAMBAAIQAxAAAACJngZf/8QAIhAAAgECBQUAAAAAAAAAAAAAAgMBAAUEBhIhIxQiQVGB/9oACAEBAAE/ALffm5ZtPWpMhBzRw0goBjjleqd/dDi1PGHaI5O/dceftf/EABcRAQEBAQAAAAAAAAAAAAAAAAECADH/2gAIAQIBAT8AuAko7v/EABcRAQEBAQAAAAAAAAAAAAAAAAIBAAP/2gAIAQMBAT8A5up03f/Z'%3E%3C/image%3E%3C/svg%3E)
The second encounter in the Destiny 2 Sundered Doctrine also marks the first boss encounter in the Dungeon. Players must get accustomed to the Pyramid symbols, which form a recurring mechanic throughout the Dungeon, and follow along a sequence to strategize the fight, start the DPS phase, and eventually defeat the boss.
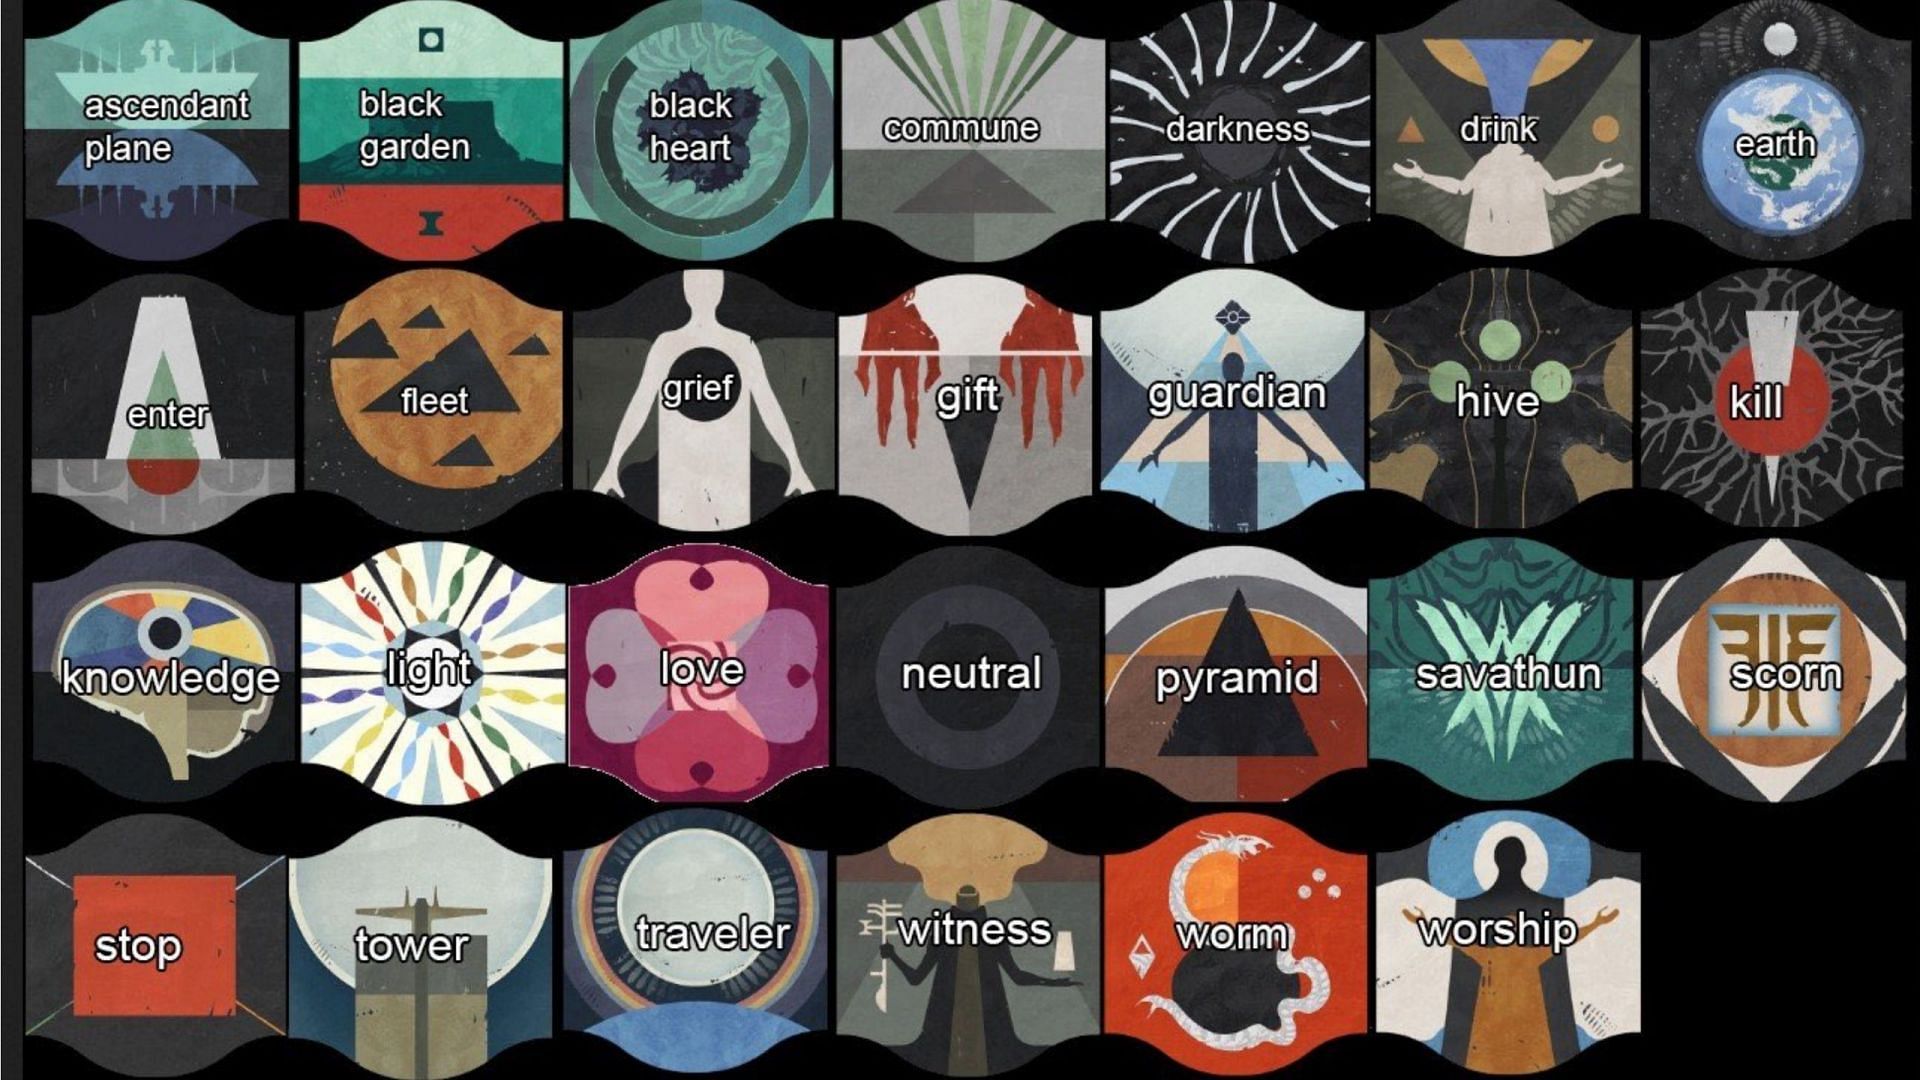
Here is an image of every callout for the available symbols in the Dungeon.
This article lists the basics of one of the most complicated encounters in a Destiny 2 Dungeon: the Zoetic Lockset boss.
How to defeat Zoetic Lockset in Destiny 2 Sundered Doctrine
1) Basic mechanic
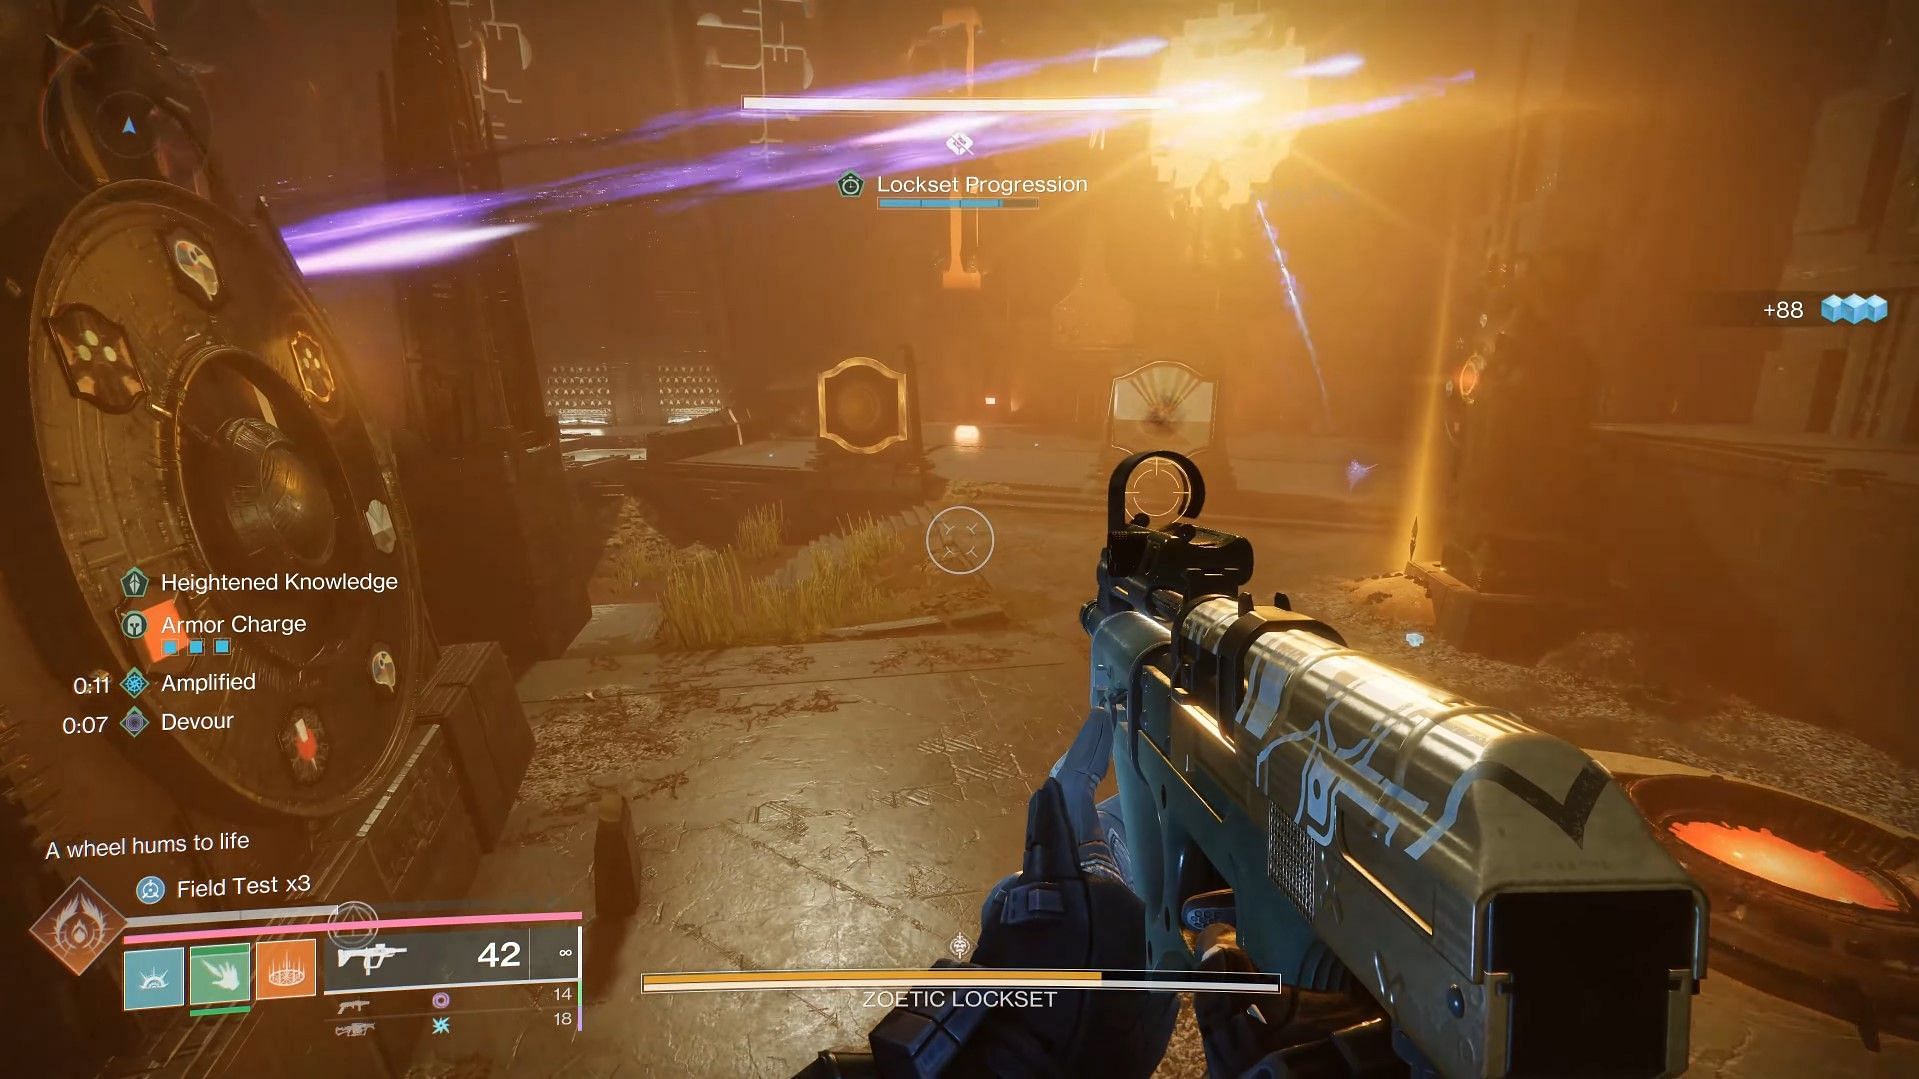
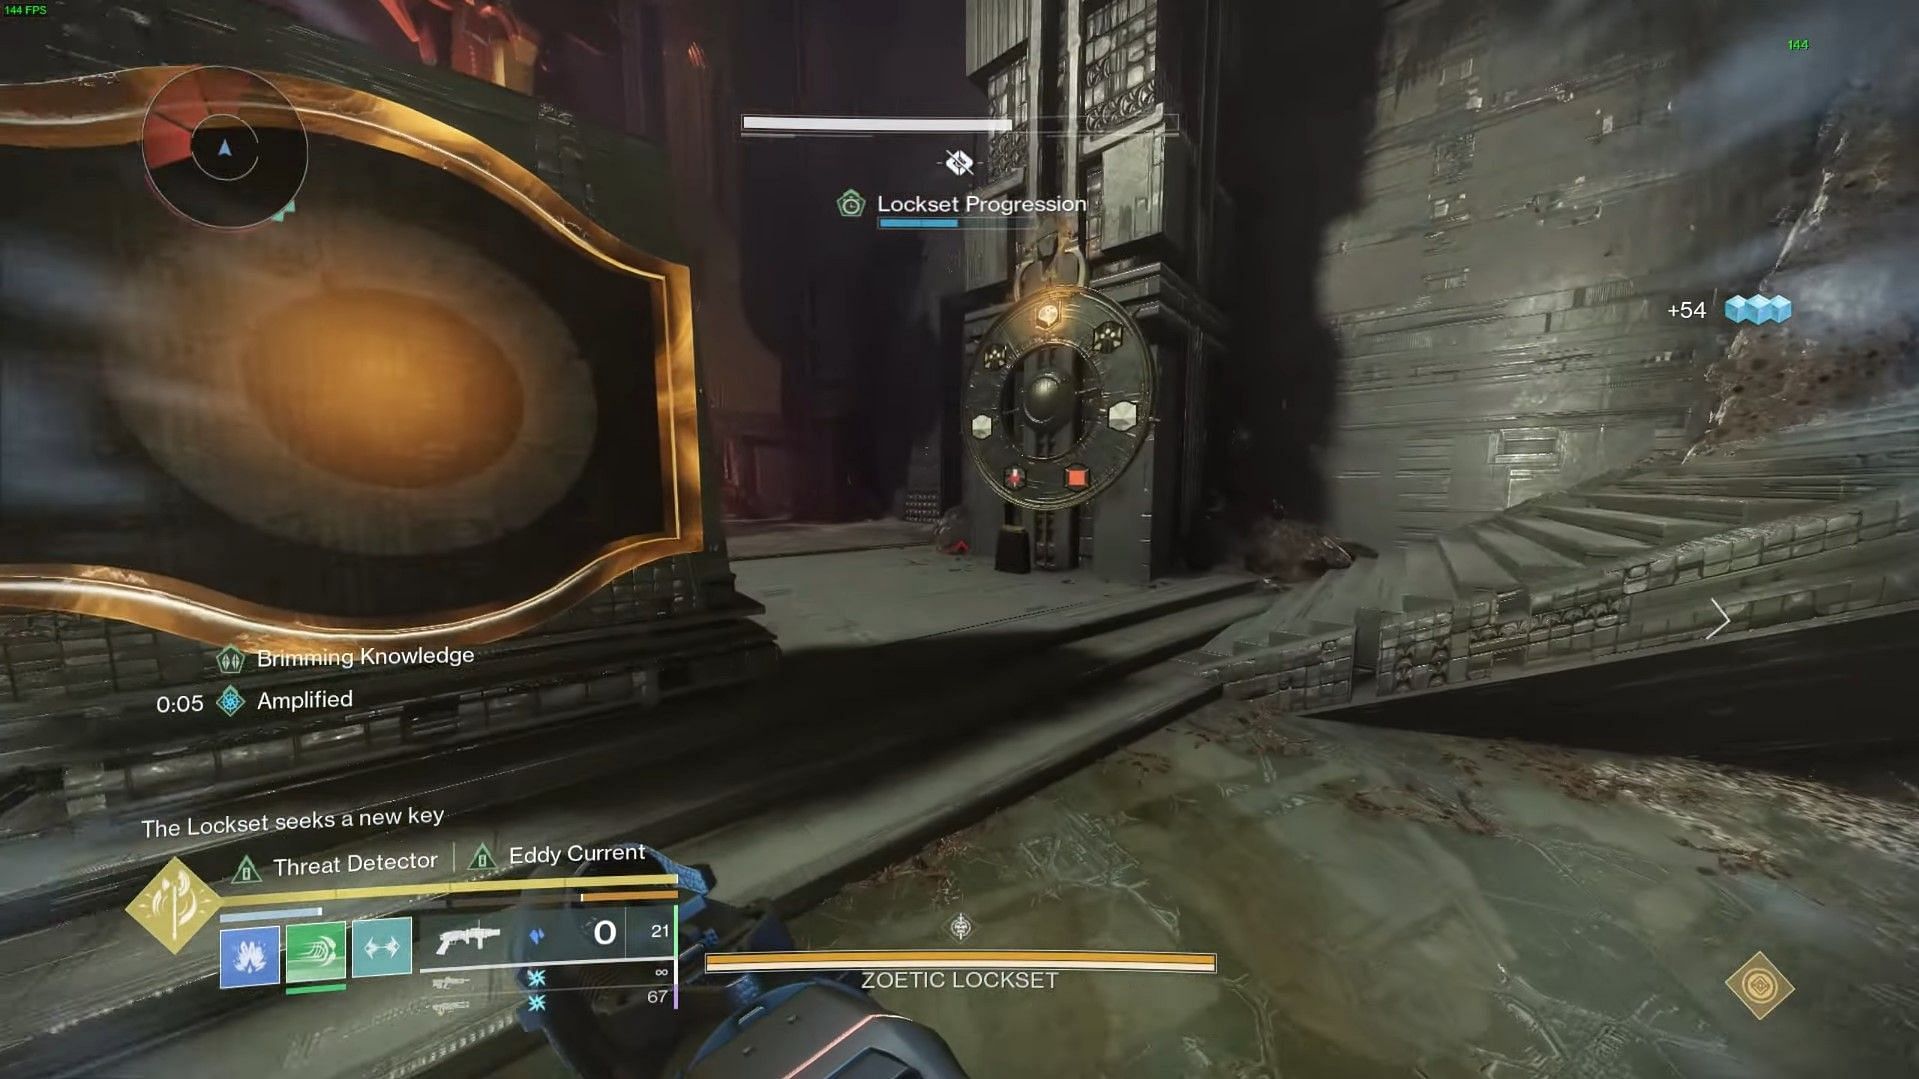
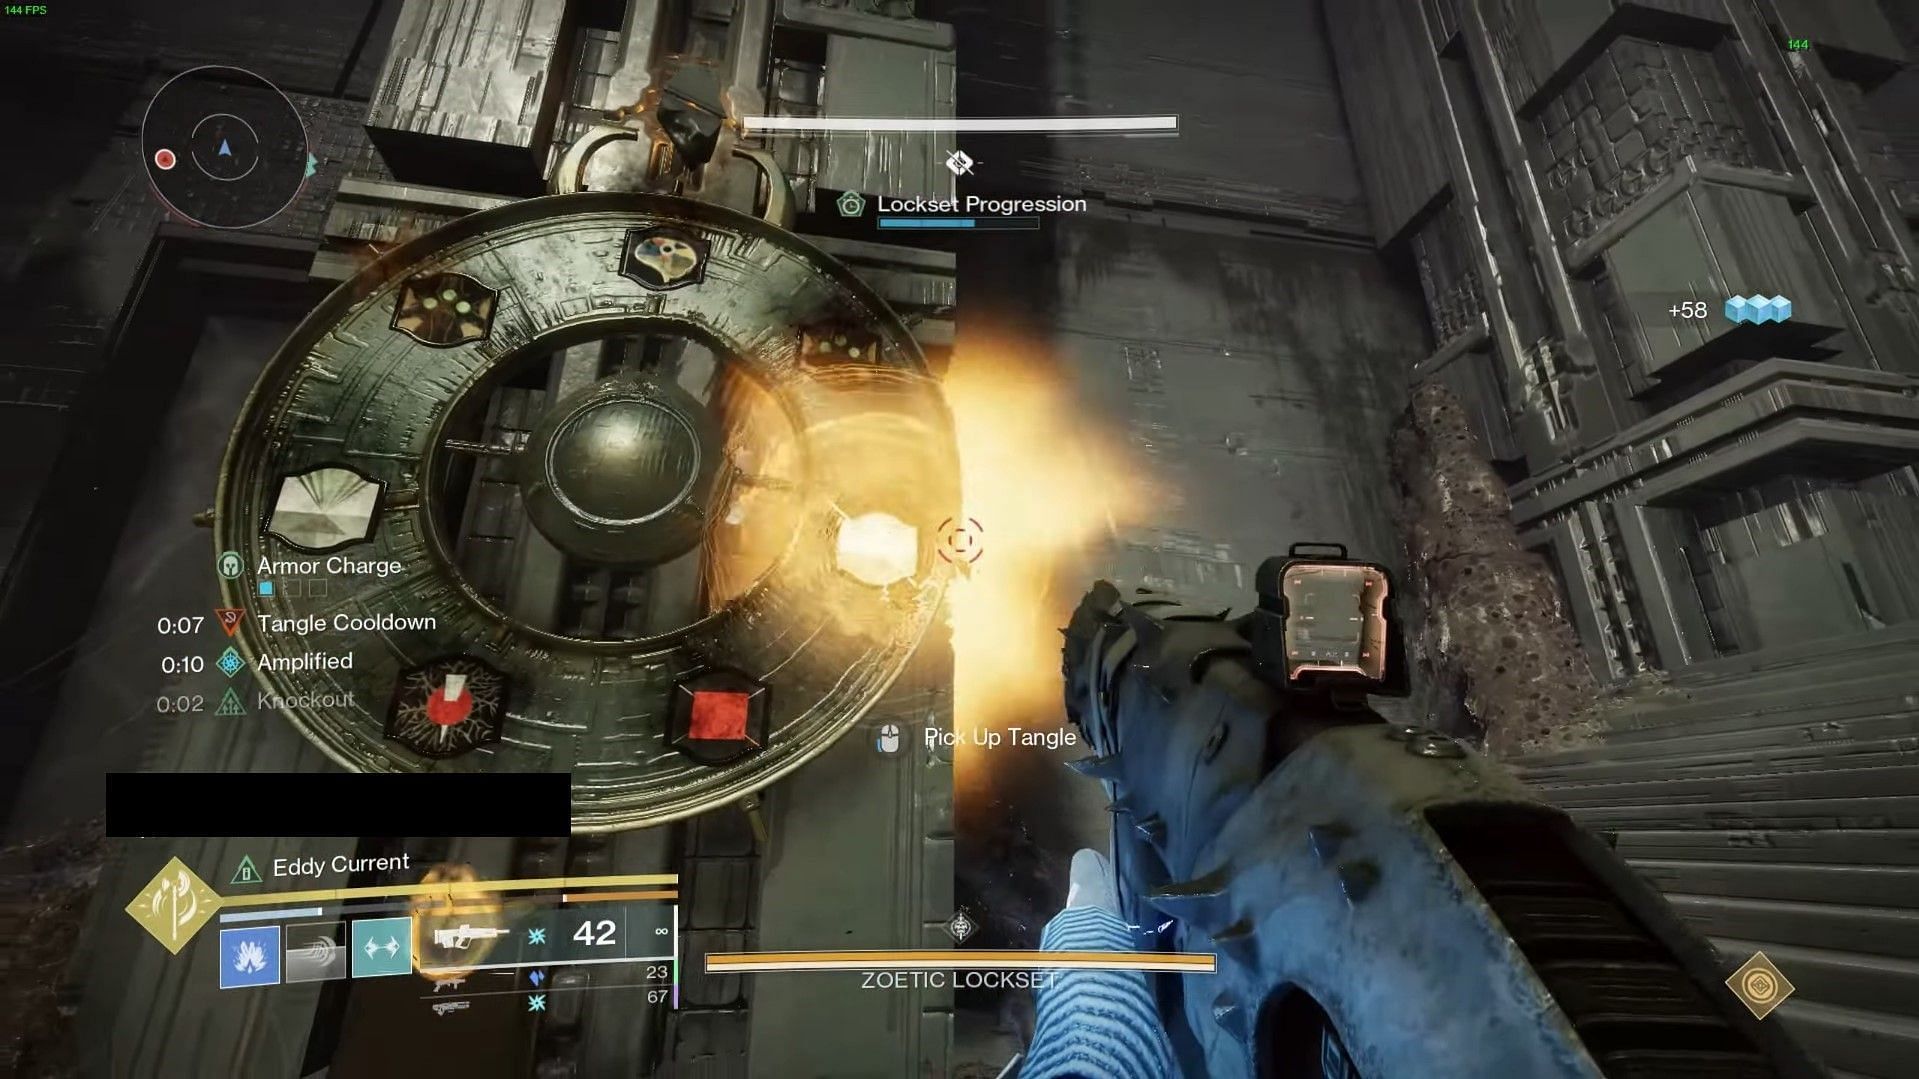
The Zoetic Lockset encounter is a boss fight in Sundered Doctrine. Your main focus here is to start the damage phase and drain the boss' health bar. However, the path to do so is quite complicated and requires you to follow certain mechanics.
After entering the arena and starting the encounter, you will notice a few things:
- There are four wheels, two on each side of the arena. These wheels have specific symbols, with a clock hand moving either in the clockwise or anti-clockwise direction.
- One symbol on the wheel will glow. You can switch the glow to other symbols on the wheel. More on that later.
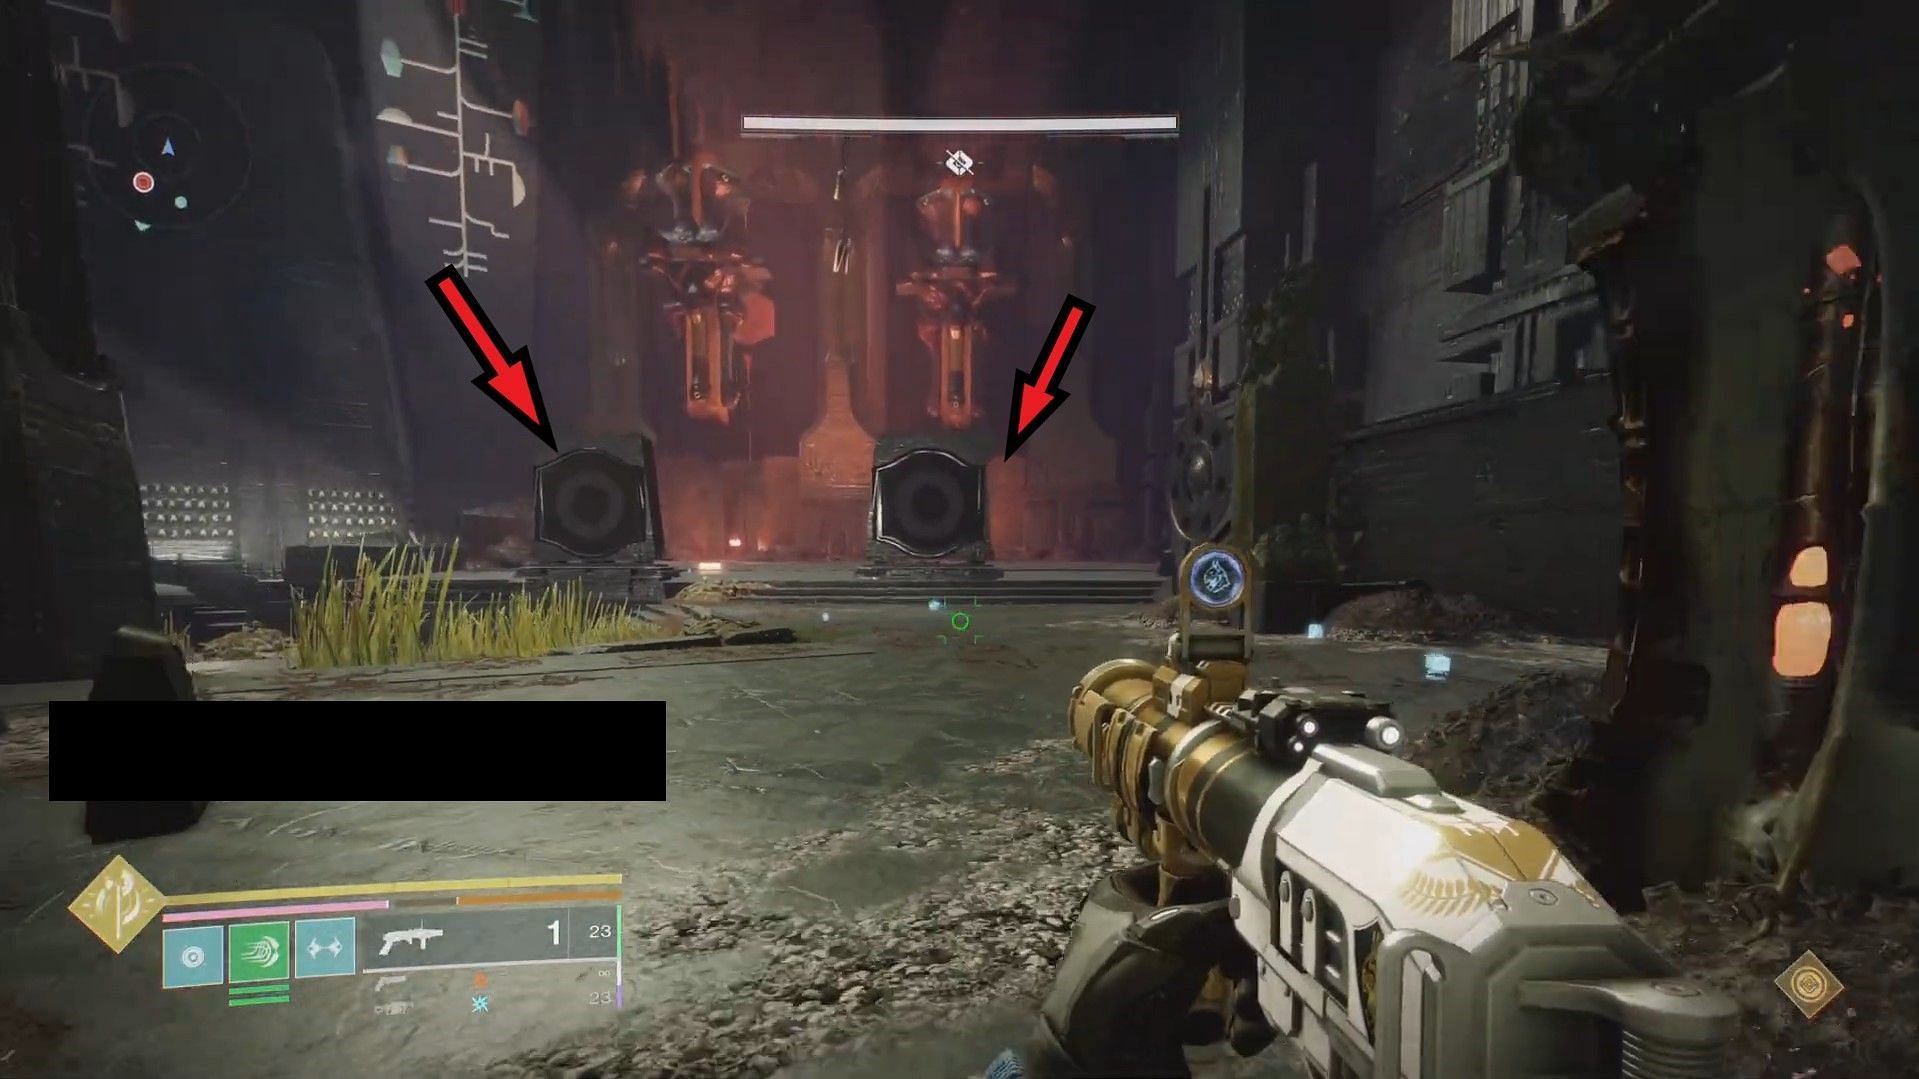
- Occasionally, you will see the boss shining a light on the arena and a random wheel. At the 75% mark (3/4th) on the "Lockset Progression" bar at the top, the boss will shine a light on the wheel. Only this time, the glowing symbol on the wheel will be locked in and shown on one of the four pillars at the front. A locked-in symbol will activate an action. This is where the "switching of the glow" becomes important.
- Note that at the 75% mark of "Lockset Progression," the boss will always shine the light starting from the right, lock in the glowing symbol, and then go one by one to the left.
- For example, at the 75% mark, if the boss shines a light on the rightmost wheel and locks in the "Hive" symbol, the pillar on the right will have the symbol engraved on it, followed by the action it has on the encounter.
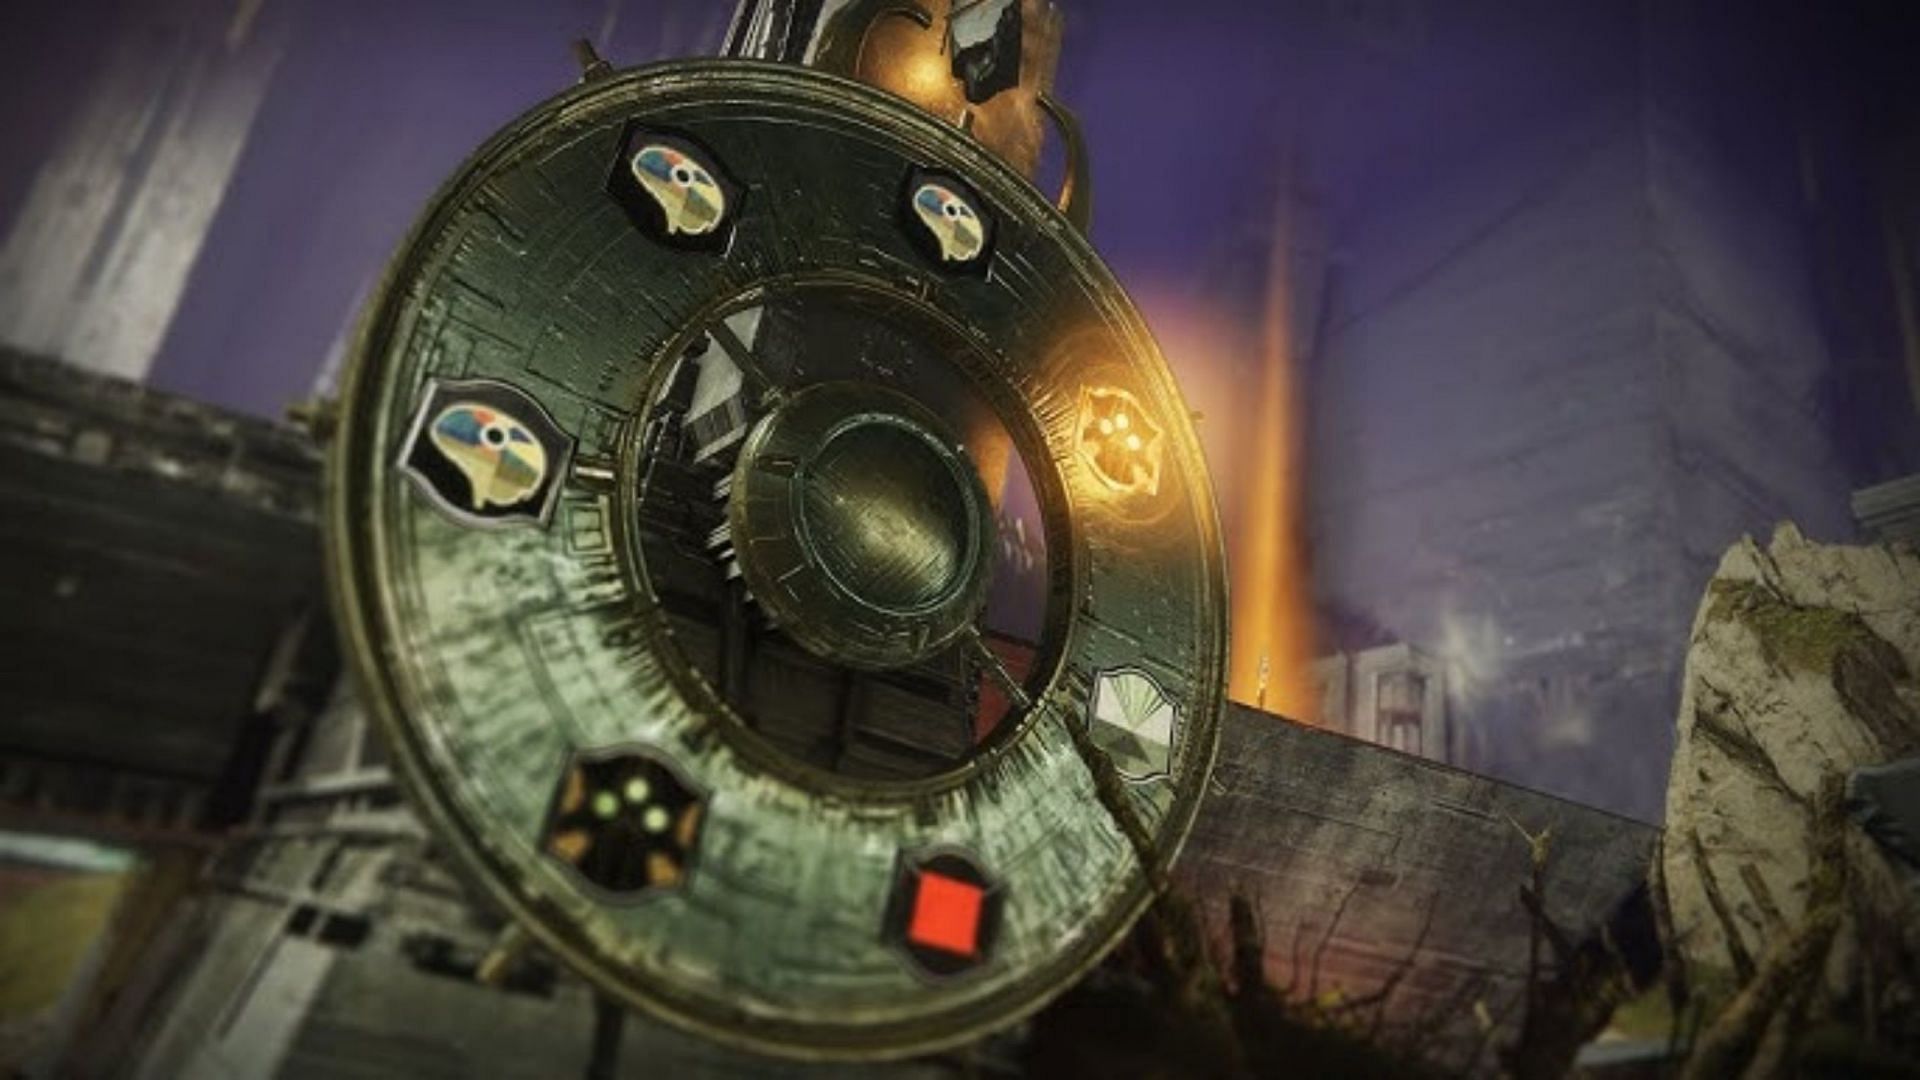
Here's what each symbol does in the encounter:
- Hive: Summons an Ogre on each side of the arena
- Knowledge: Summons Hive Knight and Wizards
- Commune: Causes the boss to do an attack
- Stop: Prevents any enemies from spawning
- Kill: Starts the boss DPS phase
Now, here's what you must do:
- Start by looking at the rightmost wheel and see which symbol is glowing. Following the actions of each symbol mentioned above, your objective is to switch the glow, or keep it, before the "Lockset Progression" reaches 75%.
- To switch a glow from one symbol to another on the same wheel, pick up Darkness Resonances and dunk them on the podium beneath the wheel.
- A Darkness Resonance can drop from killing Wizards.
- The number of Resonance you have picked up determines the number of rooms a glow will switch from one symbol to another.
- For example, if a glow is on a 'Hive' symbol, and you need to move it to 'Stop' on the same wheel, you can pick up two Resonances and dunk them on the wheel's podium. However, do note where the 'Stop' symbol on the wheel is located from the 'Hive,' alongside the direction of the rotating hand.
- In the image below, suppose the clock hands are moving in a clockwise direction. The glow is on the Hive symbol. To switch it to 'Stop,' you need to go two rooms in a clockwise direction. For this, you need two Darkness Resonances.
- Similarly, you can change the direction of the hands to anti-clockwise by shooting at the Crux at the top of the wheel.
The requirement to start the DPS phase is to have the "Kill" symbol locked in one of the four pillars. Since the boss' light shines from the rightmost wheel to the left, the ideal way to do this is to put the Kill symbol at the leftmost pillar, allowing you to get increased time for damage.
Additionally, allowing the boss to lock four symbols on the pillars will further extend the damage phase. The ideal setup for symbols is Stop>Stop>Stop>Kill.
Seeing that you will be going through either the standard or Master version, there is enough time to damage the boss. Hence, the only two symbols you can glow on are 'Kill' for the damage phase and 'Stop' for stopping enemy spawns.
Follow Sportskeeda for more Destiny 2 guides and news:
- All Destiny 2 Exotic weapon changes in Heresy Act I
- Imminence Destiny 2 god roll guide
- Non-Denouement god roll guide
- Psychopomp god roll guide
- Better Devils god roll guide
- Breachlight god roll guide
- Lost Signal god roll guide
- Patron of Lost Causes god roll guide
- Critical Anomaly god roll guide
- Episode Heresy weekly reset
- Adamantite god roll guide
- Tome of Want explained
- Essence of Desire farm guide
- Best ways to heal in The Nether
- Easiest way to get The Queenbreaker Catalyst
- Sundered Doctrine first encounter guide
