
'%20x='0'%20y='0'%20height='100%25'%20width='100%25'%20%0A%20%20%20%20%20%20%20%20%20%20xlink%3Ahref='data:image/jpg;base64,/9j/2wBDAAYEBQYFBAYGBQYHBwYIChAKCgkJChQODwwQFxQYGBcUFhYaHSUfGhsjHBYWICwgIyYnKSopGR8tMC0oMCUoKSj/2wBDAQcHBwoIChMKChMoGhYaKCgoKCgoKCgoKCgoKCgoKCgoKCgoKCgoKCgoKCgoKCgoKCgoKCgoKCgoKCgoKCgoKCj/wgARCAAGAAoDASIAAhEBAxEB/8QAFgABAQEAAAAAAAAAAAAAAAAAAAYH/8QAFAEBAAAAAAAAAAAAAAAAAAAAA//aAAwDAQACEAMQAAAAw6cEP//EAB8QAAIBBAIDAAAAAAAAAAAAAAECAwAEBSEGERITYv/aAAgBAQABPwDC8nVrRcZLZWvoChhIIAZPJFbrff0aM0TEsU2dnVf/xAAUEQEAAAAAAAAAAAAAAAAAAAAA/9oACAECAQE/AH//xAAVEQEBAAAAAAAAAAAAAAAAAAAAAf/aAAgBAwEBPwCv/9k='%3E%3C/image%3E%3C/svg%3E)
The Drowning Labyrinth quest is the Destiny 2 mission Ikora gives at the Tower. It was unlocked when the Sundered Doctrine Dungeon went live, making it easy for players to complete the activity. After completing the first step, other steps will follow, which will be listed later in this article.
For now, this article lists the first few steps of "The Drowning Labyrinth" Dungeon for Sundered Doctrine in Destiny 2.
The Drowning Labyrinth quest guide in Destiny 2 Week 1
After picking up the quest, the first step will require you to complete the Sundered Doctrine Dungeon in Normal or Master difficulty. Note that the progression of this quest is based on characters, not the account. Hence, you must do everything related to the quest as a single character.
After completing the Dungeon for the first time, the quest will progress, asking you to become "Initiated" and enter codes. Here's how to do it:
Become Initiated and enter code:
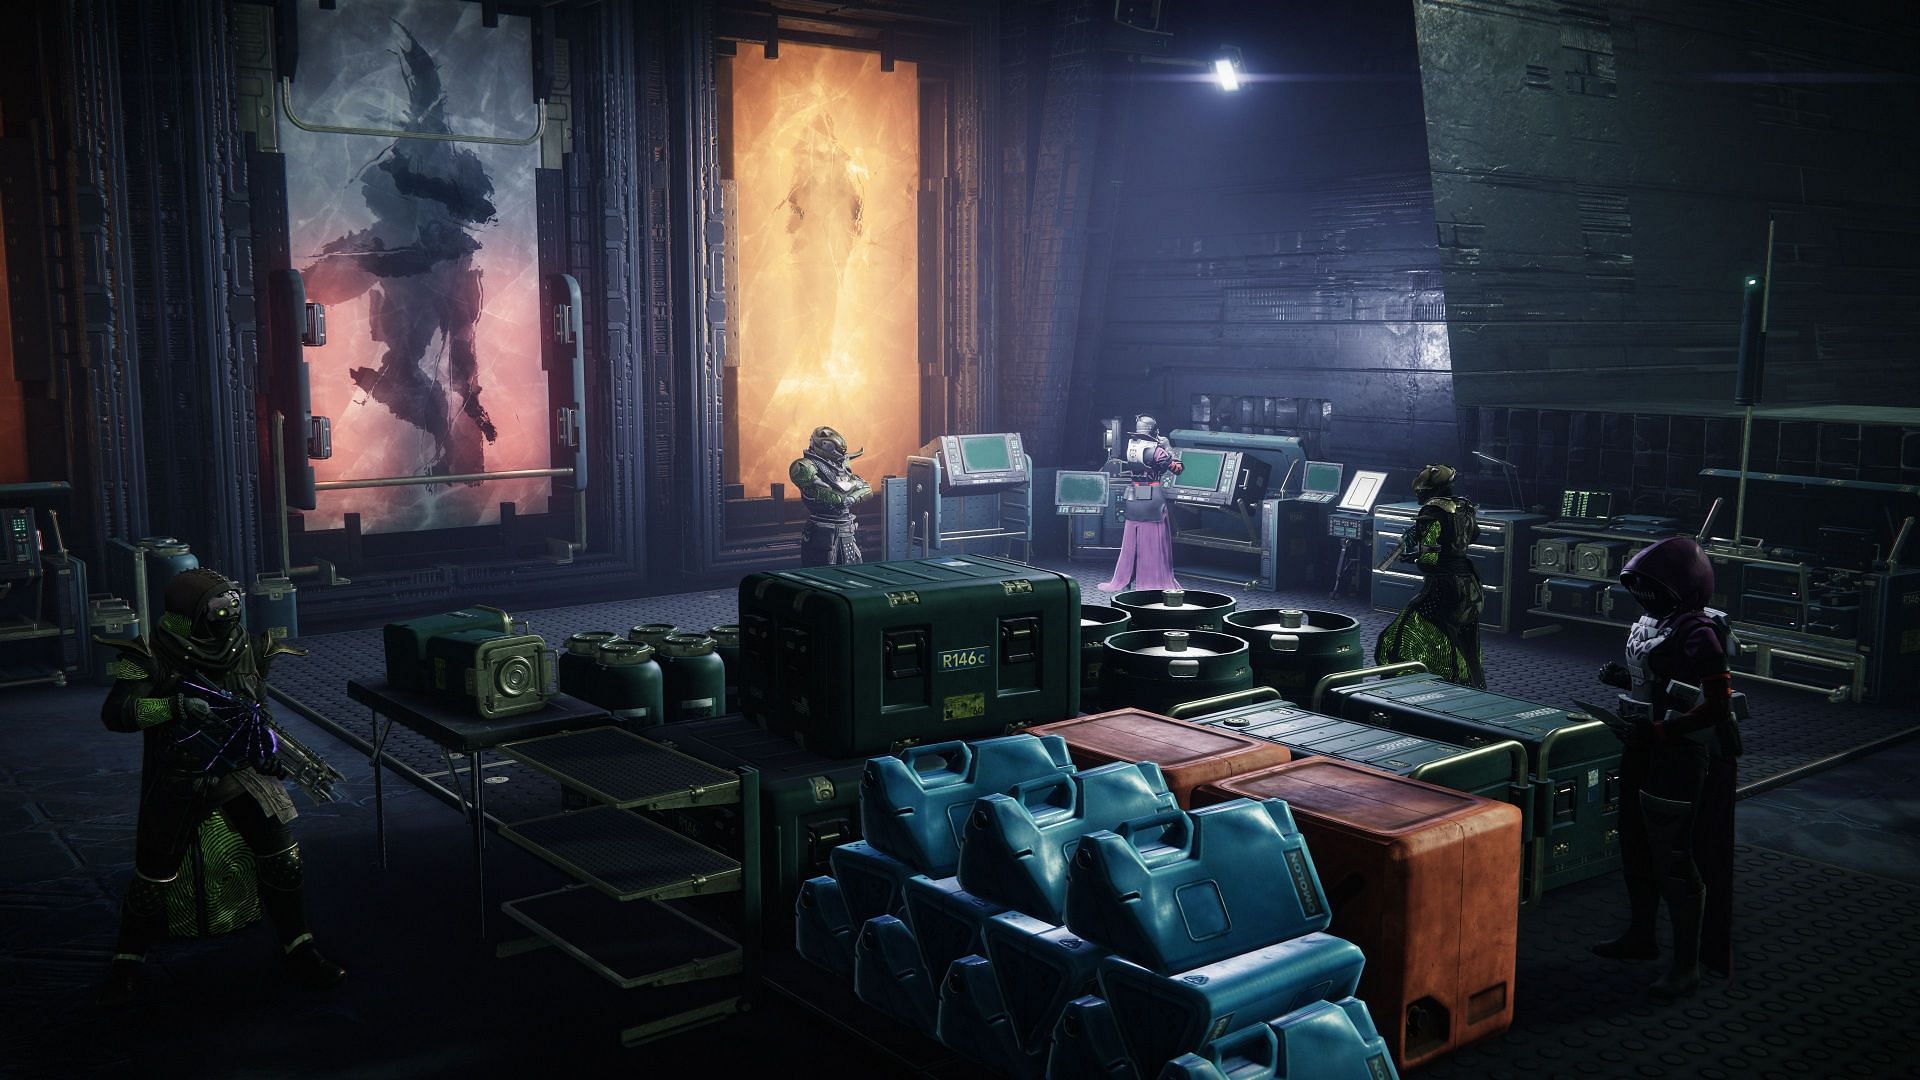
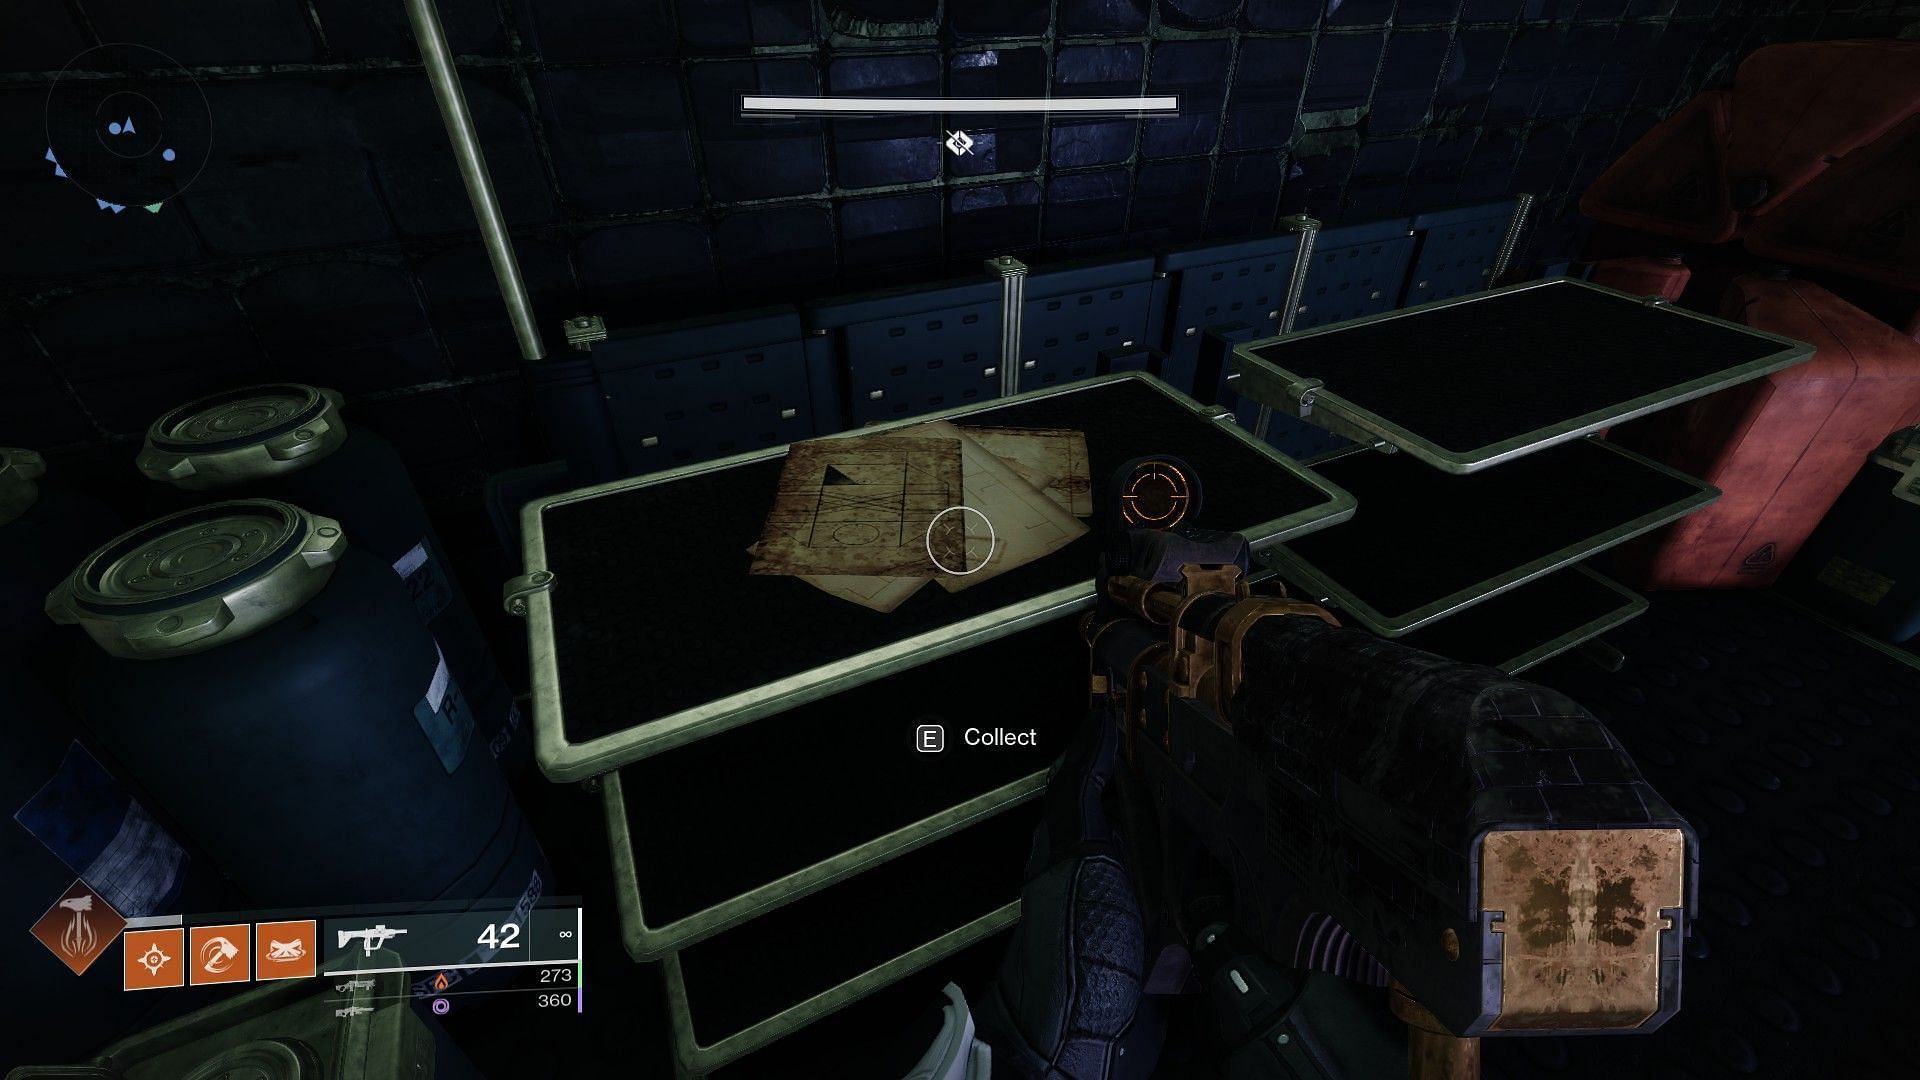
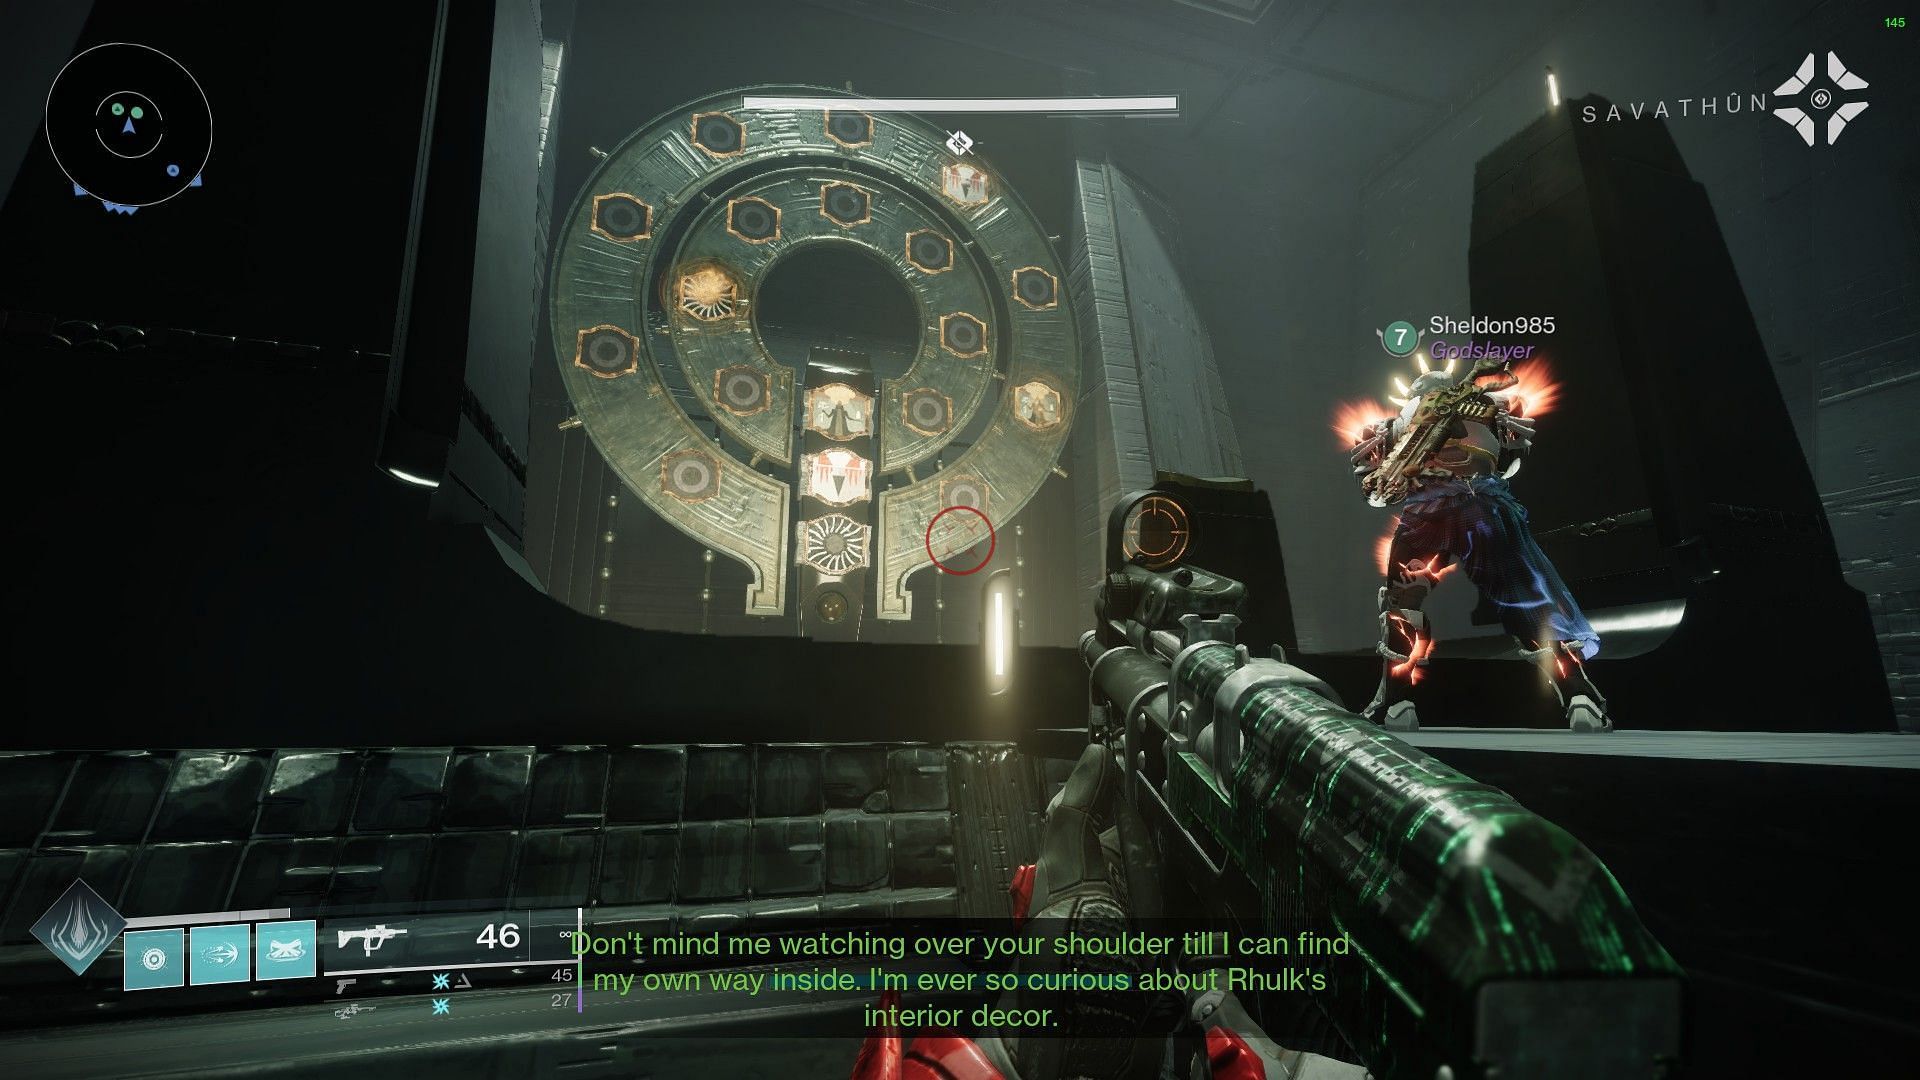
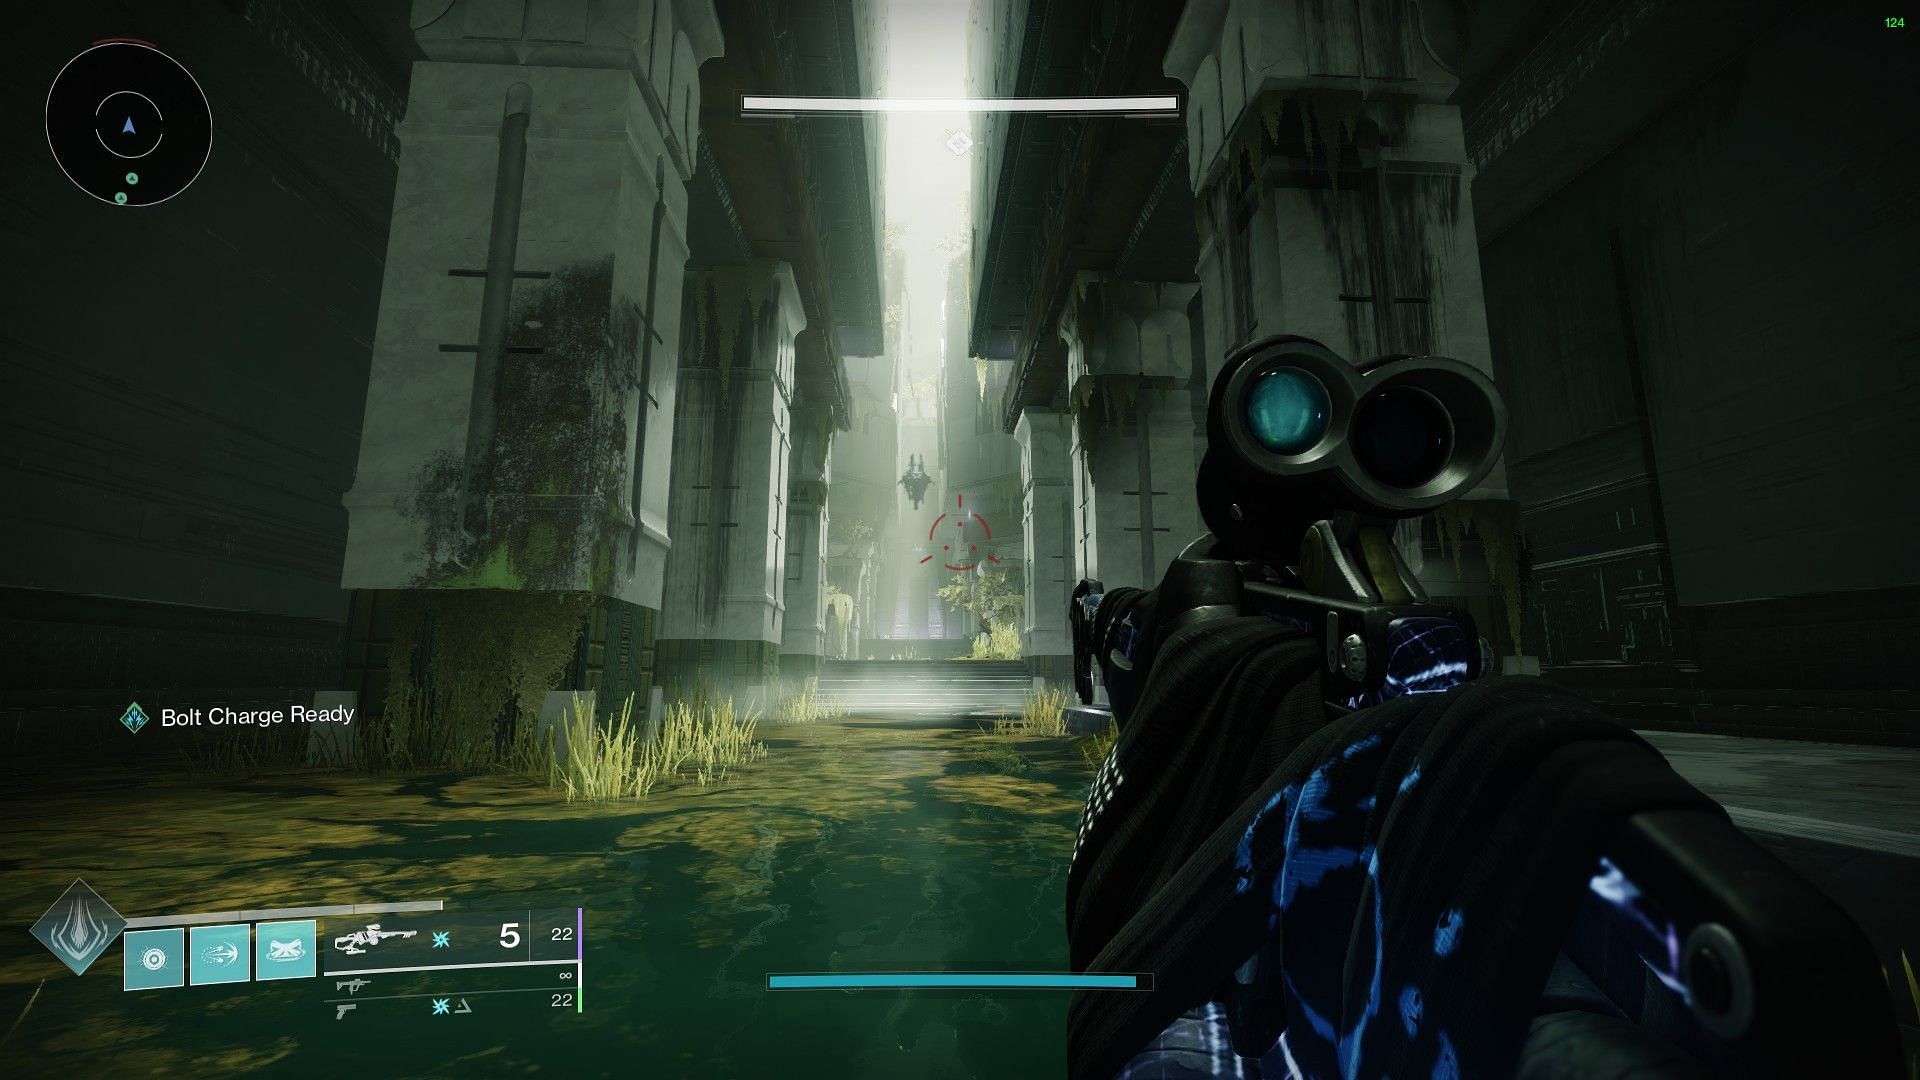
After spawning in the Dungeon a second time, enter the huge room with NPC Guardians at the starting location. Here, interact with the piece of paper on the back side of the room, near the symbol wheel.
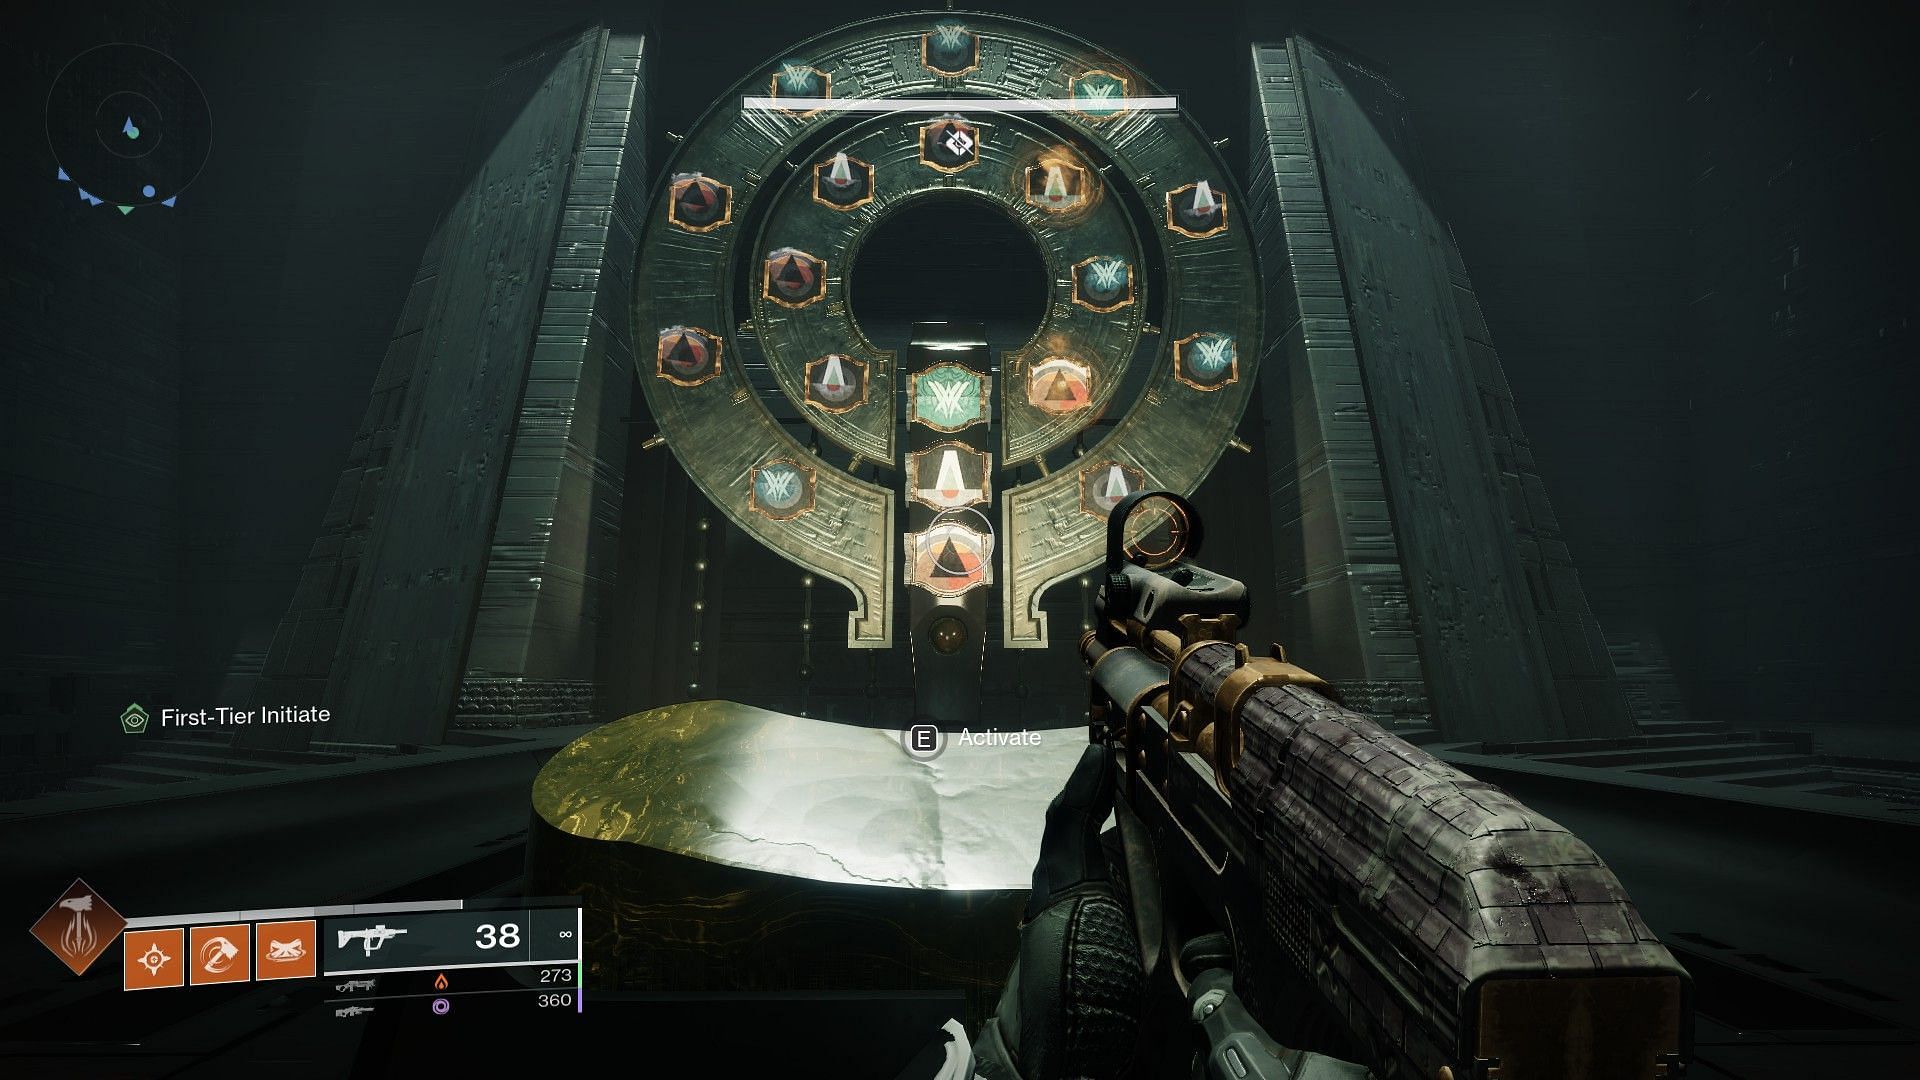
Next, you must enter a specific code with the symbols on the wheel. Interact with the podium to activate the code, and put in Witch Queen>Enter>Pyramid.
The quest step will then progress, asking you to collect three Laboratory Worms and steal Dread Knowledge.
To familiarize yourself with the symbols and callouts, refer to our first encounter guide for the Sundered Doctrine.
Worm #1:
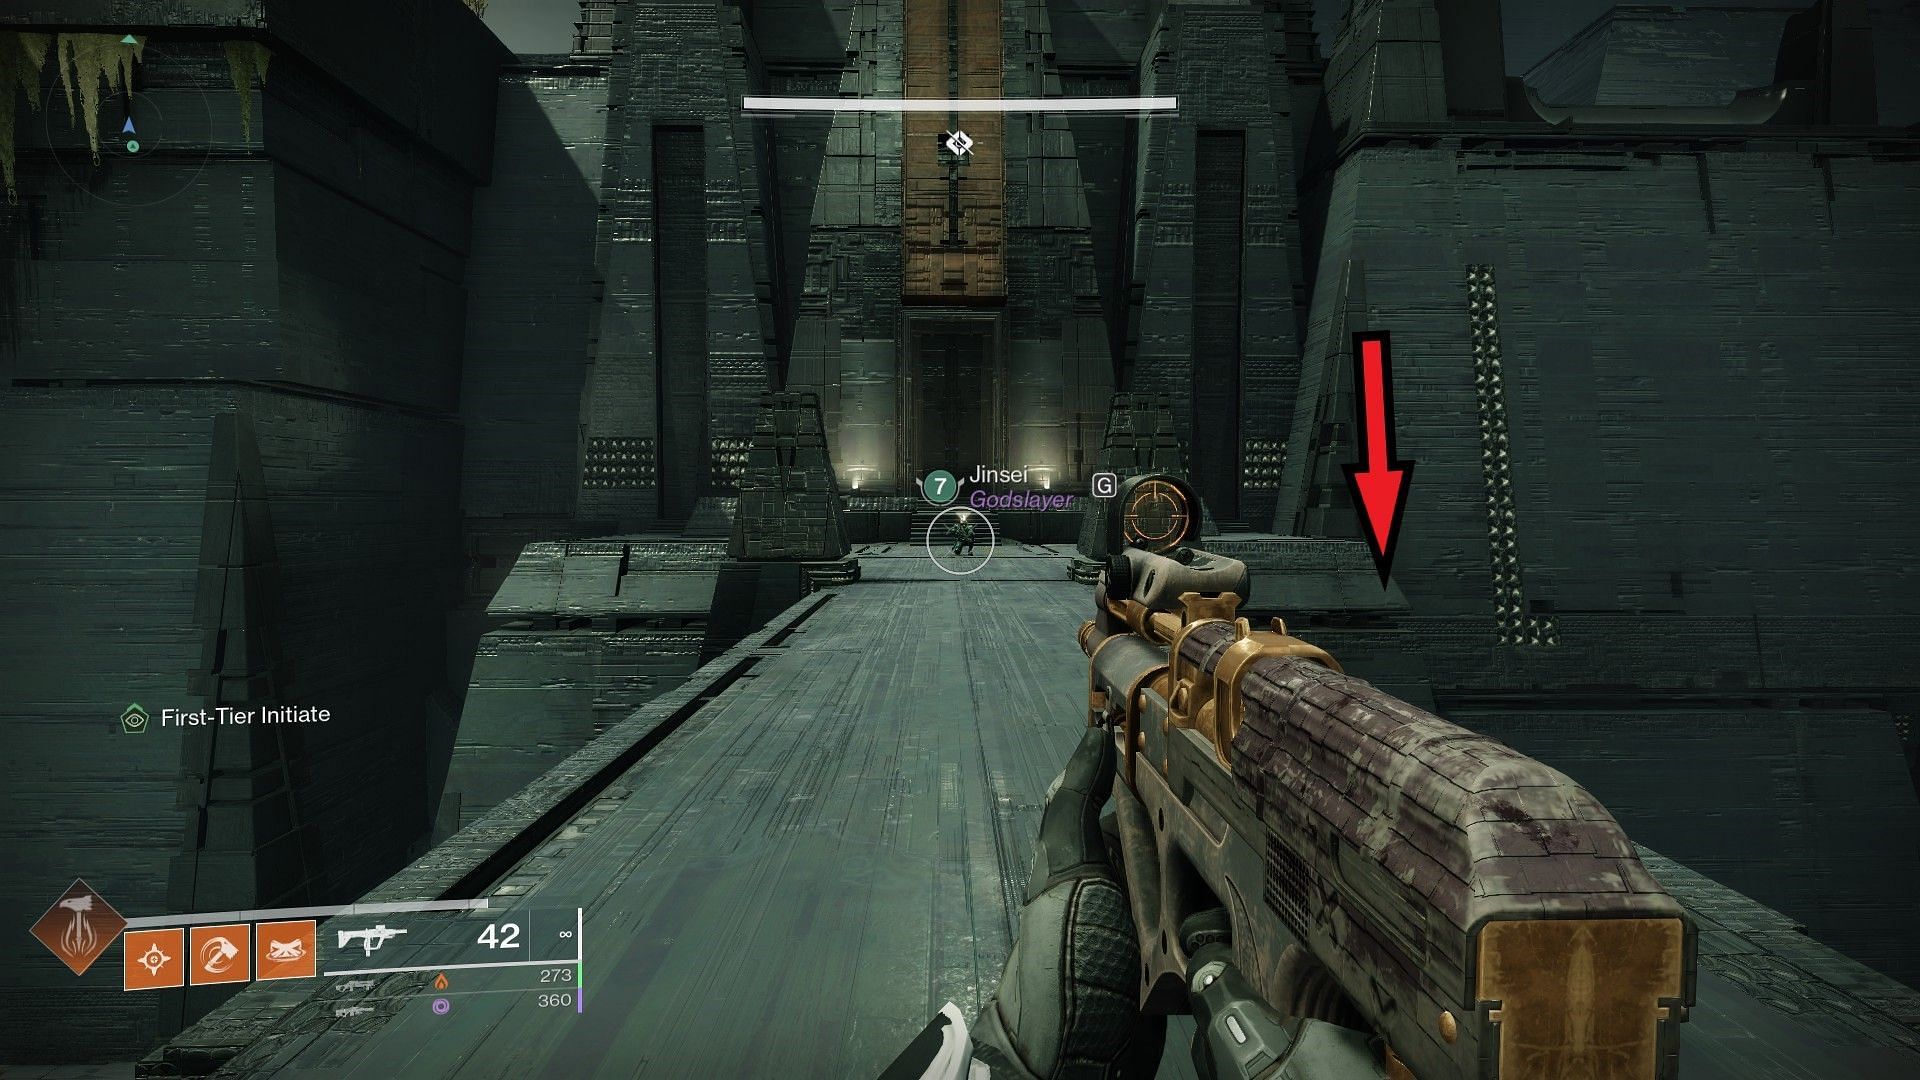
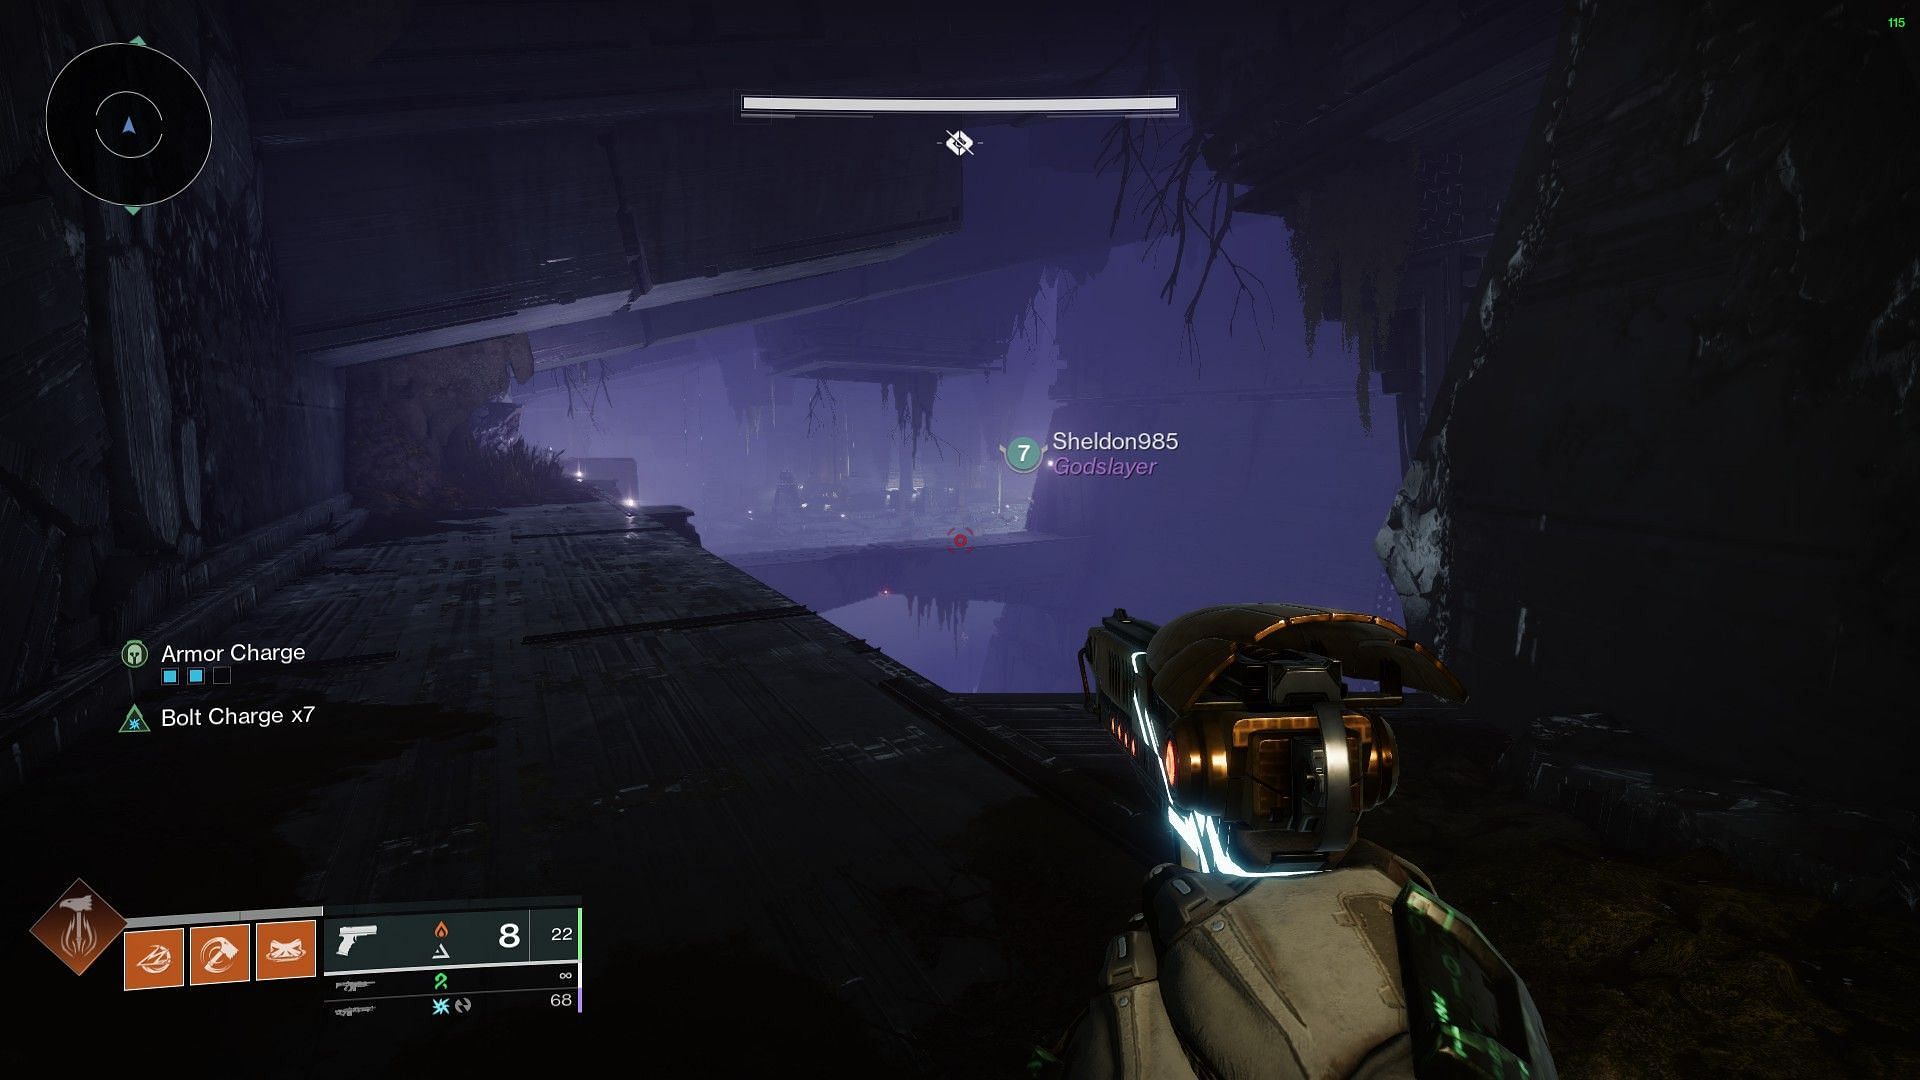
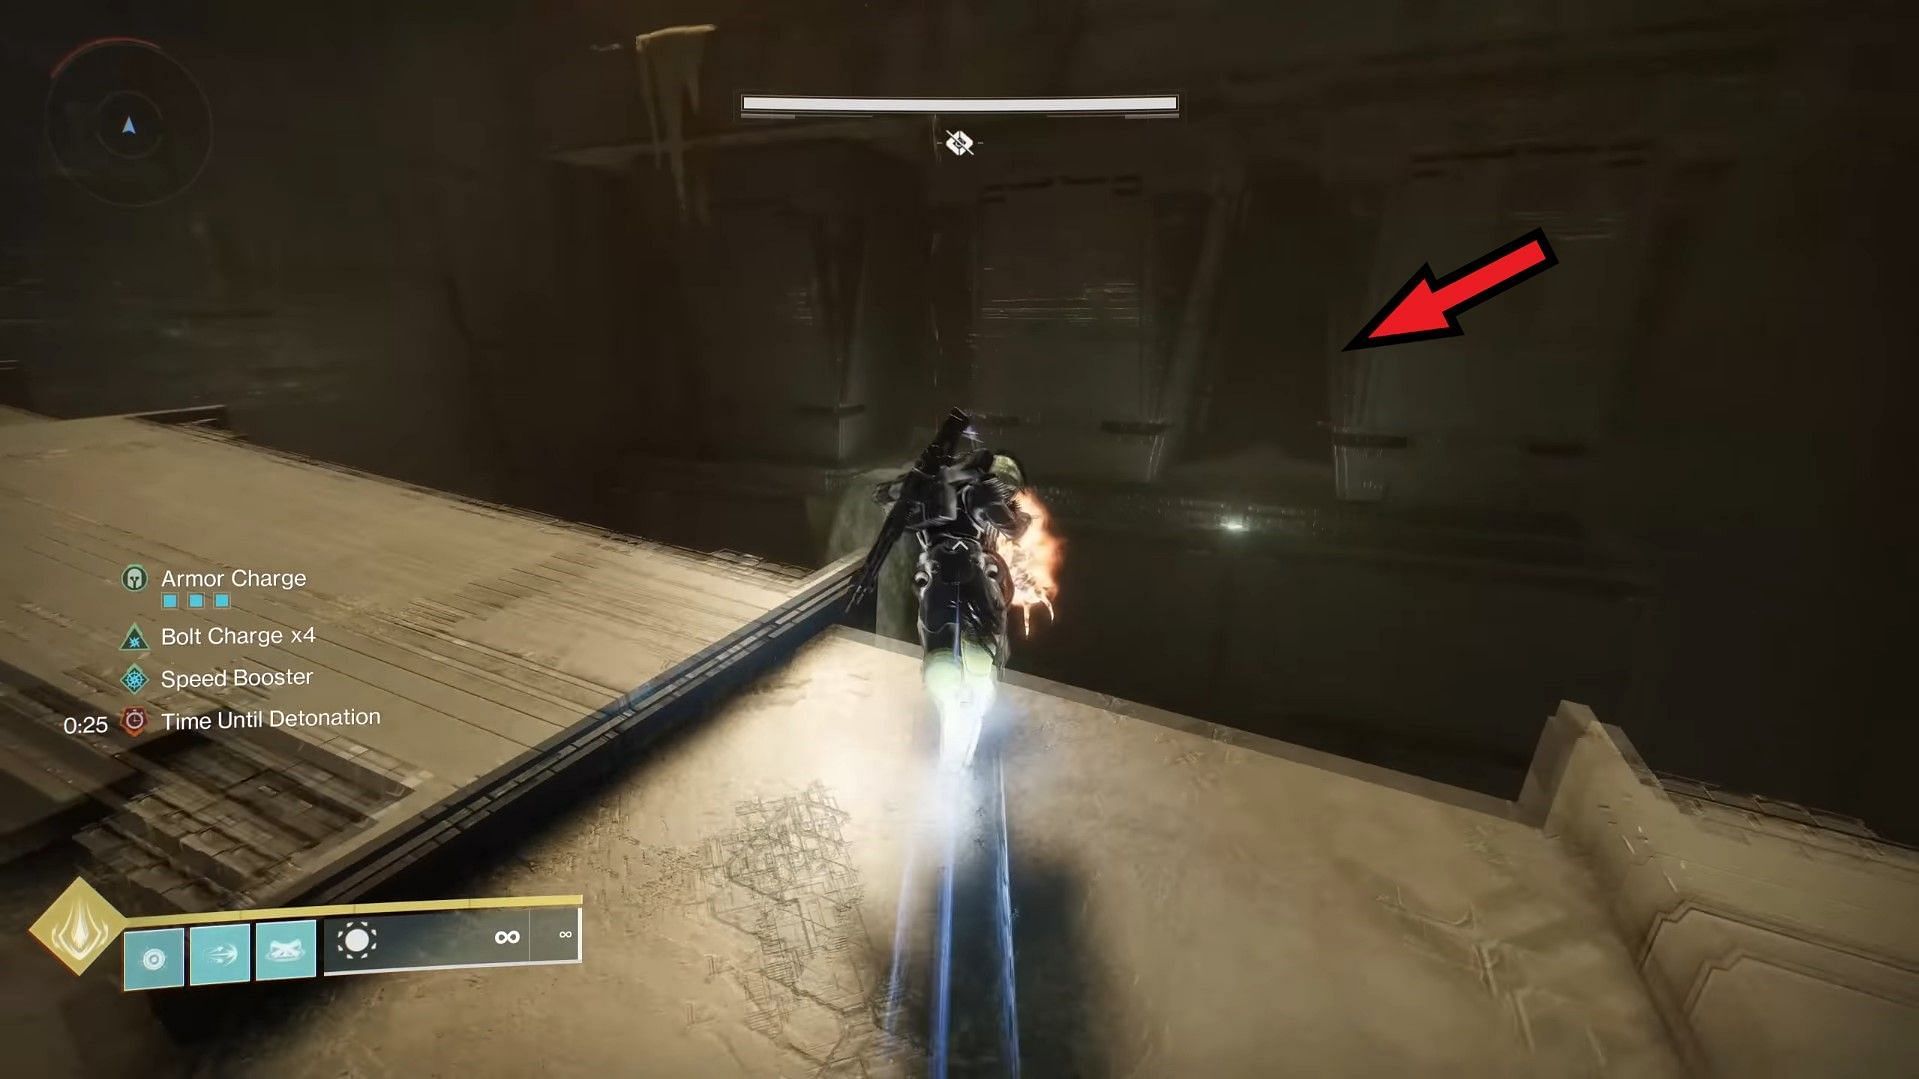
The first Worm can be found underneath the first bridge in the starting area. At the end of the bridge, drop down to the right and look for a small space underneath.

Hop into the space, and a door will open to the first Worm. Remember the Pyramid symbol on the wall in this room.
Worm #2:
After the first encounter, you will come across an underground Pyramid city.
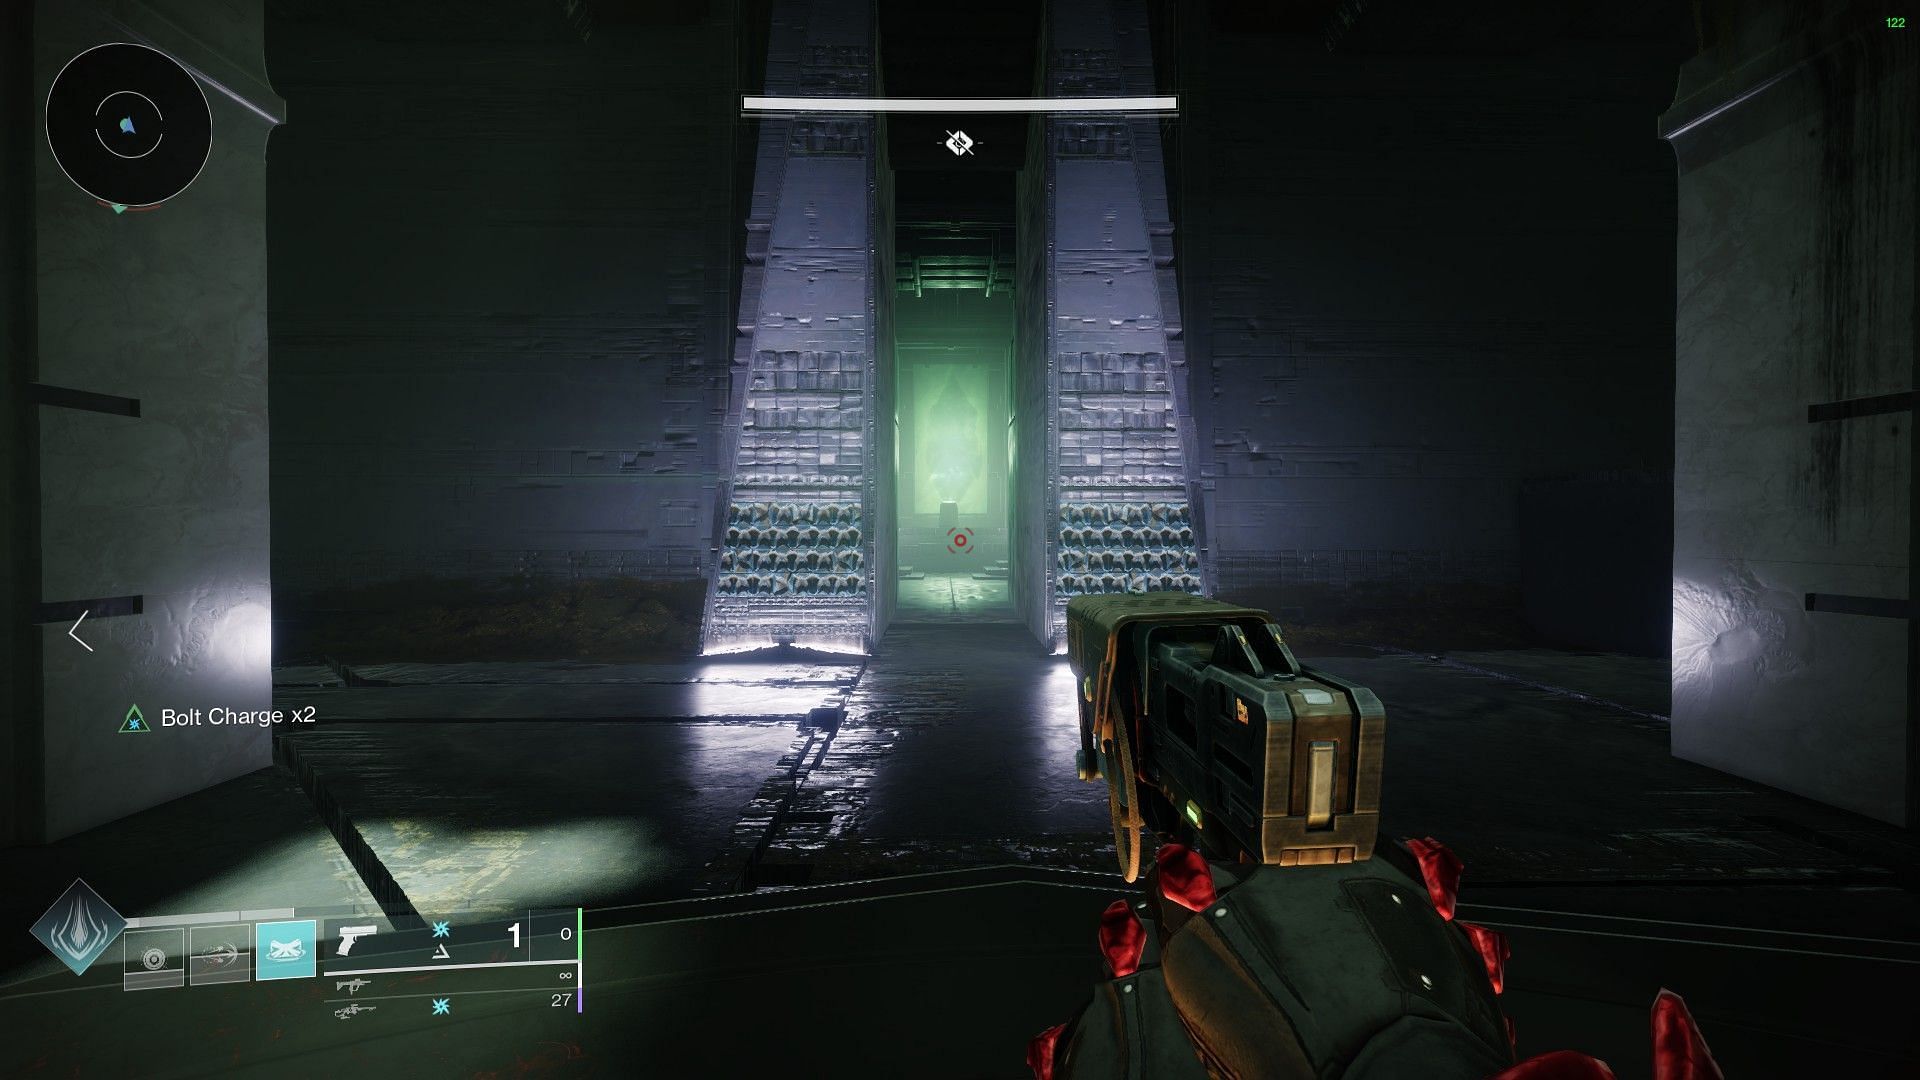
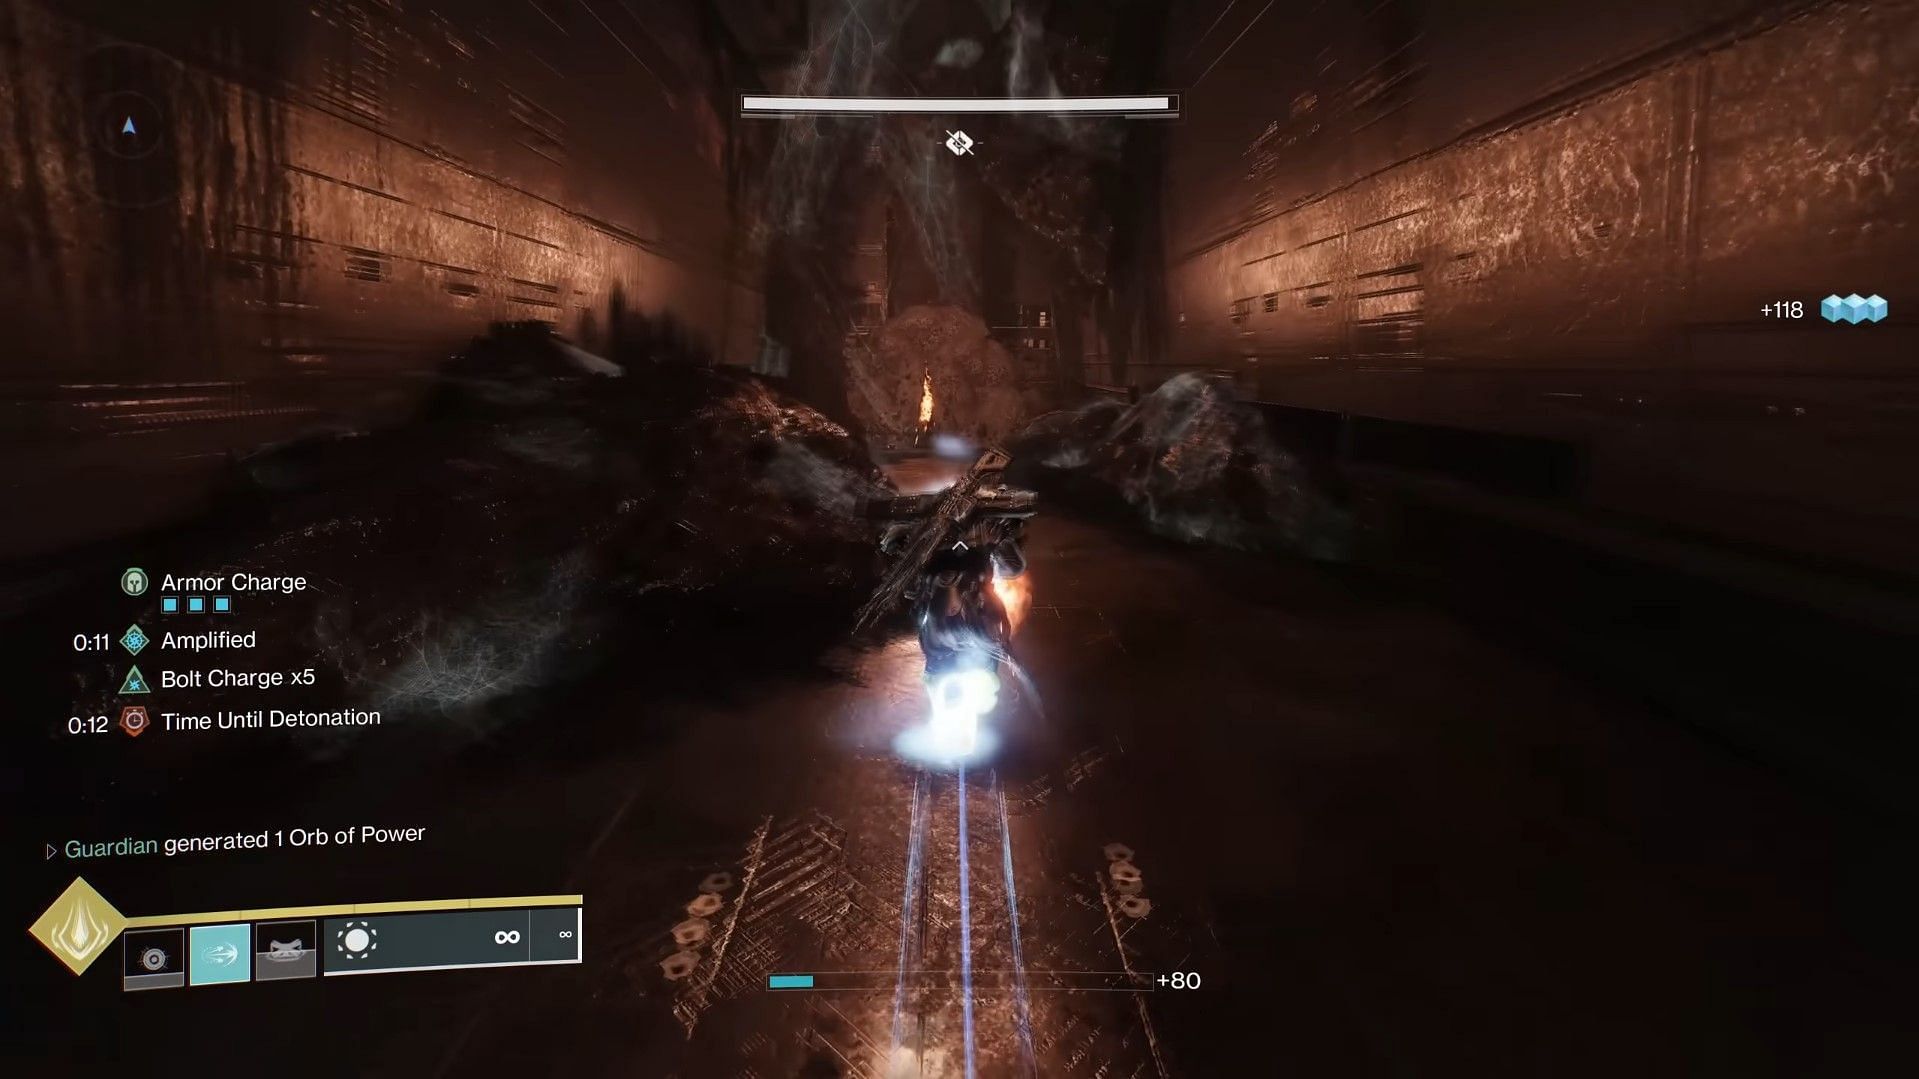
Here, instead of going through the usual path, go left, and look for an entrance at the end of the road.
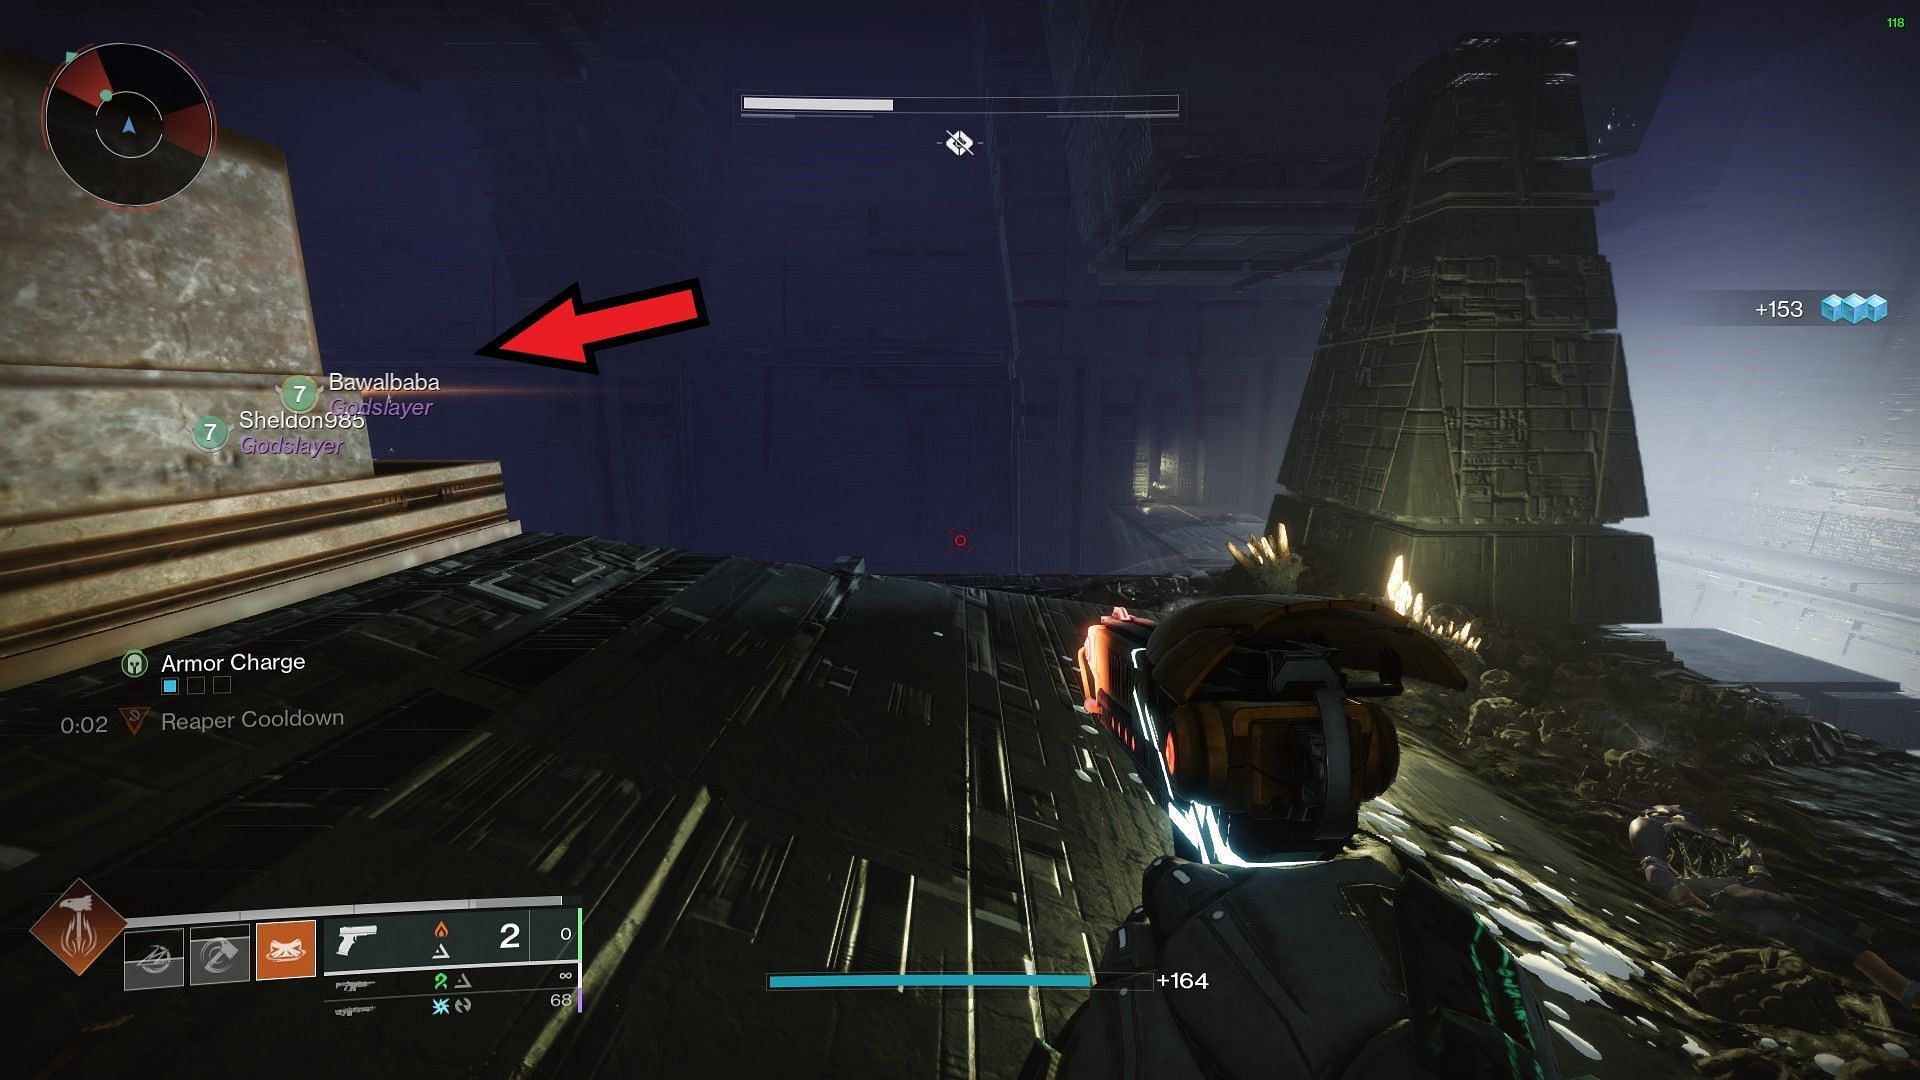
Enter the room by shooting the door. Collect the Worm and remember the symbol on the wall.
Worm #3:
After the second encounter, you will come across a room with lenses, lights, and symbols.
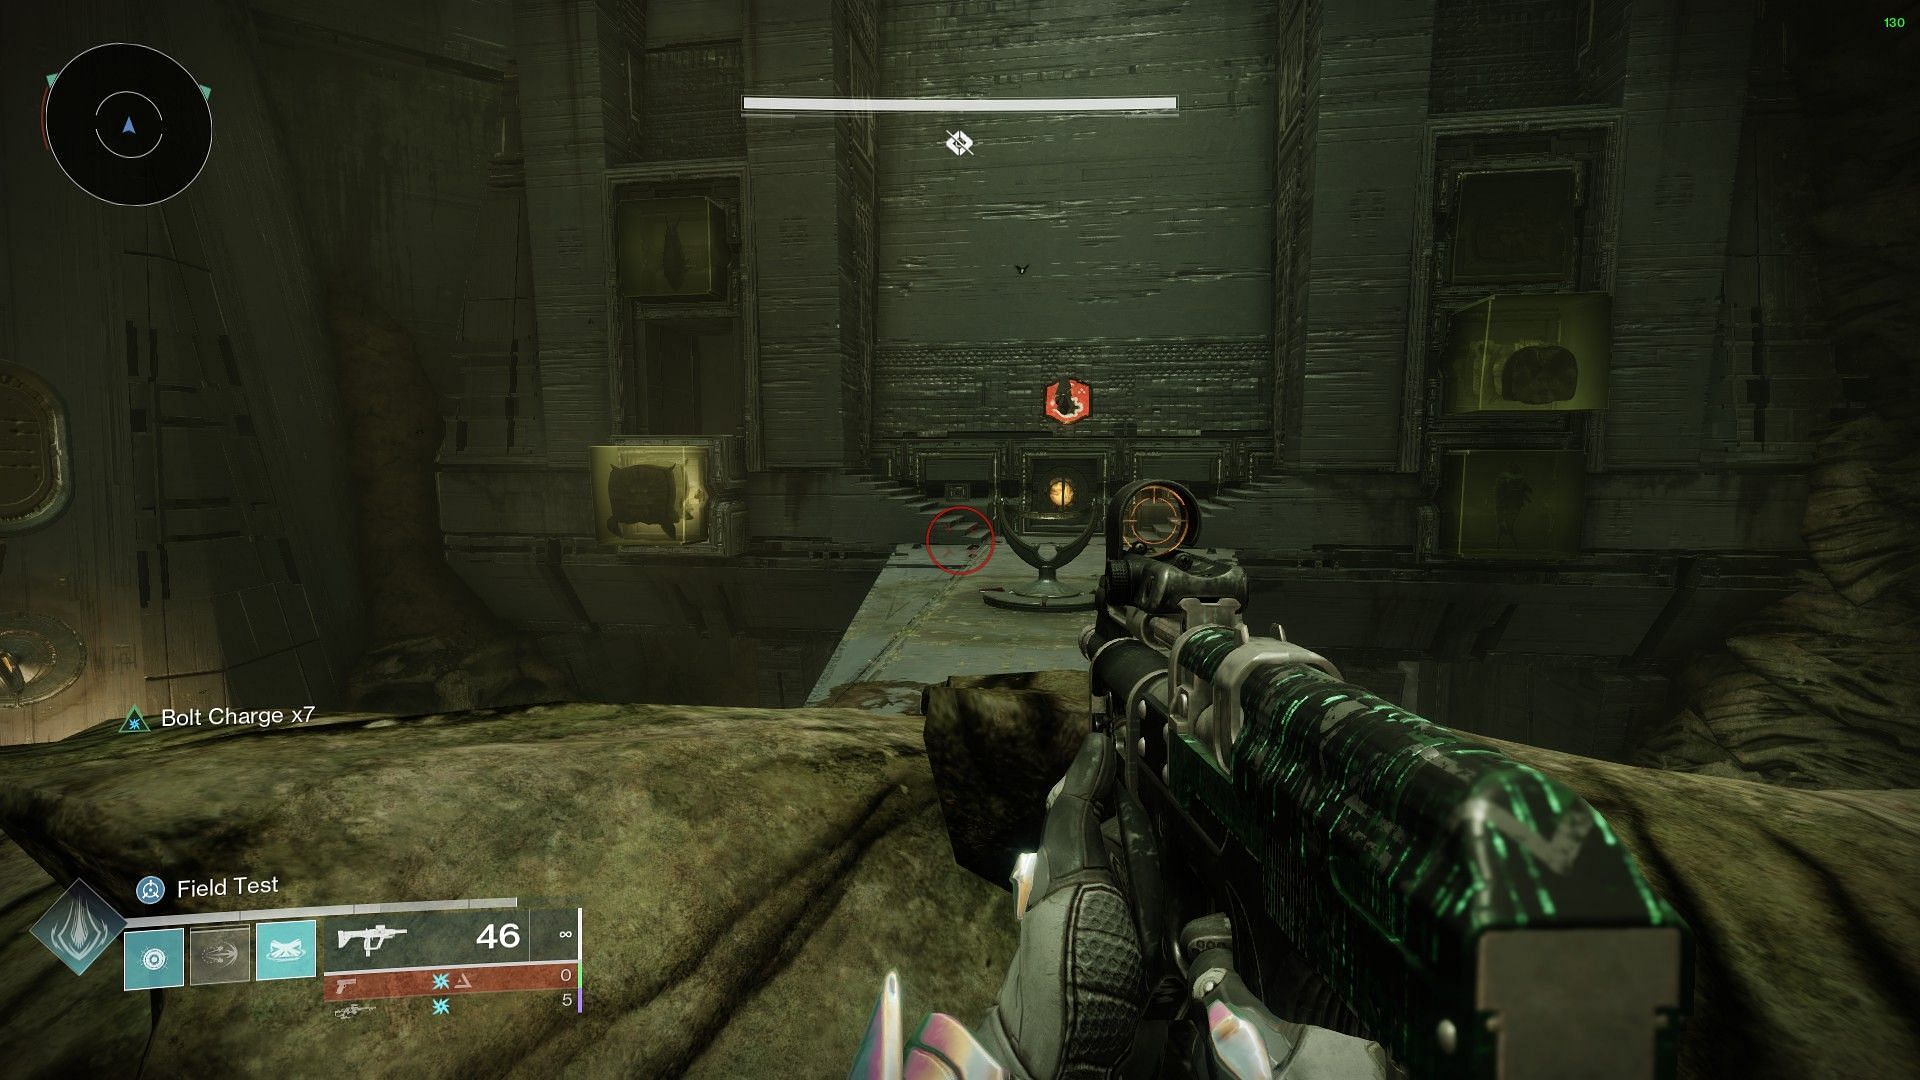
Look for the Worm symbol located on the right-upper wall from the entrance.
An opening should be beside the symbol, which leads to the third Worm. Remember the symbol in this room as well.
Steal Dread knowledge:
For the Dread Knowledge, start the Dungeon again, and head to the symbol wheel in the huge room with Guardian NPCs. This time, you must put in the symbols you saw in each Hive room. It should be Witness>Gift>Darkness.
If you do not see any symbol appearing on the wheel, try to put the first symbol combination, Witch Queen>Enter>Pyramid, and interact with the podium. This should fix the issue, and show you three symbols required for the second run.
Next, head through the usual path of the Dungeon. However, this time, you will find Shriekers in one of the hallways, and a Darkness plate at the back. Defeat the enemies and pick up Knowledge from them. Then, stand on the plate with Knowledge to drain the Darkness and open the door behind it.
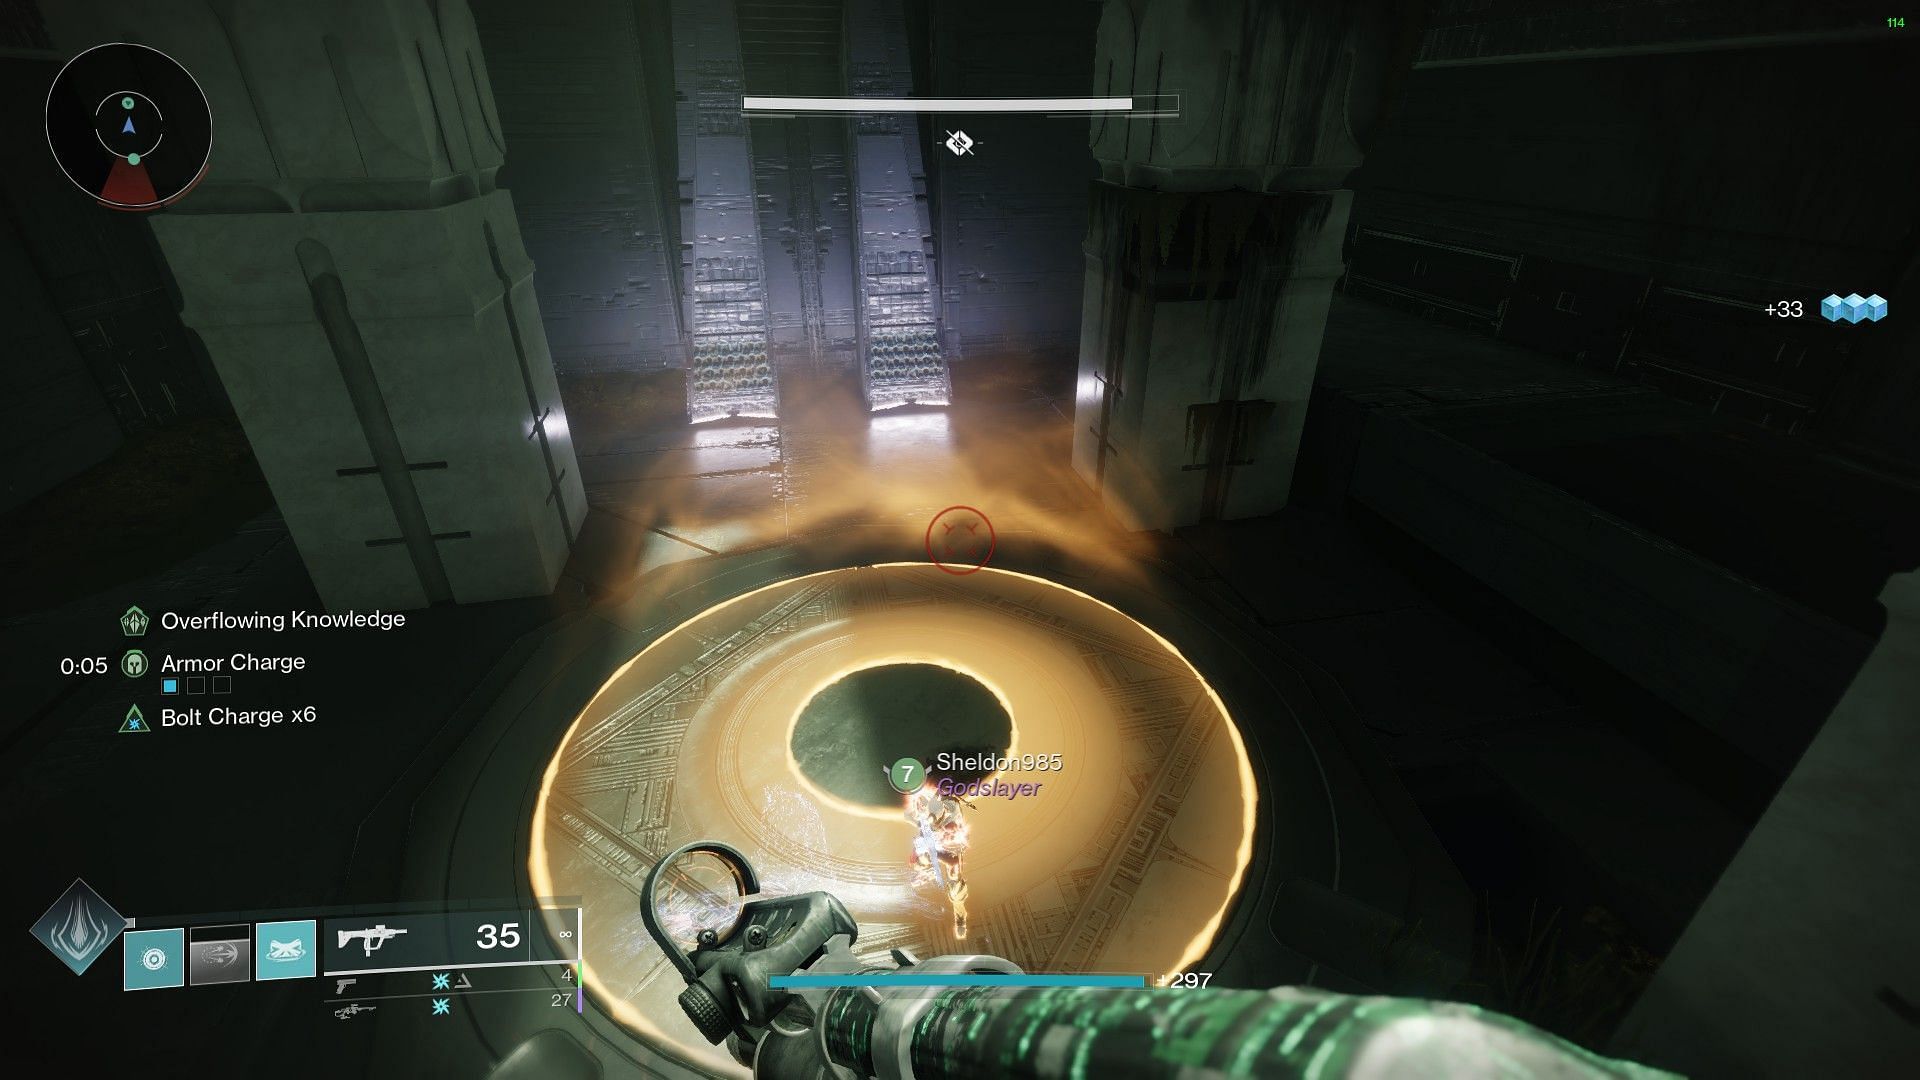
Once the door has been opened, interact with the podium inside. You should now have "Pyramid Data."
Complete the rest of the Dungeon, and the quest step will then update to the time-gated section.
The Drowning Labyrinth quest guide in Destiny 2 Week 2
This section of the article resumes from the quest step that requires players to "Become Initiated," "Get 6 Worms," and "Discover Hive Secrets." The number of steps should be 6 (of 11).
Here's what you must do:
Become Initiated:
Like the first week's process, you must become initiated by interacting with a piece of paper in the room full of Guardian NPCs. This paper should be in the room, opposite the symbol wheel.
Once you have the "Second-tier Initiate buff," start running the Dungeon until you come across the hoards of Dread with two Subjugator bosses. Take care of these enemies, and progress by going through the standard path, a small opening with purple light.
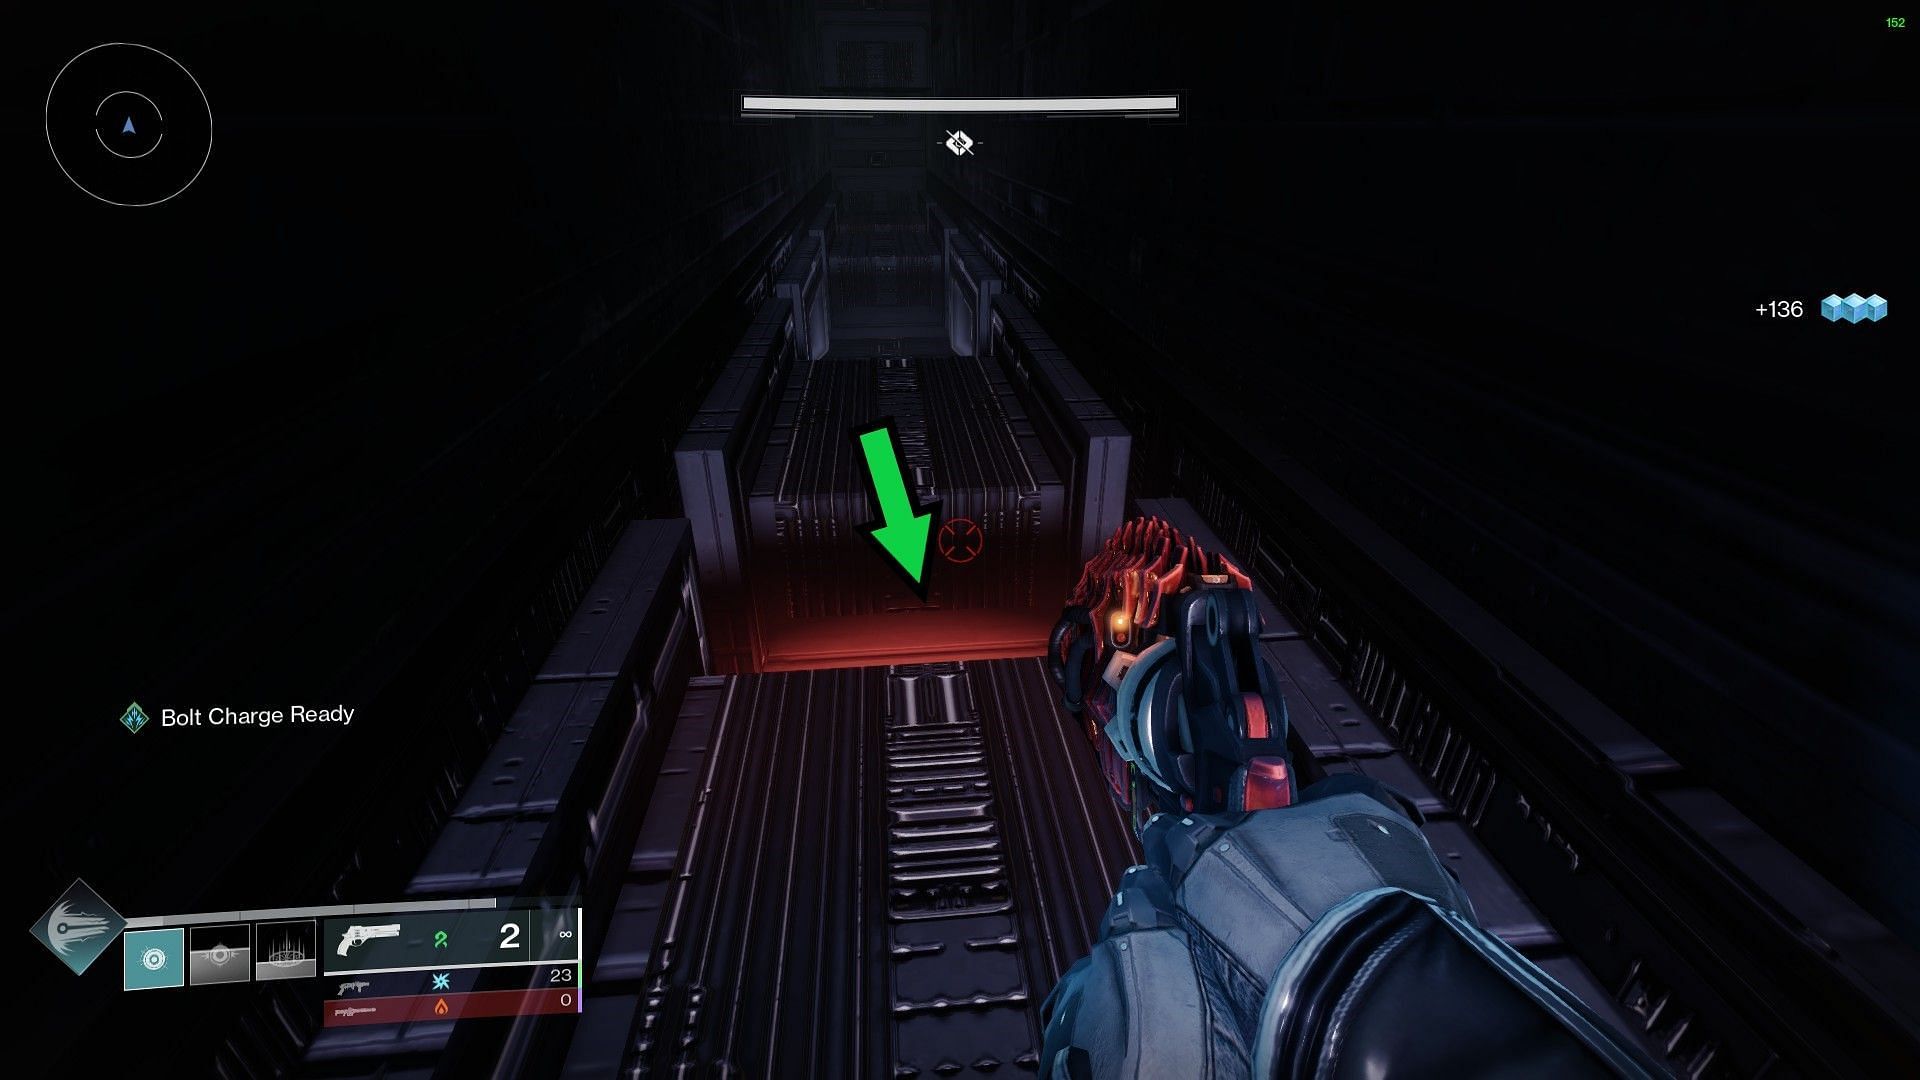
However, once you go through, drop through the crimson-lighted opening on the floor, instead of the white. This is your path to the fourth Hive Worm in the Dungeon.
Worm #4:
As mentioned, progress through the usual opening after dealing with the first wave of Dread enemies, and go through the red opening.
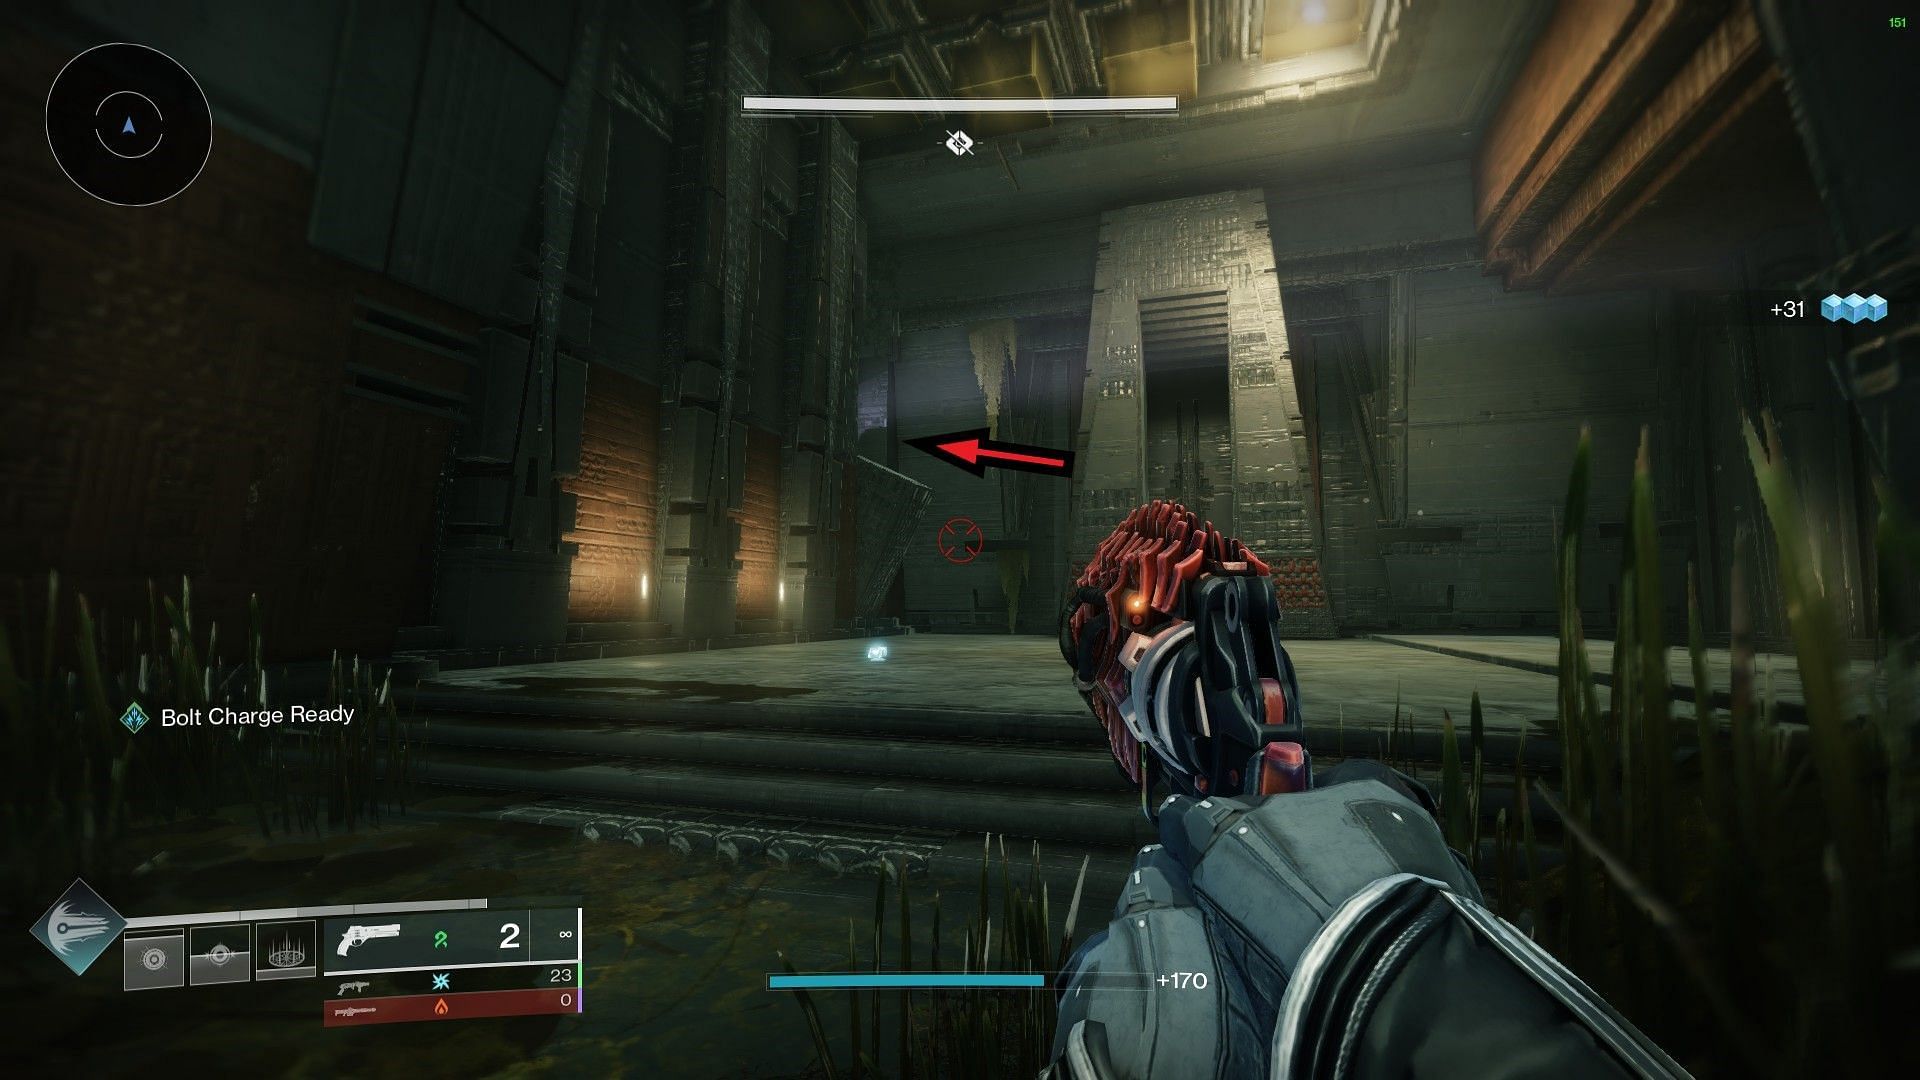
Once you drop down, stop, and do not descend any further. Instead, turn around, and you will find an "Interact" option. Once interacted, look up, and a new path has been opened.
Go through the path, jump down, and the Hive room should be in front of you.
Worm #5:
After the first encounter, traverse the Pyramid city, until you encounter the green section with a death gap in the middle. Go to the rightmost part of this section, and normally, you would jump across to the opening present opposite of you.
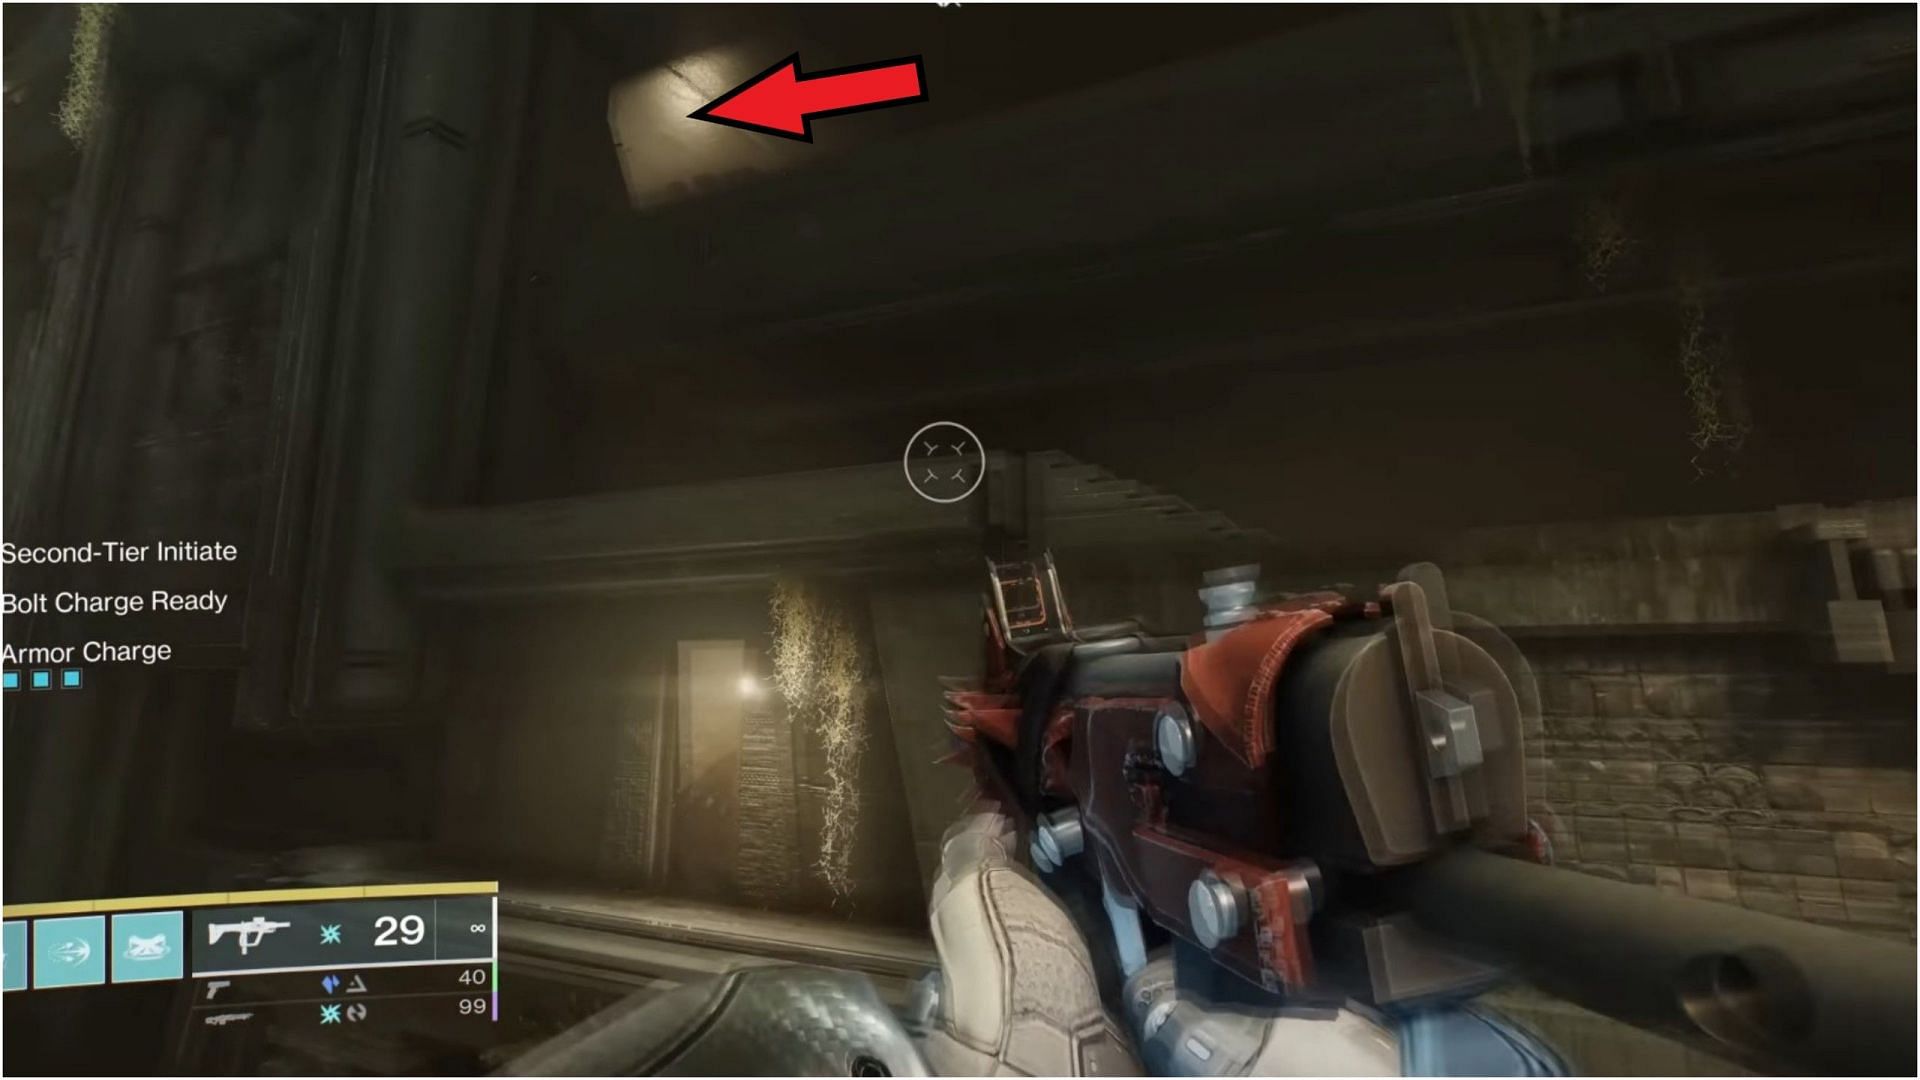
For the Worm, look up, and you will see a small ledge attached to a wall. This ledge is actually a pressure plate that opens up another room if you stand on it.
Hence, stand on the ledge, wait for the room to open up, and then get the fifth Worm.
Worm #6:
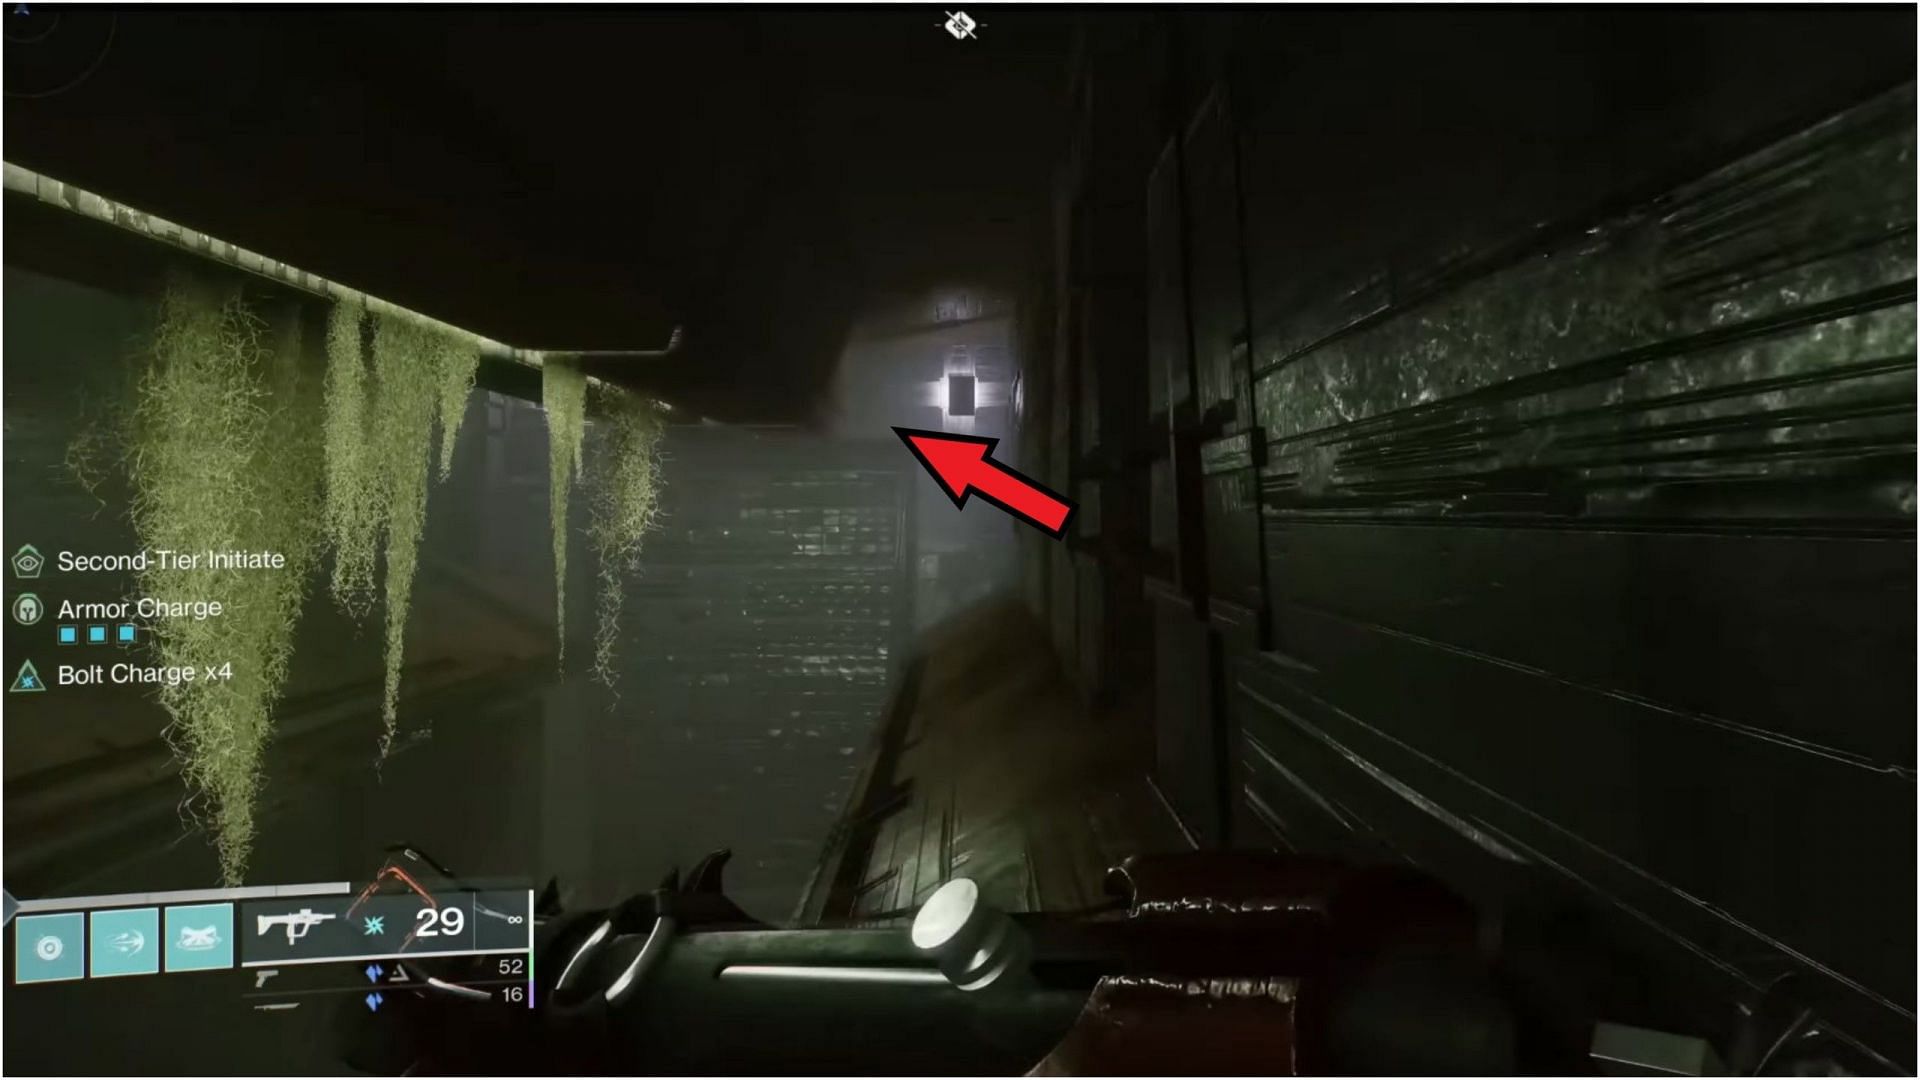
In the traversal section after the second encounter, and just before the lens puzzle, you will find a small section with Worm skeletons and Pyramid structures.
Climb to the first floor to your left, and you will find a black door to your right at the end of the hallway.
Shoot the door to open, and get the Worm.
Put in a code:
Start the Dungeon, and now put the code in order at which the Worm rooms had them laid out. In Week 2's case, it should be Hive Eyes>Grief>Worm, from top to bottom. Once done, progress through the Dungeon again, until you encounter the same area as the Worm #6.
Wormcradle Knight:
Within the area of Worm 6, defeat enemies and Shriekers until you find an orange health bar enemy, called Wormcradle Knight. Defeat this enemy, and pick up the Worm it drops.
Carry it to the location shown below.
Interact at the end of the hallway, and a new path will open up. Activate the Podium to get the Hive Knowledge. Next, complete the Dungeon to become updated with the quest step.
At the end of Week 2, you should be done with 8 of 11 steps in the quest.
The Drowning Labyrinth quest guide in Destiny 2 Week 3
Week 3 and the final quest steps for The Drowning Labyrinth questline starts with 9 out of 11 steps, asking you to collect three more Worms, become Initiated, and find a Control Chamber. Here's how to do it:
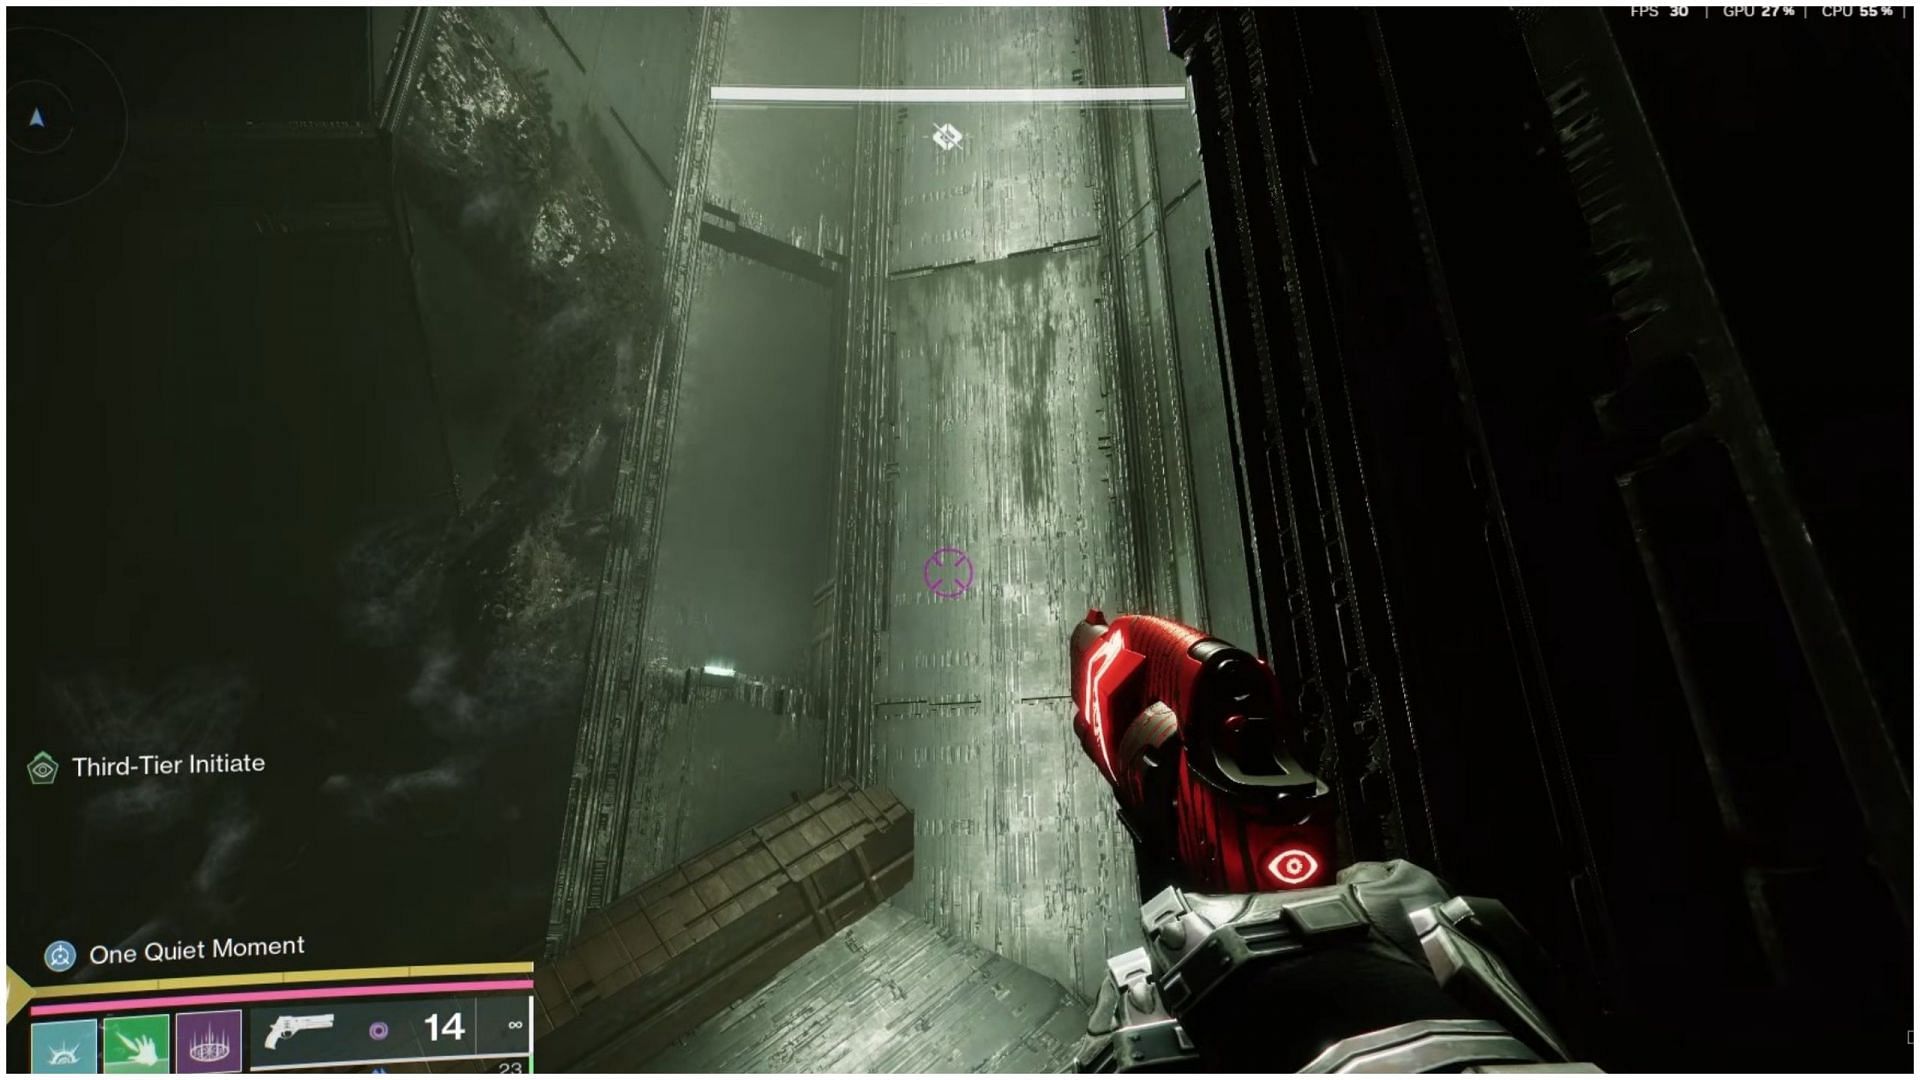
Become Initiated (third tier):
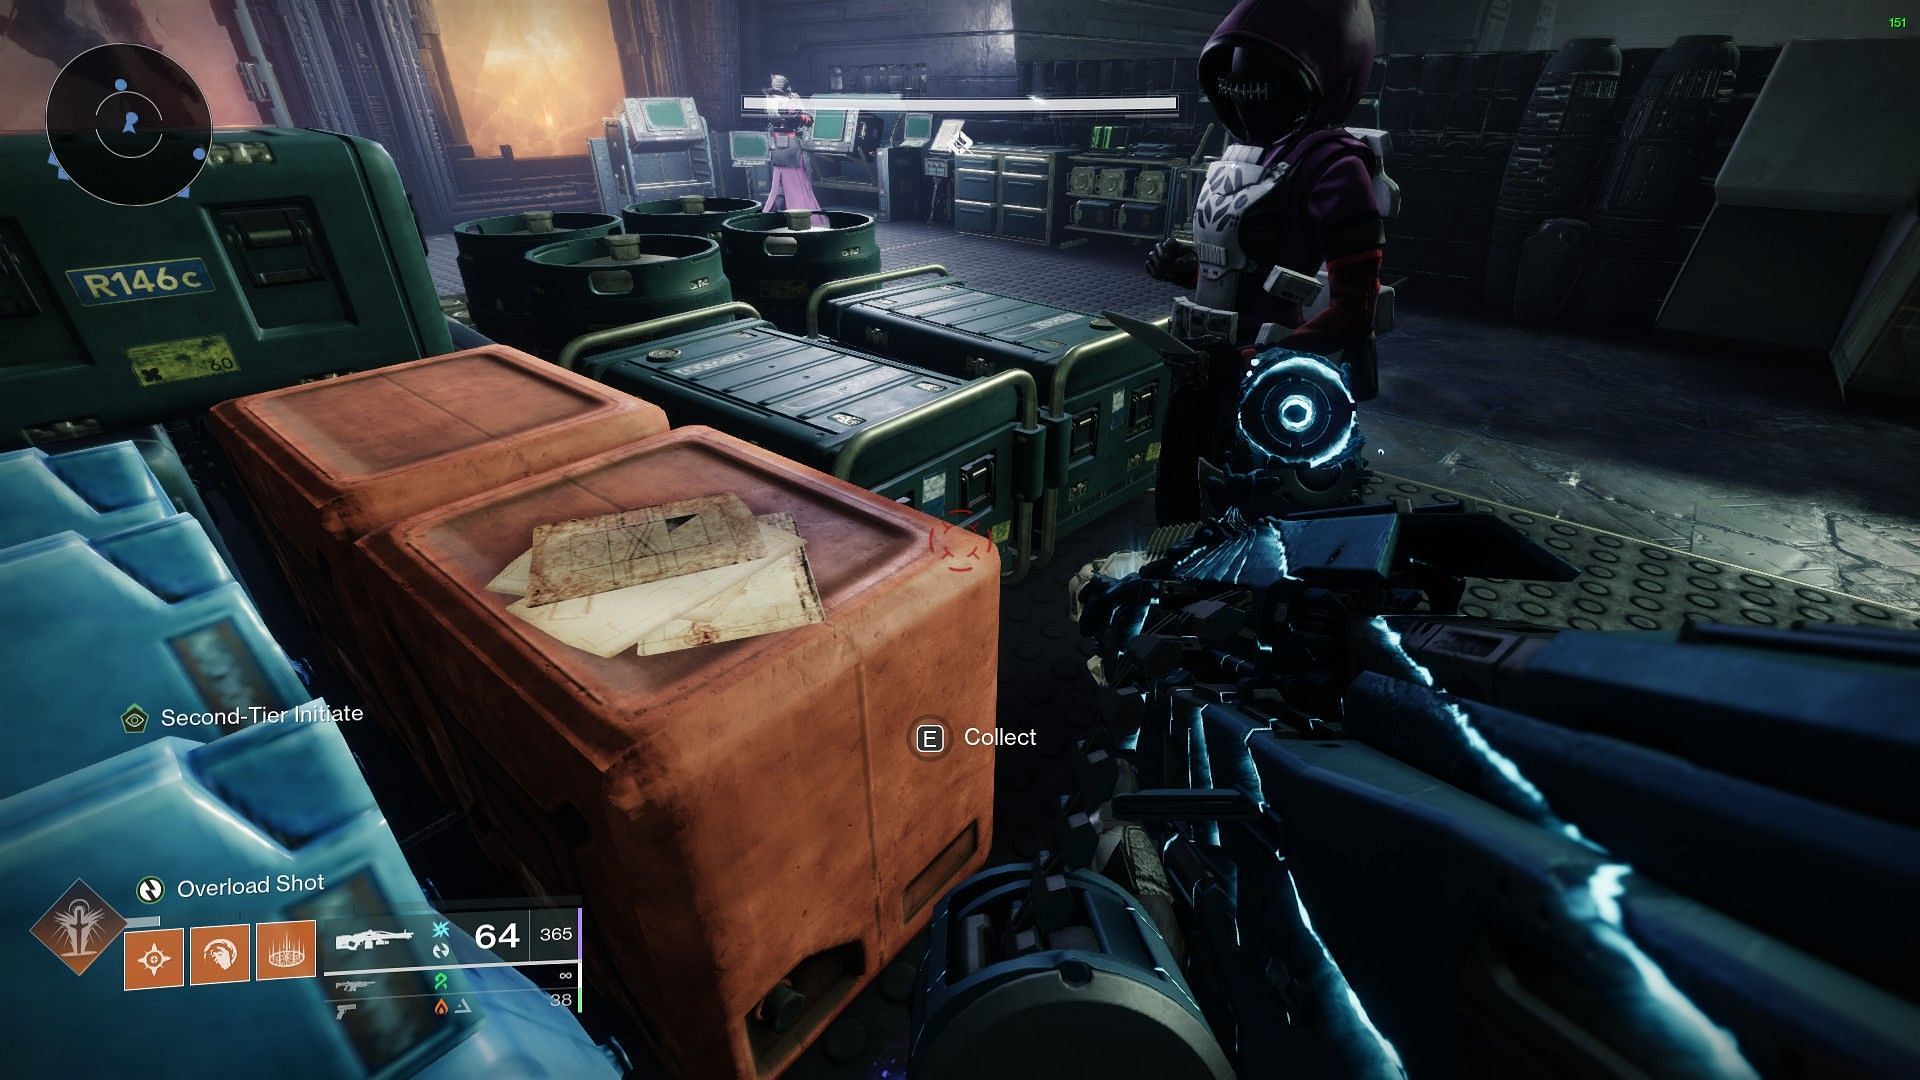
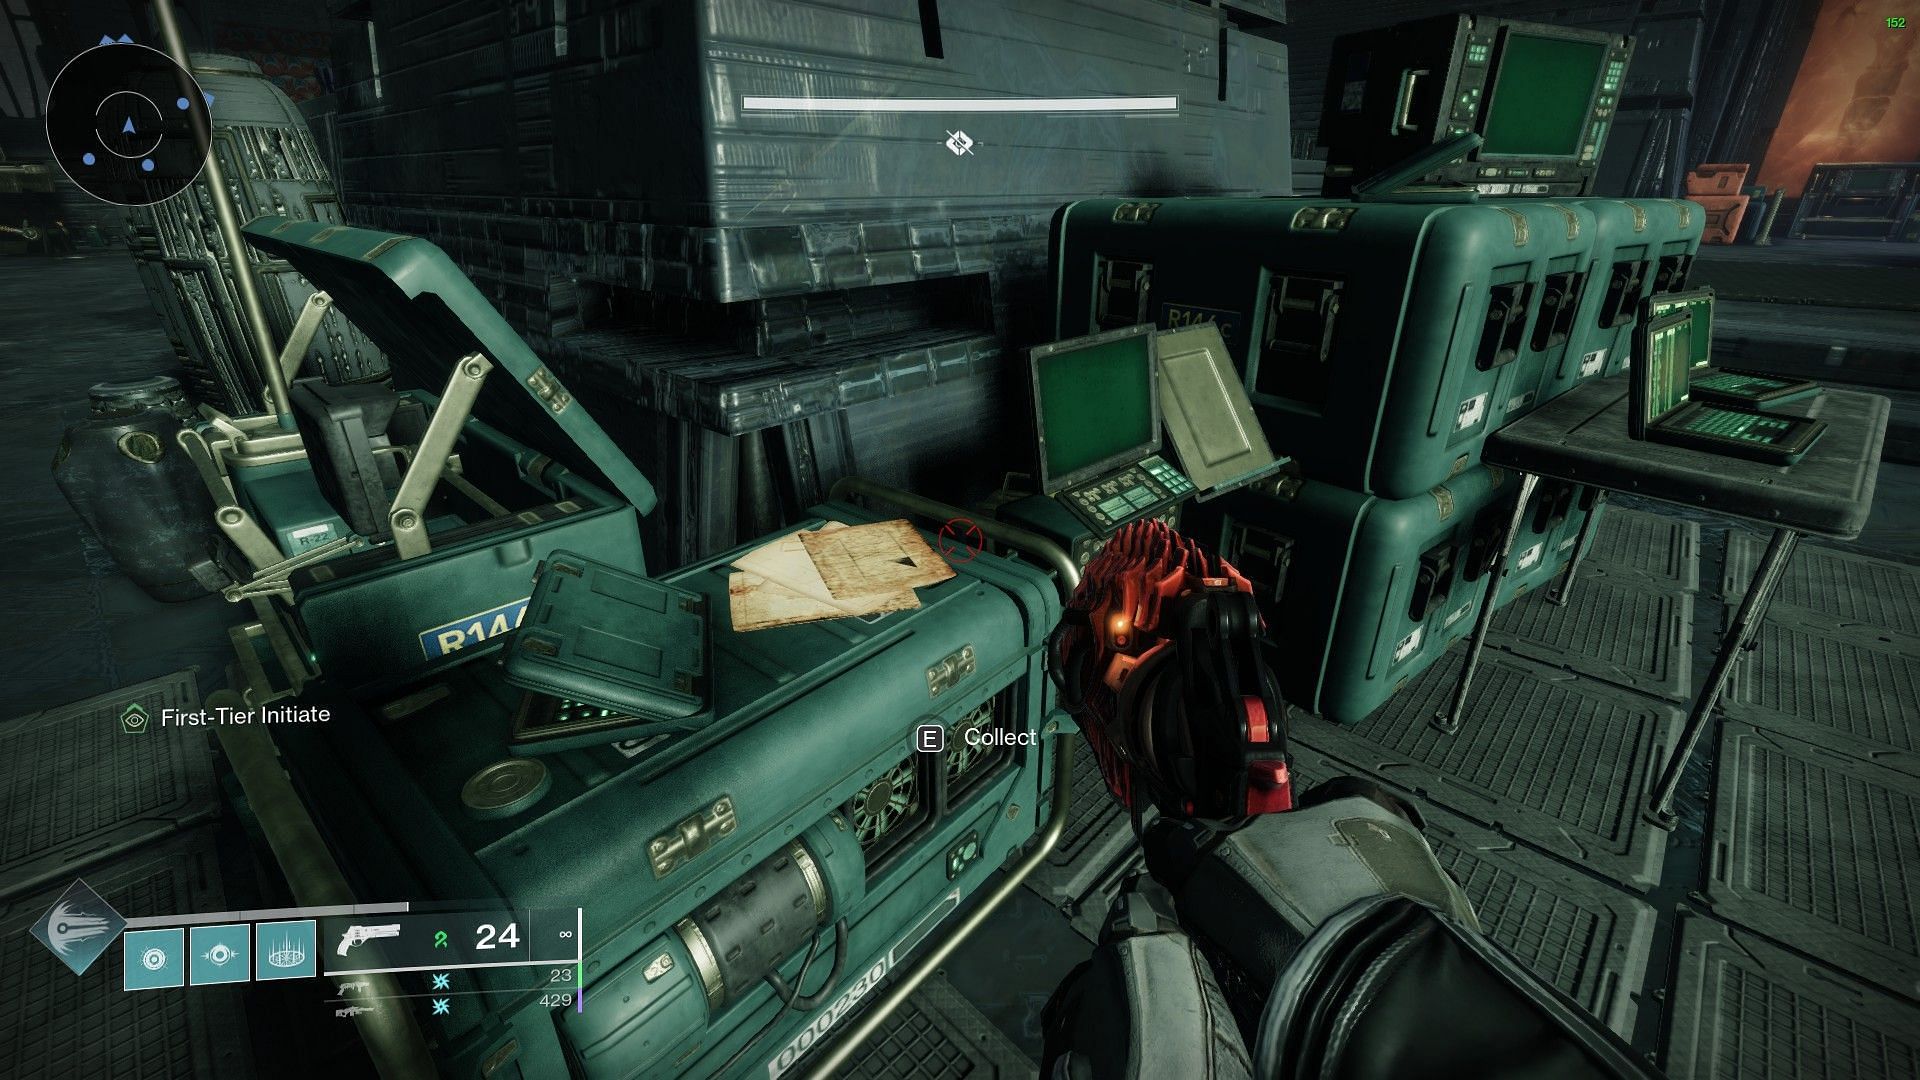
Start the Dungeon and enter the room with Guardians NPCs. Here, look for a piece of paper again, on the left side of the room on top of an orange box. Interact to gain the "Third-tier Initiate" buff. Next, put in the symbols Witch Queen>Enter>Pyramid, and start progressing through the Dungeon.
Your next task is to find three Worms again.
Worm #7:
For the seventh Worm, progress until you encounter the grass room just before the first encounter. It is also the same room where you find a small path behind a waterfall. Once you arrive in the middle, look for a ledge to the upper right.
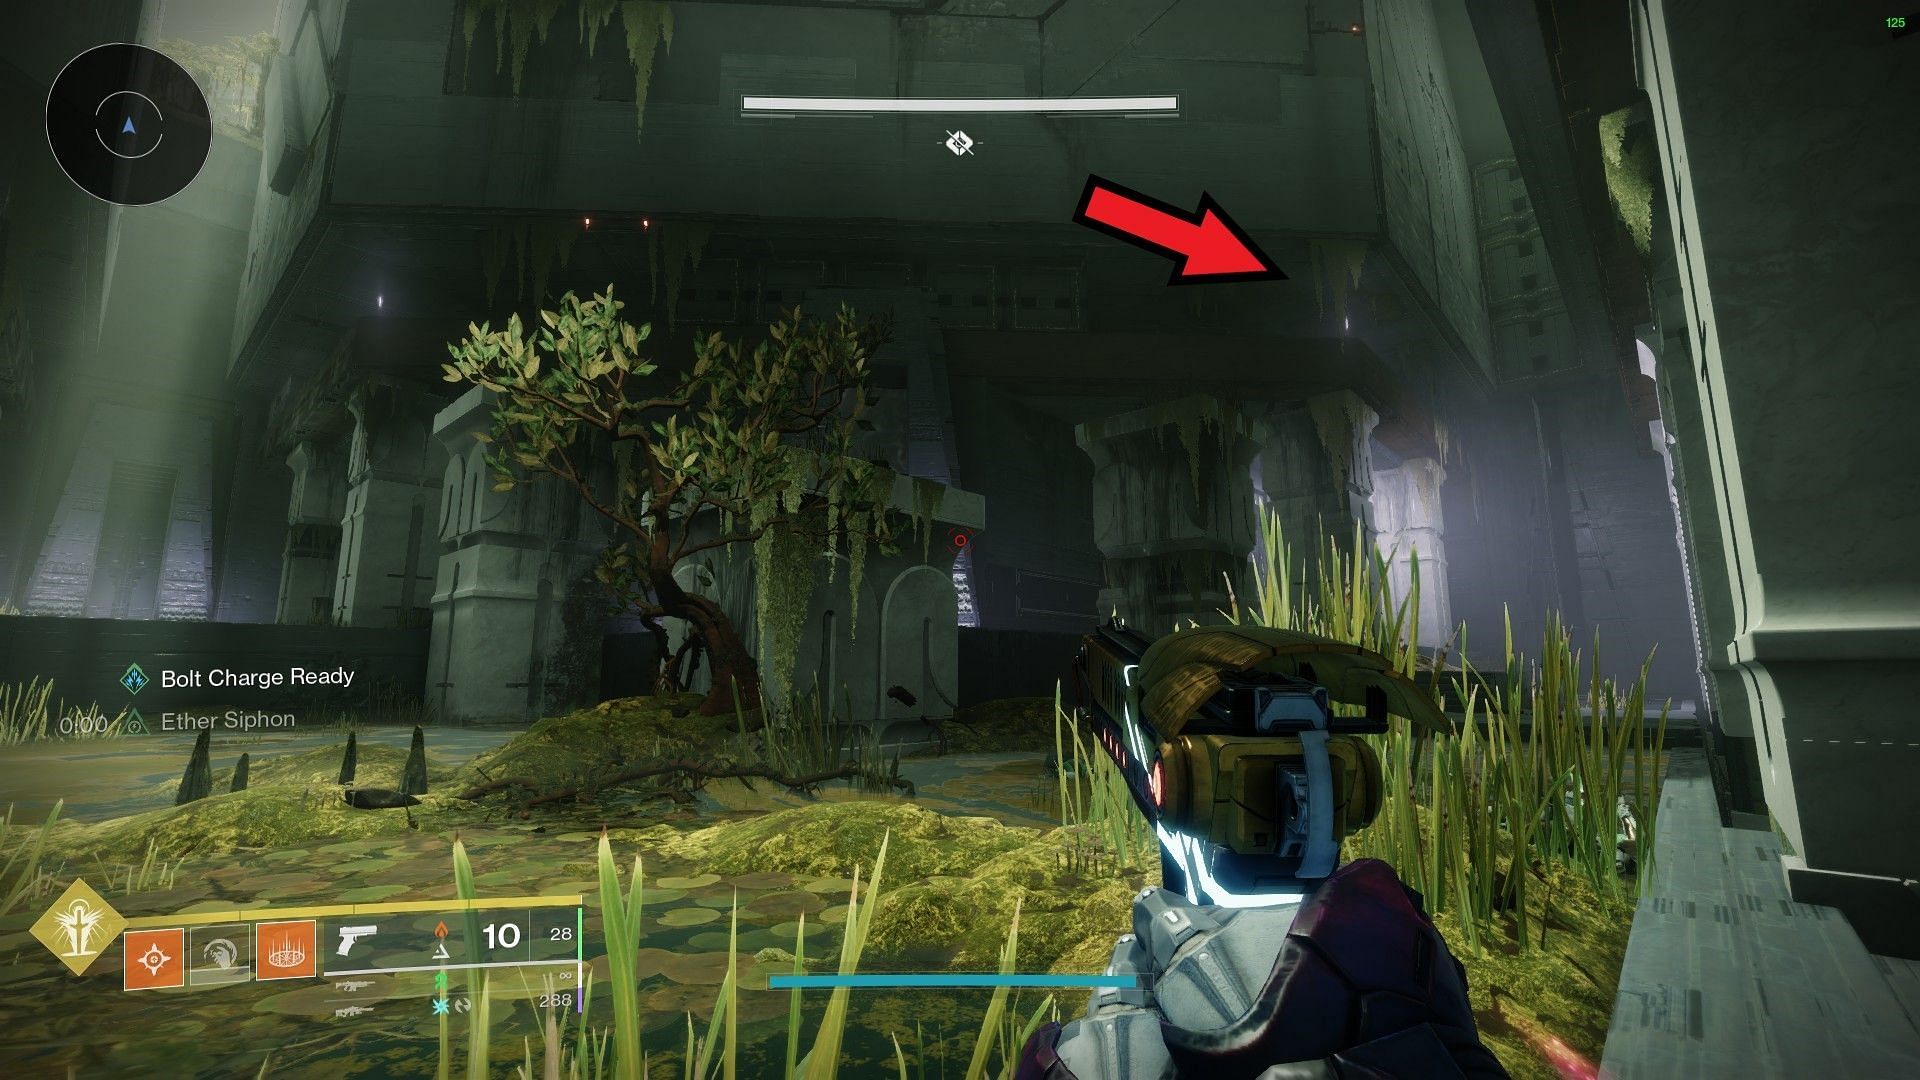
Progress towards the wall at the end, and hop onto the ledge. Shoot the door in front to open it, and grab the Worm inside. Memorize the symbol on the wall inside this Worm room.
Worm #8:
After the first encounter and the maze, when you encounter the rolling spiked ball, make your way to the end of the path instead of dropping through the crack in the ground. On the left, you will find a door that will let you interact and open. Grab the Worm, and memorize the symbol.
Worm #9:
Before the final encounter, and after the mini-encounter with Lens, you will be met with another Subjugator boss alongside a few Hive and Dread enemies. While your usual path is on the right with a shootable door, this time you must head straight, and stand on a hidden white ledge behind the wall.
This will open up the way to the final Worm.
Restart Dungeon and put code:
Restart the Dungeon once you have all nine Worms, and head to the room with Guardian NPCs. Here, put the symbol in the order: Guardian>Remember>Fleet.
Align Lenses:
After the first encounter and the maze, but before the spiked ball trap, you will encounter a small Pyramid City. Here, simply align the Lenses present to the wheel with Worm symbols.
A door will open under the wheel, leading you to an Altar. Interact with the Altar, and then carry on normally to complete the Dungeon.
After defeating the final boss, wait for the door behind the middle wheel to open. Enter the room, and interact to get the Finality's Augur Catalyst.
You can also check out our other Destiny 2 articles:
- All Exotic weapon changes in Heresy Act I
- Imminence Destiny 2 god roll guide
- Non-Denouement god roll guide
- Psychopomp god roll guide
- Better Devils god roll guide
- Breachlight god roll guide
- Lost Signal god roll guide
- Patron of Lost Causes god roll guide
- Critical Anomaly god roll guide
- Episode Heresy weekly reset
- Adamantite god roll guide
- Tome of Want explained
- Essence of Desire farm guide
- Best ways to heal in The Nether
- Easiest way to get The Queenbreaker Catalyst
