Getting to fight the Witness once and for all is a big part of the hype surrounding Destiny 2 The Final Shape. A loose end from the Lightfall days, the Witness boss fight is a long-awaited encounter many players have been waiting for. As expected from the big bad of the story, this boss encounter can be quite tricky.
This guide will go over what to expect from the Witness boss fight at the end of the Final Shape's campaign on Legendary mode. Specifically, the scope of this guide covers only the Witness encounter at the seventh mission, Iconoclasm.
Note that you don't defeat the Witness in earnest at the end of this encounter. A final showdown for this will take place in Destiny 2's upcoming Raid, Salvation's Edge, as teased heavily in the cinematic that plays at the end.
Disclaimer: As the fight takes place at the end of the campaign, it may contain some heavy spoilers for those who have not played The Final Shape yet.
The Witness boss guide for Destiny 2 The Final Shape Legendary Campaign
The Destiny 2 encounter with The Witness begins directly at the end of the Iconoclast mission, in the Sacrarium. The fight has three 'phases' you need to beat, and simply knowing the mechanics beforehand makes it much easier.
First and foremost, note that The Witness himself is invulnerable throughout the fight, and you only chip away at his shields in one of the phases. With that out of the way, lets start with the first phase.
First phase

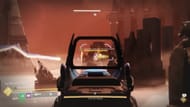
Once you enter the Sacrarium, your primary target is Lenurae, Subjugator of Fluxion. This miniboss throws a volley of projectiles at you, which can be lethal in Legendary Mode. Here are a few things you need to keep in mind:
- All of the enemy firepower comes from the center of the arena, so take cover behind the pillars often. Most importantly, find cover as soon as a message says 'The Witness unleashes an attack!" on top of your health bar.
- Beware of ad spawns, as the Grims can start slowing and suppressing you if they are left unchecked for long.
- Your goal is to chip away at the Subjugator's health till it turns invincible.
Second phase

After you drop the Subjugator down to half health, it will turn invulnerable, and the second phase will begin. What you have to do is look around for shell-like floating darkness nodes and shoot at them.
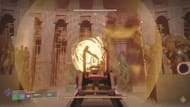
Destroying one of these gives you the 'Shielded from Darkness' buff. With this, run into the corridor marked by the objective pointer to grab the Shield of Light. For reference, this will be the passageway to the left of the arena entrance.
With the Shield of Light Relic in hand, run back to the Subjugator. Use the Super to nullify his defense, but don't try to attack him yet. Retreat back to behind the pillars, where a crack in the floor will radiate light. Stand on this exact spot, look towards The Witness, and press block.

If you are playing on a Fireteam, all teammates should also retreat back into the Shield of Light's AoE, ensuring that they all have the 'Granted Light' buff. Once The Witness' attack stops, you will have a window to kill the Subjugator for good.
Third phase

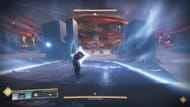
Once the Subjugator is down, you can pick up a new relic: the Sword of Light. Once you pick it up, destroy the object right in front of the giant statue and then interact with it to 'Embrace the Darkness'.
This will put you inside a room with a series of monoliths. After the Witness is done with his monologuing, you can smite the marked statue to break his shield partially.
Note that you will need to smack two more statues in this boss encounter later on, but no further mechanics are added to complicate this phase.
After this, you will be sent back into the arena.
Back to the Sacrarium Arena
Back in the arena, you may notice that you have a permanent poison debuff from the darkness now. However, several floating darkness nodes will spawn, which you have to shoot down to get the Shielded from Darkness buff again. You can maintain this throughout the rest of the fight to ward off the damaging debuff.
More to the point, the Subjugator of the Traveller will now spawn, and he has the same mechanics as the previous one. Get him down to half health once again to get another Shield of Light to spawn - on the opposite passageway this time.
Otherwise, the mechanics are the same as before - destroy the Subjugator's defenses, retreat and block, and kill him off afterwards. Afterwards, you can pick up another Sword of Light and it's a repeat of the Third Phase.
After you are transported back again, Zavalla and Cayde will join you with the fight. There are no Shield of Lights this time, but take care to clear out the ad spawns, especially the Taker Thralls that start to pile up.
The Sword of Light spawns once again; use it to enter the statue for one last time. Once you destroy the final chunk of the Witness' shield, you and your teammates will be dropped down to very low health, and an escape sequence begins.
Escape!

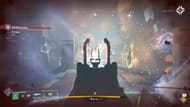
Right at the beginning of the corridor, you will be presented with a third Shield of Light. Pick it up and use it to block the projectiles. Shoot any Blighted Eye that you see, and keep moving towards the end. The Shield will recharge from areas where cracks on the floor are radiating light.
In our experience, the 90-second timer was more than enough for this final push. Once you make it to the exit, you have 'beaten' the Witness and the Destiny 2 The Final Shape campaign.
