
'%20x='0'%20y='0'%20height='100%25'%20width='100%25'%20%0A%20%20%20%20%20%20%20%20%20%20xlink%3Ahref='data:image/jpg;base64,/9j/2wBDAAYEBQYFBAYGBQYHBwYIChAKCgkJChQODwwQFxQYGBcUFhYaHSUfGhsjHBYWICwgIyYnKSopGR8tMC0oMCUoKSj/2wBDAQcHBwoIChMKChMoGhYaKCgoKCgoKCgoKCgoKCgoKCgoKCgoKCgoKCgoKCgoKCgoKCgoKCgoKCgoKCgoKCgoKCj/wgARCAAGAAoDASIAAhEBAxEB/8QAFgABAQEAAAAAAAAAAAAAAAAAAAUH/8QAFQEBAQAAAAAAAAAAAAAAAAAAAQL/2gAMAwEAAhADEAAAAMmgDH//xAAeEAABAwQDAAAAAAAAAAAAAAABAgMRAAQGMRJRcf/aAAgBAQABPwBGQXzrRLznKCBAAAEa17S7yVqJQN9V/8QAFhEBAQEAAAAAAAAAAAAAAAAAAQAC/9oACAECAQE/ADJf/8QAFhEBAQEAAAAAAAAAAAAAAAAAAQAS/9oACAEDAQE/ANLf/9k='%3E%3C/image%3E%3C/svg%3E)
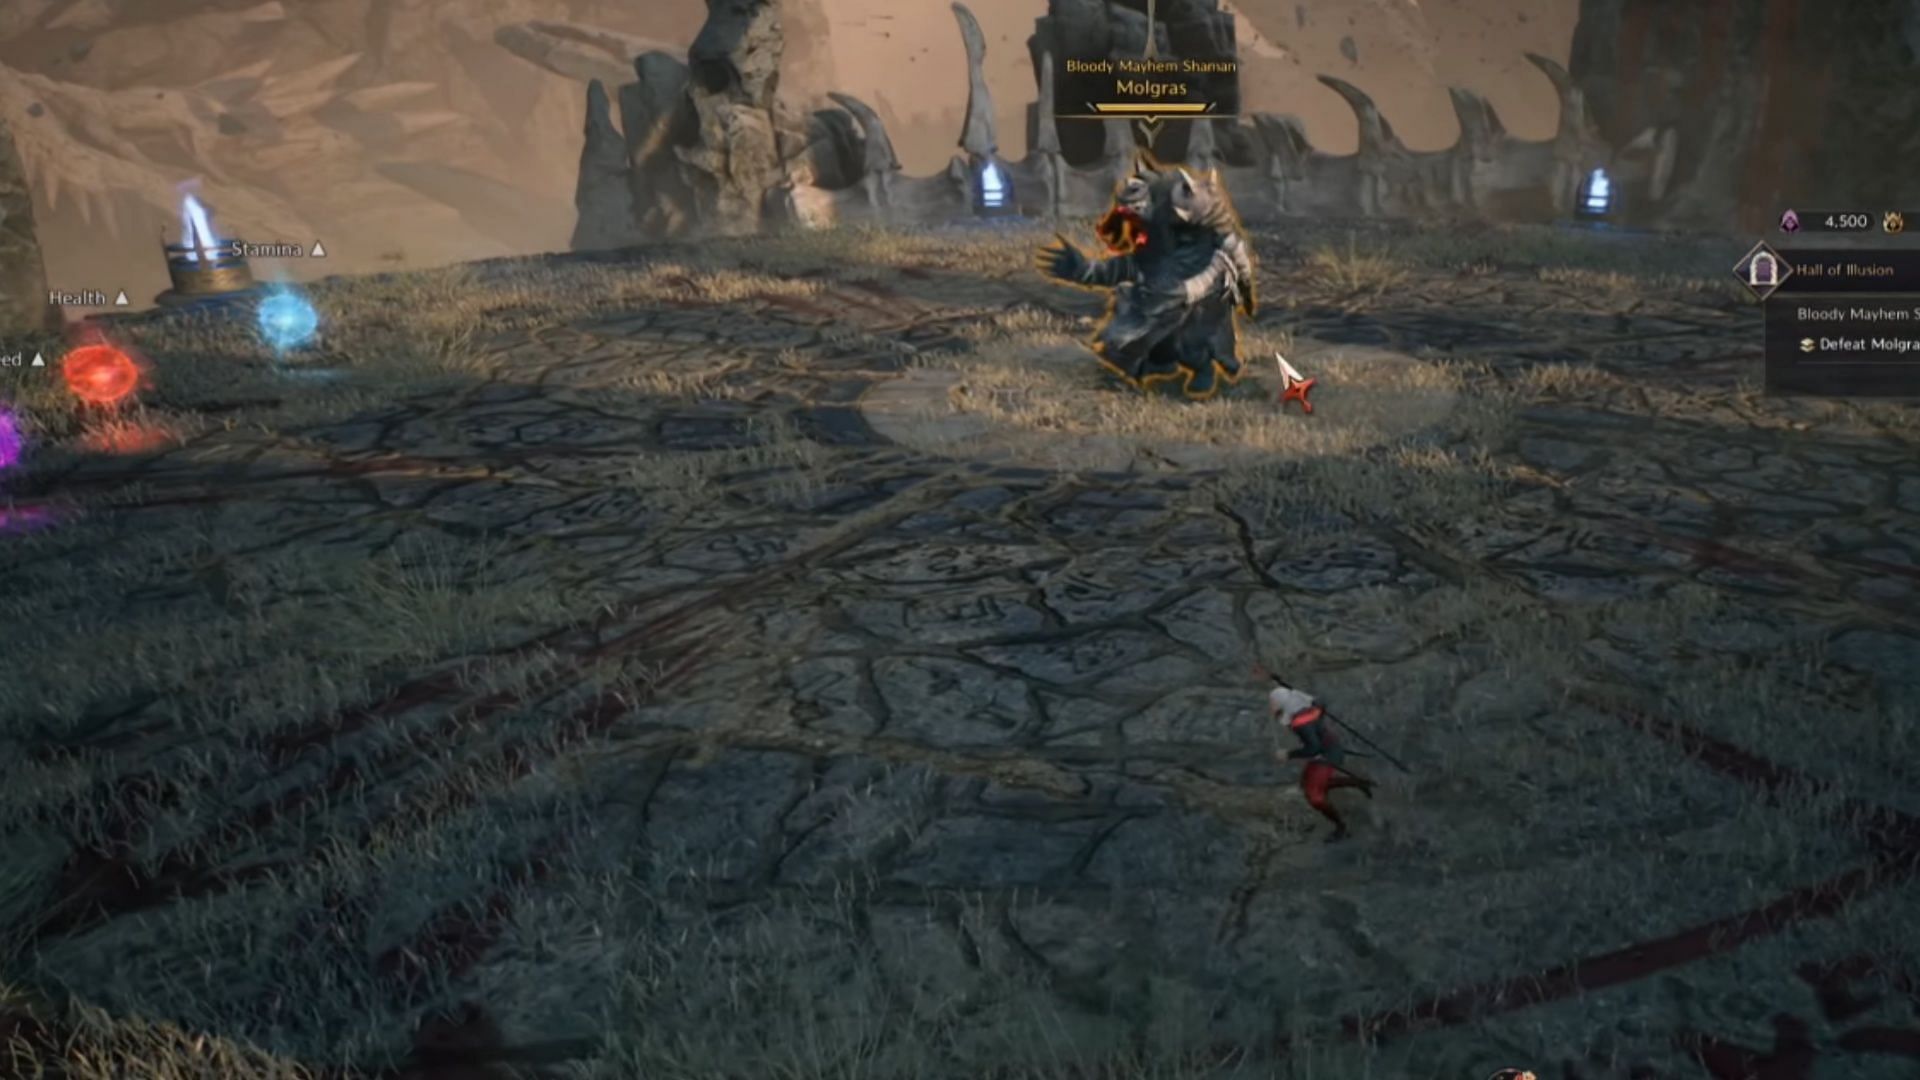
Throne and Liberty’s new solo dungeon, Hall of Illusion, introduces new boss encounters like the powerful Molgras. They are joined by Murdock, and two more bosses —Lionhead and Umbrakan — that will be added later.
Molgras is the first boss, and can very easily one-shot players if they aren’t paying attention to the tactics he employs. You’re going to be put through a bit of a Bullet Hell, with orbs constantly flowing, and you have to avoid them at all costs.
Added in 2.0.0, Hall of Illusion and Molgras are a part of Throne and Liberty’s Wilds of Talandre update, and players who are level 55 and over can tackle this solo dungeon. It features five tiers of difficulty, and if you’re struggling with Molgras, we’re here to help.
Tips to defeat Molgras in Throne and Liberty’s Hall of Illusion solo dungeon
The most important thing you need to understand for Molgras in Throne of Liberty is positioning. Being keenly aware of where you’re standing at all times is going to be important when you’re fighting this boss. Its primary mechanic is the totems that he summons.
The more of them that are in play, the harder he hits. That means eventually, he’s going to one-shot you unless you know what to do. Thankfully, Redditor orbtl posted some easy-to-follow visual aids for dealing with Molgras in Throne and Liberty.
These totems also spawn slowly-moving orbs that will damage you if they hit you. They do fly in your direction as well. So here’s what you need to do. The first totem will be placed in a random location, but keep an eye on that. The other totems are going to be placed where you’re standing, so the most important thing is to place the totems in a straight line.
After some time has passed, he’ll yell “I’ll follow you anywhere!" When you hear this audio cue, stand at the end of the line of totems but still in the line. When his charged laser fires, it will hit the totems. If he manages to destroy three or more totems, he’ll get stunned.
After this, Molgras tends to use a full-screen AOE in Throne and Liberty, teased by the line “Now, DIE!” Even this can one-shot you if too many totems are in play. That’s another reason why you absolutely must put the totems in a line.
When the boss drops below 50% health, he’ll begin using a Red Totem, teased by the line “Totem, one more!”
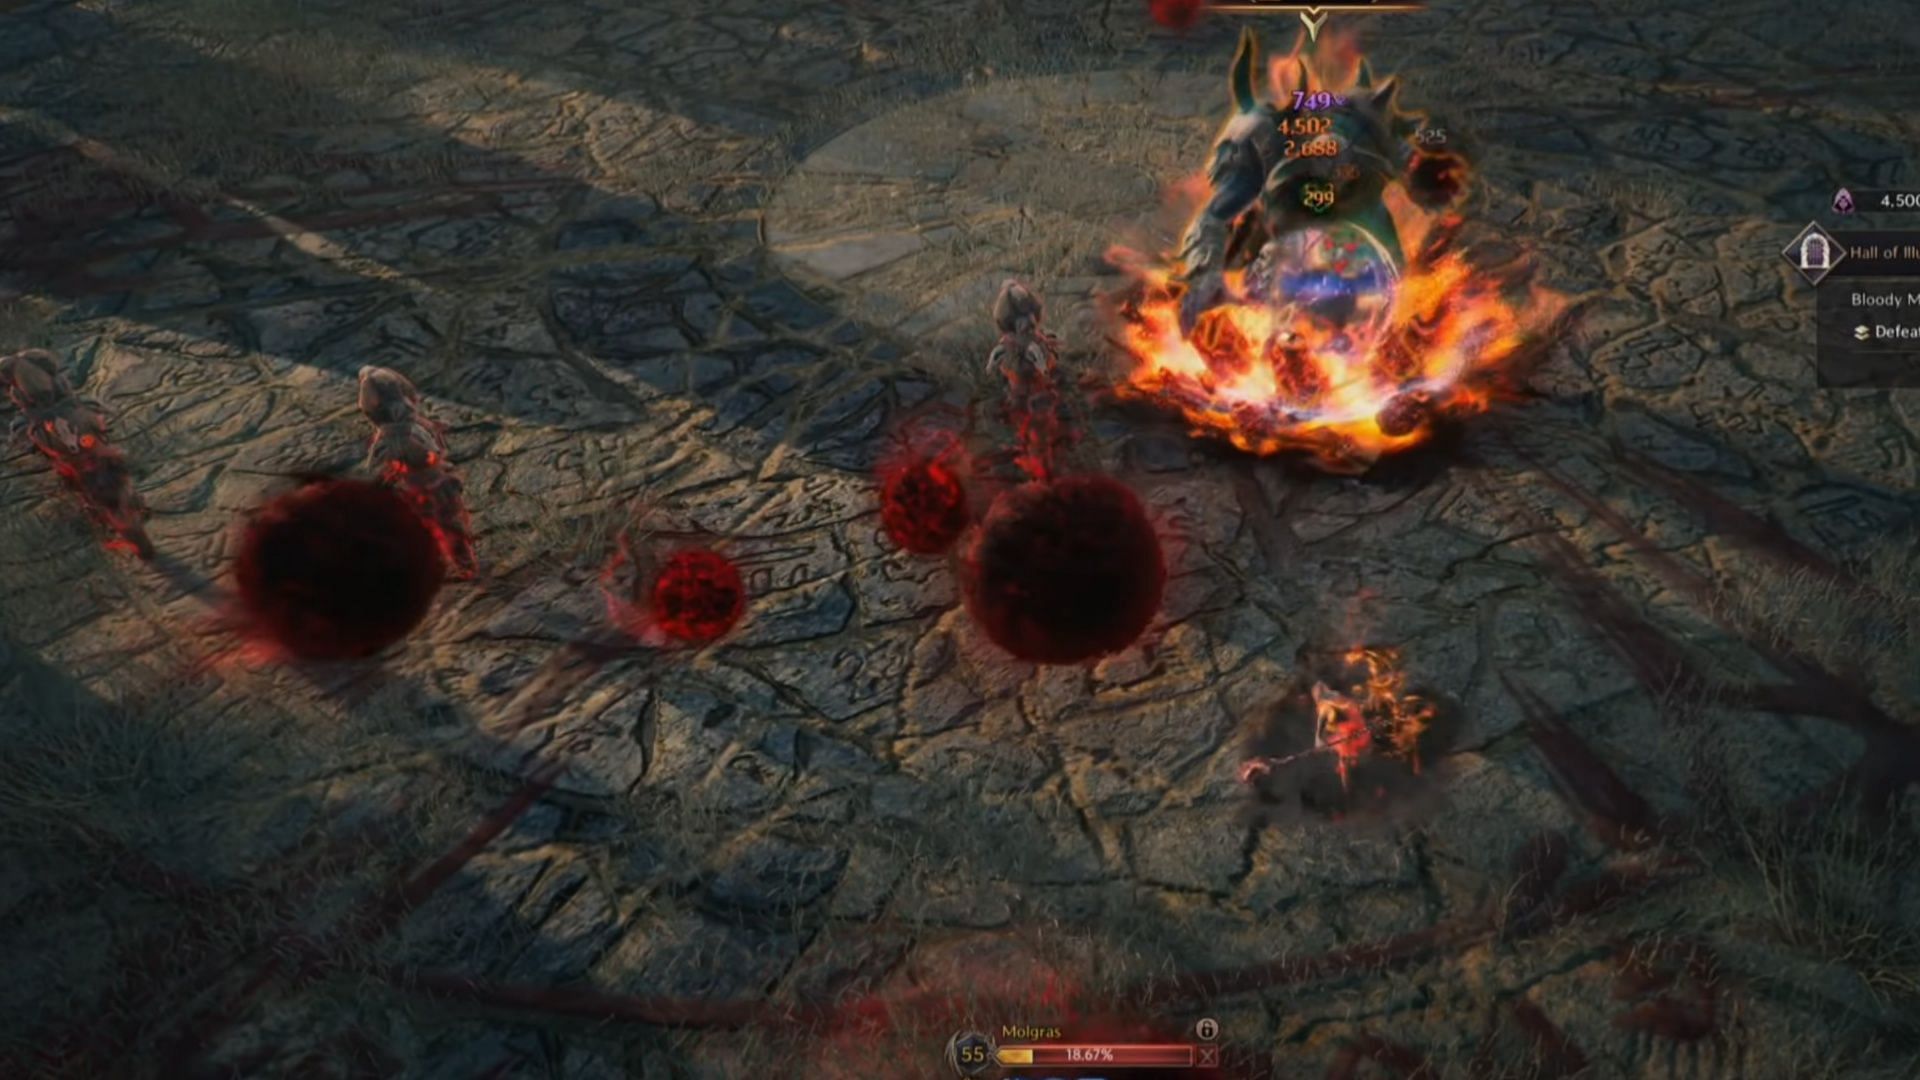
These are the only totems that need to be placed away from the rest. These deal AOE damage, if they are destroyed by the bosses’ laser. Make sure that you keep them away from the pack at all costs. In general, after the AOE attack, you’ll see the following moves:
- “Come out, totem!” - totem spawned where you are
- “Where should I go…? Here!” - teleport, fury attack
- “Call out, totem!” - totem spawned where you are
- “Totem, one more!” - red totem spawned where you are
- “I’ll follow you anywhere!” - teleport/laser attack
Keeping the Red Totem away is incredibly important. Once it’s spawned, you should move back into the line, to make sure this Throne and Liberty solo dungeon boss keeps destroying his own totems.
Once this boss is down, there’s still more to do in the Halls of Illusion, not to mention the rest of Wilds of Talandre.
Check out our other Throne and Liberty guides and features
- Throne and Liberty Wilds of Talandre expansion Milestones
- Throne and Liberty February server merge: All affected servers
- Is Throne and Liberty free to play?
