'%20x='0'%20y='0'%20height='100%25'%20width='100%25'%20%0A%20%20%20%20%20%20%20%20%20%20xlink%3Ahref='data:image/jpg;base64,/9j/2wBDAAYEBQYFBAYGBQYHBwYIChAKCgkJChQODwwQFxQYGBcUFhYaHSUfGhsjHBYWICwgIyYnKSopGR8tMC0oMCUoKSj/2wBDAQcHBwoIChMKChMoGhYaKCgoKCgoKCgoKCgoKCgoKCgoKCgoKCgoKCgoKCgoKCgoKCgoKCgoKCgoKCgoKCgoKCj/wgARCAAGAAoDASIAAhEBAxEB/8QAFgABAQEAAAAAAAAAAAAAAAAAAAMH/8QAFAEBAAAAAAAAAAAAAAAAAAAABP/aAAwDAQACEAMQAAAAzugVH//EACIQAAIBAgUFAAAAAAAAAAAAAAECBAAFAwYREjITISJCUv/aAAgBAQABPwCLmm2Q2iGHbdqMjqEdFYsdvMt9a0L1DkjryIEE42L5vpBXke596//EABYRAQEBAAAAAAAAAAAAAAAAAAECAP/aAAgBAgEBPwCZFd//xAAXEQADAQAAAAAAAAAAAAAAAAAAAQIR/9oACAEDAQE/AKp4f//Z'%3E%3C/image%3E%3C/svg%3E)
The official patch notes for Warframe Update 36.0 have gone live, documenting all the changes in the latest Jade Shadows update. On top of a new quest, this patch adds several fundamental changes to the base game, including a status effect rework, and big adjustments to enemy health scaling and resistances.
In this article, we will go over all the new stuff and changes in Warframe Update 36.0 (Jade Shadows), as documented in its official patch notes.
Warframe Jade Shadows 36.0 full patch notes: Everything new and all major changes
Without further ado, let us dive into the headliner feature of this update: the quest.
New cinematic quest: JADE SHADOWS
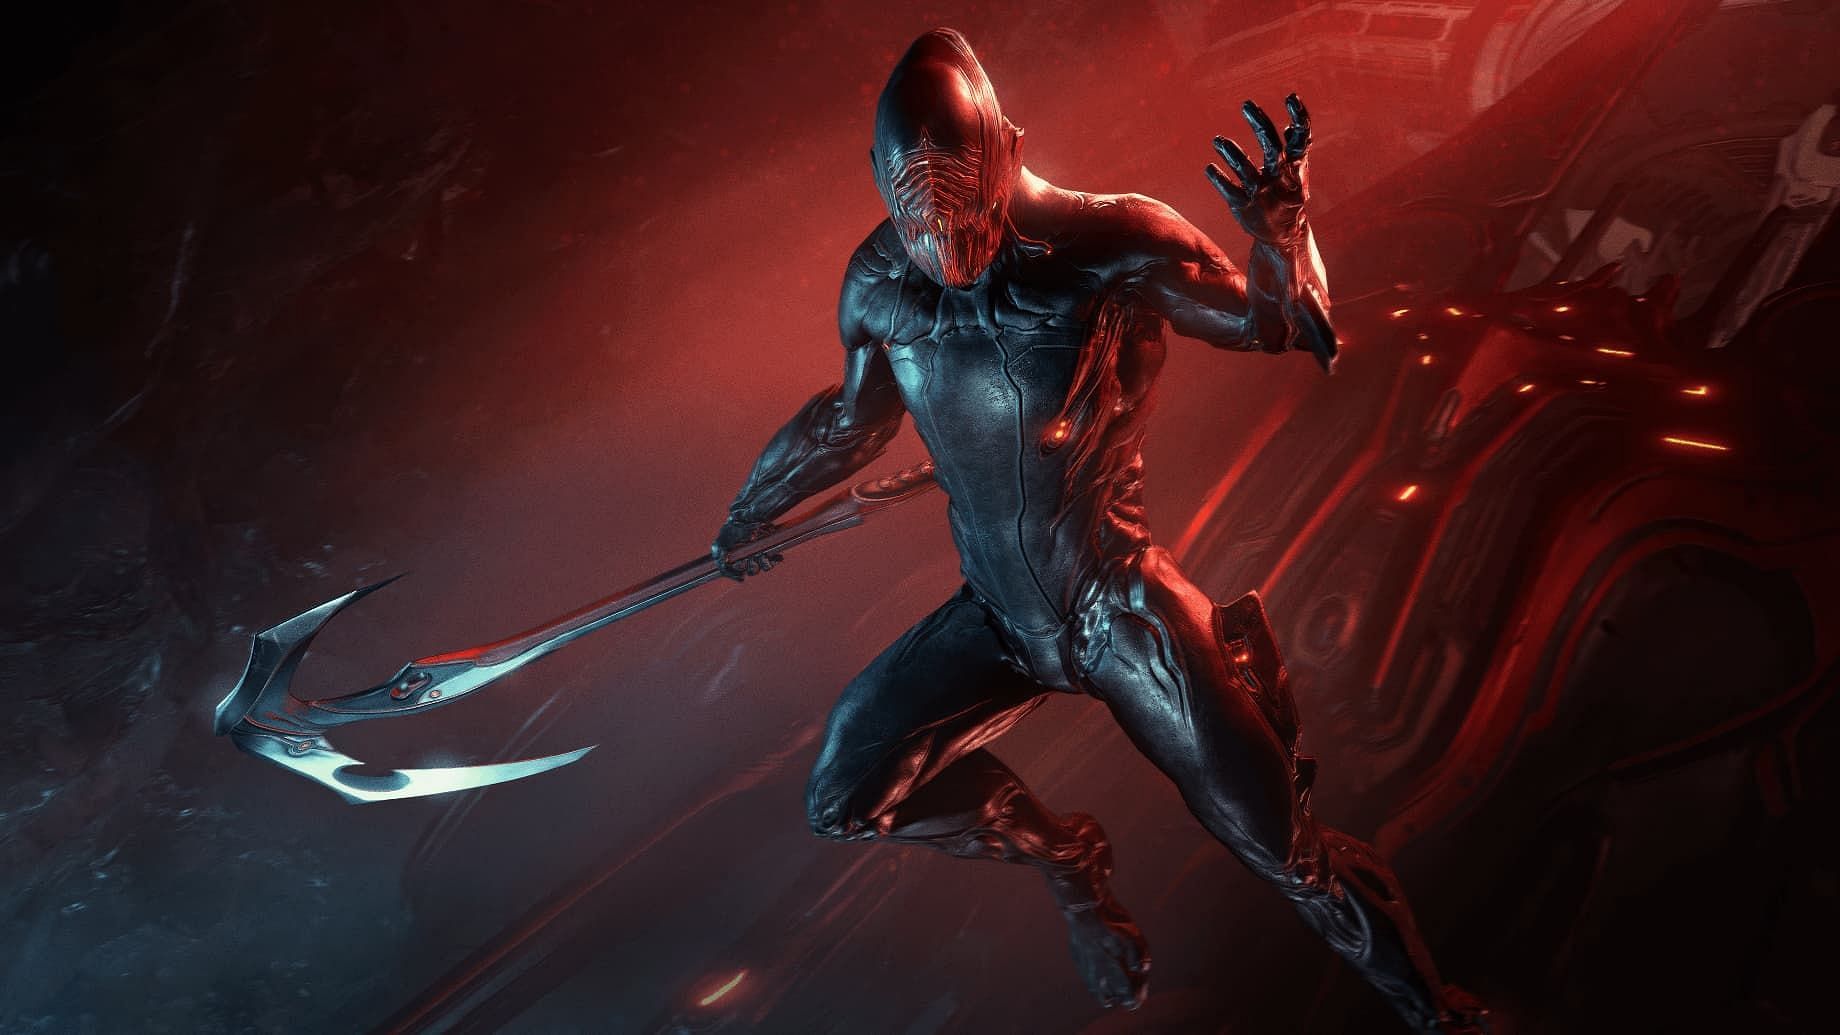
"Struggling to understand the oldest and deepest secret from his past, Stalker finds himself allied with sworn enemies on the troubling road toward uncovering the truth… and averting an incalculable loss."
Quest Prerequisites
You must have completed The New War Quest to play the Jade Shadows Quest. The Quest will become available from your Codex once you have done so.
Quest Commitment and Duration
Similar to The New War Quest, once you commit to beginning Jade Shadows, you will be unable to do other Warframe activities for the duration of the Quest. You will be able to pause the game, and your progress will be saved between missions. It is roughly a ~30-minute experience, perhaps faster for seasoned Tenno!
Content warning: This quest contains scenes of trauma related to motherhood.
Quest Rewards
- Jade Warframe Blueprint
- Access to Operation: Belly Of The Beast
- Read the dedicated section below to learn more about the Operation
- Access to the new Ascension Game Mode
- Read the dedicated section below to learn more about the new Game Mode
- New Captura Scene from the Quest
- New Displays from the Quest
New Warframe: JADE

Become enraptured by the song of devastation. Through her, the Jade Light can be a source of destruction or a source of support. Check out our dedicated guide to learn how to get Jade in Warframe.
Jade’s Abilities
Passive: The Anointed
Jade’s profound understanding of the relationship between life and death grants her two Aura Mod Slots. Some of her Abilities apply Judgments, increasing enemy damage vulnerability by 50% for 10s.
Ability 1: Light’s Judgment
Create a well of light that heals allies and hurts enemies. Those who enter the well will be highlighted by Judgment.
Light’s Judgment is Jade’s Railjack Kinesis ability.
Ability 2: Symphony of Mercy
Cycle through three songs that strengthen allies. Extend the duration of each song by killing enemies surrounded by Judgments.
- Power Of The Seven: Increases Ability Strength
- Deathbringer: Increases Weapon Damage
- Spirit Of Resilience: Increases Shield Regeneration and decreases Shield Regen Delay
Ability 3: Ophanim Eyes
Jade summons an accusatory gaze that slows nearby enemies and dissolves their Shields and Armor. When the gaze falls upon allies, they can be revived from a distance.
Ophanim Eyes is Jade’s subsumable Helminth ability.
Ability 4: Glory on High
Soar with destructive power. Use alternate fire to detonate Judgments, causing an explosion of Jade Light. Enemies inside the Light’s Judgment radius empower the explosion.
Jade’s Glory on High Exalted Weapon: Glory
Unleash the power of the Jade Light.
Maximum Loadout Slot Increase:
With the release of Jade, the maximum number of purchasable Loadout Slots has been increased from 25 to 26.
Jade’s Prex Card
Expand your Prex Card collection with a new addition! Jade’s Prex Card can be found in a special location in the new Ascension Game Mode’s tileset.
Read More: All Jade abilities, explained
New Weapons
New Bow: Evensong
Counter the dread of battle with a song of praise. Enemies cannot hurt your allies while wounded by Evensong’s arrows. Kills with Evensong empower ally weapons with Multishot.
Unique Trait - Evensong Devotion
Damage dealt by Evensong's arrows applies seven stacks of Puncture Status, which reduces the target's damage output by 100% and increases their Critical Chance of damage taken by 35%. Kills with Evensong activate Evensong Devotion, a buff that increases Multishot by 35% for allies.
How to acquire Evensong:
Acquire the Evensong Blueprint from the new Ascension game mode, or obtain the Blueprint in exchange for Vestigial Motes from Ordis in the Larunda Relay on Mercury. It can also be purchased fully built via the in-game Market for Platinum.
New Thrown Secondary: Cantare
In moments of despair, let the battle resonate with song. Cantare’s blades lodge into the battlefield and return upon reload. When returning blades strike enemies, Cantare empowers allies with increased Reload Speed.
Unique Trait - Cantare Chorale
Cantare's blades have a 300% Critical Chance when they return upon reload. Strike enemies with returning blades to activate Cantare Chorale, a buff that increases Reload Speed by 20% for allies.
How to acquire Cantare:
Acquire the Cantare Blueprint from the new Ascension game mode, or obtain the Blueprint in exchange for Vestigial Motes from Ordis in the Larunda Relay on Mercury. It can also be purchased fully built via the in-game Market for Platinum.
New Scythe Melee: Harmony
Harmony triumphs over hate. Heavy Attacks condense Status Effect damage into a single instance. Heavy Attack kills empower allies with increased Status Duration.
Unique Trait - Harmonic Resonance
Heavy Attacks condense all Status Effects that deal damage over time into a single instance. Heavy Attack kills activate Harmonic Resonance, a buff that increases Status Duration by 30% for allies.
How to acquire Harmony:
Acquire the Harmony Blueprint from the new Ascension game mode, or obtain the Blueprint in exchange for Vestigial Motes from Ordis in the Larunda Relay on Mercury. It can also be purchased fully built via the in-game Market for Platinum.
Jade’s Ensemble Buff
When all three weapons are used together they have a unique buff! Evensong, Cantare, and Harmony sing together. Their buff effects are doubled.
New game mode: ASCENSION
The Stalker’s stronghold is under intensive assault from marauding Corpus forces, but what they’re after must remain safe. You’ll need to initiate an emergency evacuation before embarking on a grueling ascent through enemy-infested elevator shafts to the Extraction waiting for you above.
Visit the new Brutus node on Uranus after completing the Jade Shadows Quest to assist Ordis in gathering Vestigial Motes! This new non-endless mission unfurls in three stages:
Stage 1 - Mote Collection
The Corpus have set up Mote Collectors to extract energy from the air - Ordis has taken them over, so you must defend them while they complete extraction!
Stage 2 - Ascension
Once you have extracted the Motes, they must be transported in their Extraction Capsule top-side! To do so, power the elevator using Ionic Capsules dotted throughout the map, or dropped from enemies. As you approach them, they’ll be marked with a small green waypoint! Keep your eyes peeled for extra-glowy Boosted Ionic Capsules that offer an additional power and speed boost. Once picked up, use the Alternative Fire to throw them at the Extraction Capsule to power your ascent!
Players can keep up with the ever-rising gameplay with increased jump height (thanks to a special Air Support deployed by Ordis) and via jump pads littered on various platforms. Should you take an unfortunate fall to the bottom of the map, use the jump pad at the bottom of the elevator to catch up to its height.
Bonus Objective:
Along with the Ionic Capsules, players may come across Sister Beacons hidden throughout the map, identified by the soft pinging noise they emanate upon approach. Collect three of these to summon a Sister of Parvos, who will spawn once you reach the top of the Elevator shaft. Defeating the Sister will reward you with 5-7 Vestigial Motes and a chance at a new Arcane, listed below (8-10 Motes and a guaranteed Arcane on Steel Path). Sisters of Parvos will also drop Steel Essence in Steel Path Ascension missions.
Stage 3 - Extraction
Once you’ve made it to the top, escort the Extraction Capsule safely to extraction and defend it from Corpus foes along the way! Should enemies manage to deplete the health of the Extraction Capsule, its progress will stop briefly and the health will regenerate, at which point it will continue on its path once more.
Rewards
Completing an Ascension mission will award players with 11-13 Vestigial Motes (16-18 on Steel Path), as well as a reward from the mission drop table, including:
- Jade’s Component Blueprints
- Endo
- Relics
- Harmony Blueprint
- Cantare Blueprint
- Evensong Blueprint
For a full overview of the Ascension Drop Tables, please review our Drop Tables site.
Releasing Vestigial Motes
Visit Ordis in the Larunda Relay on Mercury during Operation: Belly of the Beast to exchange Vestigial Motes for various wares, including:
- Jade Main and Component Blueprints
- Harmony Blueprint
- Cantare Blueprint
- Evensong Blueprint
- New Arcanes (read on below to learn more!)
Once Operation: Belly of the Beast ends, Ordis will relocate to the Drifter Camp and offer his wares there. He finally got a job.
New Aracanes and Augment mods
Jade Shadows adds four new Augment mods and six new diverse Arcanes.
Check out our guide on the new Arcanes and Augment mods to learn more.
New Semi-Auto Fire Mods
These new Mods can be equipped on Semi-Auto Fire weapons only, and prevent their firing speed from being modified once equipped.
Target Juno Sapper Moa enemies in Ascension missions to earn these Mods!
You can identify which weapons are eligible via the Arsenal if their Trigger type is “SEMI”.
- Semi-Rifle Cannonade: +240% Damage, +1.5 Punch Through
- Semi-Pistol Cannonade: +300% Damage, +1.5 Punch Through
- Shotgun Cannonade: +240% Damage, +1.5 Punch Through
New Status Damage Mods
This mechanic was originally introduced with Dante, and we have dedicated a whole series of Dual-Stat Mods to it! Increasing your Status Damage stat increases the damage per tick for Statuses that do damage over time (specifically Slash, Heat, Electricity, Toxin, Blast, and Gas).
Earn these Mods from new Juno Sapper Moa enemies found in Ascension missions!
- Rifle Elementalist: +90% Status Damage, +0.6 Punch Through
- Melee Elementalist: +90% Status Damage, +60% Heavy Attack Wind Up Speed
- Pistol Elementalist: +90% Status Damage, +60% Reload Speed
- Shotgun Elementalist: +90% Status Damage, +60% Magazine Capacity
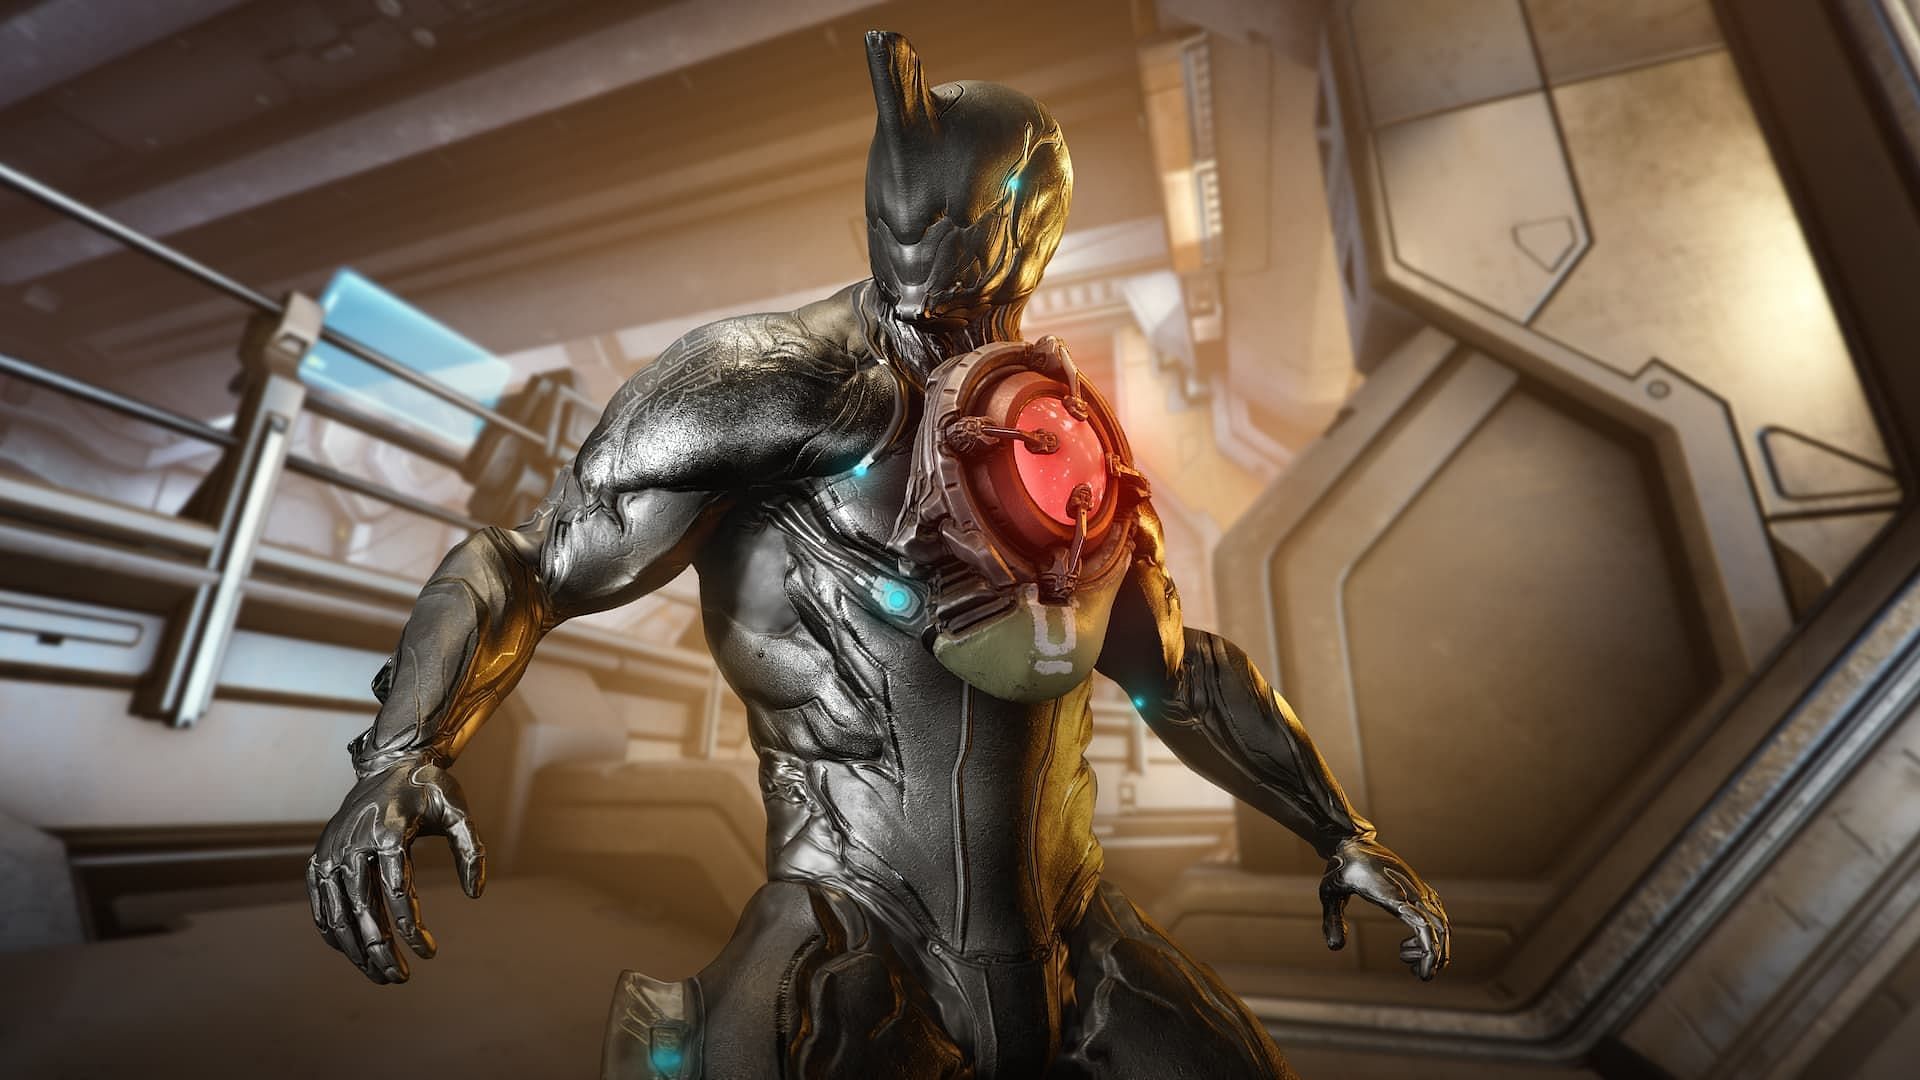
New Eximus Unit: JADE LIGHT EXIMUS
Introducing a new Eximus Type: Jade Light Eximus.
Players will find them in all missions where Eximus spawn, where they will face the threat of Jade Light on the battlefield.
These new foes will target up to two players and will summon a beam of Jade Light that follows them and deals increasing damage the longer you are in contact with it. Players can either avoid the Jade Light until it dissipates (~8 seconds) or attempt to destroy the beam by shooting at the top of it — or kill the Eximus unit itself, of course. Once a Jade Light is summoned, the Eximus' Ability will go on a short cooldown before another can be cast.
Operation: BELLY OF THE BEAST
JUNE 18 @ 11:30 am ET - JULY 18 @ 11:30 am ET
Parvos Granum is attempting to harvest Volatile Motes to make his own Jade Light Eximus army, and only you and Ordis stand in his way. With Ordis’ help, you can commandeer the Mote Collectors and put an end to Parvos’ plans.
Venture to a secretive location (discovered in the Jade Shadows Quest) at Brutus on Uranus to preserve Jade’s legacy! Fight against the Corpus to earn new and returning rewards from previous Operations.
What You Need To Know
Operation: Belly of the Beast requires you to step into this shrouded location - only those who have completed the Jade Shadows Quest are permitted to do so.
After finishing the Jade Shadows Quest, players will have access to a new node on Uranus: Brutus. Here they can access the new Ascension game mode and access Operation-specific missions. Successfully foiling Parvos’ efforts will reward you with special Volatile Motes, which can be exchanged for Operation rewards.
What You Need To Do
While Operation: Belly of the Beast is live, players will have access to special nodes that allow them to take on Parvo’s forces. In these missions, all Eximus units you face will be empowered by Jade Light - meaning the only Eximus units that will spawn are Jade Light Eximus. You can help Ordis in his mission to stop Parvos in one of three ways:
- Operation Variant of Brutus (Uranus)
- Operation Alerts
- Stalker Joins the Fray
Operation Variant of Brutus (Uranus)
In the traditional Operation style, the new Brutus node on Uranus has its own Operation variant. Play Ascension as you know it but with all Eximus units spawning in as Jade Light Eximus. On top of the regular Ascension rewards, each Operation mission will award players with 4-6 Volatile Motes (8-10 on Steel Path), which can be traded for rewards via Ordis in the Larunda Relay.
Summoning a Sister of Parvos will also earn players an extra 1-3 Volatile Motes (2-4 on Steel Path), as well as her usual drops.
Operation Alerts
In addition to the Brutus node on Uranus, timed Operation Alerts will appear across the solar system that will also reward players with 10 Volatile Motes (15 on Steel Path). These non-Ascension missions will have normal gameplay, but will feature increased Eximus Spawns, and will only feature Jade Light type Eximus. Look for these time-limited Alerts appearing every half hour or so as an alternative method to earning Volatile Motes.
Stalker Joins the Fray
Visiting Ordis in the Larunda Relay not only allows you to earn Operation Rewards, but also lets you call on an old foe to assist in your efforts. In speaking to Ordis, selecting the “A Shared Purpose?” option will allow you to join another Squad’s mission as Stalker. Doing so will reward you with the usual mission rewards, but at risk of losing them all should you be downed.
Rewards
No Operation is complete without rewards, and Ordis has collected quite a few offerings for you to choose from. Ordis can be found in the Larunda Relay in the Navigation Room, where he will trade Volatile Motes for rewards.
Community Progress
Belly of the Beast comes with a Community Progress segment, tracking the total Volatile Motes collected by players. As the total number of Volatile Motes collected ticks up, progress is made towards a new variant of the Jade Light Ephemera, unlocking it for purchase for all players at Ordis in the Larunda Relay.
To find out about the rewards for this operation and more, read our Warframe Belly of The Beast Operation guide.
Resistances and status rework
As discussed over the last two months, across both Devstreams 179 and 180, we’ve overhauled Warframe’s Health Types and Resistances alongside a select few Status Effects!
To help players revisit their builds following these changes, an inbox containing 3x Forma will be sent to all players today (June 18th) at 12pm ET today.
New Health Types
Previously, enemy resistances and vulnerabilities were split between 13 Health Types. These have now been simplified into four:
- Health
- Armor
- Shields
- Overguard
Now, these Health Types only serve to differentiate between Status Effects and Abilities that affect them, such as Magnetic hindering Shields, Corrosive stripping Armor, or Viral amplifying Health damage.
"We’ve changed the system so that Resistances and Vulnerabilities are no longer tied to the previous Health Types. Resistances and Vulnerabilities are now based upon the Faction a player is engaging with."
Star Chart “Suggested Damage”
Vulnerabilities are now listed in The Star Chart mission nodes! Here, we aim to recommend the appropriate per-Faction Resistances, which will then universally affect that specific group.
The Star Chart now shows Faction Resistances per node. Aligned with the present Faction, Vulnerabilities, and Resistances will be listed to communicate the “Suggested Damage” options best used against any specific Faction or location.
Sub-Factions will also have different Vulnerabilities and Resistances from their primary counterpart. The three main Sub-Factions are:
- Kuva Grineer
- Corpus Amalgam
- Deimos Infested
Viewing Faction Vulnerabilities and Resistances now also depends on where the player is within Warframe’s Story. The Factions (and Sub-Factions) will be unlocked via:
Factions:
- Grineer: Unlocked by default.
- Corpus: Unlocked by default.
- Infested: Unlocked by default.
- Orokin: Unlocked after Phobos Junction.
- Sentient: Unlocked after The Second Dream Quest completion.
- Narmer: Unlocked after The New War Quest completion.
- Zariman: Unlocked after Angels of the Zariman Quest completion.
- Murmur: Unlocked after Whispers in the Walls Quest completion.
Sub-Factions:
- Kuva Grineer: Unlocked after The War Within Quest completion.
- Corpus Amalgam: Unlocked after Jupiter Junction.
- Deimos Infested: Unlocked after Heart of Deimos Quest completion.
Simplified Faction Resistances
With the removal of Resistances/Vulnerabilities being tied to Health Type, they will now be Faction-specific.
Default Faction Vulnerabilities and Resistances:
- Grineer: Vulnerable to Impact and Corrosive
- Corpus: Vulnerable to Puncture and Magnetic
- Infested: Vulnerable to Slash and Heat
Factions by Quest Vulnerabilities and Resistances:
- Orokin:
- Vulnerable to Puncture and Viral
- Resistant to Radiation
- Sentient:
- Vulnerable to Cold and Radiation
- Resistant to Corrosive
- Narmer:
- Vulnerable to Slash and Toxin
- Resistant to Magnetic.
- Zariman: Vulnerable to Void
- The Murmur:
- Vulnerable to Electric and Radiation
- Resistant to Viral
- Rogue Necramechs also fall under these Vulnerabilities and Resistances.
Sub-Faction Vulnerabilities and Resistances:
- Kuva Grineer:
- Vulnerable to Impact and Corrosive
- Resistant to Heat
- Corpus Amalgam:
- Vulnerable to Electric and Magnetic
- Resistant to Blast
- Deimos Infested:
- Vulnerable to Blast and Gas
- Resistant to Viral
With these Resistance and Vulnerability changes, we’ve made a notable decision to make Impact deadlier towards the Grineer, while making Puncture deadlier towards the Corpus. This is a departure from the previous system, however, we believe that these two Statuses are more suited for these specific Factions.
Since Impact Status Effects enables Mercy actions, we found that it wasn’t all too effective against Corpus due to their lower Health counts compared to their Shields, while Mercy killing Grineer is more accessible due to their innate tankiness. The Corpus can deliver incredibly high amounts of raw damage, allowing for Puncture to naturally play effectively into limiting their damage potential.
Armor Adjustments
Important Note: We have not changed player Armor. This only applies to enemy Armor!
Enemy Armor scaling in its previous current iteration meant that Armor Stripping was almost an all-or-nothing game, especially at higher levels. This resulted in players focusing on Armor Stripping as a way to tackle Grineer at higher difficulty content. Our goal is to reduce some of the extreme damage reduction offered by Armor at high levels and make partial Armor Stripping more feasible.
To do so, we are making the following changes:
- Armor has a maximum cap of 2700 Armor (90% Damage Reduction).
- Armor has a minimum cap of 200 Armor.
- Steel Path no longer increases Armor values.
- Grineer enemies have increased Health scaling.
- Altered the formula for Armor Reduction to increase the effectiveness of Partial Armor Stripping.
- For reference, currently around 50% of Damage Resistance came from just 300 Armor, which is why complete Armor Strip felt so needed at higher levels.
Additionally, our goal was to make partial Armor Stripping a more valuable tool. By capping enemy Armor and adjusting how Armor is calculated, a partial Armor Strip will allow players to engage with high-level Grineer more easily - meaning max Corrosion stacks against an Armored enemy (reducing the Armor by 80%) will feel more impactful due to the new distribution of Damage Resistance from Armor values).
Full Armor Strip is still valuable, but we wanted to even the playing field so players didn’t feel forced to build around it.
Shield Adjustments
Important note: We have not changed player Shields. This only applies to enemy Shields!
The Grineer are tankier by design, but the Corpus try to make the difference through their Shields. However, Corpus Effective Hit Points (EHP) are significantly lower, making them often trivial to deal with by comparison. Our goal is to reduce the discrepancy between Grineer and Corpus time-to-kill (TTK) by making Corpus Shields a bit more challenging and interesting to fight.
Changes to Enemy Shields:
- Shields now scale more quickly starting at level 80. This means stronger Shields than before as players fight higher-leveled Shielded enemies.
- Shield Recharge Delay is now unified across all enemy types.
- Shield Recharge Delay now has a minimum and maximum length depending on how much damage has been dealt to enemy Shields.
- The more damage dealt, the slower enemy Shields will begin recharging, so if you can’t outpace enemy Shields right away, you can chip their Recharge Delay down within a maximum and a minimum.
- For example, if enemy Shields break at any point, it automatically acts as if 200% damage (which becomes the maximum delay) has been inflicted on those Shields. However, if an enemy absorbs 99% damage (so 1% of their shields left), their accumulated damage taken now sets their Recharge Delay in the middle of their respective minimum and maximum delays. Should they Recharge and you deal another 99% damage to their Shields, they’ll have absorbed 198% damage, taking them to the maximum Recharge delay of what that scaled enemy can have.
- Shield Recharge Rate scales with enemy level, recharging at a faster rate for higher-leveled enemies.
- Shield Recharge Rate will also accelerate while Shields are actively Recharging.
- Shield Recharge Acceleration Rate’s base multiplier greatly increases after level 80, resulting in faster Recharge rates at higher levels.
- Steel Path Shields are now multiplied by 2.5x, in place of the previous 6.25x. Steel Path Shields were doubly-applying the multiplier unintentionally.
Effective Hit Points (EHP) Adjustments
Enemy stat scalings, such as Health and Shields, now grow faster as enemy level increases, in compensation for the loss in Enemy Armor and to make Shields more engaging to deal with.
Changes:
- After Level 75-80, enemies receive increased stats, such as Health, at a slightly increased rate to prevent EHP stagnation.
- It’s important to note that the increase in Health scaling is not meant to match the EHP values seen by previous levels of Armor.
Status Effect Reworks
Blast
Our goal with Blast is to invoke an immediate and on-death effect to emphasize explosions.
Now, instead of enemy inaccuracy, you detonate your enemies! When dealing a Blast Status Effect to an enemy, the following will happen:
Blast Changes:
- Upon inflicting a Blast Status Effect, individual stacks will cause a mini-explosion, and a max stack count of 10 will inflict combined damage in a 5m radius
- After 1.5 seconds, an individually incurred Blast Status Effect deals a percentage of base-inflicted damage per stack-explosion and over 100% of base-inflicted damage for a full (10 stack) explosion.
- Status Duration will increase the delay before the Status Effect applies and depletes.
- Removed the previous Status Effect of inaccuracy.
Cold
With Cold, we want to fully realize the fantasy of slowing, freezing and shattering your enemies. The existing Cold Status mechanic of slowing enemies is unchanged, but now has a new mechanic upon applying Max Stacks - freezing your foes!
Cold Changes:
- Cold now has a maximum cap of 10 stacks (was 9).
- Applying 10 Cold stacks to a foe will make them Frozen for 3 seconds. Frozen enemies cannot move, will not recharge Shields, and receive double Critical Damage. After the Frozen effect wears off, 3 Cold stacks will remain.
- Bosses, such as Alad V or Kela De Thaym, will be unable to be Frozen since they cannot accumulate 10 Cold stacks.
Gas
Gas often lacked effective readability, making it difficult to distinguish its presence from the enemy or yourself. We’ve introduced enhanced visuals so that when the Gas Status Effect is active, you’ll be able to recognize it more clearly.
Gas Changes:
- Added VFX on top of the target affected by a Gas Cloud to clearly show an effect is active.
- In addition to current and new VFX, Gas VFX now also more clearly shows the radius of the Gas Damage-over-Time (DoT) effect around a given target to better understand its impact on surrounding enemies.
- If a player is inside the radius of the Gas DoT, the visuals are reduced for them to maintain visibility, similar to Frost’s Snow Globe.
- Gas VFX now has billowy volume to better present presence.
- Gas VFX now has additional floating particles around the smoke.
Magnetic
Magnetic has received a few buffs to increase its effectiveness against Shields and to hammer home the power fantasy of overloading enemy Shields.
Magnetic Changes:
- Damage to Nullifier Bubbles has been increased
- Minimum Damage raised to 300 Damage per shot.
- Maximum Damage raised to 1200 Damage per shot.
- Additionally, we now show the minimum and maximum damage numbers against Nullifier Bubbles, with Magnetic attacks displaying the buffed damage shown above, while non-magnetic sources will display the original, unbuffed damage.
- Known issue: Clients see the incorrectly unbuffed damage from Magnetic sources, which is strictly a UI/visual bug. Magnetic sources will continue to deal increased damage towards Nullifier Bubbles despite the incorrect numbers displayed. We will look to resolve this in a future Hotfix/Update.
- Reduced Shield Regeneration by a percentage per Magnetic stack against affected targets.
- Upon Shield/Overguard Breaking a target, the enemy will now be dealt Electric Status damage for a percentage of Max Shields/Overguard per Magnetic stack while also forcing an Electric Status Effect.
- Magnetic stacks on an enemy with Overguard now allow for bonus damage to Overguard, similar to how Magnetic affects Shields.
Warframe Changes
With the above changes to Resistances and Status Effects, we took a look at Warframe abilities and made some adjustments to complement the changes.
Frost Rework
Frost, the definitively-themed Cold Warframe, has received a rework to better situate him for how Cold works with this Update! While Frost dealt icy attacks to his foes, the Freeze from his hit was not tied to Cold Status Effects. With the update to the Cold status, we have also amended his kit to properly use Cold Status Effects to Freeze enemies!
New passive - Fortifying Freeze:
Cold Status Effects applied by Frost Abilities have their duration increased by 100%. Frost gains 50 Armor per enemy inflicted with Cold Status within 15m.
Freeze (1st Ability):
- Adds required Cold stacks to freeze instead of simply freezing to both initial hit and AoE interactions.
- “Duration” is now known as “Freeze Duration,” indicating how long an affected target is Frozen.
- Doubled the baseline Area of Effect component of the projectiles.
- The Area-of-Effect aspect now scales with the Ability Range stat. The Area-of-Effect Radius is now present in the Ability description.
Ice Wave (2nd Ability):
- “Duration” is now known as “Freeze Duration,” indicating how long an affected target is Frozen.
- Ice Wave Impedance Augment Changes:
- Leaves a frozen trail for 12s that adds a Cold Status Effect per second on enemies in contact with it.
Snow Globe (3rd Ability):
- Applies a Cold Status Effect every 3 seconds to enemies inside the Globe.
- Updated “Slow” stat to “Cold Status/Second”.
- Instantly apply full Cold stacks on cast if an enemy is within Snow Globe range.
- No longer blocks player projectiles from the outside!
- Snow Globe now visually cracks as it takes damage.
- When the Snow Globe breaks, it’ll also explode and deal damage and 3 Cold stacks to enemies within its radius.
- Chilling Globe Augment Changes:
- Updated the Augment to add 10 Cold stacks if the condition is met (i.e., unify the freeze with the Cold Status Effects as we normally do now).
Avalanche (4th Ability):
- Adds the required Cold stacks instead of simply freezing.
- Its “Duration” stat is now “Freeze Duration,” indicating how long an affected target is Frozen.
Ember Changes
We’ve made changes to the Heat-incarnate Warframe Ember to stoke the flames of her power and give her some more firepower.
Fireball (1st Ability):
- Removed the hold to charge to get the maximum damage. The damage increase (500%) from the previous hold charge is now applied to the now default tap cast.
- Its AOE now has a 100% guaranteed Heat Status Effect.
- Previously, it only had a 50% chance to apply this effect.
- Increased radius from 2m to 3m.
- Previously, its max range with fully charged cast was 2.4m. So we’ve bumped it up to 3m for all casts.
- Added an “Immolation Meter” stat to inform of the amount of Heat Fireball generates for Immolation.
Immolation (2nd Ability):
- Reduced the Energy Per Second cost when at max Heat from 10 to 4.
- We want to make it easier for players to maintain its Heat gauge at max.
- Added an “Immolation Meter” stat to inform of the amount of Heat that is passively generated by Immolation.
Fire Blast (3rd Ability):
- Energy cost now scales based on the Immolation’s Heat gauge
- 75 Energy (at lowest) all the way down to 25 (at max).
- Fireblast’s Heat Damage and Armor reduction now affects bosses that are by default vulnerable to Armor stripping abilities (ex: Captain Vor), as well as Acolytes and Demolishers.
- Its knockdown effect will not affect those listed above that are CC immune.
- Improved hit detection so that enemies at varying heights in relation to you (above or below) are hit by Fire Blast.
- Added an “Immolation Meter” stat to inform of the decrease in Heat generation overtime.
- Added an “Immolation Meter on Cast” stat to inform of the % of Heat Fire Blast removed from Immolation when cast.
- Augment Mod Changes:
- Healing Flame: Now converts all over healing (gaining Health points while as max Health) into Overguard.
- Description now reads: “Each enemy hit heals by 25 to 50 depending on current Immolation level. With Ember, over healing grants you Overguard.”
- This only applies to Ember herself and not to Fire Blast on other Warframes via Helminth.
- Purifying Flame: Ember will now also benefit from the Status Effect cleansing and Status Immunity when hit by the ring of fire.
Inferno (4th Ability):
- The Heat damage per second from ring of fire can now trigger Heat Status Effects.
- For a boost in its CC effect and to give it a more lasting effect on impacted enemies.
- Added an “Angle” stat to better inform of the on-screen LOS checks.
- Added an “Immolation Meter” stat to inform of the amount of Inferno generated for Immolation.
Other Ember Changes/Fixes:
- Moved Ember’s Passive icon from the Buffs Bar to be above the Immolation Gauge.
- Fixed recasting Ember’s Fire Blast while another Fire Blast is active resulting in the original Fire Blast not armor stripping or interacting properly with the Healing Flame Augment.
- Also fixed recasting Fire Blast with a different Ability Strength than the original cast resulting in the first cast taking the Ability Strength of the second cast.
- Fixed Purifying Flame Blast UI Buff appearing to end earlier than expected. This was a UI-only issue and did not impact gameplay.
- Fixed Fireblast not showing its Altered stats in the Helminth screen.
Gauss Thermal Sunder Changes
Gauss’ Thermal Sunder has been updated to properly reflect the mechanics of Cold, as he is one of the few Warframes capable of fully Freezing targets with Thermal Sunder!
- Tapping Thermal Sunder during Redline will now apply 10 Cold stacks - resulting in the same full Freeze. Its duration scales with the duration of his Ability.
- Tapping Thermal Sunder will add 9 Cold stacks on the second tap if it hits a target already affected by a Cold Status to reach full Freeze.
Atlas Petrify Changes
Atlas’ Petrify interacts with Freezing and Resistance values. As such, he’s received a few changes to clarify and enhance the mechanics of his ability.
- All enemies caught within the cone are now instantly turned to stone. Petrified enemies have their Damage type modifiers increased by +50% (does not scale with Mods).
- Added a “Damage Vulnerability” stat to Petrify to communicate this mechanic.
- Petrifying Frozen enemies will retain the Frozen Status Effect, but the petrification will override the enemy visually.
Baruuk Reactive Storm Changes
We’ve updated his “Serene Storm” Augment to properly adapt to the new Vulnerabilities, rather than the optimal Health Type as was before.
- Adjusted Baruuk’s Reactive Storm to utilize the new Vulnerabilities system rather than the Health Type system - Reactive Storm will behave the same way it did before, but we’re just ensuring it works properly with the new system!
Modular Companion Changes
Modular Companions from Son are also now adjusted for the new Resistance system. Mutagens will be based upon Resistances instead of Health Types.
Miscellaneous changes
- Codex Changes:
- Enemies now have their Resistances and Vulnerabilities more clearly labeled in their Codex entry by Faction.
- Previously, only the Damage Type icons were present and were labeled as green/red depending on whether it was a resistance or vulnerability. For a player who is unfamiliar with these icons, this was not entirely helpful.
- Now, these icons are partnered with their written name and are categorized under a Vulnerability/Resistance header. Additionally, combined elemental damage types have the damages that are used to create it in parentheses.
- Health values are now indicated in the Codex entry.
- Removed Armor Scaling from Eximus Units due to the Armor Cap implemented.
- With the cap, Armor Scaling is unreliable in increasing the difficulty of eliminating Eximus Units. To compensate, Eximus units have had their Health and Shield multipliers increased by 50%.
- Status Effects no longer inherit Energy Colors, so players can more easily identify when an enemy is affected by a Status Effect.
- Damage Resistances (from Mods such as Shock Absorbers) have been added as a secondary stat to the Armor Stat on-hover.
- Tau Resistance was already reflected on-hover for Armor Stats, now other damage resistances are given the same treatment.
- Tooltips for Status Effects in the Upgrade screen UI now include what they are “Effective Against” and its “Damage Efficacy”.
- Unified terminology for the following Status Effects throughout the game:
- “Bleed” is now “Slash Status Effect”
- “Ignite” is now “Heat Status Effect”
- “Confusion” is now “Radiation”
- “Disruption” is now “Magnetic”
- “Corrosion” is now “Corrosive”
- These Status Effects have long been using the above terms interchangeably to describe the same thing. So, to prevent confusion when interacting with these, we’ve updated all mentions to their proper term. We’ve also fixed inconsistent capitalization of Status Effects throughout the game for consistency.
- Zealoid Prelate will now cleanse himself of Status Effects during invulnerable periods to prevent Cold Status Effects from unnecessarily slowing the fight.
Share your Feedback & Bug Reports on the Enemy Scaling & Status Effect Rework in the dedicated Subforums.
Duviri additions and changes
New Decrees
Sourced from our incredible Design Council, a new set of Decrees now has a chance to appear in Duviri to bolster your efforts to escape Dominus Thrax’s vicious cycle.
The creative minds in the Design Council came back with more ideas than a Maw could eat up! The Dev team chose the following from the ideas pitched and made changes for balance purposes.
Stats shown below are indicative of each Rank of the Decree to its max stacks.
Bountiful Harvest
Double drops from crates and plants.
Paragrimm’s Wisdom
Gain 3 Decree Rerolls.
Marauder’s Nerve
Reduce incoming damage by 3% per Decree up to 75%.
Fault Finder
Weakpoint kills create a 10m field that deals 10/15/20% of the killing blow’s damage as Electricity Damage every second for 8 seconds.
Grim Armory
On kill: 5/10/15% chance to refill the ammo for whatever weapon you have equipped.
Rain of Vitality
Enemies have +60% additional chance to drop Health Orbs. Health Orbs increase Armor by 80/160/240 for 10 seconds. Effect triples for Warframes.
Storm Caller
100/200/300% Magazine Capacity. Gain 1 Electricity Damage by every bullet reloaded to your weapon.
Inner Absorption (Spiteful)
Sacrifice x0.5 from your Weapon Damage to increase your Ability and Power Strike Damage by 600% to enemies.
Good Governance (Spiteful)
Sacrifice x0.5 from your Critical Chance to gain x3 to your squad’s Critical Damage.
Cloak and Dagger (Spiteful):
Your weapons deal an extra hit with 100% Slash Damage and Status, but 100 Slash Damage with Status is self-inflicted when you attack.
New Undercroft Mission: Alchemy
Your knowledge of the elements from your explorations of Albrecht’s Laboratories is required in Duviri, Tenno! Maintain the laws of alchemical science in the Undercroft with the addition of the Alchemy mission type.
Like most things in Duviri, completing an Alchemy Undercroft mission is different from how you know it outside of the Spiral. Here’s what you can expect:
- Players must fill 2 Crucibles in order to complete an Undercroft mission or to move to the next stage in the Circuit.
- There is no Conversion Progress mixing stage in the Undercroft - players do not need to destroy Distressed Pipes while the Crucible mixes the elements.
- Dax Enemies will drop the required Amphors for the active Crucible, while other enemies will drop them at random.
General Alchemy Change (applies to Duviri and standard mode):
- Slightly reduced the amount of Amphors required to fill up an element in the Crucible for Squads of 3 or 4 players.
Pathos Clamps Rewarded From Undercroft Portals
Pathos Clamps are now rewarded for completing Undercroft Portal side objectives (story stage Undercroft portals do not reward Pathos Clamps) in the Duviri Experience! This is in addition to the current Decrees, Arcanes, and Steel Essence (if played on Steel Path difficulty) rewards.
Undercroft Portals completed on standard difficulty have a guaranteed reward of 1 Pathos Clamp for completion, while those completed on Steel Path have a guaranteed reward of 3 Pathos Clamps.
New player experience improvements
Debt-Bond Farming Changes
We have revamped Solaris United Bounty Drop Tables to increase the amount of Debt-Bonds earned across the board. Our goal with these changes was to increase Debt-Bond drop rates, but not affect rare or desired items already in the Drop Tables.
- Moved Debt-Bonds from Stage 1 to Final Stage, but increased drop rate significantly for every Bounty Tier.
- Running the first Bounty Stage was a common practice to farm Debt-Bonds, and while we wanted to increase Debt-Bond drop chance, leaving them in that Stage would only incentivize that behavior further.
- With these in the Final Stage Drop Table, players who complete all the Bonus Objectives will have an extra kick at the Debt-Bond can, since the Bonus Objectives reward comes from this drop table.
- Increased existing Debt-Bond drop rates in Middle-Stage Drop Tables (Stages 2, 3, and 4, where applicable).
- Removed lackluster “filler” items from the Uncommon and Rare reward tables:
- Level 5-15: 3,000 Credits
- Level 10-30: Tepa Nodules
- Level 20-40: 3,000 Credits
- Level 30-50: Tellurium
- Level 40-60 (including Narmer and Steel Path): 500 Kuva
- Replaced 10k Credits reward in Level 40-60 Bounties (including Narmer and Steel Path) with rare resources (Neurodes or Orokin Cells).
- Slightly adjusted Garuda Blueprints and Synth Mods drop rates to accommodate changes above, but we did our best to avoid increases or decreases over 5%.
- Reduced the Credit costs of Ticker’s Debt Bonds by 50%.
- Previously, the cost would randomly roll between 5k - 350k Credits depending on the bundle offered. Now, it’ll roll between 2.5k - 175k.
For a full overview of the Drop Table changes, please review our Drop Tables site.
Voidrig Acquisition Improvements
- Players who haven’t completed The War Within are now prevented from equipping the Necramech Summon to their Gear Wheel.
- Further amended the Voidrig Blueprint build requirements to require less investment in the Necralisk Syndicate, reduce overall farming time, and include resources that can be found in the regular Star Chart.
- Voidrig Casing Blueprint:
- Replaced 8 Stellated Necrathene (Rank 2) with 30 Faceted Tiametrite (Rank 0)
- Replaced 5 Cranial Foremount (Rank 4) with 140 Lucent Teroglobes
- Voidrig Engine Blueprint:
- Replaced 1 Biotic Filter with 4 Parasitic Tethermaw
- Replaced 6 Cabochon Embolos (Rank 3) with 10 Orokin Cells
- Voidrig Capsule Blueprint:
- Replaced 2 Scintillant (locked behind Master Rank 5) with 3 Morphics
- Reduced Spinal Core Section cost from 15 to 12, as players can get a maximum of 2 per fish
- Voidrig Weapon Pod Blueprint:
- Replaced 40 Thaumic Distillate (Rank 2) with 40 Purified Heciphron (Rank 1)
- Replaced 6 Trapezium Xenorhast (Rank 3) with 30 Purged Dagonic (Rank 0)
- Moved Damaged Necramech pieces from Necraloid’s offerings in the Necralisk to Father.
- Players are given the Voidrig Blueprints upon completing the Heart of Deimos, but the majority of the acquisition path is hidden behind The War Within. While we initially added these items to Necraloid in Update 34: Abyss of Dagath, we found that players still had difficulty finding them, especially if they had not yet progressed in the Main Story Path. Moving them to Father is lore-consistent and should help reduce the grind further.
UI additions, changes and more
Loadout Customization From Navigation
You can now change your Loadout directly from Navigation! Instead of running back and forth from the Arsenal when you need to make a change before jumping into a mission, you can now do so conveniently from the Navigation screen.
Most actions you can accomplish in the Arsenal you can do here:
Change Loadout: Selecting this option will bring up all of your available Loadout options to swap to.
Warframe Options:
- Swap Warframe- Select from your available Warframes to equip.
- Upgrade Warframe- Change upgrades (Mods, Arcanes, etc.) on equipped Warframe.
- Select Mod Config- Select from your existing Mod Configs for equipped Warframe.
- View Warframe abilities - Hover over the ability icons for the equipped Warframe to view stats.
- Note: Access to change Exalted Weapons from the Star Chart will be coming in a future update.
Weapon Options:
- Swap Primary/Secondary/Melee Weapon
- Select from your available Weapons to equip.
- Upgrade Primary/Secondary/Melee Weapon
- Change upgrades (Mods, Arcanes, etc.) on equipped weapons.
- Select Mod Config
- Select from your existing Mod Configs for equipped weapons.
Companion Options:
- Swap Companion - Select from your available Companions to equip.
- Upgrade Companion - Change upgrades on equipped Companion.
- Select Mod Config - Select from your existing Mod Configs for equipped Companion.
- Companion Weapon Options - Swap Companion Weapon
- Select from your available/eligible Weapons to equip onto equipped Companion. - Upgrade Companion Weapon - Change upgrades on equipped Companion Weapon.
- Select Mod Config - Select from your existing Mod Configs for equipped Companion Weapon.
Finisher changes
Unified Finisher Mechanics
Before explaining the changes, let’s define a few terms and basic concepts about Finishers:
- Mercy Kills: Available on specialty enemies when they reach certain health thresholds.
- Finishers: Available when a move “opens enemies to finishers”.
- Ground Finishers: Available after certain effects which knock enemies down.
All of the above count as Finishers for relevant Mods, Arcanes, Abilities, etc. Mercy Kills differ slightly as they are specific to your Parazon upgrades which do not apply to other Finishers.
In order to make utilizing finishers easier in Warframe, we have updated how they function to unify their mechanics:
- Increased the Finisher context action distance for Finishers from in front or behind from 2m to 3m.
- Ground finishers are now performed via context action instead of automatically via Melee Attack input. This should allow players to execute Ground Finishers much more reliably.
- The “Ground Finisher” context action will appear on enemies in range who are open to Ground Finishers.
Enemy Size Scaling
We’ve taken strides in reducing how we scale enemies whenever a Finisher is used against them!
By default, Finishers cause enemies larger than your Warframe (ex: Grineer Bombard and Corrupted Gunners). This had the risk of causing some strange visual issues on the enemies that weren't ideal.
We’ve audited the contact points between the player and the enemy with all Melee Weapon animations to resolve these graphical sizing mishaps!
What this looks like is:
- If a point of contact is present between the player character and an enemy, such as a chokehold or grabbing a limb, enemy scaling will persist.
- If there is no physical point of contact between the player character and an enemy, the enemy scaling doesn’t occur as it isn’t necessary!
Scaling Fixes in Warframe:
- Fixed an issue where Finishers on Corpus Crewman and Grineer Lancers would stretch their spines. Like an untrained chiropractor.
There’s word that several Prex Cards have been strewn about the Kronia Relay on Saturn - help locate them and add these Warframe’s Prex Cards to your collection!
- Ember Prex Card
- Vauban Prex Card
- Titania Prex Card
- Garuda Prex Card
- Protea Prex Card
New Simulacrum Rooms
New Simulacrum Rooms are available for you to take your simulated fights to the next level!
Similar to the Sanctum Simulacrum room that launched in Dante Unbound, the following rooms allow enemy difficulty to be set 25 levels above the standard maximum.
- Ambulas Arena Simulacrum - Simulate a battle on your foe’s territory.
- Acquired from The Perrin Sequence offerings at max rank.
- Moonlit Courtyard Simulacrum - Simulate a battle under the light of Lua.
- Acquired from New Loka offerings at max rank.
- Red Veil Temple Simulacrum - Hone your combat skills under the auspices of the Red Veil.
- Acquired from Red Veil offerings at max rank.
- Zanuka Arena Simulacrum - Stage a battle in your enemy’s arena for deeper insight into their tactics.
- Acquired from Arbiters of Hexis offerings at max rank.
- Orokin Derelict Simulacrum - Simulate a battle inside an Orokin Derelict.
- Acquired from Cephalon Suda offerings at max rank.
- Grineer Asteroid Simulacrum - Step into your opponent’s territory to devise a strategy for their defeat.
- Acquired from Steel Meridian offerings at max rank.
- Orowyrm Arena Simulacrum - Simulate a battle straight out of Tales of Duviri.
- Acquired from Acrithis’ Wares.
These new Simulacrum Rooms and the Sanctum Simulacrum Room are also tradeable and sellable! This is so that players can trade between one another without having to switch around their Syndicate Pledges/acquire from Loid for Vessel Capillaries. The Citadel room remains untradeable as it is the default, as well as the Ballroom as it is an event-specific reward.
General Additions in Warframe
- Added the Cavia Arcane Collection to Loid’s “Arcane Dissolution” Offerings - this Collection has a chance at the following Arcanes:
- Melee Fortification
- Melee Retaliation
- Melee Animosity
- Melee Exposure
- Melee Influence
- Melee Vortex
- Melee Crescendo
- Melee Duplicate
For a more detailed breakdown of the many UI changes bug fixes, and general improvements, check out the full Warframe patch notes.
Check out other Warframe guides from Sportskeeda:
- All Warframes tier list
- Warframe Incarnon weapons tier list
- Kuva weapons tier list
- All Warframe Twitch drops this week
- Best stat-stick weapons in Warframe
- Tenet weapons tier list
- Latest Baro Ki'teer Inventory
- All Warframe Promo Codes
- Best weapons in Warframe for each Mastery Rank