Roblox Studio stands out as a unique game design engine exclusively tailored for crafting metaverse experiences. Some of its best features are that level designing, modeling, and coding are quite easy and straightforward compared to other prominent design engines.
As a matter of fact, anyone can create games using the metaverse design engine, provided they have mastered the fundamentals. Our guide will help you with this process and provide you with vital information about this engine. By the time you finish reading this article, you'll be equipped with the important basics required to create your own metaverse game.
Everything a beginner should know about Roblox Studio
Install and get started with Roblox Studio

Download Roblox Studio on your device and run it. You can do so by clicking here.
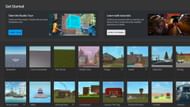
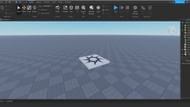
Now, log into your profile to access the front page of the application. You will see a bunch of maps, many with preloaded assets. Select Baseplate template and an empty scene will be displayed on the app.
Baseplate is the best place for beginners to learn about level designing and modeling as they start from scratch.
Controls of Roblox Studio
The following are the command keys to move your camera angle:
- Right-click (mouse) - Hold it to move the camera in any direction.
- W - Forward
- S - Back
- Q - Up
- E - Down
- Alt - Hold the camera in place
- Scroll button - To zoom in and out
- Left-click (mouse) - Select objects; hold it to select multiple assets
- Delete - Delete the selected asset
- Ctrl + D - Duplicate
- F - Focus
If you feel the camera speed is too fast or slow, simply press Alt+S to open the Settings tab. Now, adjust the camera speed according to your liking. Move around the scene using the controls and familiarize yourself with the movement keys and camera control.
Tools and other properties of Roblox Studio

On the left side of the app, you'll see the Explorer tab. All the assets featured in your workspace will appear here. You can also customize the lighting, spawn point, terrain, and camera in this tab.
Above the scene, you'll see the toolset. The important tools for creating a basic scene are as follows:
- Select
- Move
- Rescale
- Rotate
- Editor
- Toolbox
- Part
- Material Manager
- Color
How to create a scene in Roblox Studio

There is a small base in the middle of the grid—that is the spawn point of players. It won't affect your assets and models when designing the scene. Now, click Part in the toolset box and press Block.
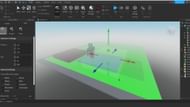
A default block will appear in the location your camera is focused on. Select it and click the Scale button to access the scale options of the object. The block will act as your terrain or ground for the scene, so place it right above the grid.
Hold the control key and move the red and blue points to extend the block evenly. After doing this, choose the color of your terrain and place any other objects you want. Press Toolbox to bring up an interface featuring a plethora of designs, models, and more. You can use the search box to find any specific asset.

Once you select the asset, it will be added to your scene. Keep in mind that you can always remove these assets using the Explorer tab. For a more realistic scene, select the Editor option next to Toolbox to open the Terrain Editor. Now, click Import and scroll down to find Material Settings.
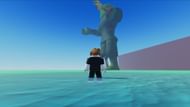
Choose your favorite material and add it to the scene. Select Generate (left to Import), scroll down, and choose the required biomes for the terrain. Now, hit Generate for the terrain to load up in your newly established scene. Press the blue Play button on top of the screen to use your avatar in your scene.
That concludes our foray into the basics. Stay tuned to Sportskeeda's Roblox section as we will release more guides about creating different types of metaverse games in the future.
Check out this A-Z list of all of our Roblox Codes 2025
